New in HDR Light Studio - 9 Drop 1
Introduction | Overview | Edit Mode | Advanced Falloffs | LightPainting Curve Points
Curve points are usually added via the Lumi-Curve Editor panel. However, you can add points directly via the HDR Canvas, or via a Render View. When a light has Lumi-Curve as its content type, Add Lumi-Curve Point is added to the LightPaint Tool drop-down on the HDR Canvas and Render Views. Let's follow the workflow for adding a new light reflecting in the side of a car and clicking on the car to draw the curve.
LightPainting Curve Points Workflow
You can follow along by opening the Car demo model and changing the camera view to Cam2_Side
Click the Lumi-Curve light button on the toolbar to create a new light.
Position and scale the light so that its reflection covers the area you want to reflect in the 3D model.
The light reflection area (pink Bounding Box color) defines the maximum extent within which you can draw a Lumi-Curve.
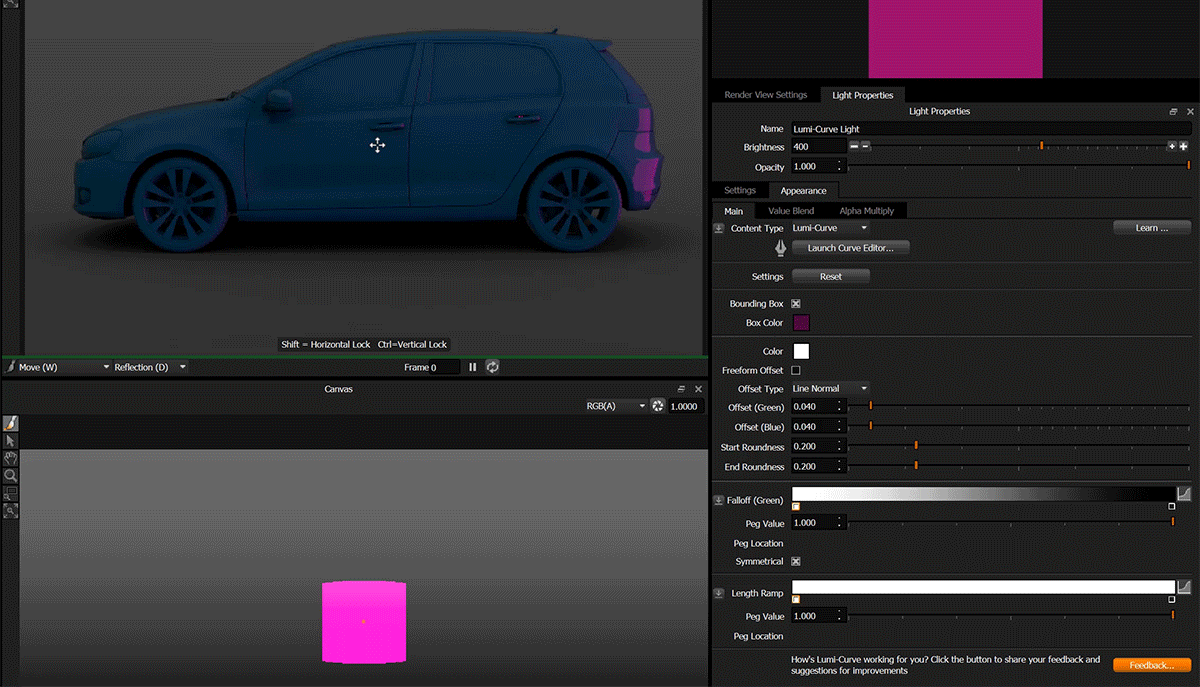
Press the Launch Curve Editor button to open the Curve Editor panel.
Select 'Add Lumi-Curve Point' in the LightPaint Tool selection drop-down in the Render View.
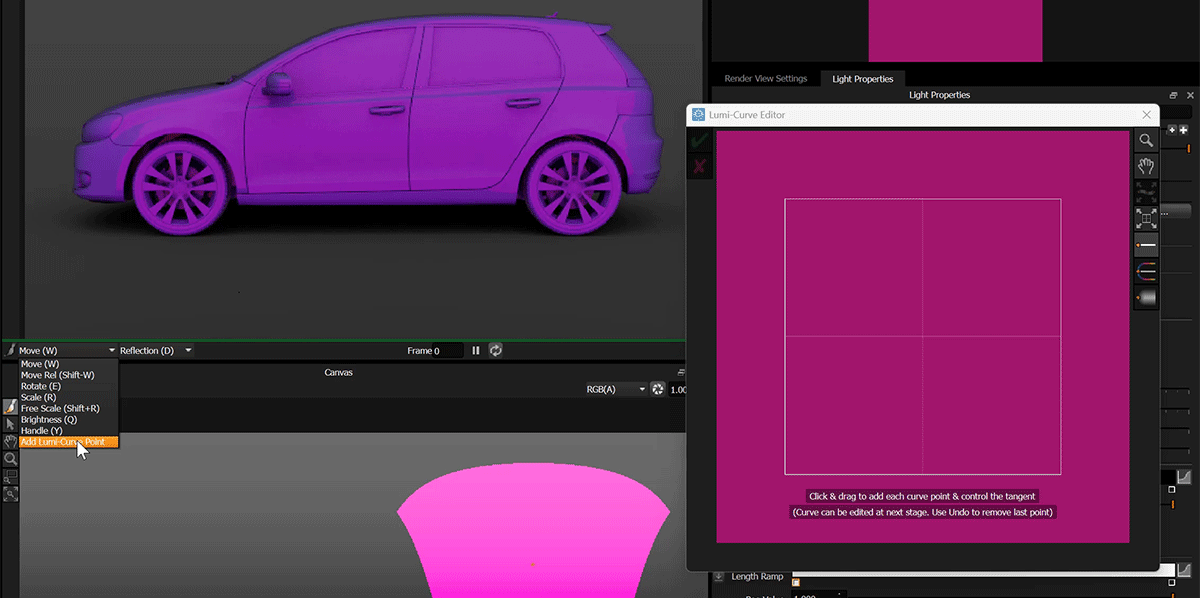
Click on the 3D model in the Render View where you want your first, second and third points - going from the front to the back of the car.
You can't drag to control tangent handles, just click to add points.
Click on the 3D model in the Render View where you want your second point.
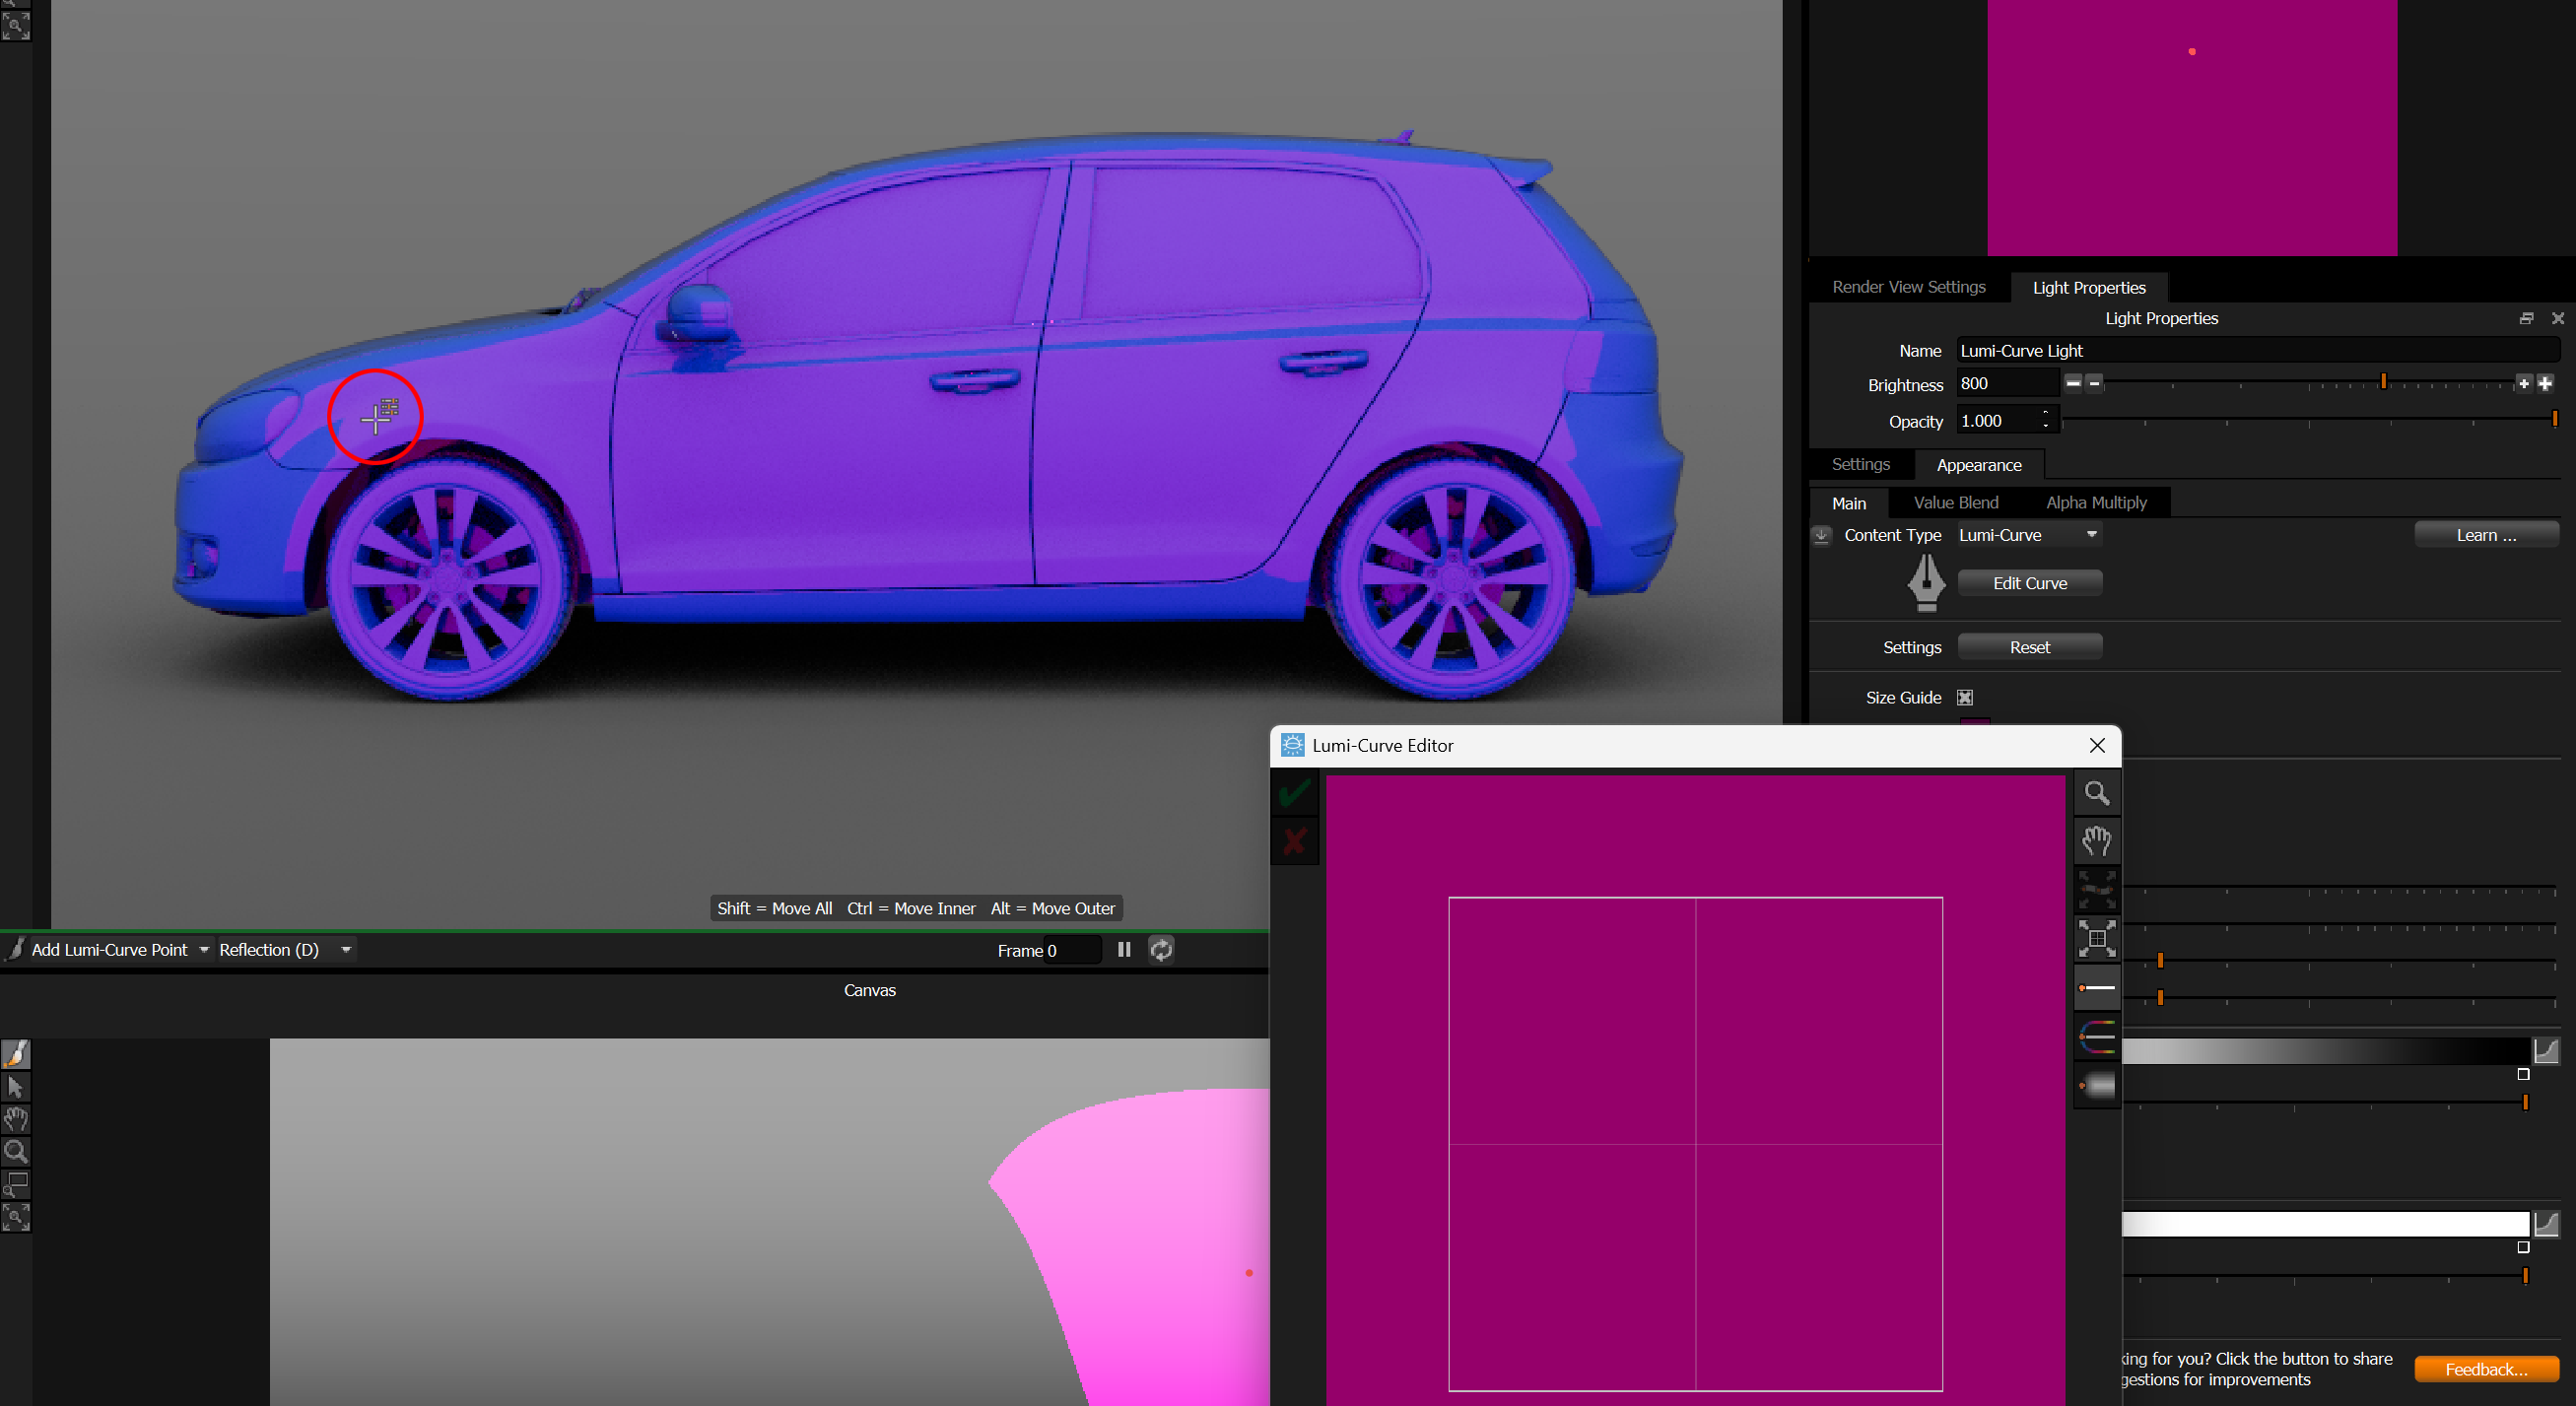
You will begin to discover that the idea you have in your head of what kind of curve shape you will create does not always match with reality - due to the complex forms and changes of directions in the surfaces of the car. Lighting complex forms like cars is not easy and is about experimentation. There is lots of scope for adjusting the curve later to discover the best curve shape and settings. But this gives us a good starting point and understanding of the challenge.
Click on the 3D model in the Render View where you want your last point.
As you can see, the reflection you may have expected and wanted didn't happen, but let's keep going.
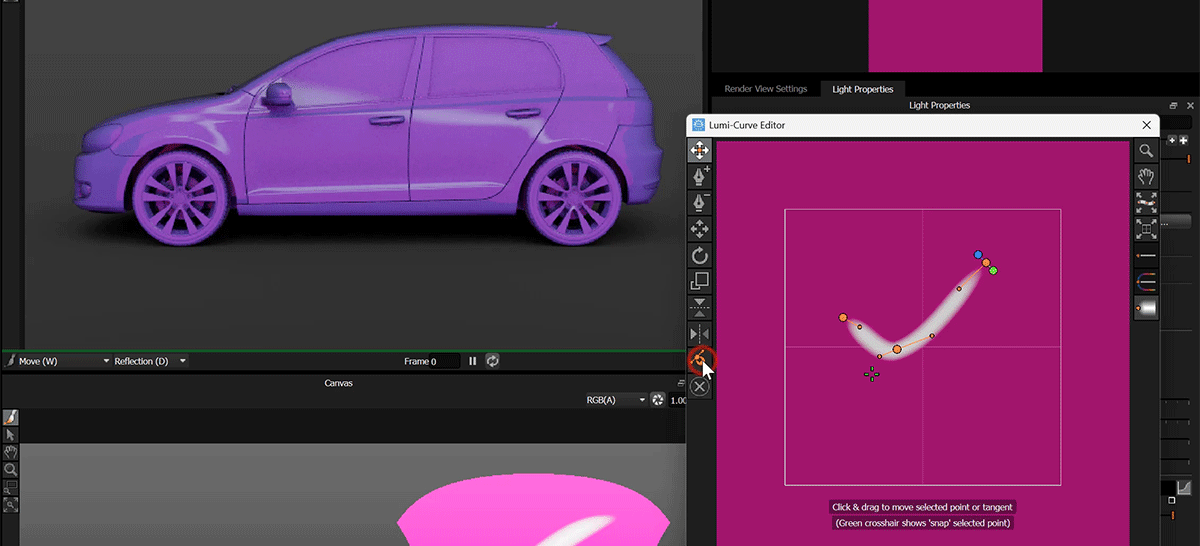
Click on the tick to accept the curve.

The Editor now switches to Edit Mode. The falloff offsets are now displayed.
Because we used LightPaint to place each point in the Render View. We didn't have control over the tangent handles, and the first point isn't even pointing in the right direction.
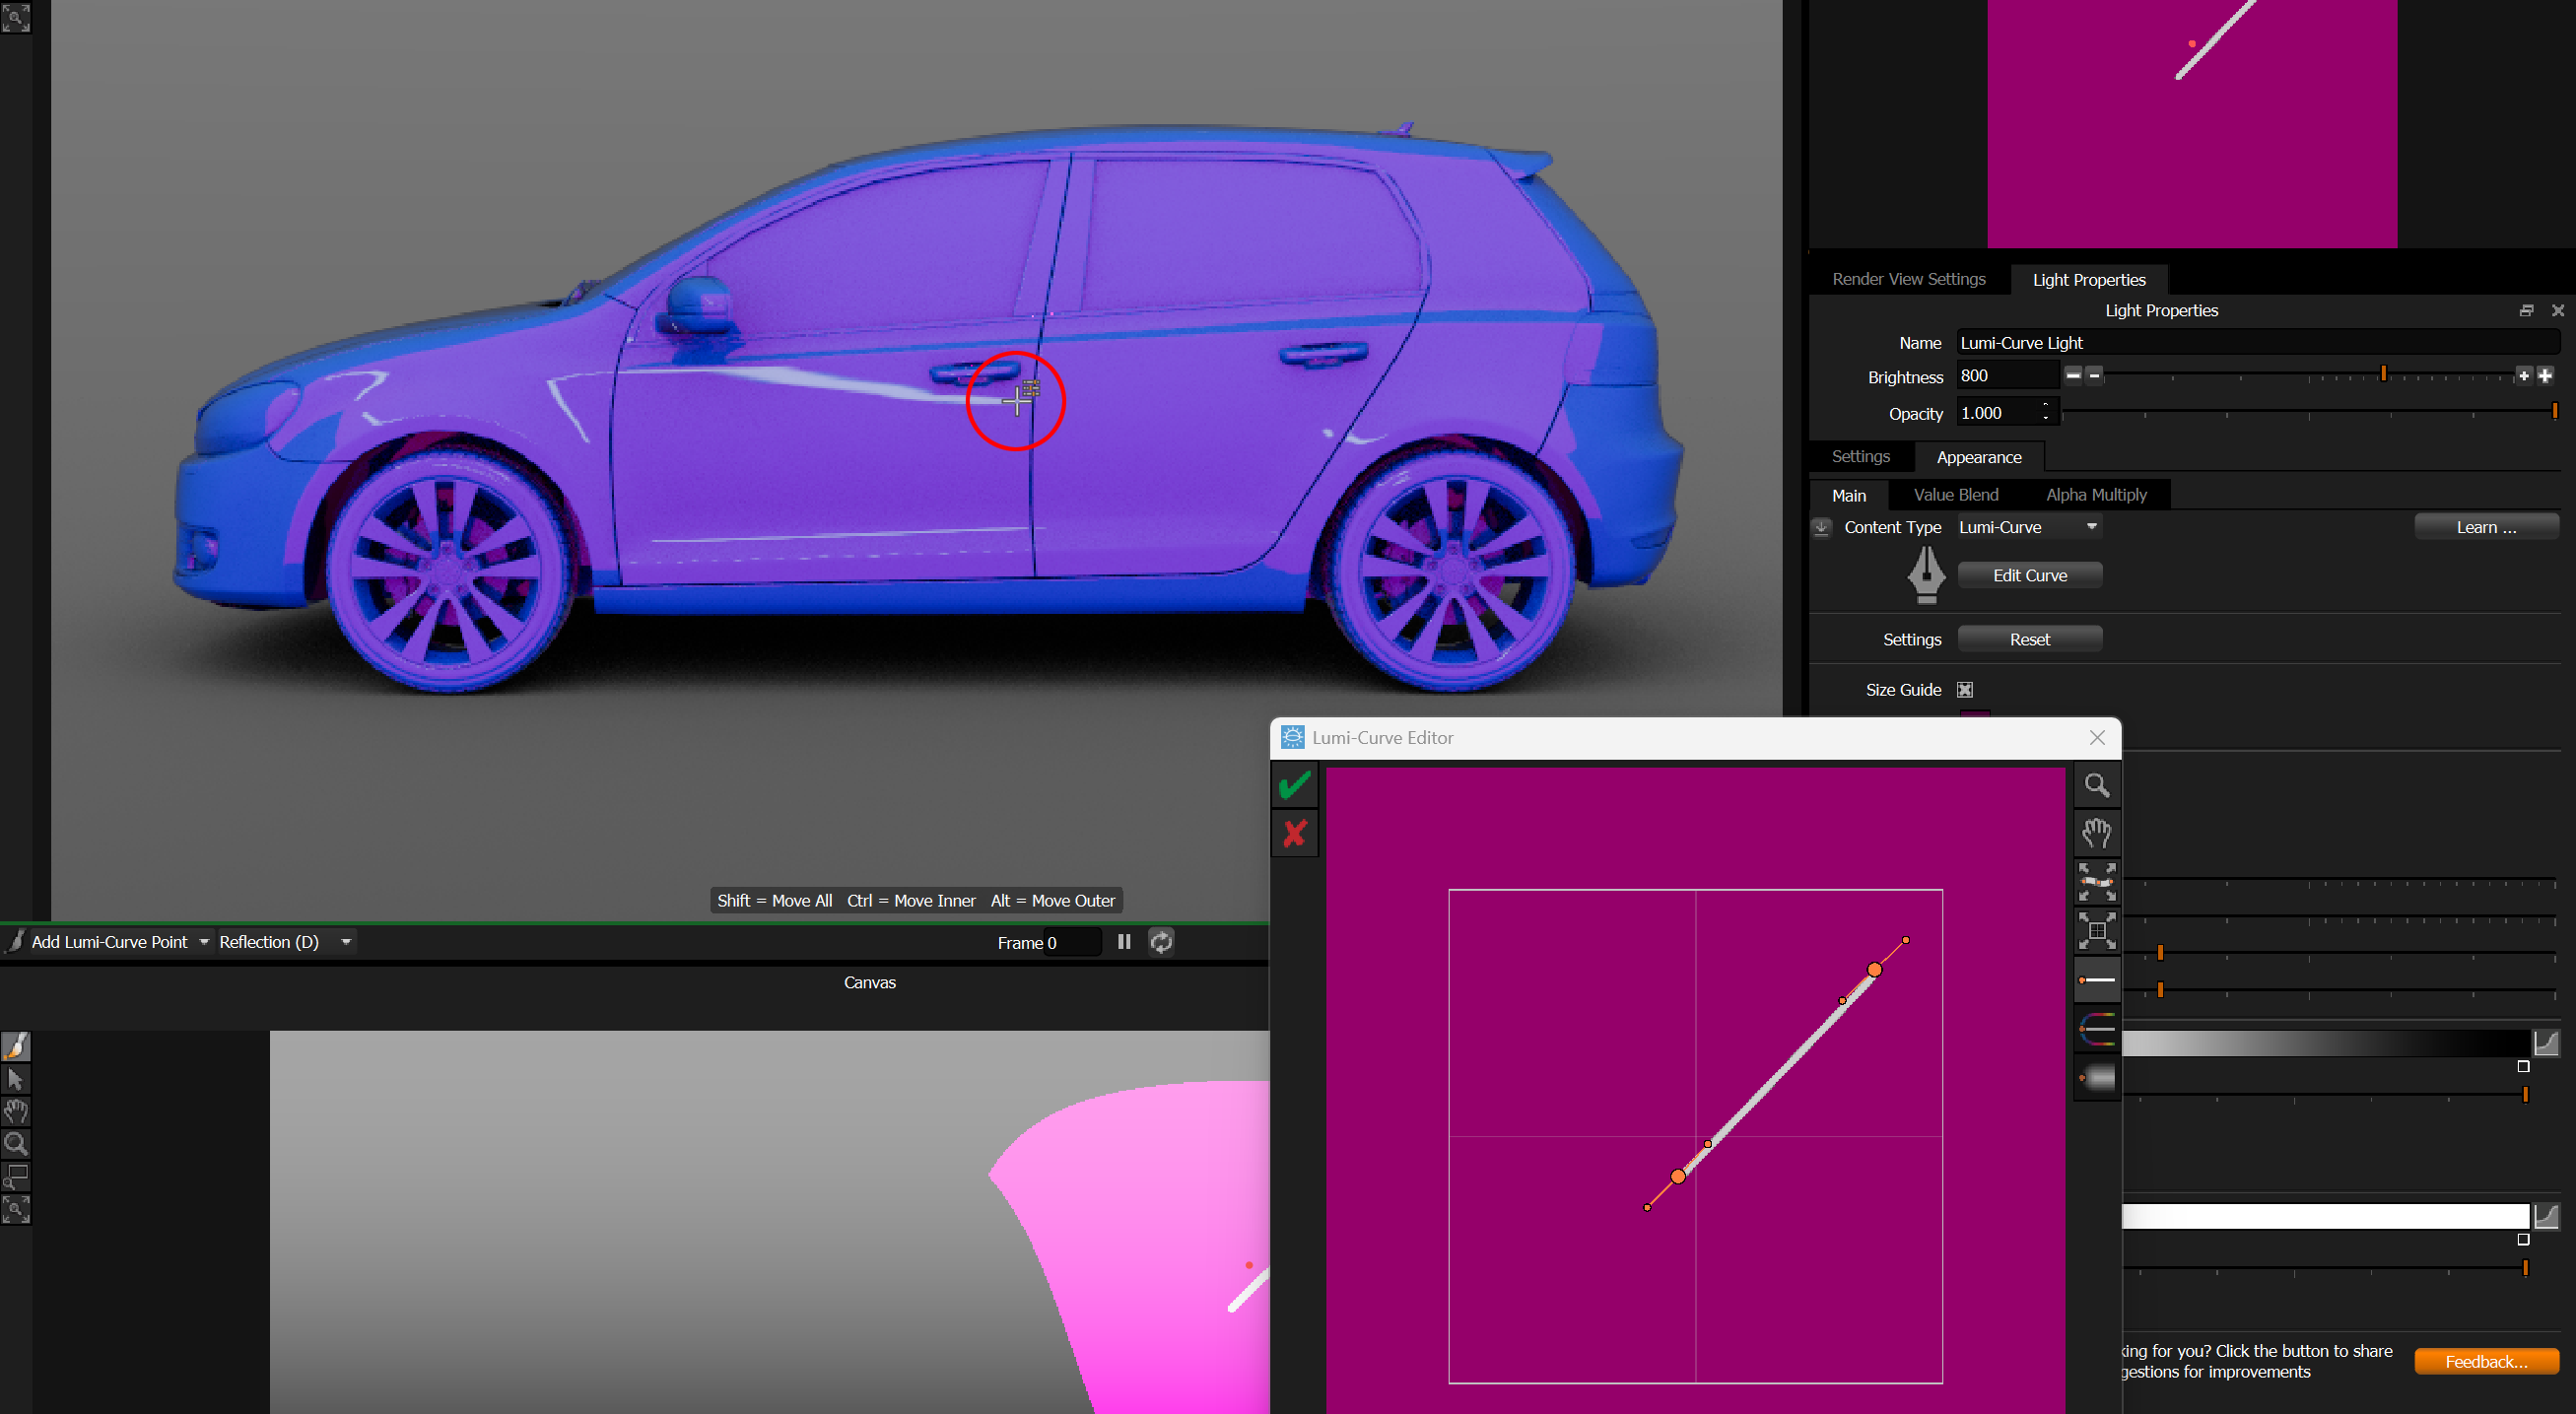
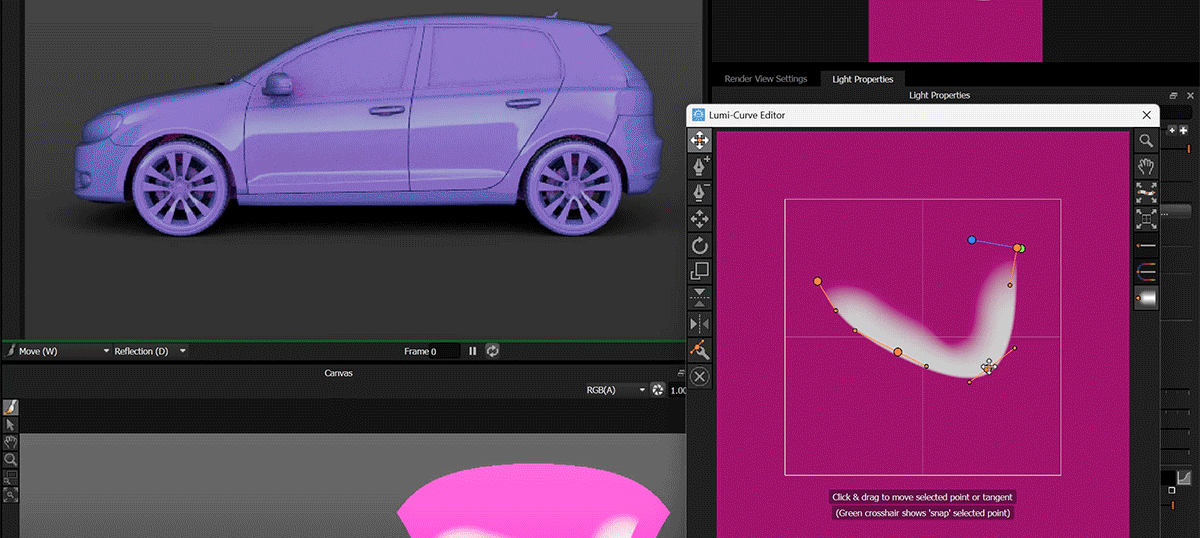
Press the Fix Curve button to regenerate all of the tangent handles.
The algorithm will make sure the tangents point in sensible directions between the points and will scale the tangent handles to 1/3 of the distance between each point - ensuring a sensible central curve.
We can see how the curve now looks smoother and the falloffs appear correctly each side of the line.
Tweak the curve in the Editor and adjust the falloff offsets to get the reflection you desire in the car.
As you have seen from this example, using LightPaint to place Lumi-Curve points is useful, but the effectiveness of this process can depend on the nature of the form you are trying to light. This LightPaint process is just a part of your lighting tool kit and you can try it and see if it helps you with tricky lighting challenges.
