
HDRI Map kindly provided by https://ctccreativestudio.com/
New in Xenon Drop 4
The Motion Blur (Advanced) filter is used to create advanced motion blur effects on HDRI maps.
Here are the additional features that the Motion Blur (Advanced) filter provides, above the standard Motion Blur filter:
•The motion path can be curved in any direction. Use case: Replicating motion blur travelling around a corner in a car.
•Noise can be added to the path. Use cases: Replicating the effect of road noise in the blur or to generate a creative lighting trail effect.
•Motion blur amount can be scaled per pixel by values from a loaded image. Use case: Paint an image to control where the map is blurred and by how much.
This filter is slower to calculate than the standard Motion Blur filter.
Motion Blur (Advanced) Settings
 Settings")
Motion Blur (Advanced) Settings
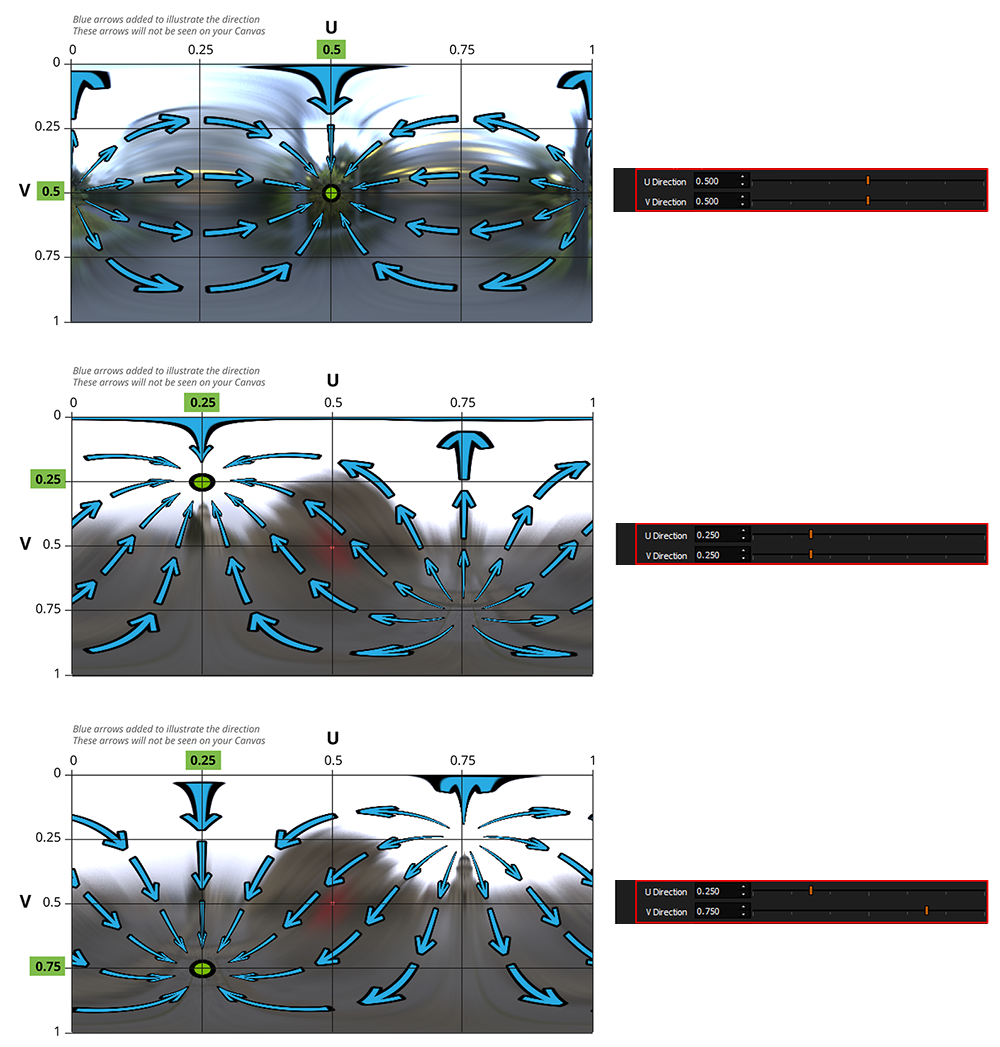
U and V Directions
The U and V Directions control the direction of travel for the motion blur within the HDRI map image space. Example settings and results can be seen in the image below.
Please note: The blue arrows and green dot have been added to help your understanding of the motion blur direction for the given settings.
Using the sliders is not the best way to set the direction. There is a far more intuitive way of using the LightPaint tool on the Canvas and Render Views.
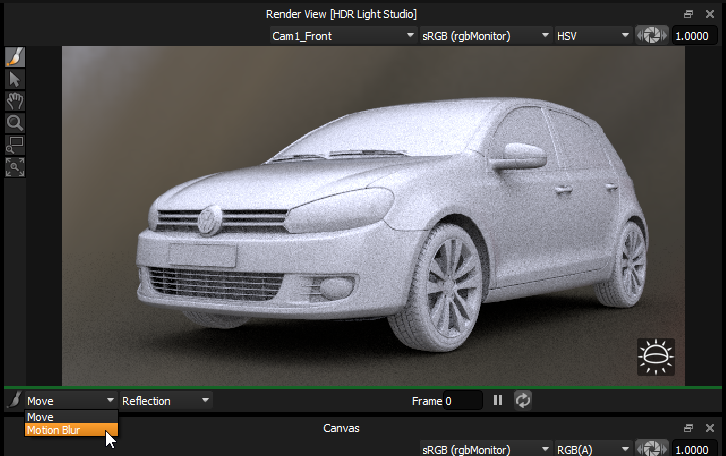
When a light is selected with a Motion Blur (Advanced), the LightPaint Tool drop-down on the Canvas or Render View is updated to include a Motion Blur option. Select this option to position the direction for the motion blur.
Now if you click on the Render View, the LightPaint mode of Reflection, Illumination or Rim will be used to position the direction for the motion blur. This will update the U and V Directions in the properties panel.
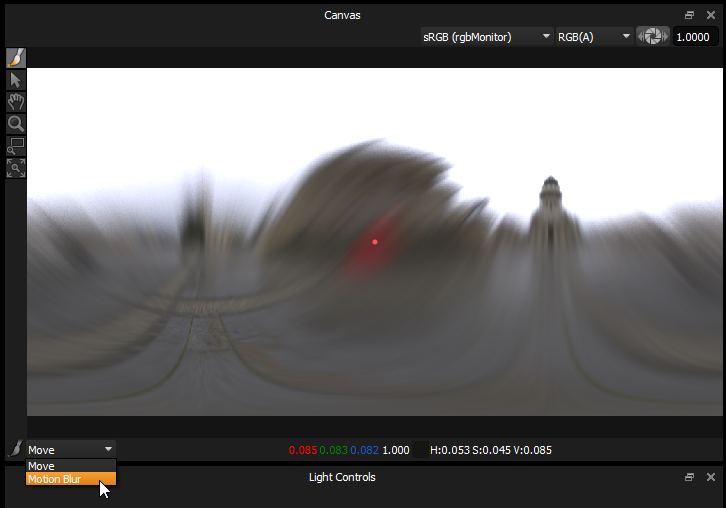
Now if you click on the Canvas, you will directly position the direction for the motion blur on the HDRI map. This will update the U and V Directions in the properties panel.
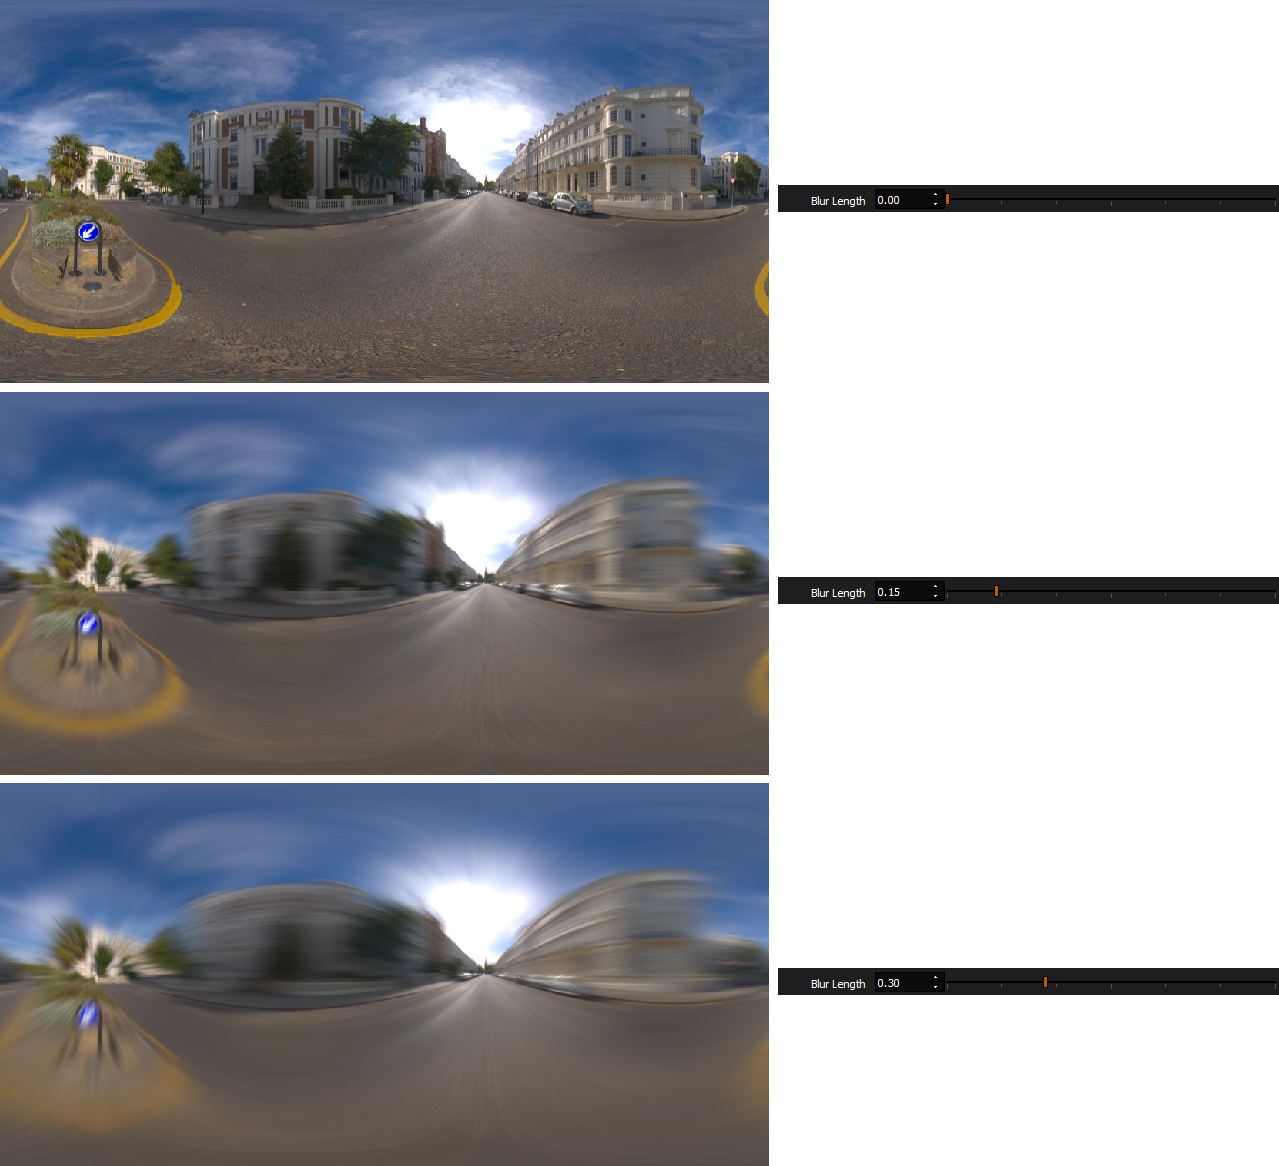
Blur Length
Controls the length of the motion blur. A larger value gives the impression of moving faster.
Curvature and Tilt
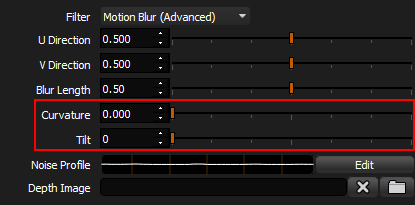
A special feature of this motion blur is the ability to curve the motion path and tilt the orientation.
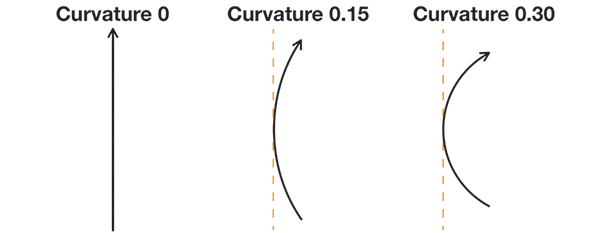
The curvature setting changes the amount of curvature on the motion path.
By default the value is 0 and this provides a straight path. As the value of this setting increases, the path becomes more curved.
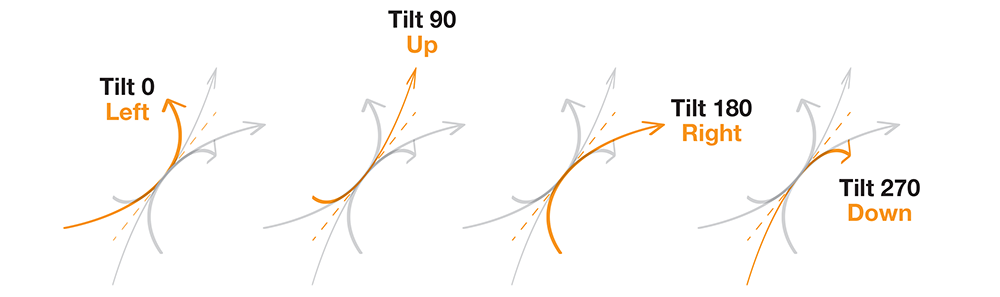
The tilt value controls the orientation of the curved path. See example settings below.
For example, curving to the left has a tilt setting of 0.
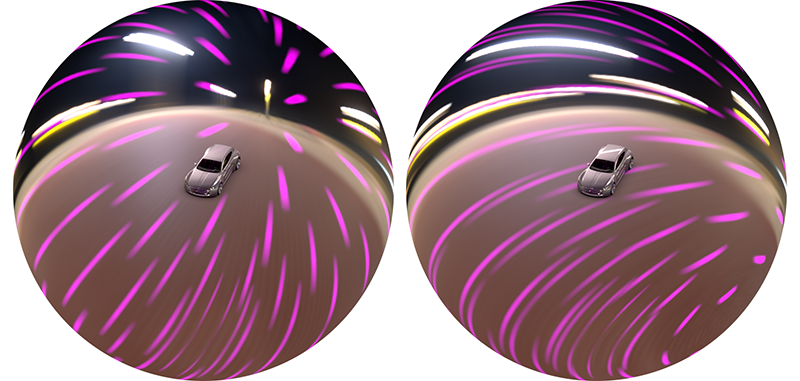
In the examples below, the image on the left has a curvature setting of 0. The image on the right has a curvature setting of 0.5. You can see how the motion blur is curving in the image on the right.
Noise Profile

A key feature of the advanced motion blur is the ability to put a jitter noise profile onto the motion path. This is useful for replicating the effect of road noise or to generate a creative lighting trail effect.
Press the Edit button to adjust the noise profile settings.
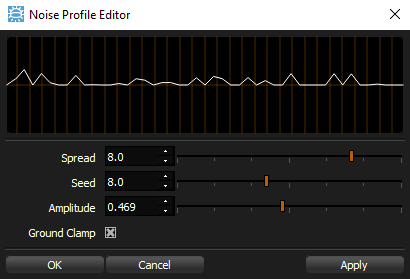
At the top of the panel is a preview of the noise. As this UI panel is scaled, this preview area increases in size, ideal if you want to see the noise path in more detail.
As you adjust the settings, this preview visual will update in real-time. However, to apply the new settings to the HDRI map in HDR Light Studio, you will need to either press the Apply or OK button. The OK button will apply the settings and close the panel. Press cancel to revert any changes made in the current editing session and close the panel.
Spread
Scales the noise over the length. Smaller values produce a smoother result.
Seed
Explore the seed values to vary the noise effect. This seed value ensures the noise result is the same next time the project is opened.
Amplitude
Scales the height of the noise. A value of 0 will remove all noise.
Ground Clamp
With this setting turned on, the values are clamped to positive values only.
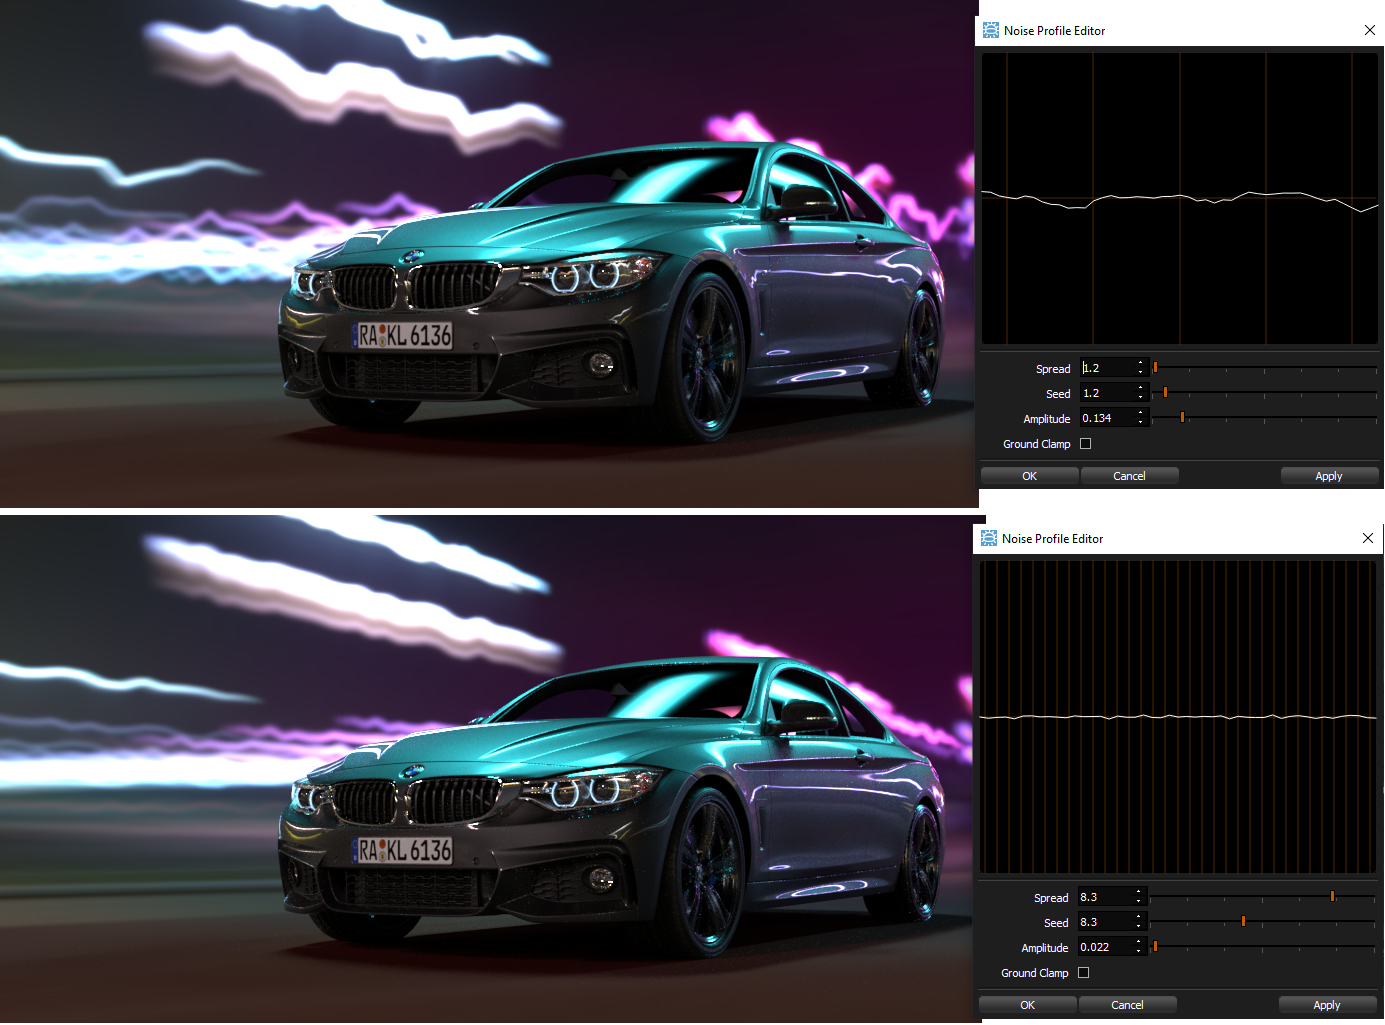
Here are some example motion blurs results with different noise settings.
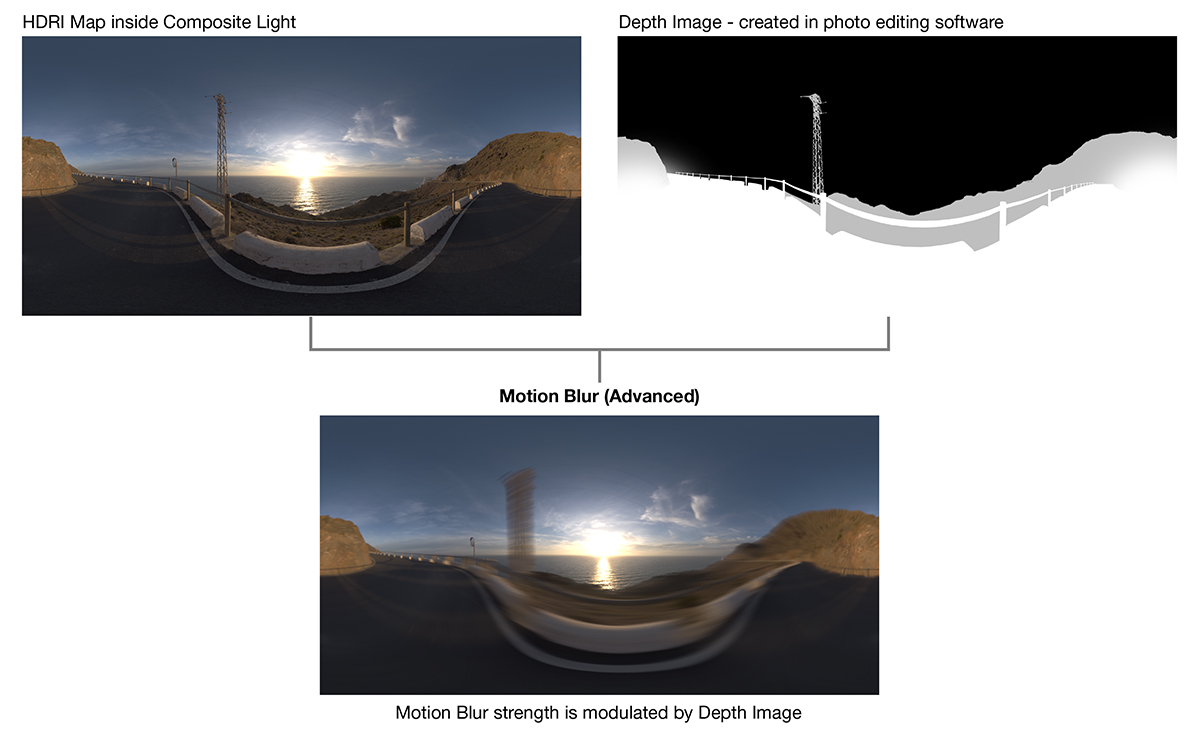
Depth Image

A loaded image scales the amount of motion blur that each pixel will receive. You can use this feature to paint a depth image in photo editing software, with values from black to white, in order to decide which parts of the map get blurred and by how much. Black pixels are not blurred, white pixels are fully blurred.
Here are 2 examples using the Depth Image.
In example 1: We have painted a depth image - so that the sky, sun and horizon remain still, but the closer elements are blurred. You can see the railings are blurred, but the sea between the rails is not.
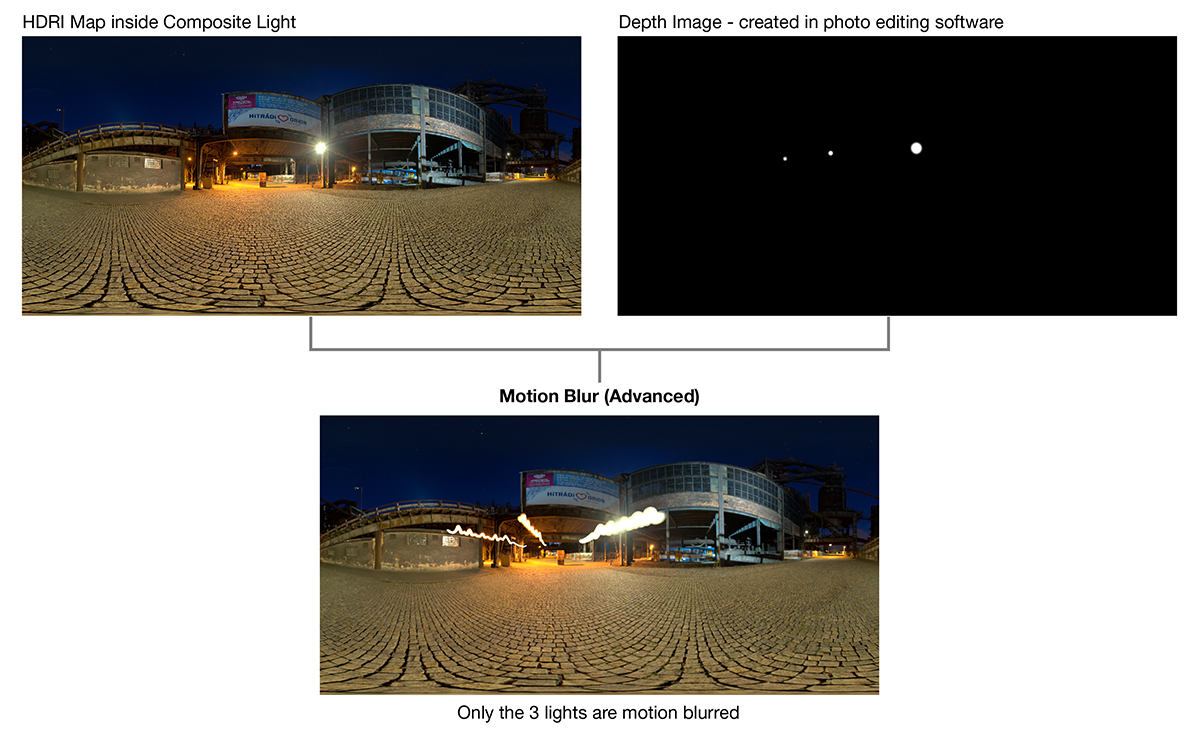
In example 2: You can see we have used the depth image more like a mask. Selecting only 3 lights from the HDRI map to get blurred. The 3 lights make stunning light trails over the rest of the map.
Advanced Motion Blur Tutorial
Now you have learned the basics, watch this video tutorial to see the Advanced Motion Blur filter in action: Advanced Motion Blur Tutorial
