New in Xenon Drop 3
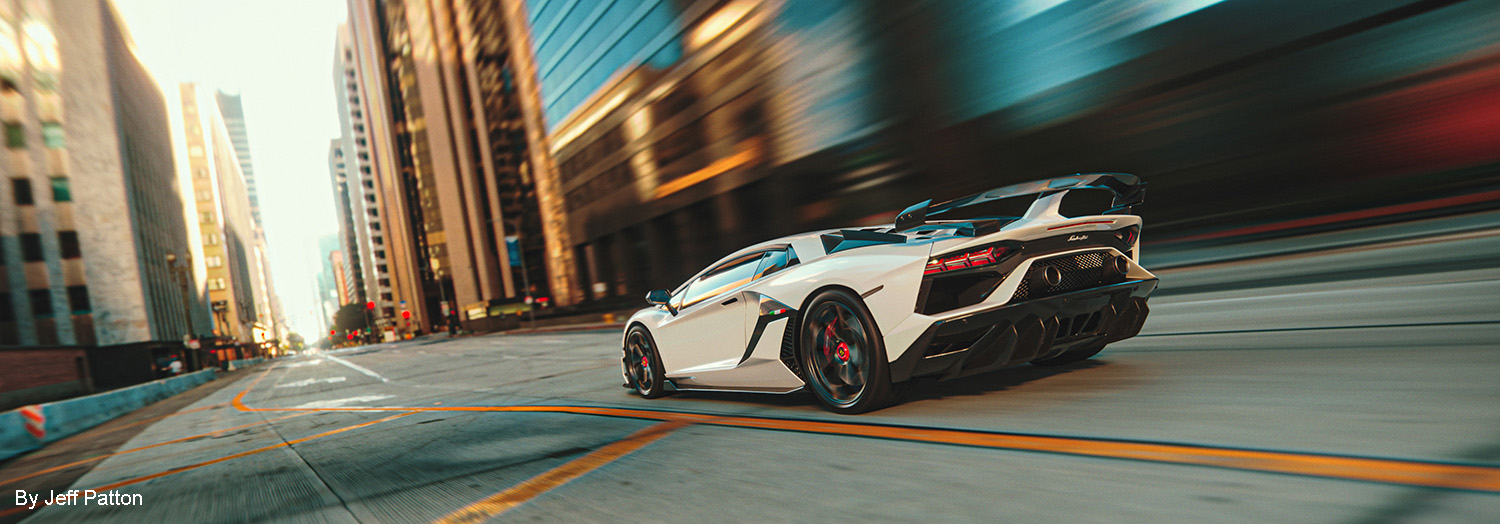
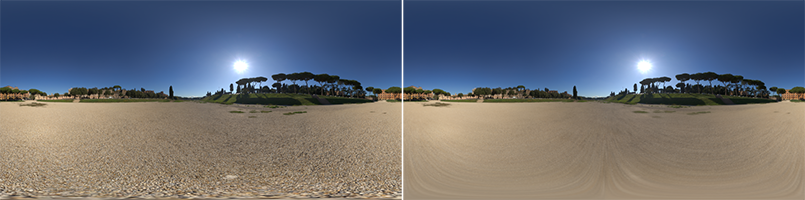
The Motion Blur filter is used to provide a linear motion blur effect. The example image above shows an HDRI map used for lighting and for the background image that was motion blurred using this new filter.
Things you can do with Motion Blur
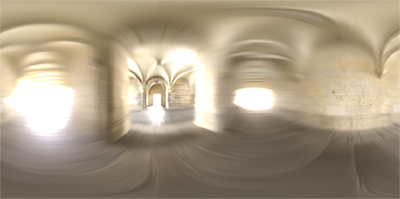
Easily add linear motion blur in any direction to your whole HDRI map.
Add motion blur to an edited HDRI map
Add lights and adjustments to an HDRI map and those are included in the motion blur. Move lights within the lighting design and they get motion-blurred on the fly.
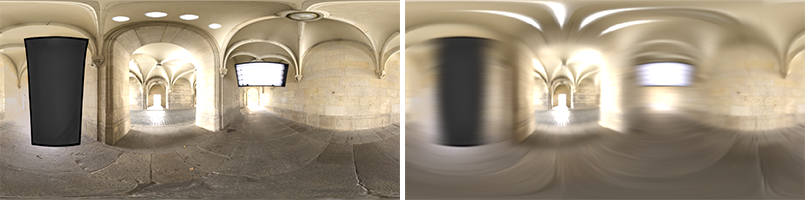
Design a static lighting design and then add motion blur to the final design.
Add moving objects to a static HDRI map.
In this example, we are showing a moving car and aircraft, each with their own motion blur direction.

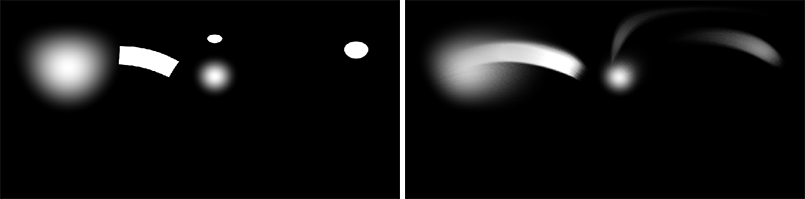
Add motion blur to certain areas of the map using masking/alpha.
In this example, we have blurred only the road, which is more correct as the sun and far off parts of the image would not appear to move.
Motion Blur Filter Settings
Type - Spherical
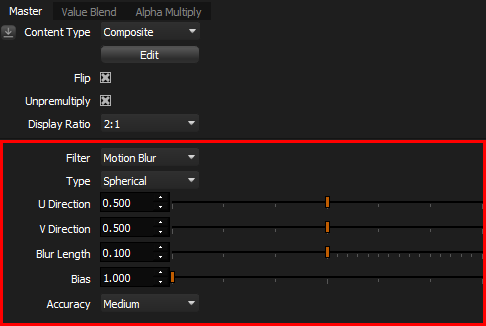
With the Spherical setting, Motion Blur is applied taking into account the image is an HDRI map with lat-long mapping.
U and V Directions
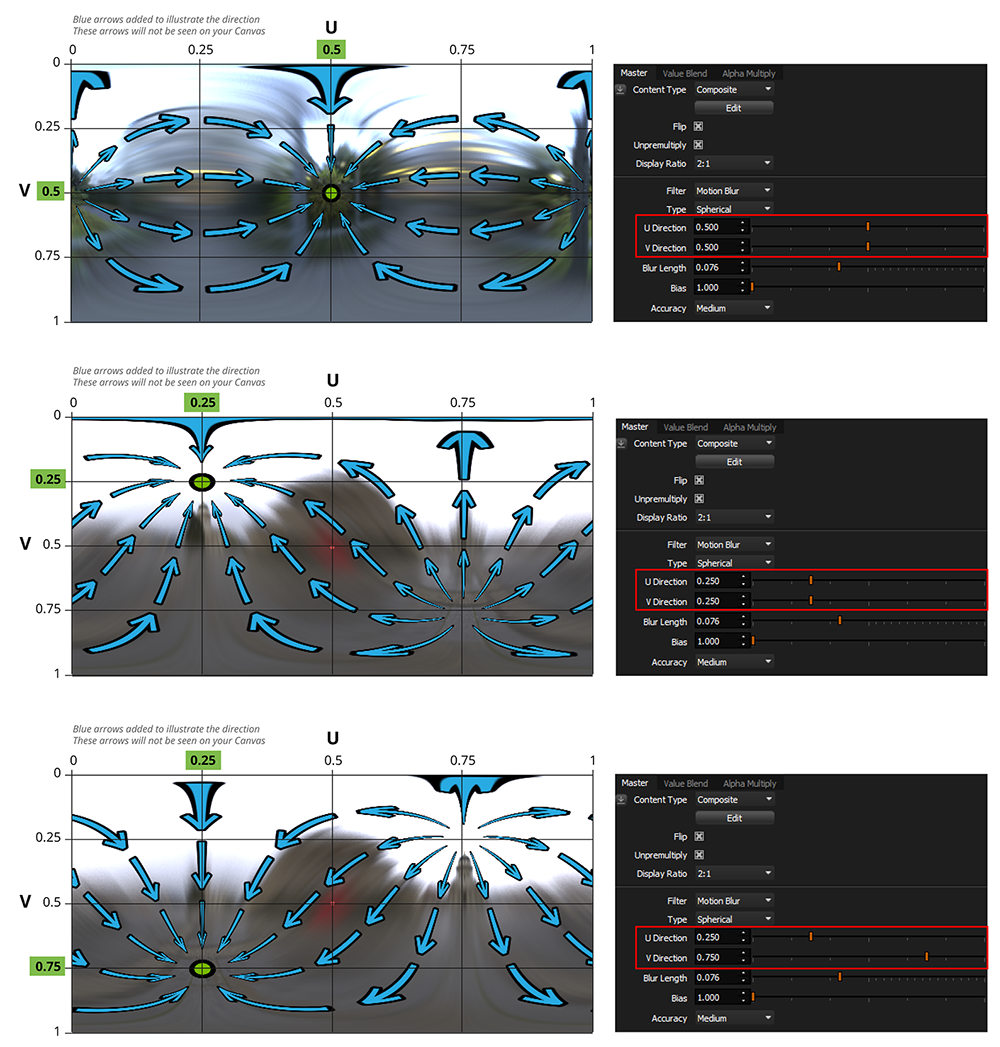
The U and V Directions control the direction of travel for the motion blur within the HDRI map image space. Example settings and results can be seen in the image below.
Please note: The blue arrows and green dot have been added to help your understanding of the motion blur direction for the given settings.
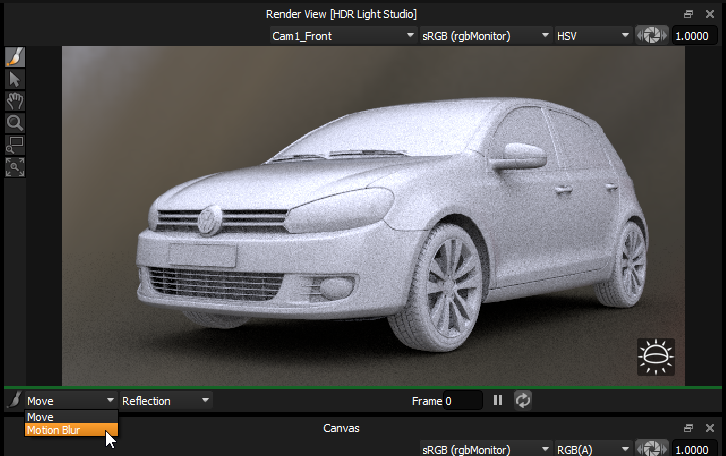
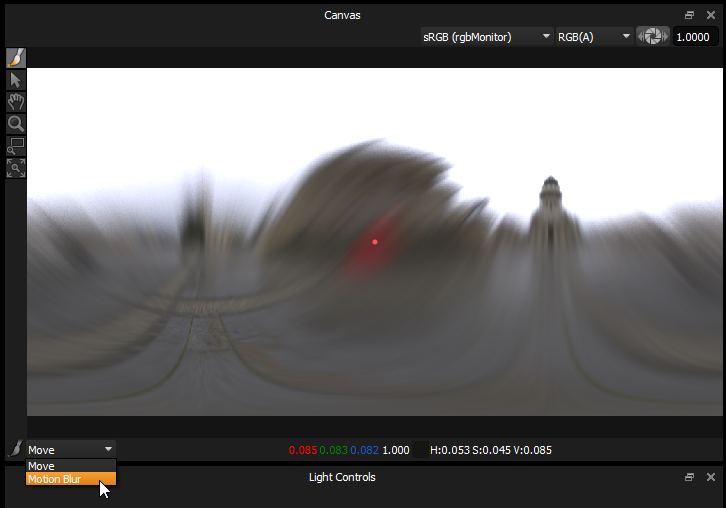
Using the sliders is not the best way to set the direction. There is a far more intuitive way of using the LightPaint tool on the Canvas and Render Views.
When a light is selected with a Motion Blur (Spherical), the LightPaint Tool drop-down on the Canvas or Render View is updated to include a Motion Blur option. Select this option to position the direction for the motion blur.
Now if you click on the Render View, the LightPaint mode of Reflection, Illumination or Rim will be used to position the direction for the motion blur. This will update the U and V Directions in the properties panel.
Now if you click on the Canvas, you will directly position the direction for the motion blur on the HDRI map. This will update the U and V Directions in the properties panel.
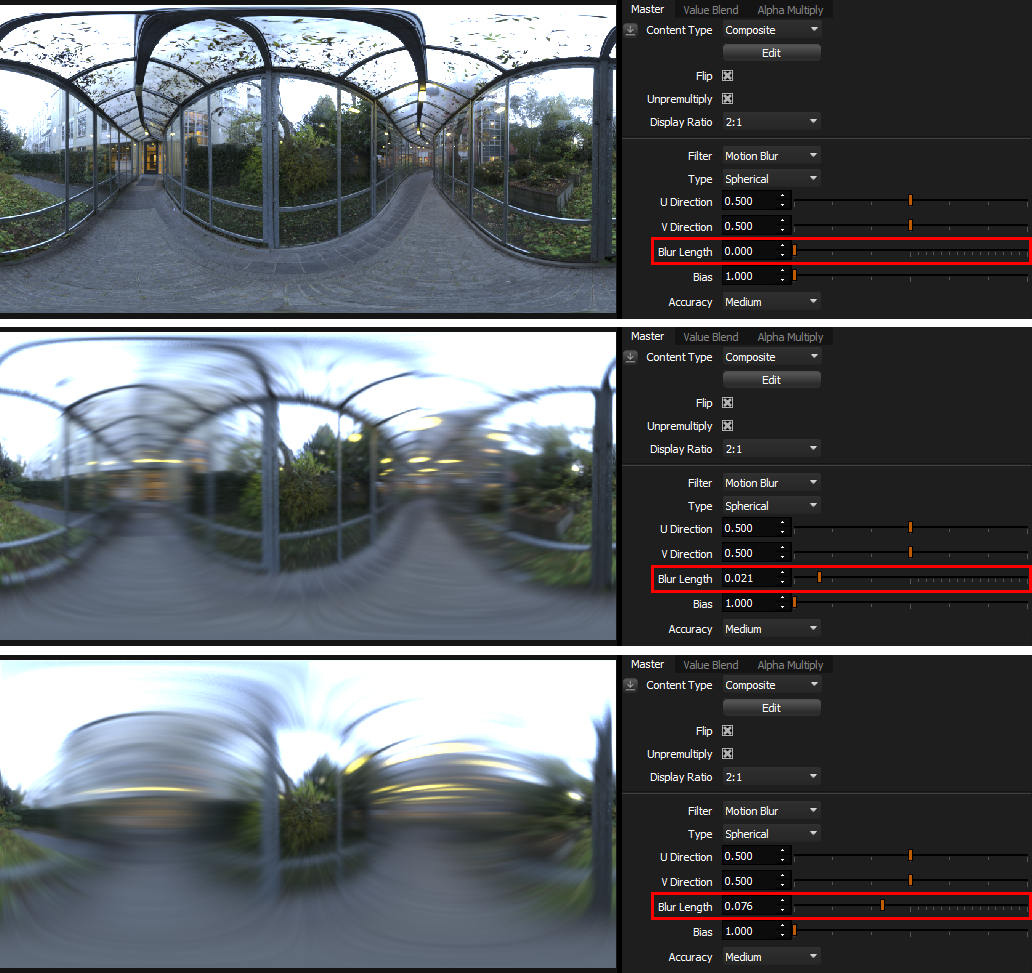
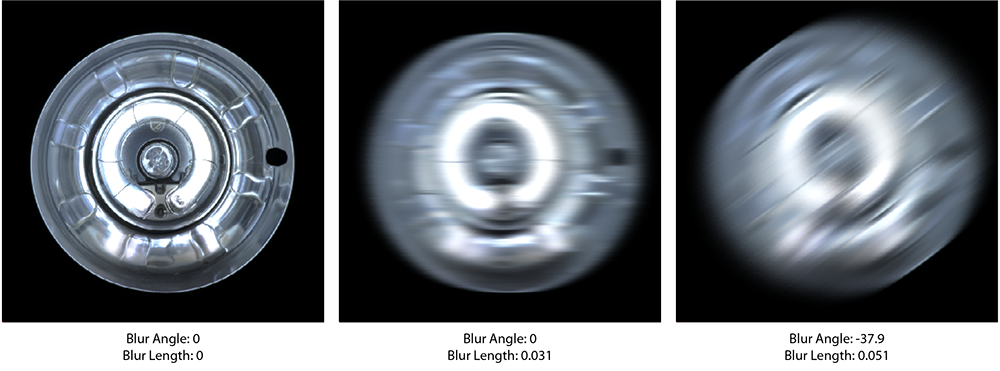
Blur Length
Controls the length of the motion blur. A larger value gives the impression of moving faster. Example settings and results can be seen in the image below.
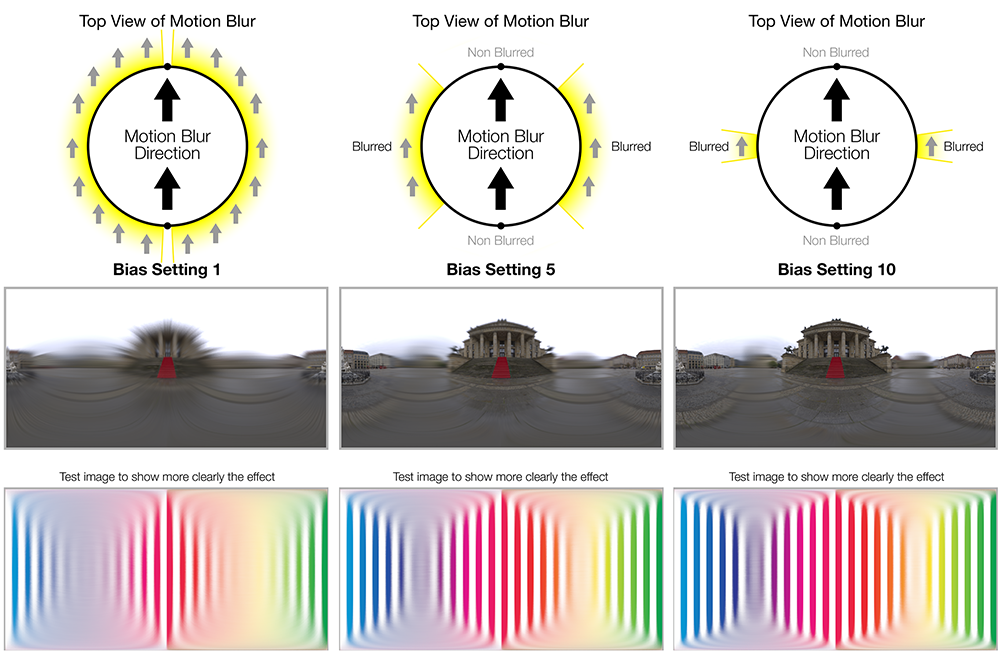
Bias
This setting allows artistic control over the motion blur. The default setting is 1 and is most physically correct. But using a higher Bias value the non blurred area of the HDRI map in the direction of travel increases. You may want to adjust this if you have a visible HDRI map in the background of your shot and you want to control at what point the map starts to become motion blurred.
Accuracy
There are 3 accuracy settings: Low, Medium, and High.
The higher the setting, the smoother the result but it will take a little longer to render.
Type - Planar
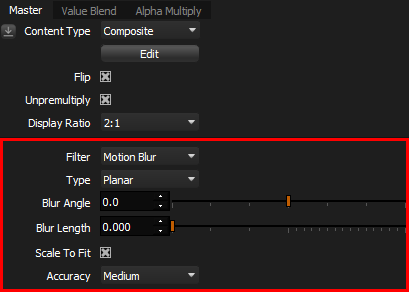
Use this setting to apply Motion Blur to flat images. For example the appearance of an Area Light.
Blur Angle and Blur Length
These settings control the direction and amount of motion blur.
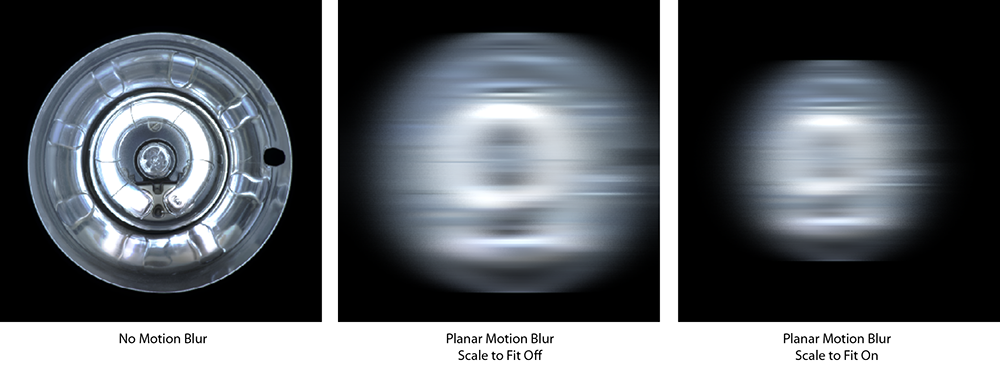
Scale to Fit
With this setting On, the blurred content will be scaled to fit inside the image dimensions - maintaining soft edges.
The higher the blur length, the more the image is reduced in scale to fit.
With this setting Off, the image will be blurred without scaling. As the blur length increases, the blur will spill over the edges of the texture space.
Accuracy
There are 3 accuracy settings: Low, Medium, and High.
The higher the setting, the smoother the result but it will take a little longer to render.
Motion Blur Tutorials
Now you have learned the basics, why not watch the 3 motion blur tutorials to see motion blur in action.
Motion Blur - Tutorial 1 - Introduction
Motion Blur - Tutorial 2 - Using gradient to mask motion blur
Motion Blur - Tutorial 3 - Using alpha image to mask motion blur
