HDR Light Studio is a standalone lighting application providing a set of tools and content dedicated to lighting 3D scenes. Using HDR Light Studio connected to MODO provides the ability to create custom HDRI maps to light your scenes, with lights chosen and positioned to provide the perfect effect on your model. As you work with HDR Light Studio, the lighting is updated in real-time in MODO, where you can see the lighting interact with your 3D scene. You can also create and control Area Lights using HDR Light Studio.
This workflow tutorial will teach you how to use the connection between MODO/Octane Render and HDR Light Studio.
It will not teach you how to use HDR Light Studio itself. Please see our 'Getting Started' content here to learn the HDR Light Studio interface and the basic features.
Workflow Tutorial
For compatibility ensure you are running 'at least' Octane Version: 2018.1.3.145
1. Start MODO and load the MODO project you want to light.
It makes most sense to use the 'Render' interface layout in MODO when using HDR Light Studio (see Figure 1).
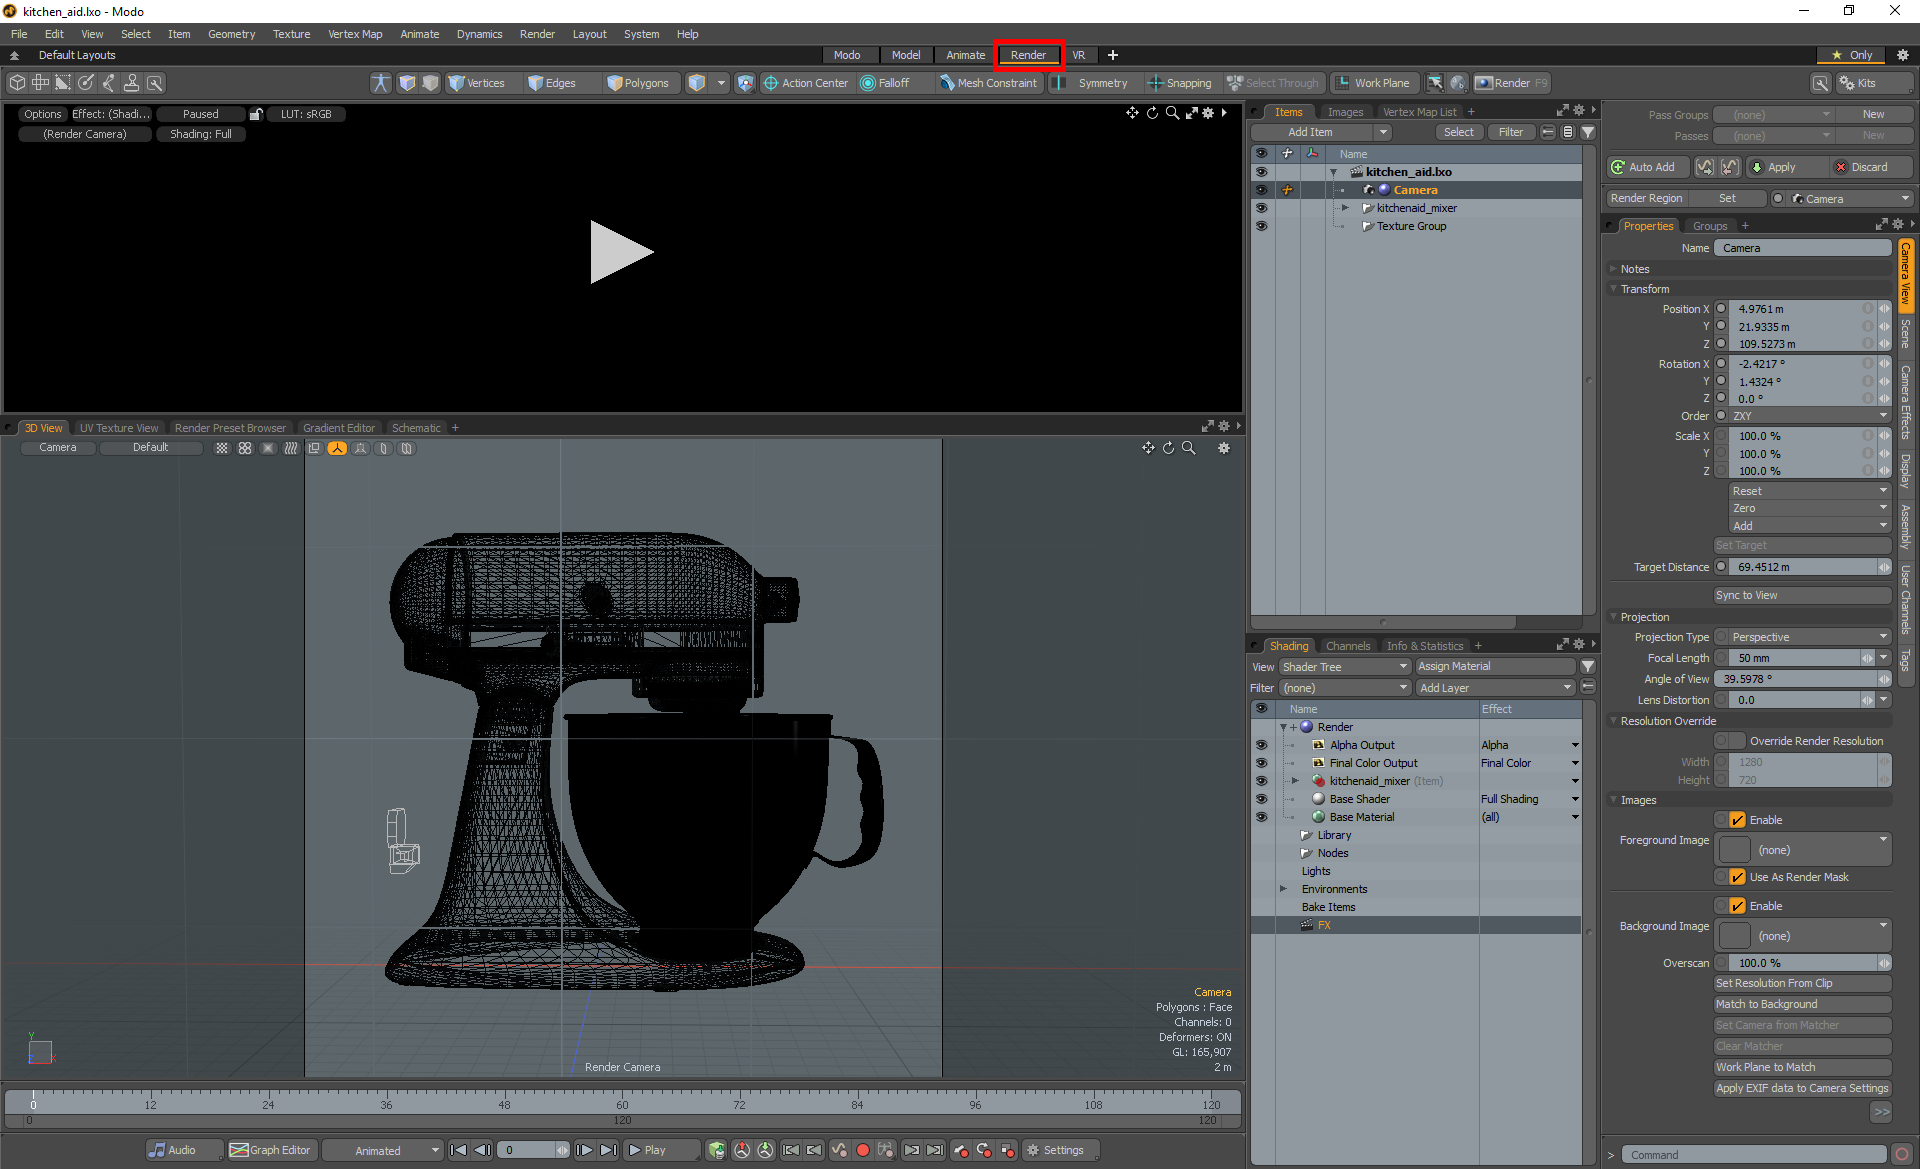
Figure 1: Setting the interface layout to 'Render'
Make sure a camera is set up and active for the specific view you want to light. By default, MODO creates a camera for us called ‘Camera’, which can be seen in the ‘Items’ panel. For this camera to be the camera view that we use when lighting in HDR Light Studio, it needs to be ‘Set as Render Camera’ by Right-Clicking on the camera in the ‘Items’ panel and selecting that option (see Figure 2). A ‘blue ball’ icon next to the camera name in the Items panel will appear to indicate that this is the current Render Camera.
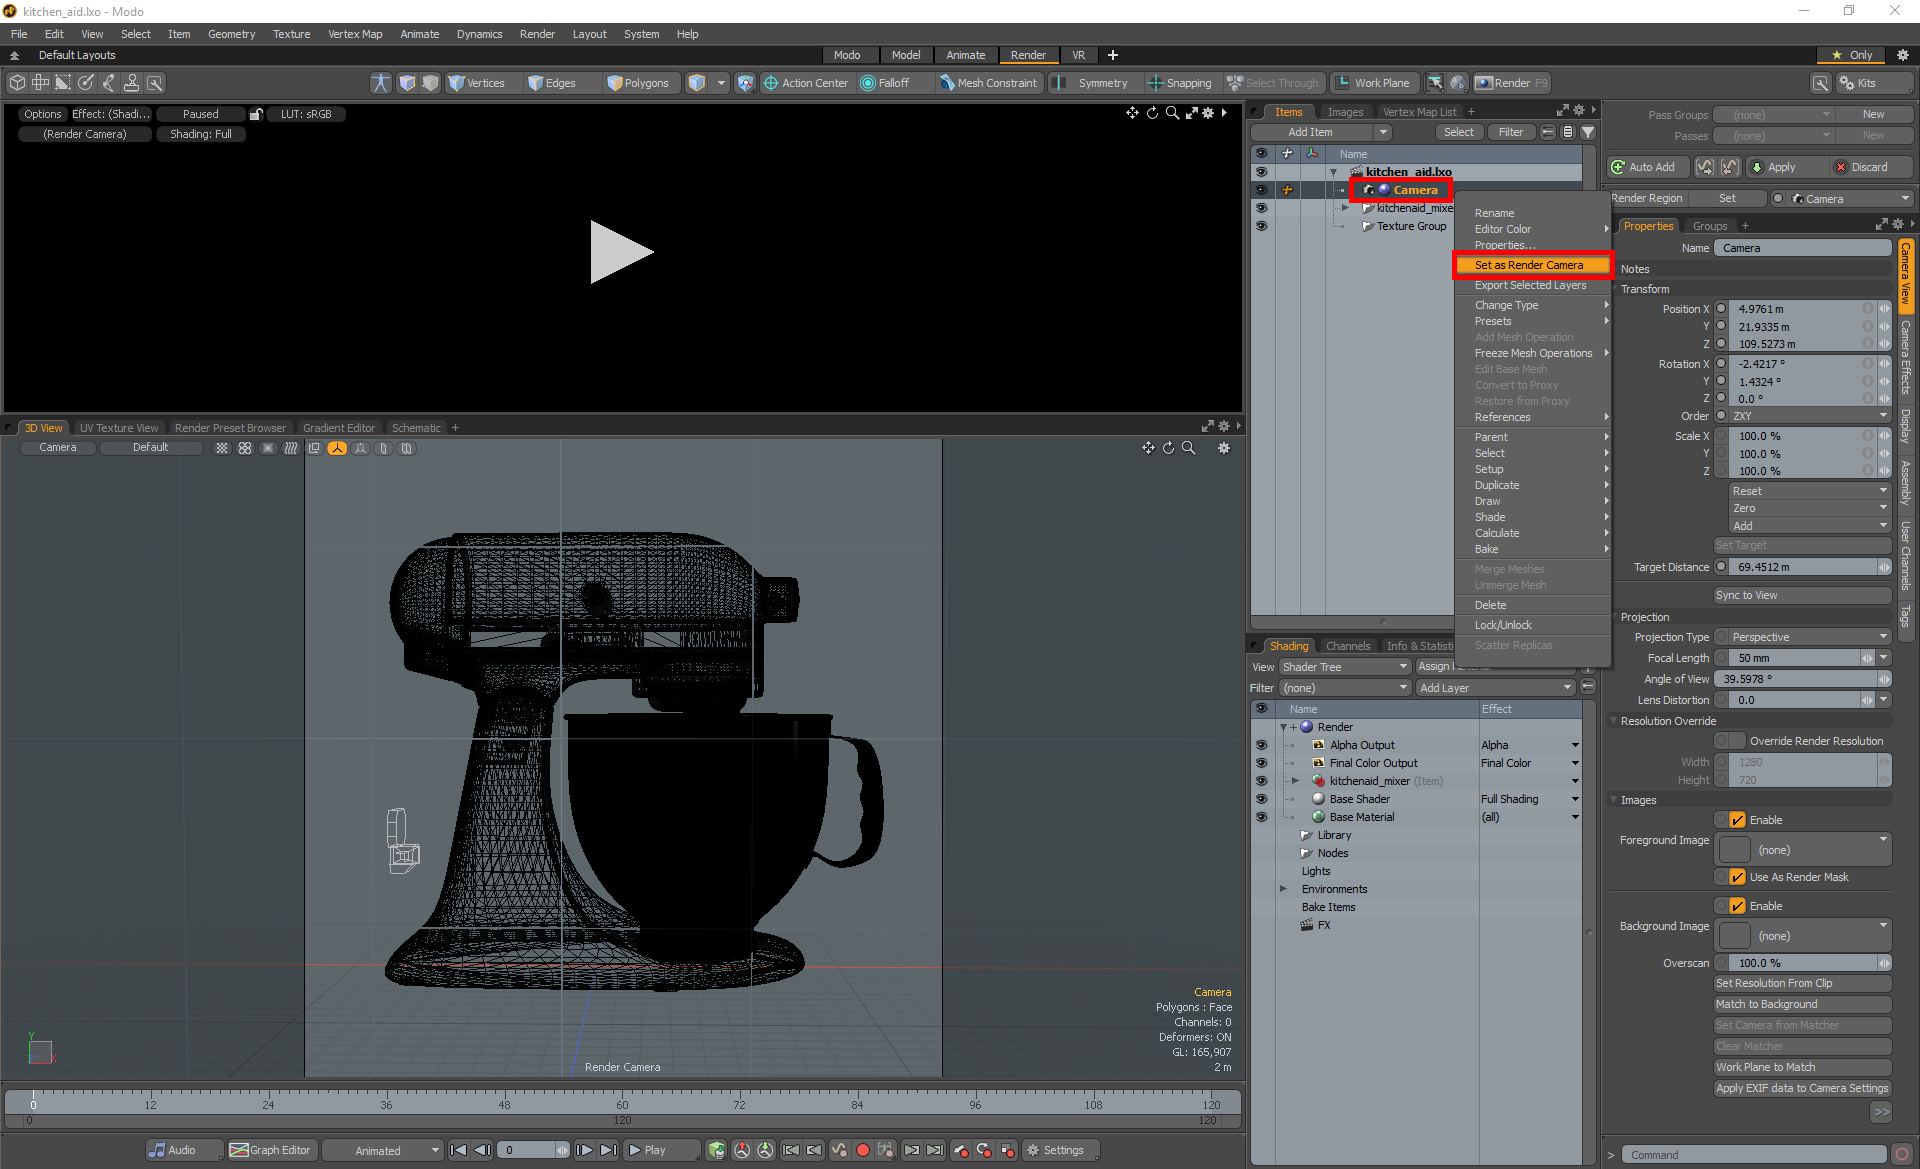
Figure 2: Setting a camera to be the Render Camera
2. Whatever interface layout you are in (MODO, Model, Animate, Render, VR), ensure the view is set to ‘Render Camera’ (see Figure 3).
This is to ensure your view always displays the view of your camera in HDR Light Studio. If the view in MODO does not match the camera view in HDR Light Studio, you will notice that LightPaint will not paint the lights where you would expect them to.
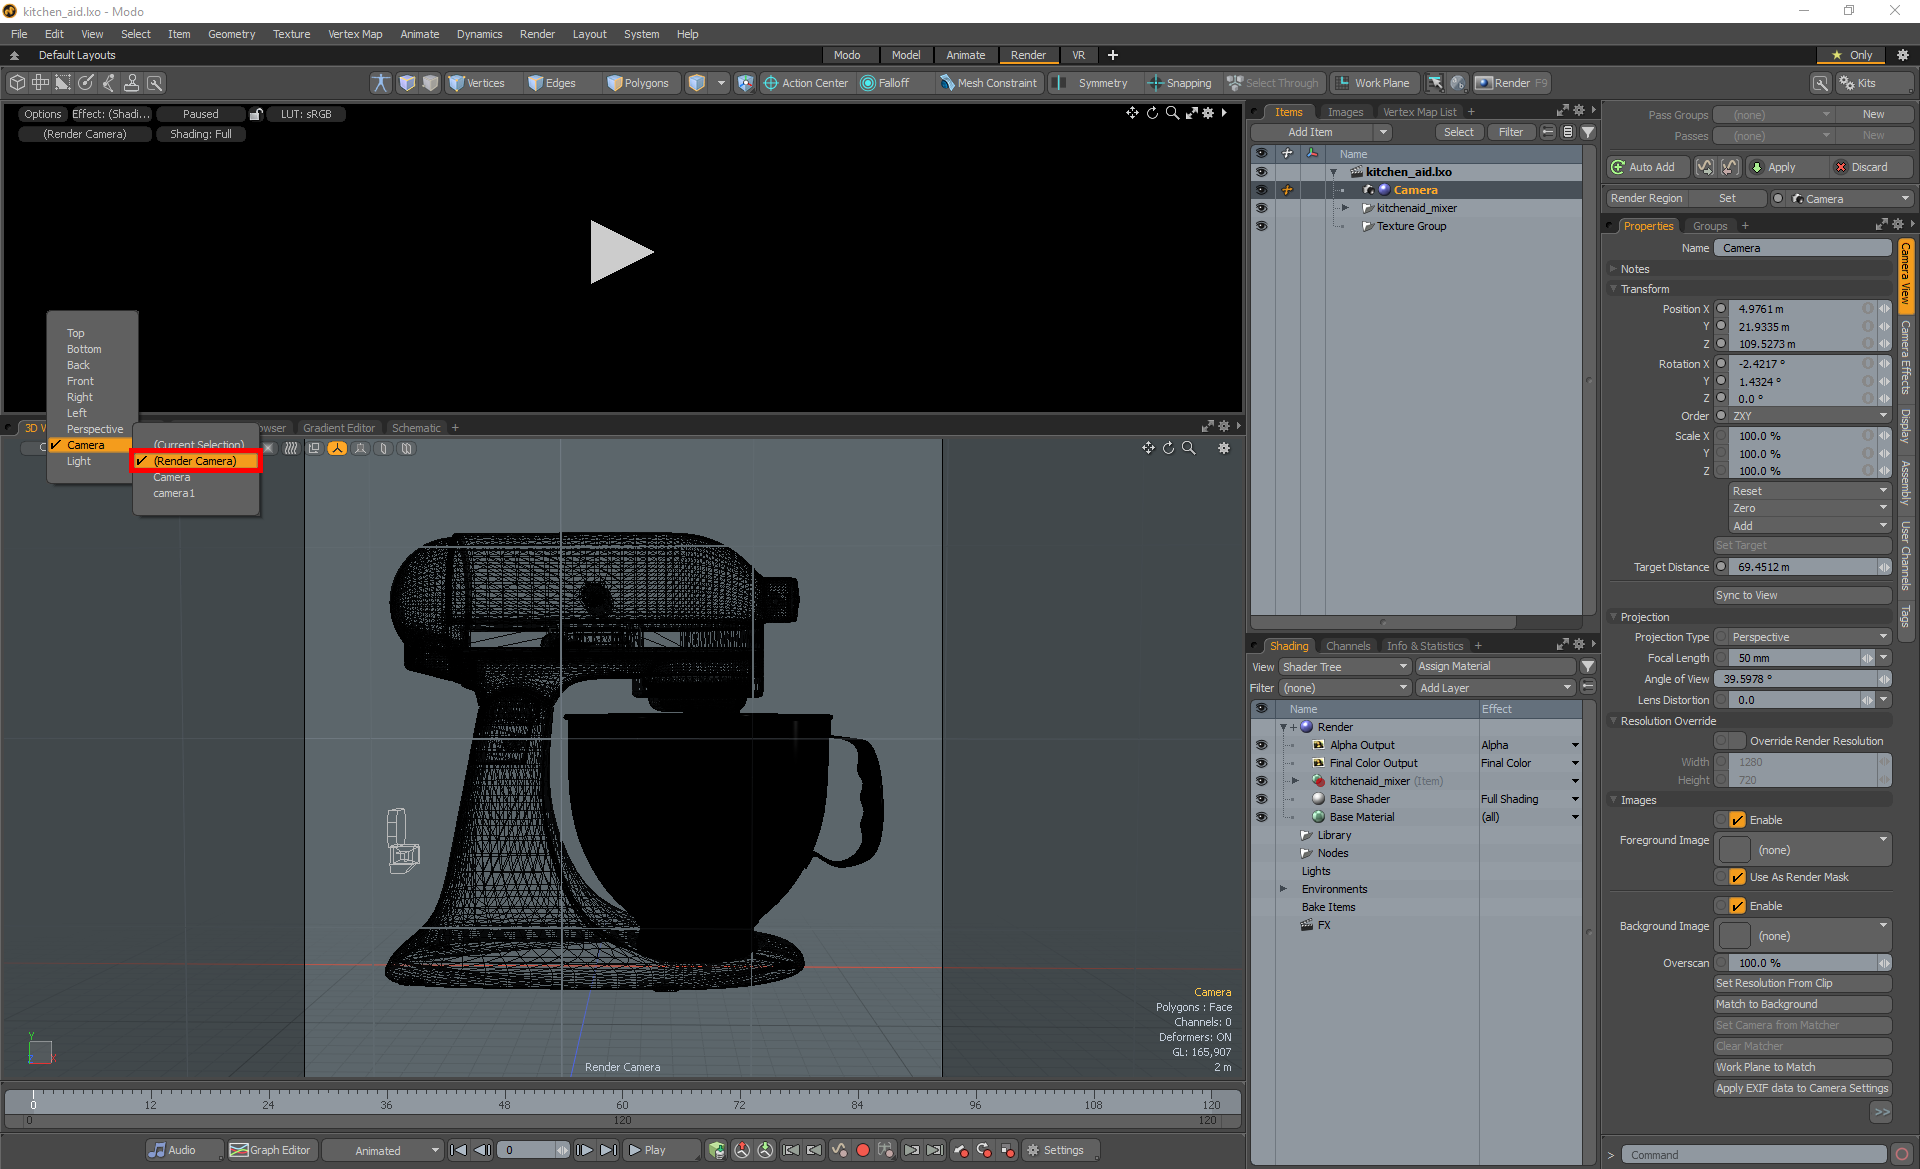
Figure 3: Changing the view to always show the view of the Render Camera
3. In the Shading Panel, select an Environment. The HDR Light Studio Connection 'controls' can be seen at the bottom of the Environment Properties (see Figure 4).
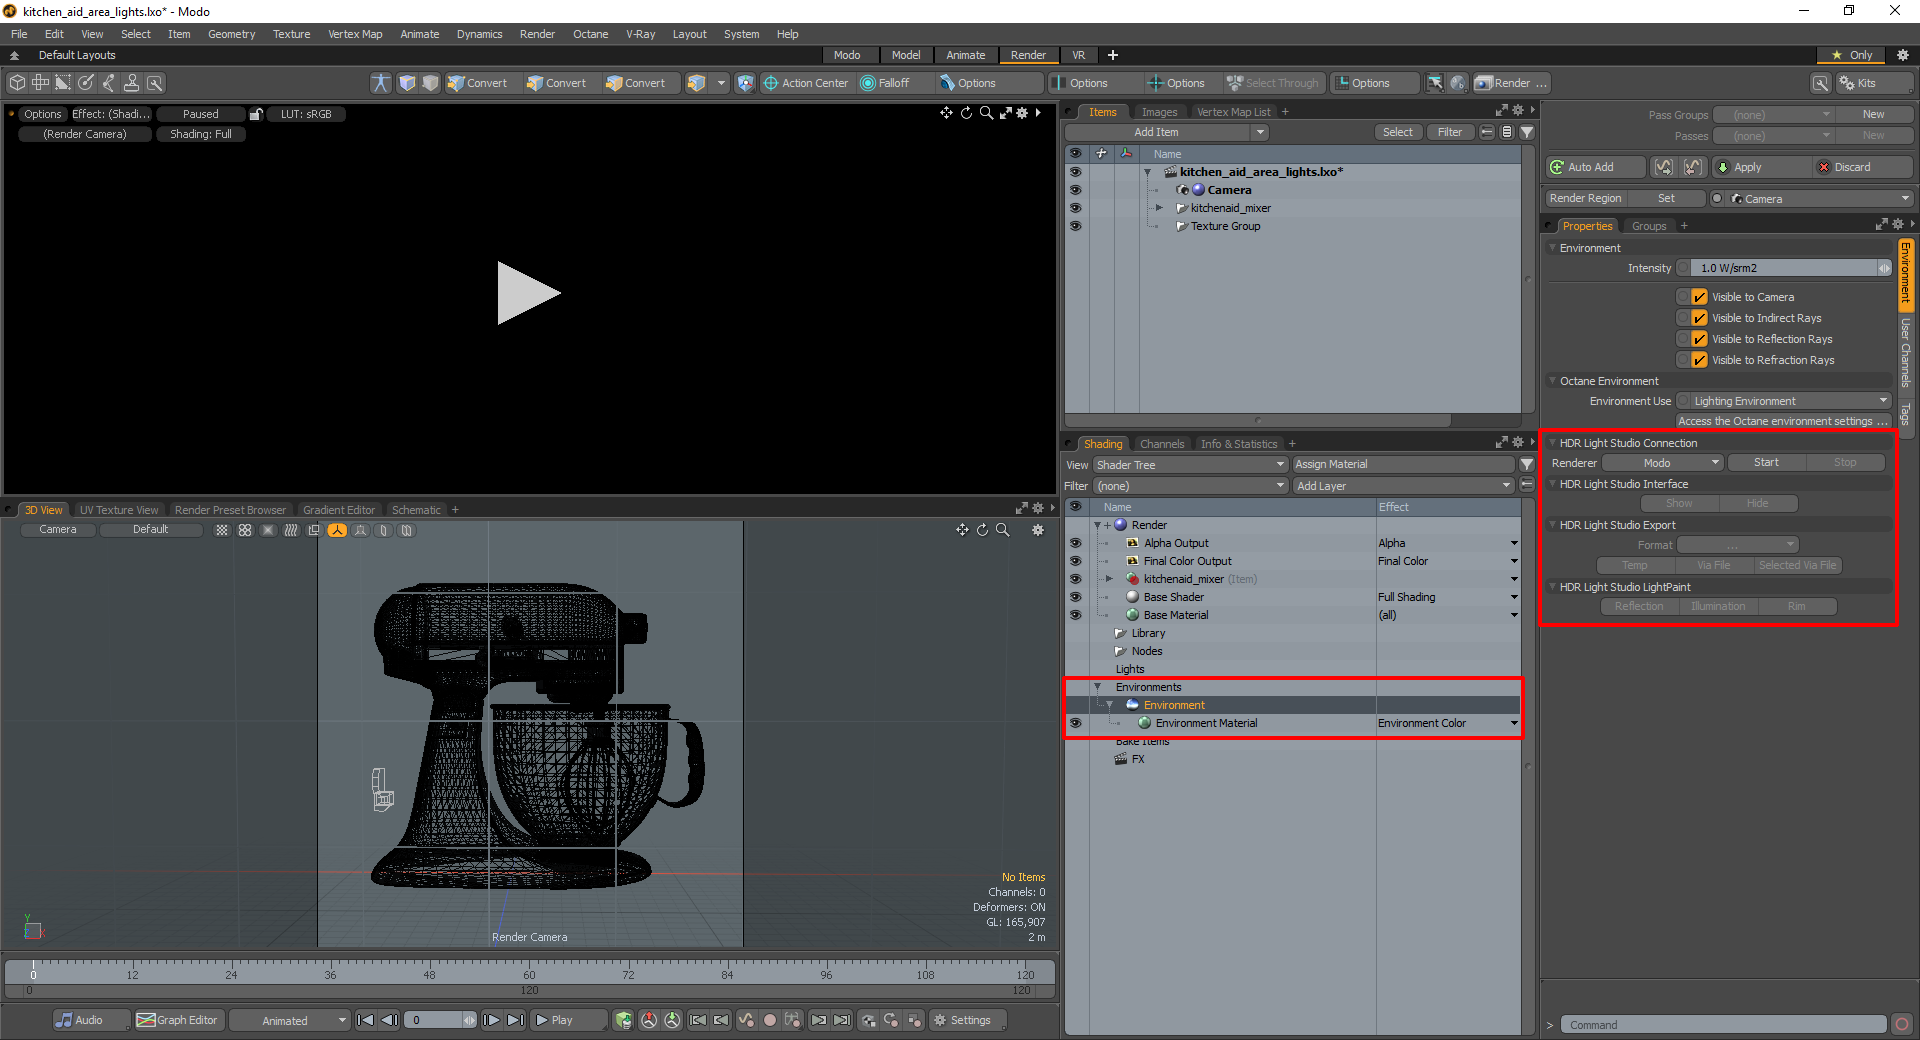
Figure 4: Controls of the HDR Light Studio connection
4. Click within the 3D viewport in Modo to make sure the view is 'active'.
HDR Light Studio needs to know the active view when starting. (Although Modo does not highlight the active view, so its easy to forget to do this).
5. In the HDR Light Studio Connection controls, use the drop-down to choose the Renderer you are using for this project (see Figure 5).
This is used to determine the available features in the HDR Light Studio interface. The lighting design created will be the same and compatible with MODO, Octane and V-Ray renderers.
In this example we are using the Octane renderer.
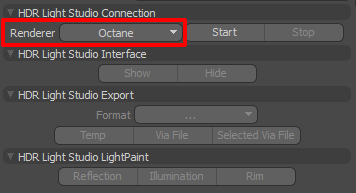
Figure 5: Choosing Octane as the renderer
6. Press 'Start' to start HDR Light Studio connected with MODO (see Figure 6).
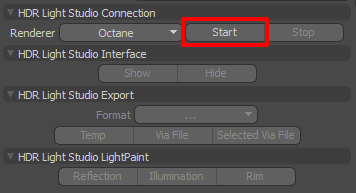
Figure 6: Starting HDR Light Studio connection
The HDR Light Studio application will now open and is connected to MODO.
The HDR Light Studio connection has added a new image on the selected Environment (see Figure 7).

Figure 7: New image is added to the environment
The current HDRI map design in HDR Light Studio is shared with MODO as a temp proxy (lo-res) image. A proxy is used because it's faster to calculate and faster for MODO to load during the iterative lighting design process. When the lighting design changes in HDR Light Studio, this image is updated in MODO to use a new temp with a new filename, to ensure the renderer uses the new image even when caching images.
The HDR Light Studio interface should look like this (see Figure 8).
If not in HDR Light Studio you can reset it by going to the menu: Window > Layout > Load > Default > MODO
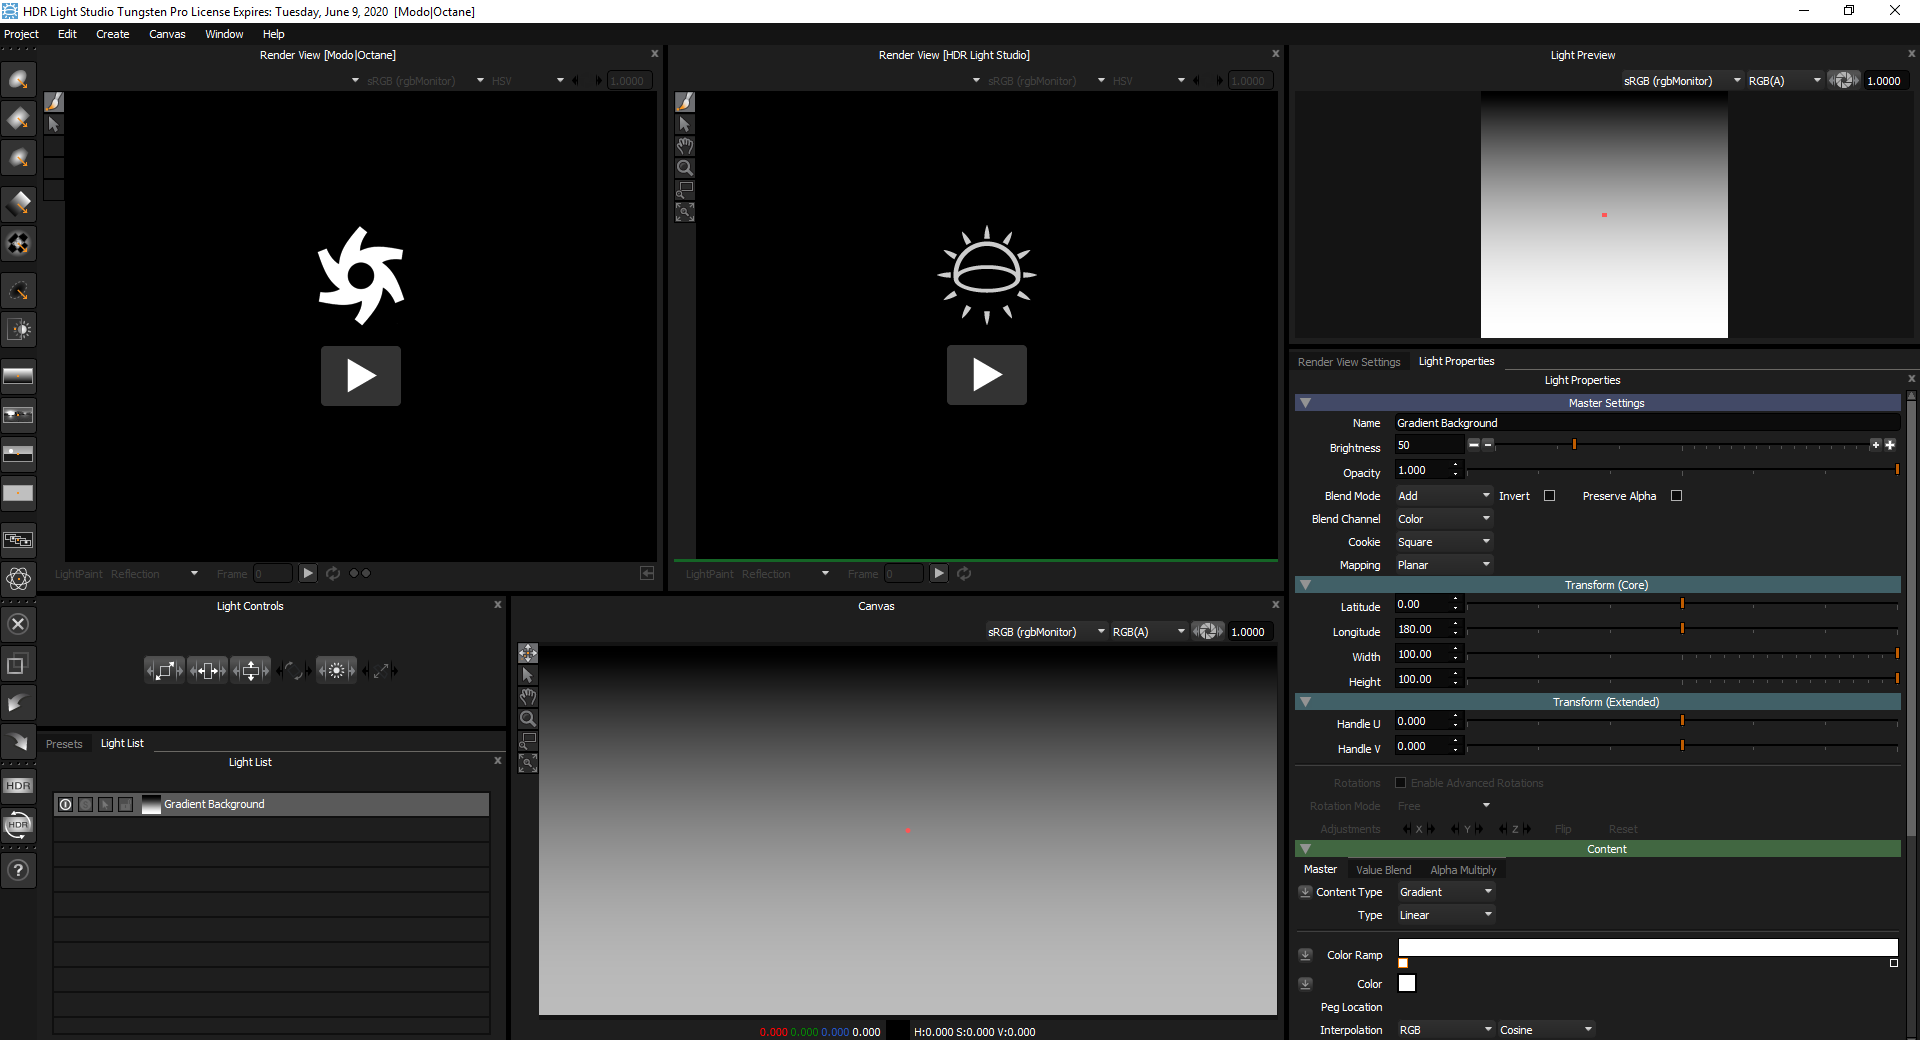
Figure 8: HDR Light Studio on startup with MODO
Using our latest version of HDR Light Studio and the MODO connection - the HDR Light Studio interface will now show 2 Render Views.
On the left is Render View [Modo|Octane] (New in Tungsten Drop 2)
7. Press Play on Render View [Modo|Octane] (see Figure 9)
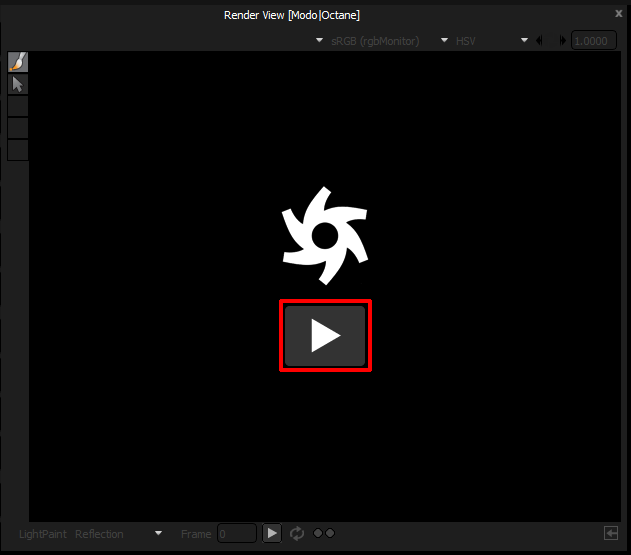
Figure 9: Starting the Octane Render View within HDR Light Studio
HDR Light Studio now instructs MODO to start Octane Render interactive rendering in an OctaneRender Viewport.
This interactive Preview Render image is now displayed in this Render View (see Figure 10).
To understand all of the features/controls for this view, see here.
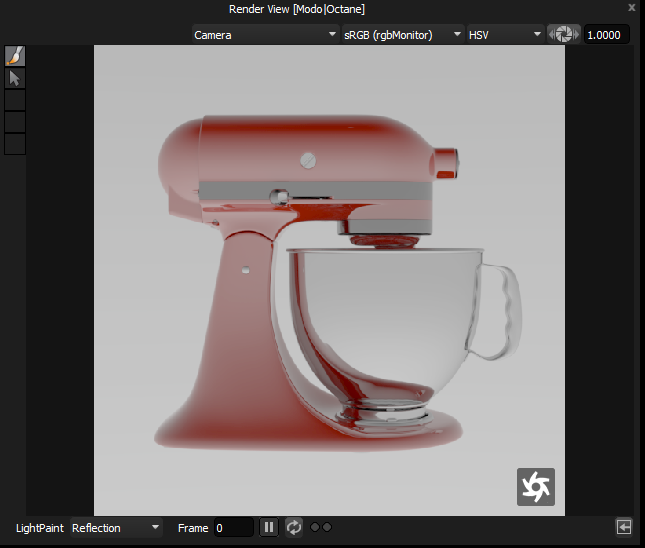
Figure 10: Octane render view working within HDR Light Studio
By default this view will be set to have a display LUT, in this case sRGB. But the image being shared with HDR Light Studio already has a display LUT applied.
To display this image correctly, to match what we see in MODO. Use the drop-down to change the LUT to None (see Figure 11).
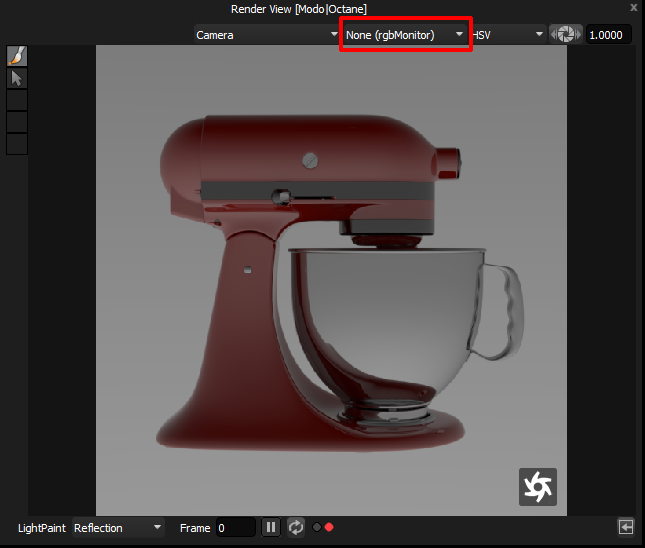
Figure 11: Removing LUT
Let's make our first light in HDR Light Studio ...
By default, LightPaint is set to Reflection in this view. So lights are positioned to reflect in the chosen location on the 3D model when using LightPaint (see Figure 12).
Learn about LightPaint here.

Figure 12: LightPaint mode set to Reflection
8. Click on the Presets tab next to the Light List tab, to show the Preset Lights (see Figure 13).
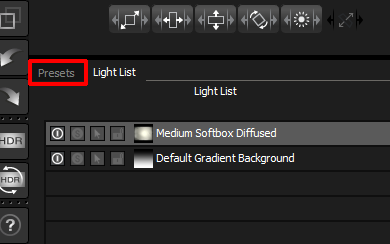
Figure 13: Opening the presets tab to see a list of presets
9. Drag and drop a Preset Light onto the 3D model in the Render View [Modo|Octane] (see Figure 14).
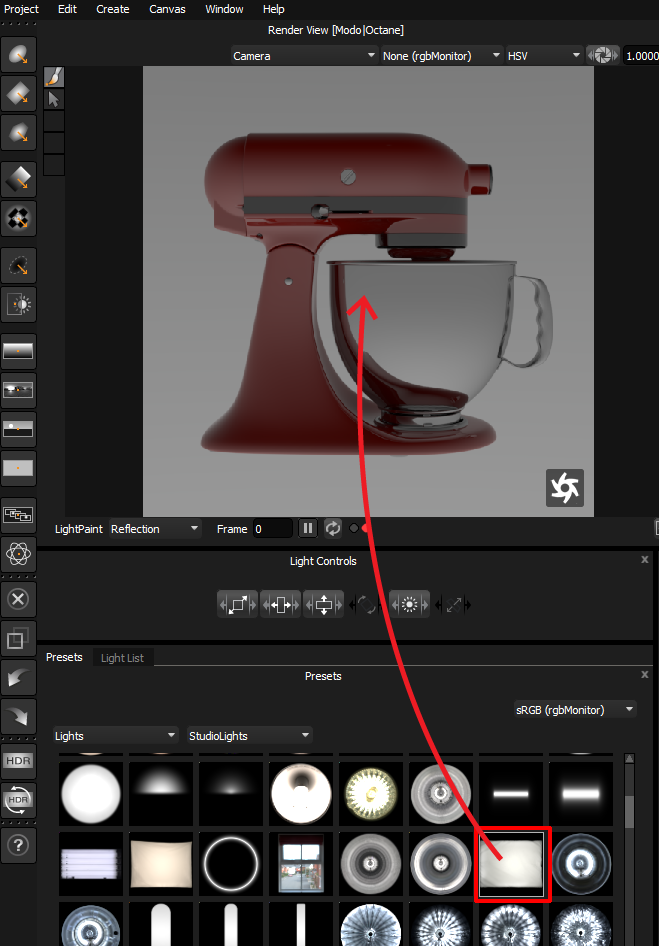
Figure 14: Placing a preset light on the model
The Preset Light has been added to the lighting design in a location that is reflecting where the light was dropped on the 3D model.
You will see:
•A new light in the Light List in HDR Light Studio (see Figure 15).
•You can see the new light added on the Canvas (HDRI Map View) in HDR Light Studio (see Figure 15).
•The MODO environment has been updated to use the new live HDRI map from HDR Light Studio, and the Octane render updated using the new lighting (see Figure 15).
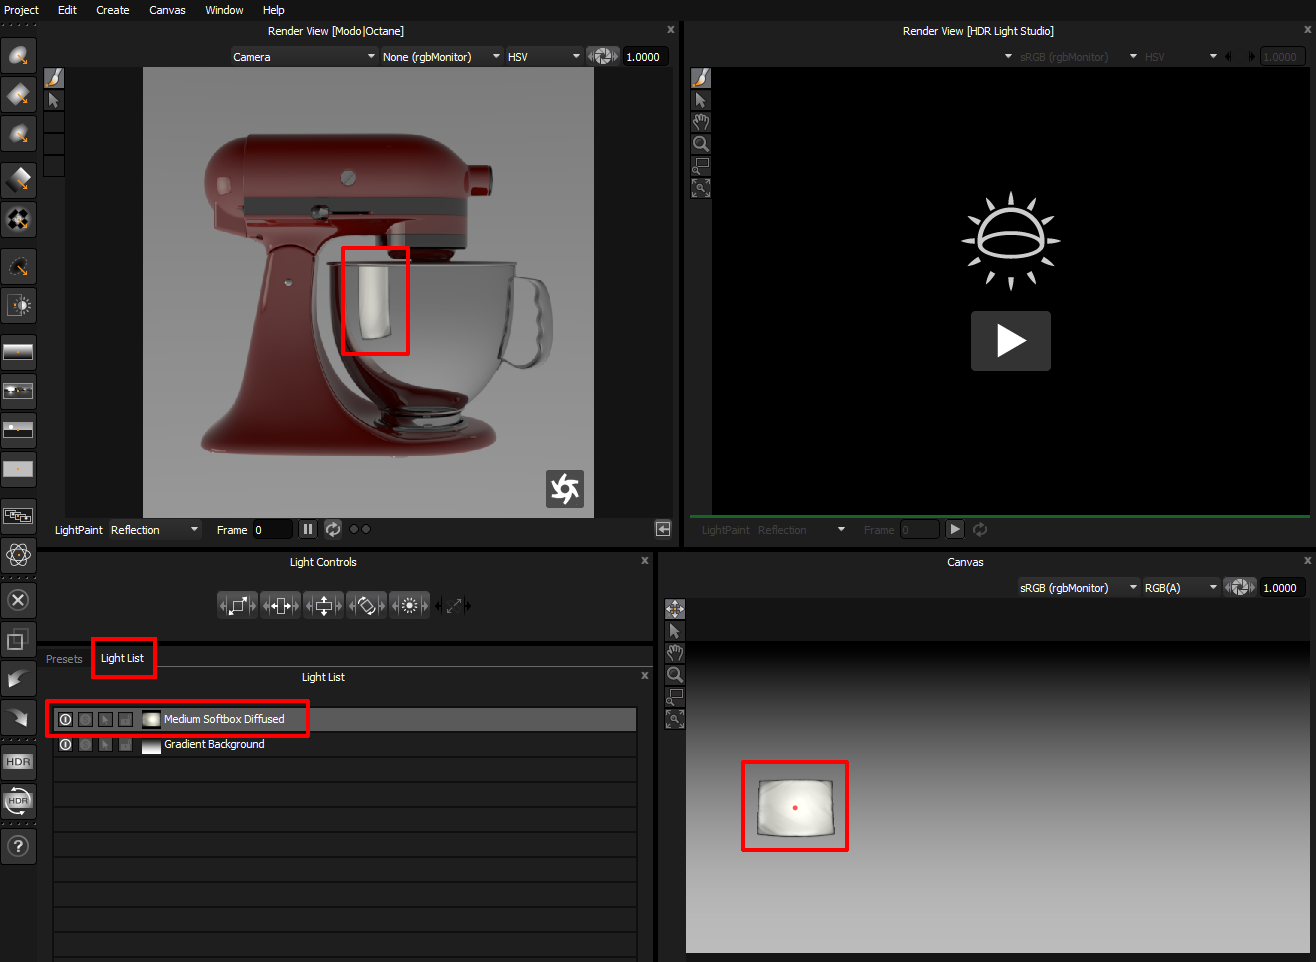
Figure 15: HDR Light Studio interface after creating a light
You can see that the LightPaint tool is active in the toolbar within the Render View [Modo|Octane] (see Figure 16).
10. Click on the 3D model to reposition the selected light from the Light List (see Figure 16).
The light is moved on the HDRI map, the new HDRI map is sent to MODO and Octane Render updates.
This is a very interactive way to light your shot. Placing lights directly on the 3D model where you want them.
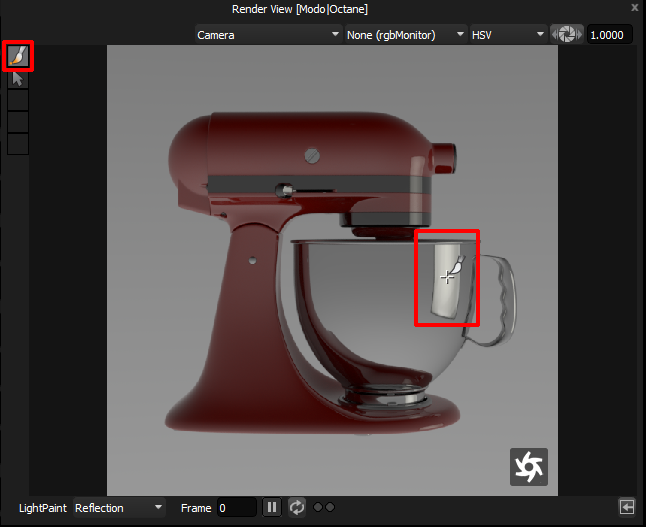
Figure 16: Using LightPaint to paint lights on the model
If there is a delay of more than a second, or so, after clicking to move a light and see the updated rendered result - the process will be slow and tedious. This is unlikely when using Octane as its fast.
But, if Octane updates are slow for some reason, we could use HDR Light Studio's built in renderer to speed up the lighting process.
11. Press the play button on Render View [HDR Light Studio] (see Figure 17)
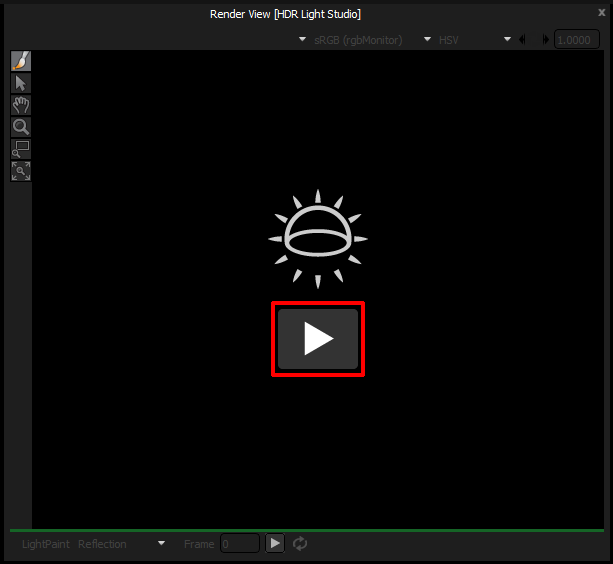
Figure 17: Starting up HDR Light Studio Render View
The Import Scene Geometry panel will pop up
12. Press Import (see Figure 18)
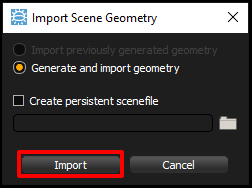
Figure 18: Importing the scene from MODO to HDR Light Studio render view
By default the whole MODO scene is exported as a temporary alembic file and loaded into the Render View [HDR Light Studio].
To export only selected geometry into HDR Light Studio - see here
You may need to use the Camera drop-down in Render View [HDR Light Studio] to match the camera view you are seeing from MODO (see Figure 19).
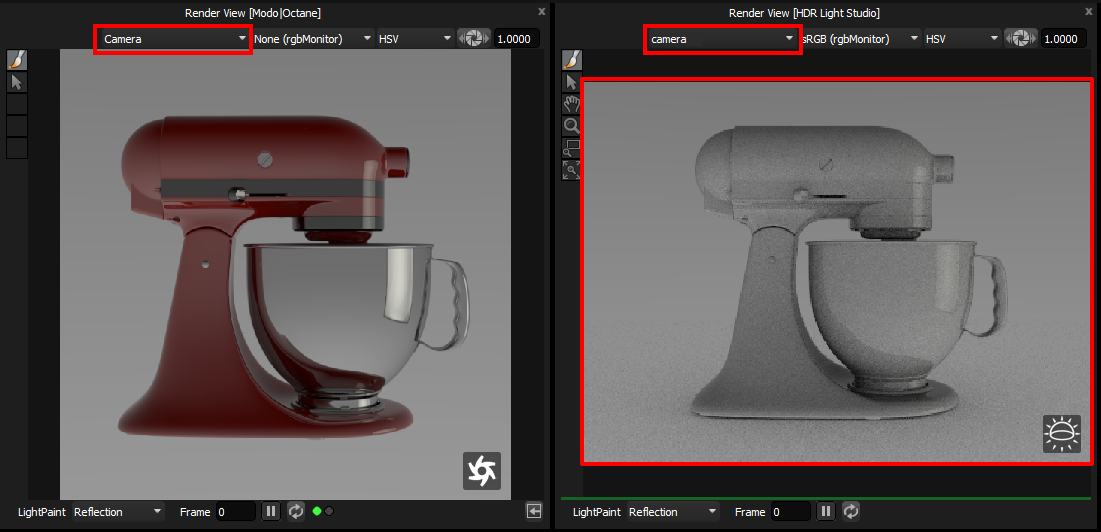
Figure 19: Octane render view (left) and HDR Light Studio render view (right) side by side
The Render View [HDR Light Studio] renders the loaded scene lit with the current lighting design. A simple shader is used on the whole scene to preview the light and reflections.
If you needed to open Render View [HDR Light Studio] to get a more interactive lighting experience. Use this view for LightPaint, where clicking and dragging to position lights is supported - it's fast and interactive.
The Render View [Modo|Octane] rendering will catch up eventually as you work, and will display an image using the latest lighting.
If the Render View [Modo|Octane] is so slow that it is of little benefit during the interactive lighting process, then use the Pause/Play button to stop and resume rendering in Render View [Modo|Octane], in order to do test renders from time to time (see Figure 20).

Figure 20: Pause/Play button for the render view
We have documented in more detail the process of using 2 Render Views together in HDR Light Studio here.
So far the light we created is on the HDRI map. With a single setting, this light can be removed from the HDRI map, and created as an Area Light in 3D space in MODO, mapped with the HDR content from HDR Light Studio.
13. Enable the Area Light check box in the Light Properties panel for the selected light (see Figure 21).
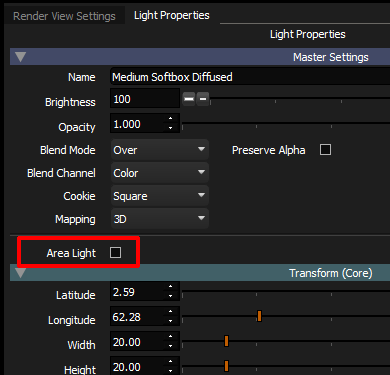
Figure 21: Converting a light into an area light
As a result of enabling the Area Light setting, these things instantly happen:
•The Light in the Light List gets the suffix [AreaLight] and the text is now yellow - clearly showing which lights are Area Lights (see Figure 22).
•The light is removed from the HDRI map lighting the Render Views (but is still represented and shown on the Canvas) (see Figure 22).
•A 3D Area Light mapped with the HDR light content (RGBA) is created in HDR Light Studio with a Smart Dolly distance of 1,000 (see Figure 22).
•A 3D plane with emitter shader is created in MODO, mapped with the HDR light content (RGBA), this can be seen lighting the shot in Render View [Modo|Octane] (see Figure 22).
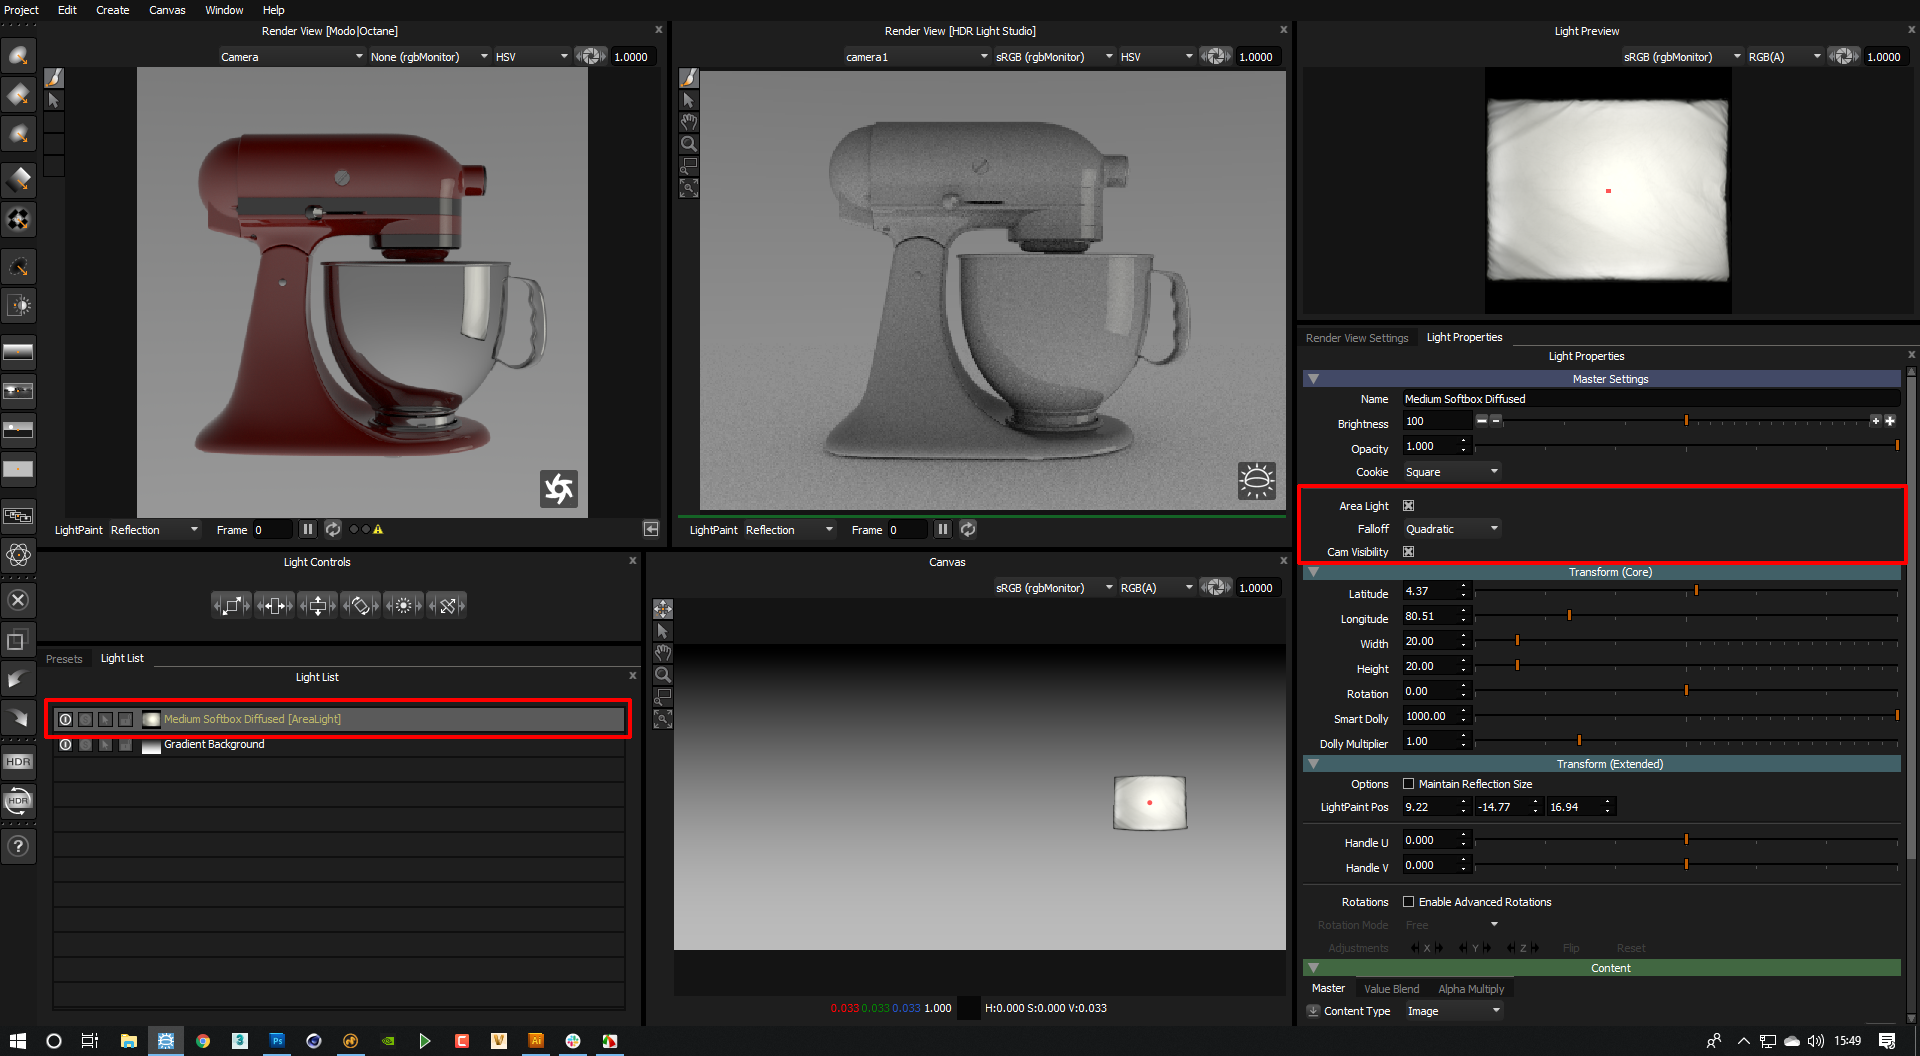
Figure 22: Light converted into an area light
14. Reduce the Smart Dolly slider value to move the light closer to the 3D model (see Figure 23).
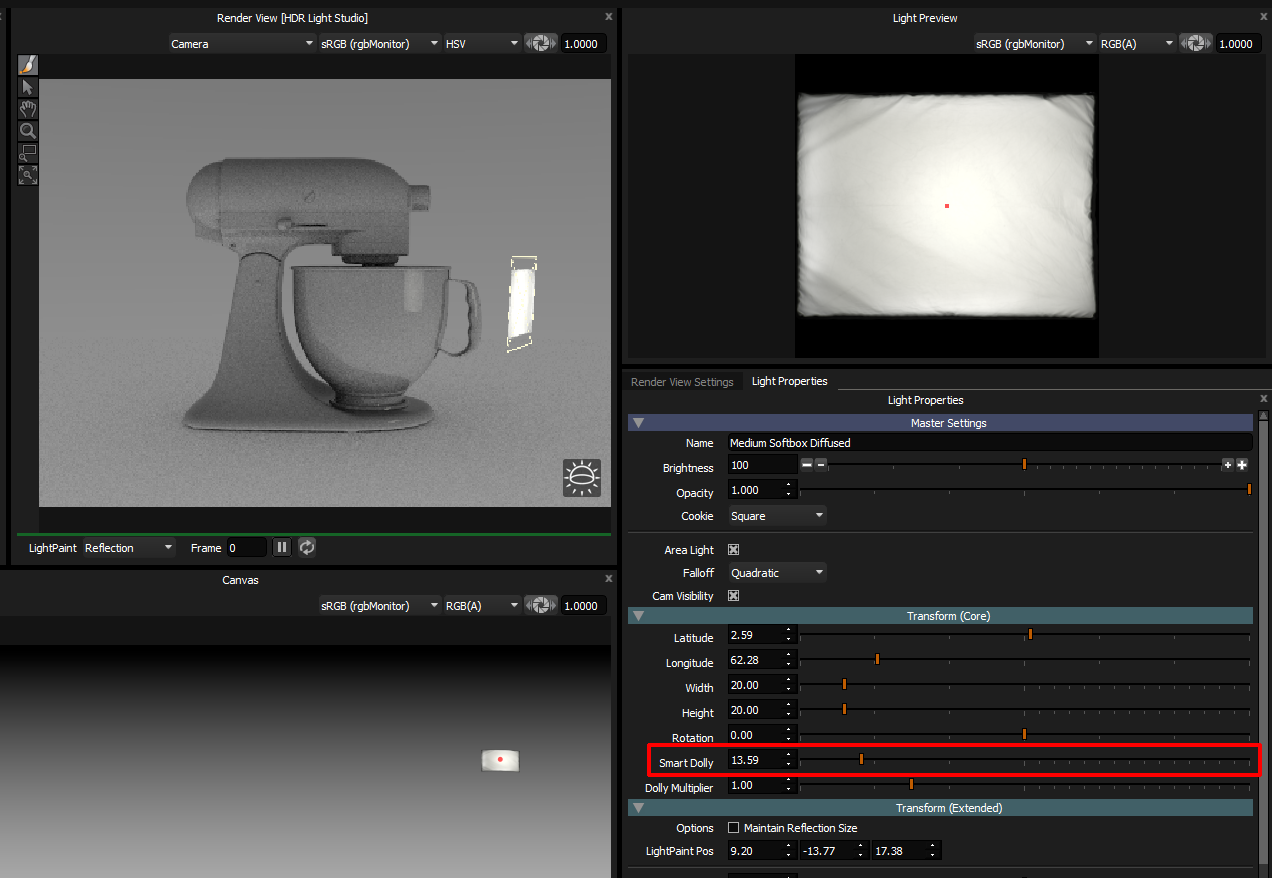
Figure 23: Moving the area light closer to the model (LightPaint position)
HDR Light Studio has a scene scale setting that is useful when working with Area Lights in MODO. If the area lights are too close or too far away by default. Adjust the Smart Dolly Scalar value in Preferences. This value scales all area lights in HDR Light Studio.
If we switch to the MODO user interface, we can see:
•The Area Light geometry in the viewport (see Figure 24) (If not, the area light is most likely too far away from your scene. To learn more about Smart Dolly - click here)
•A folder containing the area lights made with HDR Light Studio in the Items panel (see Figure 24)
•Shaders setup in the Shading panel for the created area lights - mapped with HDR (RGBA) content (see Figure 24)
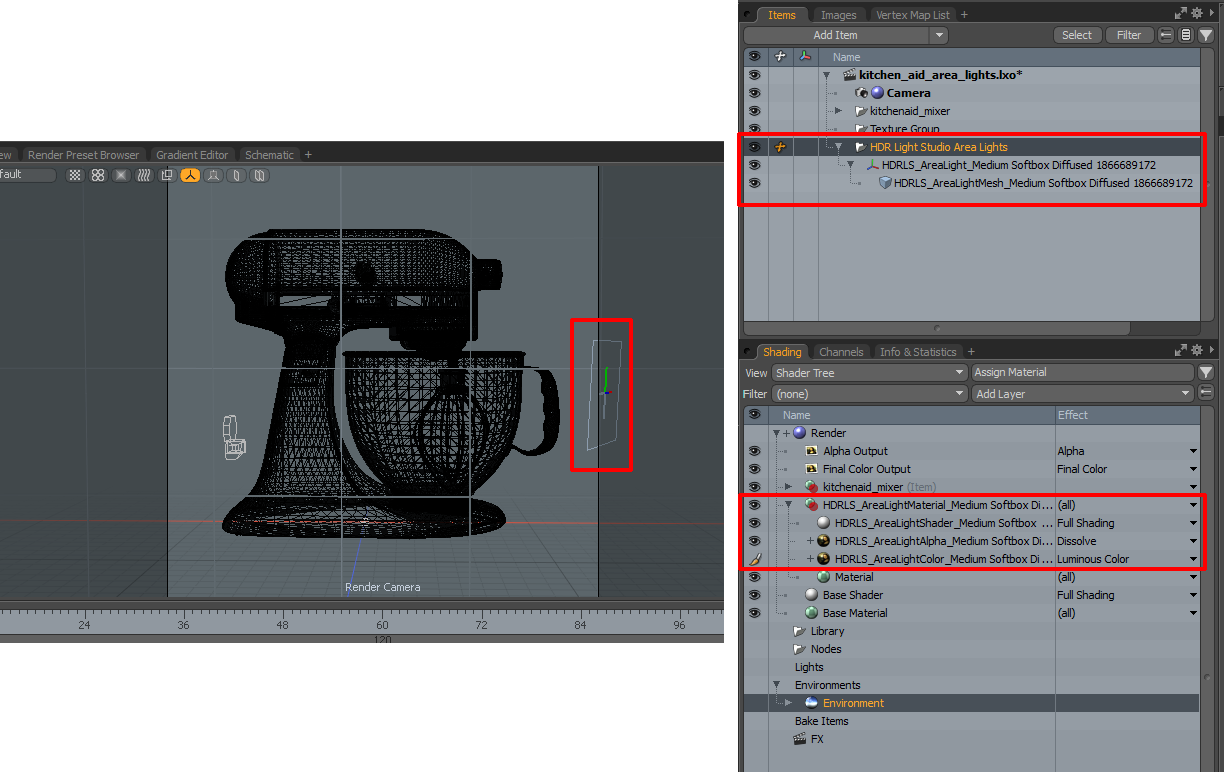
Figure 24: MODO interface after creating an area light
15. Use LightPaint in the Render Views to move the Area Lights, just like moving a light on the HDRI map (see Figure 25).
In fact area lights are controlled just like any other light in HDR Light Studio, with the addition of distance settings.
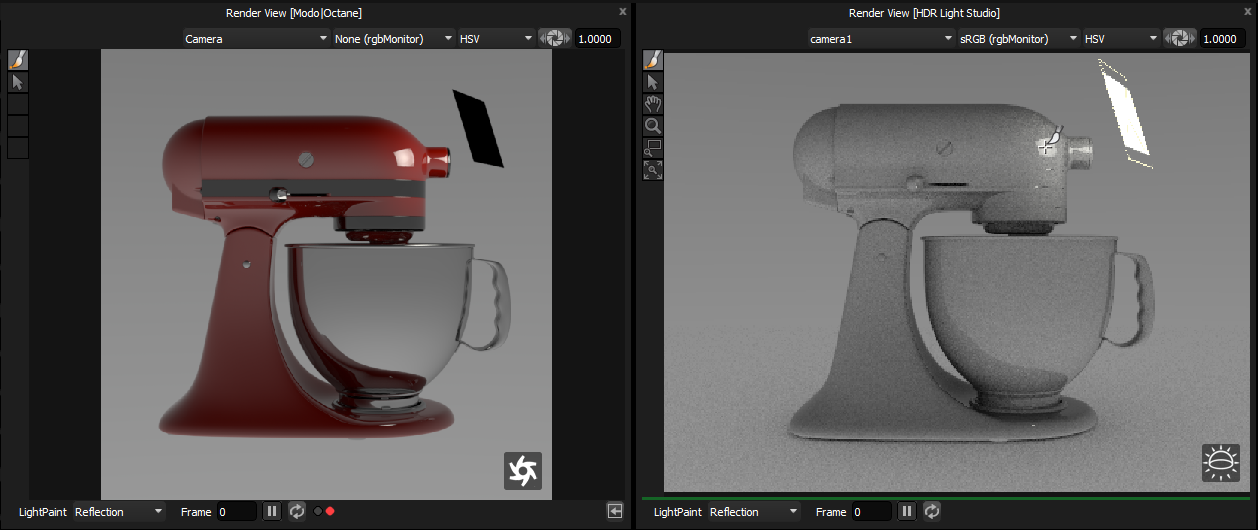
Figure 25: Using LightPaint to position the area light
When using the HDR Light Studio area lights, please note:
Renaming/deleting/duplicating these area lights in MODO (or any part of their associated shader network/file nodes) will cause problems!
16. Production Render
Once you are happy with your lighting, press the 'Production Render' button in HDR Light Studio (see Figure 26).
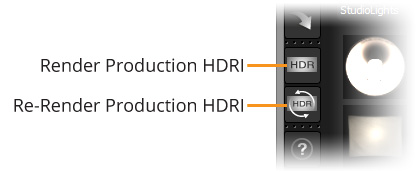
Figure 26: Production Render buttons
Set your Production Render settings and Press Render in this panel. Notice how the 'Orientation' is already set to 'Modo/Octane', this ensures that the rendered HDRI map is mapped correctly in the host, i.e. MODO (see Figure 27). For more information see: Production Render Dialog
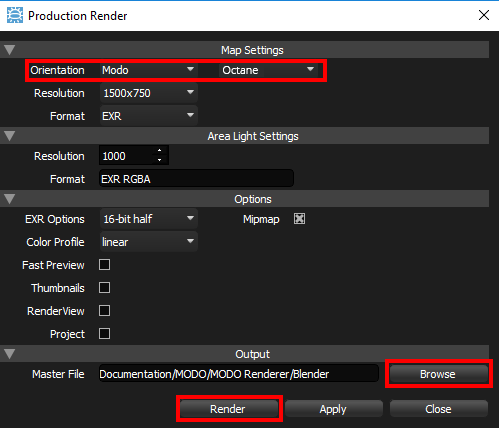
Figure 27: Production Render panel
The production quality content will be calculated and saved. The connection will automatically update MODO to use these final area light and HDRI map images.
If any further changes are now made to the lighting in HDR Light Studio, all content will be updated to use the updated proxy versions again.
So please ensure you 'Stop' the HDR Light Studio connection after you have produced your production lighting, by Pressing the Stop button (see Figure 28).
The OctaneRender Viewport will be stopped but will remain open in MODO when stopping HDR Light Studio. This view will need to be closed manually.
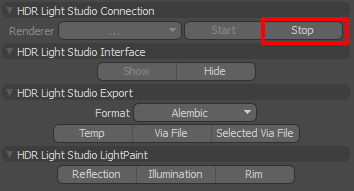
Figure 28: Stopping the HDR Light Studio connection
17. Save MODO scene.
If you would like the HDR Light Studio project to be saved in your MODO scene, you should save your MODO scene now. This way the scene state matches the HDRI map and area lights that are currently in the project.
18. Saving and loading HDR Light Studio projects
HDR Light Studio projects can be saved from the HDR Light Studio interface at any time during the lighting process as a HDi file (native HDR Light Studio project file), even when using HDR Light Studio via a connection. If you were to open HDR Light Studio in a connection with MODO, this project can be loaded into HDR Light Studio using Project > Open Project. The lighting design would load into HDR Light Studio replacing its current design, and would then be synced back into MODO. This is how you can move lighting between MODO projects or between other supported 3D software.
