This workflow tutorial teaches how to use HDR Light Studio with Houdini via the Connection.
Watch the HDR Light Studio - Quick Start video first to learn the key concepts of using HDR Light Studio.
Ensure you have installed both the HDR Light Studio main application and the HDR Light Studio Connection for Houdini (Python 3 build).
For compatibility ensure you are running at least HDR Light Studio 8.1.1 (build 2023.0515).
Start Houdini and Load your Houdini Project
Before we start to use HDR Light Studio to light this scene.... let's make sure the scene is ready to light first.
Camera View
Make sure you have a camera setup with the final composition for the shot that you want to light. If you move the camera during the lighting process, the reflections of the lights will move and this will ruin your lighting.
Renderer
Make sure the renderer is set up. In this example, we are using Mantra and have set up the renderer in the Network View: Outputs by pressing the Tab key and selecting Mantra.


Create a HDR Light Studio Connection Controller
Press the Tab key in the Network View: Objects and select Digital Assets > HDRLSConnectionCtrl. Not seeing HDR Light Studio Connection? See installation instructions
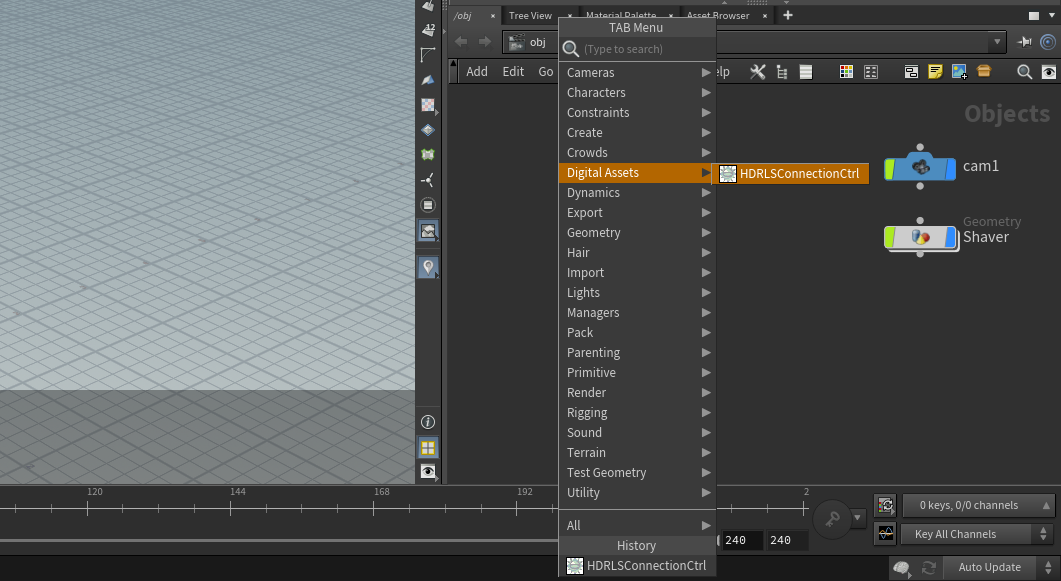
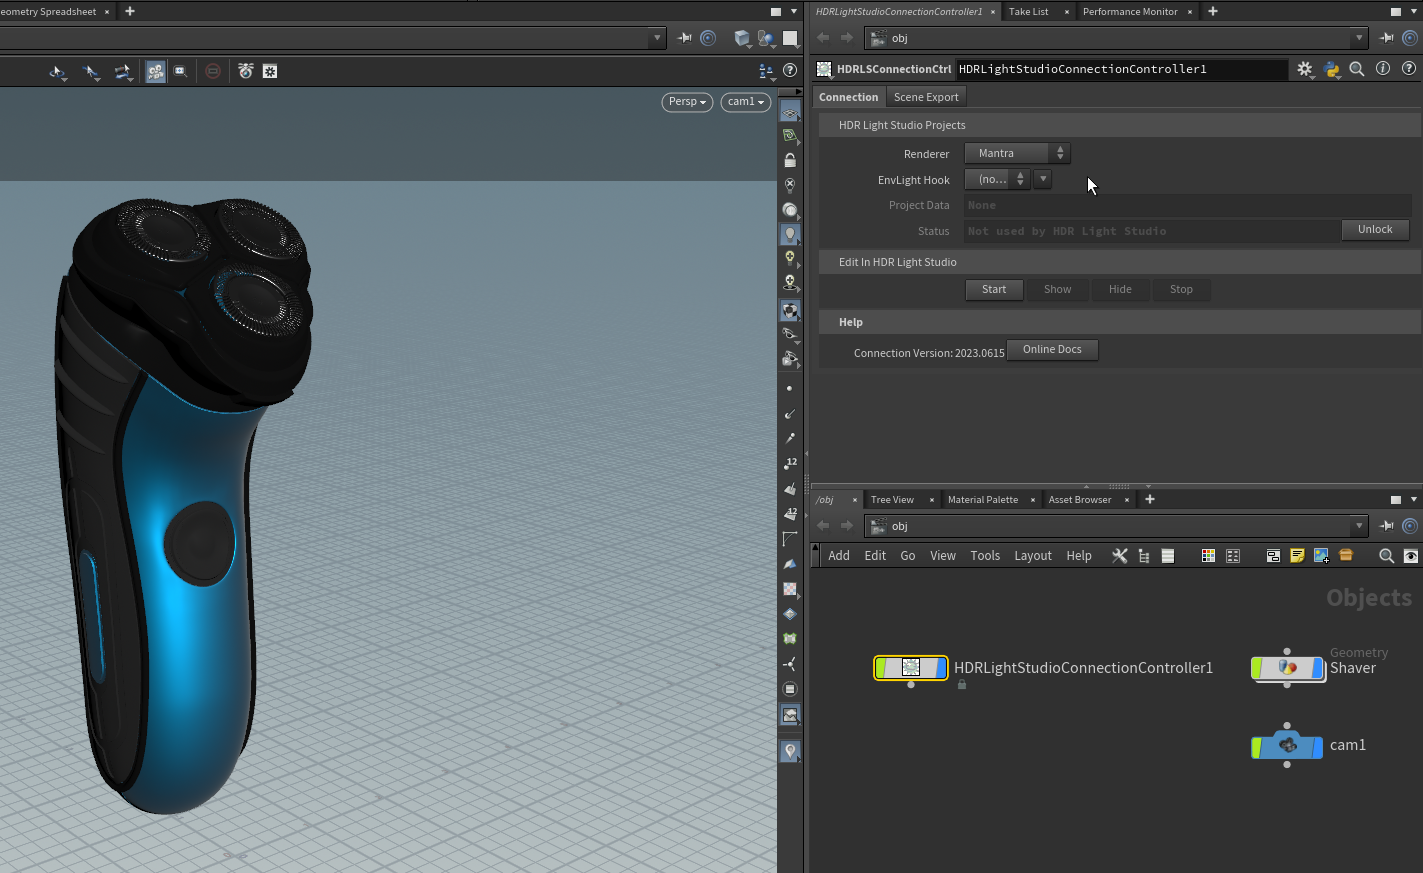
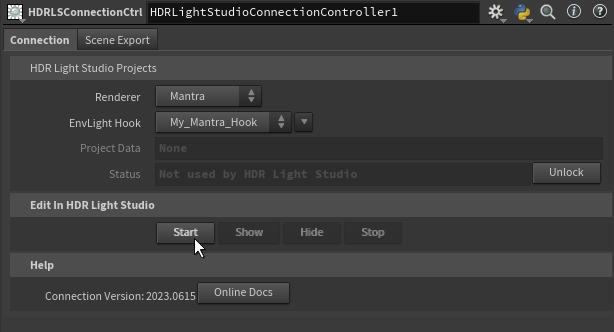
The HDR Light Studio Connection Controller has been created and the HDR Light Studio connection panel will open.
Set Renderer
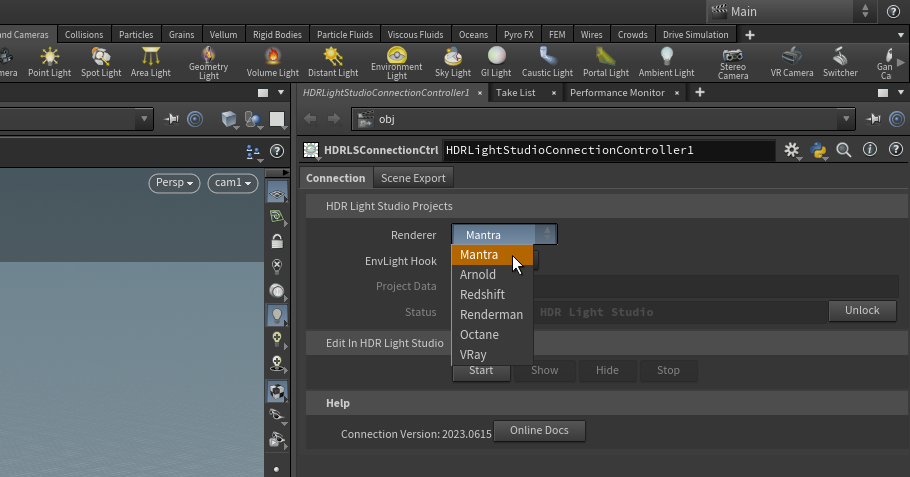
Use the Renderer drop-down in the Connection panel to set the Renderer for this Houdini project.
This tells HDR Light Studio which renderer it will create lighting for. In this example, we are choosing Mantra in the drop-down.
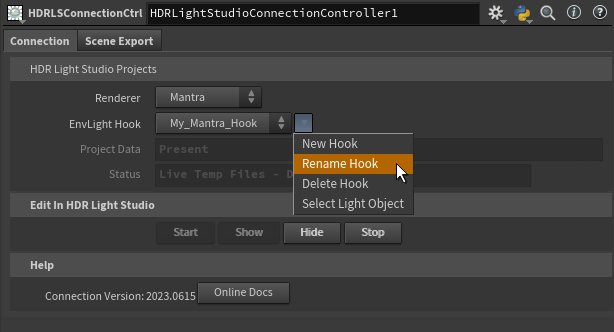
Create a new EnvLight Hook
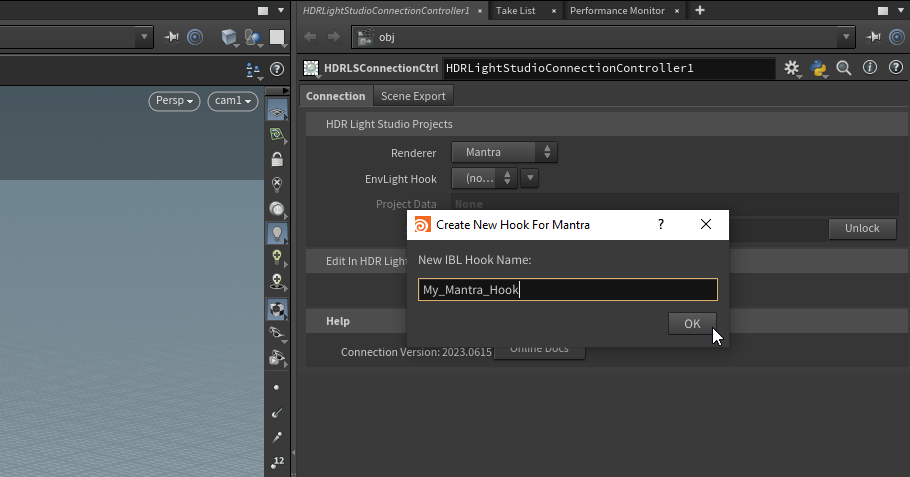
Use the EnvLight Hook menu in the Connection panel to create a New Hook.
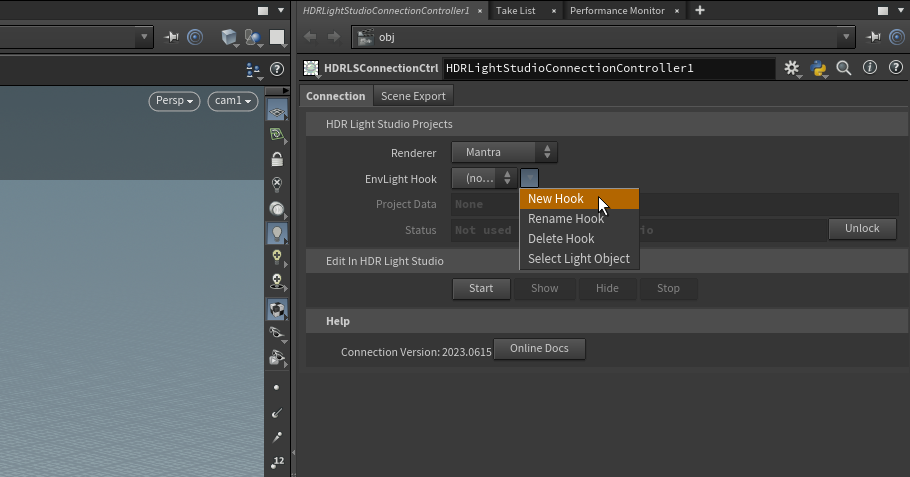
You will be asked to name your EnvLight hook. In this example, we will use the default name: My_Mantra_Hook.
 Please note: If you have given your EnvLight Hook a name and you decide to change it later, do not rename it until you start HDR Light Studio. EnvLight Hooks should only be renamed while HDR Light Studio is running.
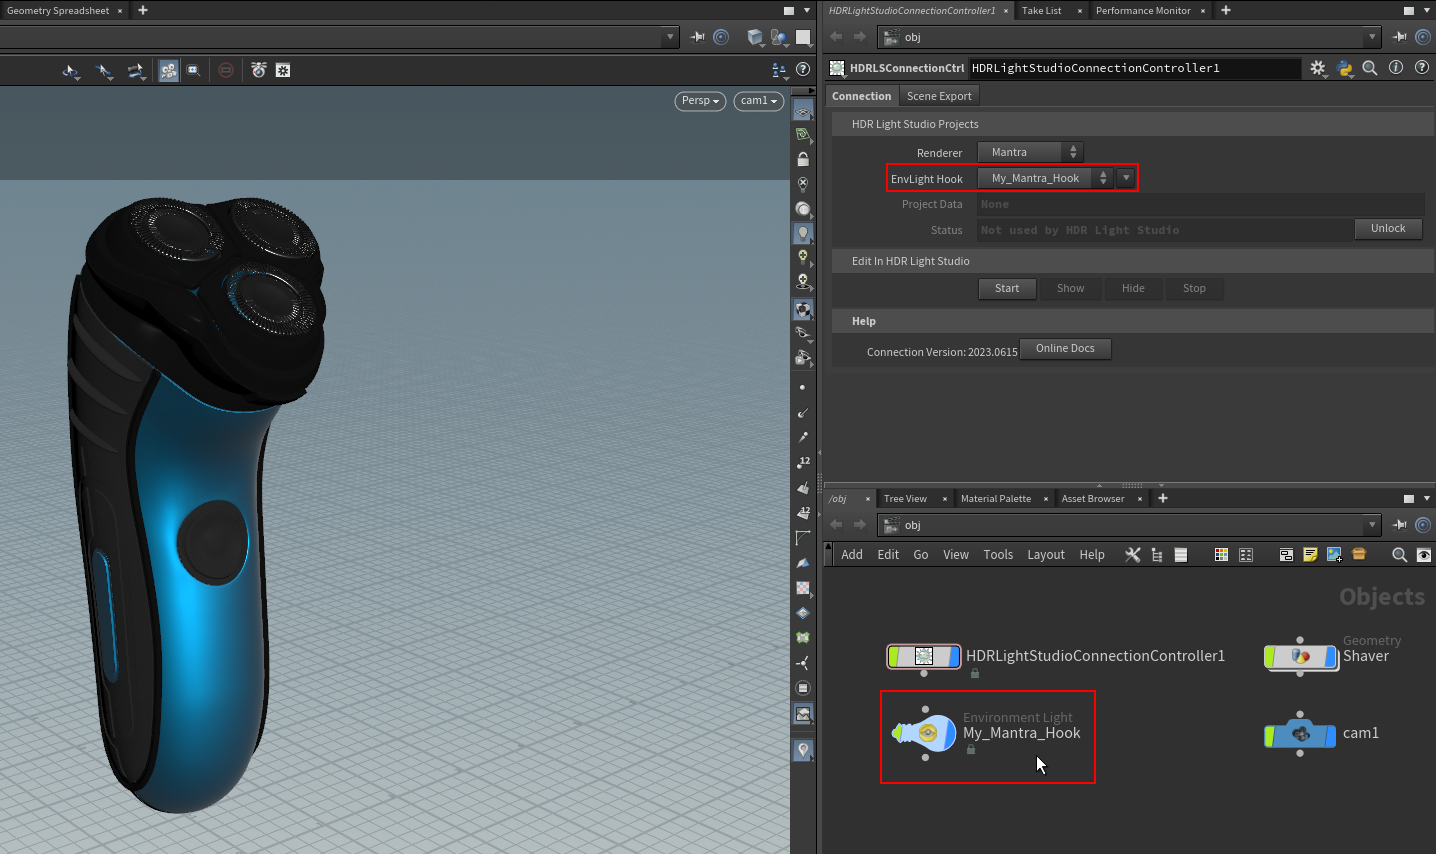
The EnvLight hook will contain a single HDR Light Studio project (consisting of a single Environment Light plus any area lights).
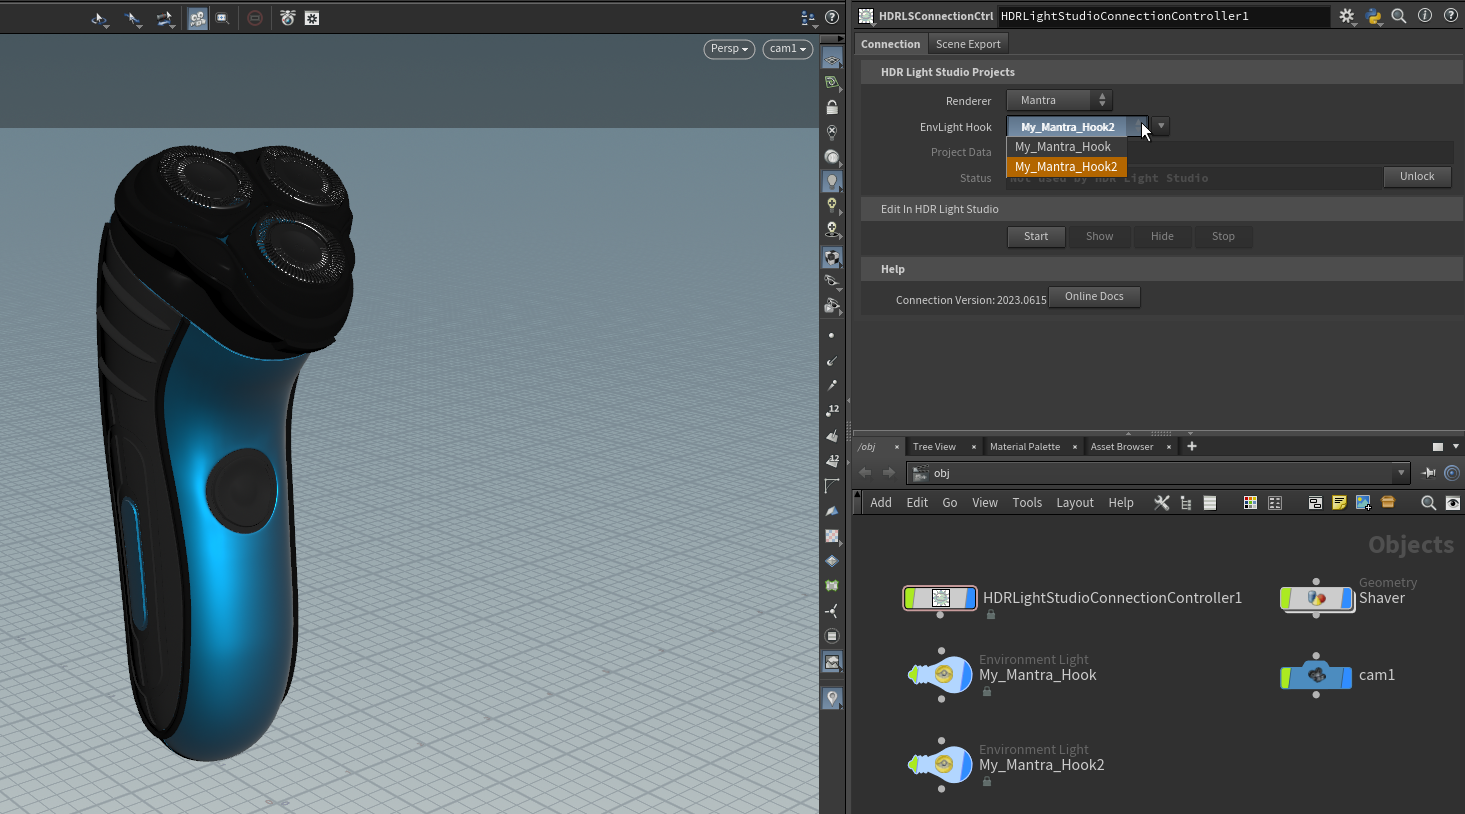
We can see the Environment Light has been created for our renderer and it has inherited its name from the EnvLight hook it is associated with.

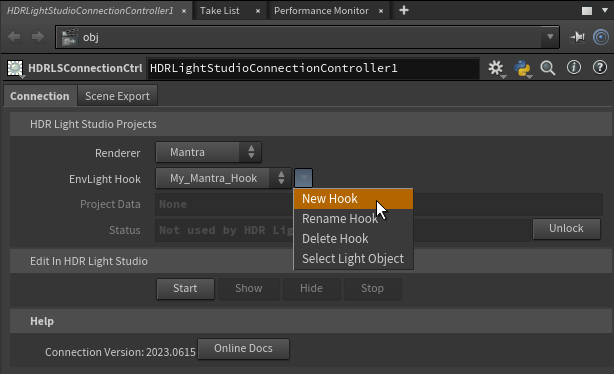
 Working with Multiple EnvLight Hooks
Start HDR Light Studio
Press Start to start HDR Light Studio in connection with Houdini.
Please Note: If HDR Light Studio is already open standalone, connected with another 3D app, or connected to another session of Houdini - the connection will not function correctly. So please ensure HDR Light Studio is not already open before starting it from Houdini.
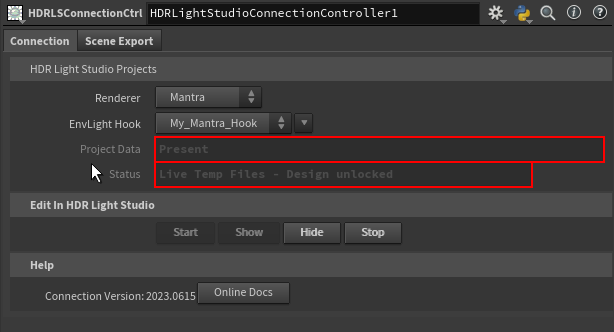
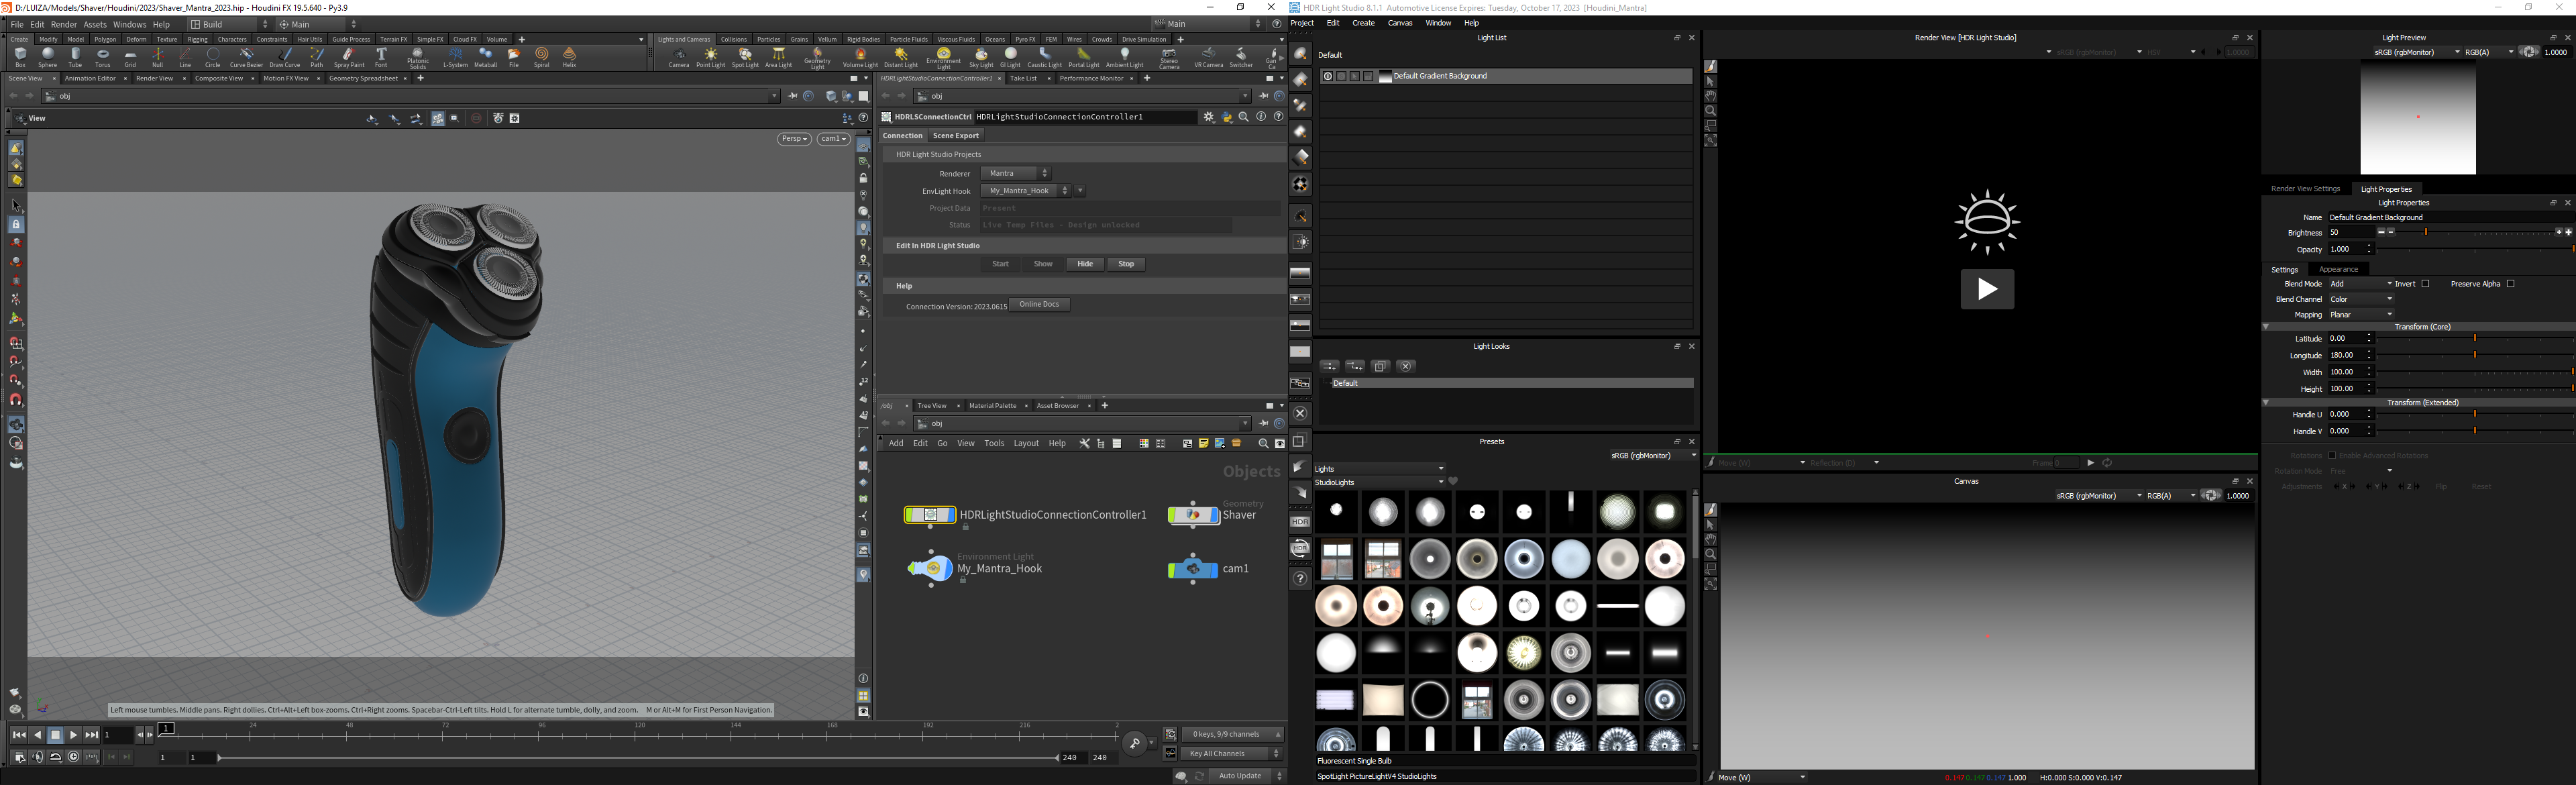
The HDR Light Studio application will now open connected with Houdini. Notice how the Project Data has changed to Present and Status to Live Temp Files - Design Unlocked.
Behind the scenes, the HDR Light Studio connection has embedded project data in the Houdini scene and it has taken control of the environment image on the Environment Light called My_Mantra_Hook. The HDRI map from HDR Light Studio is now shared with Houdini as a temporary low-res image (a proxy). This image is fast to calculate and fast for Houdini to load and use during the interactive lighting design process.
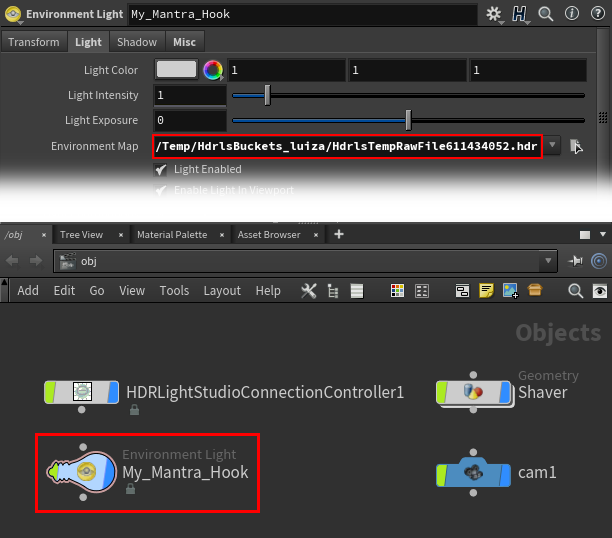
When the lighting design changes in HDR Light Studio, the Environment Light in Houdini is updated to use a new temp file. The temp file will have a new file name with a random number on the end. This ensures the renderer uses the new image and not a cached old image.
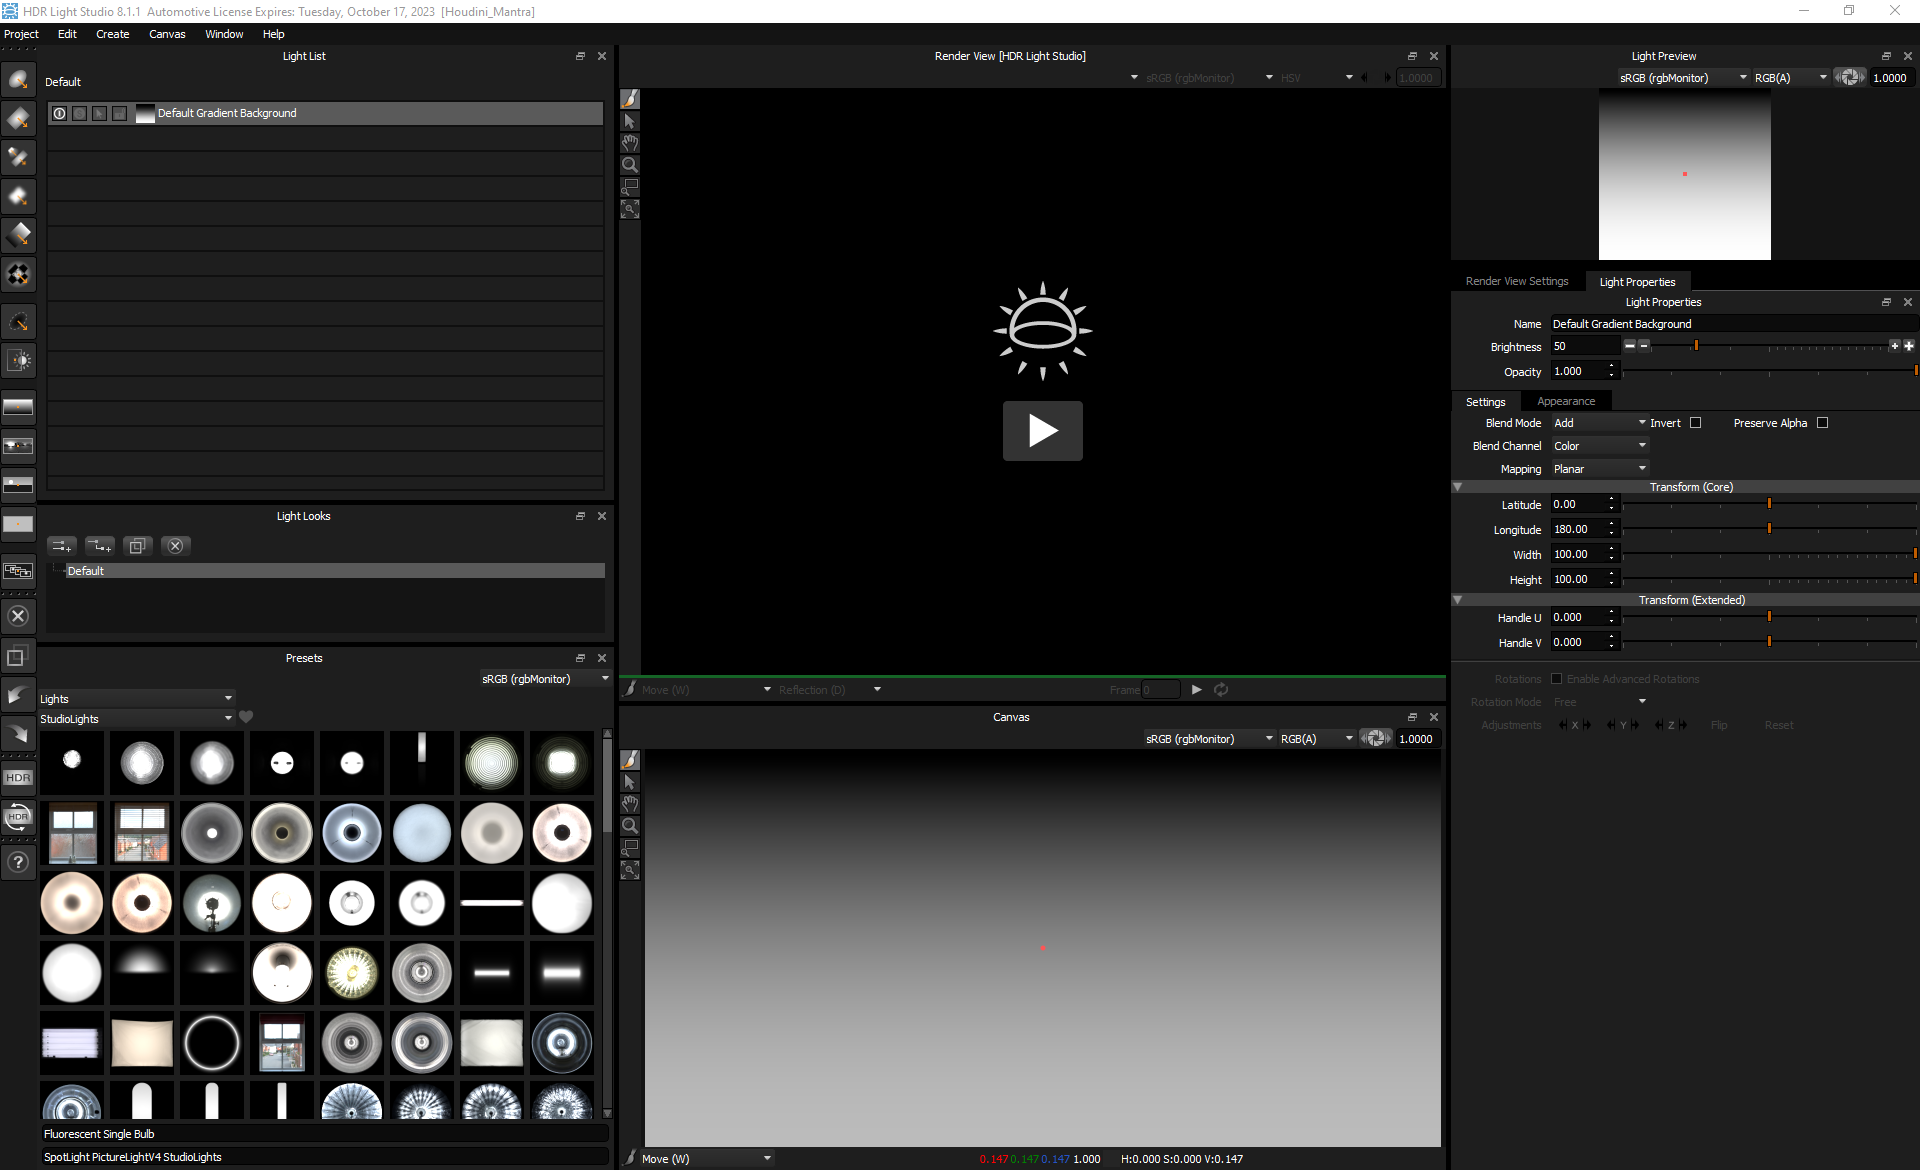
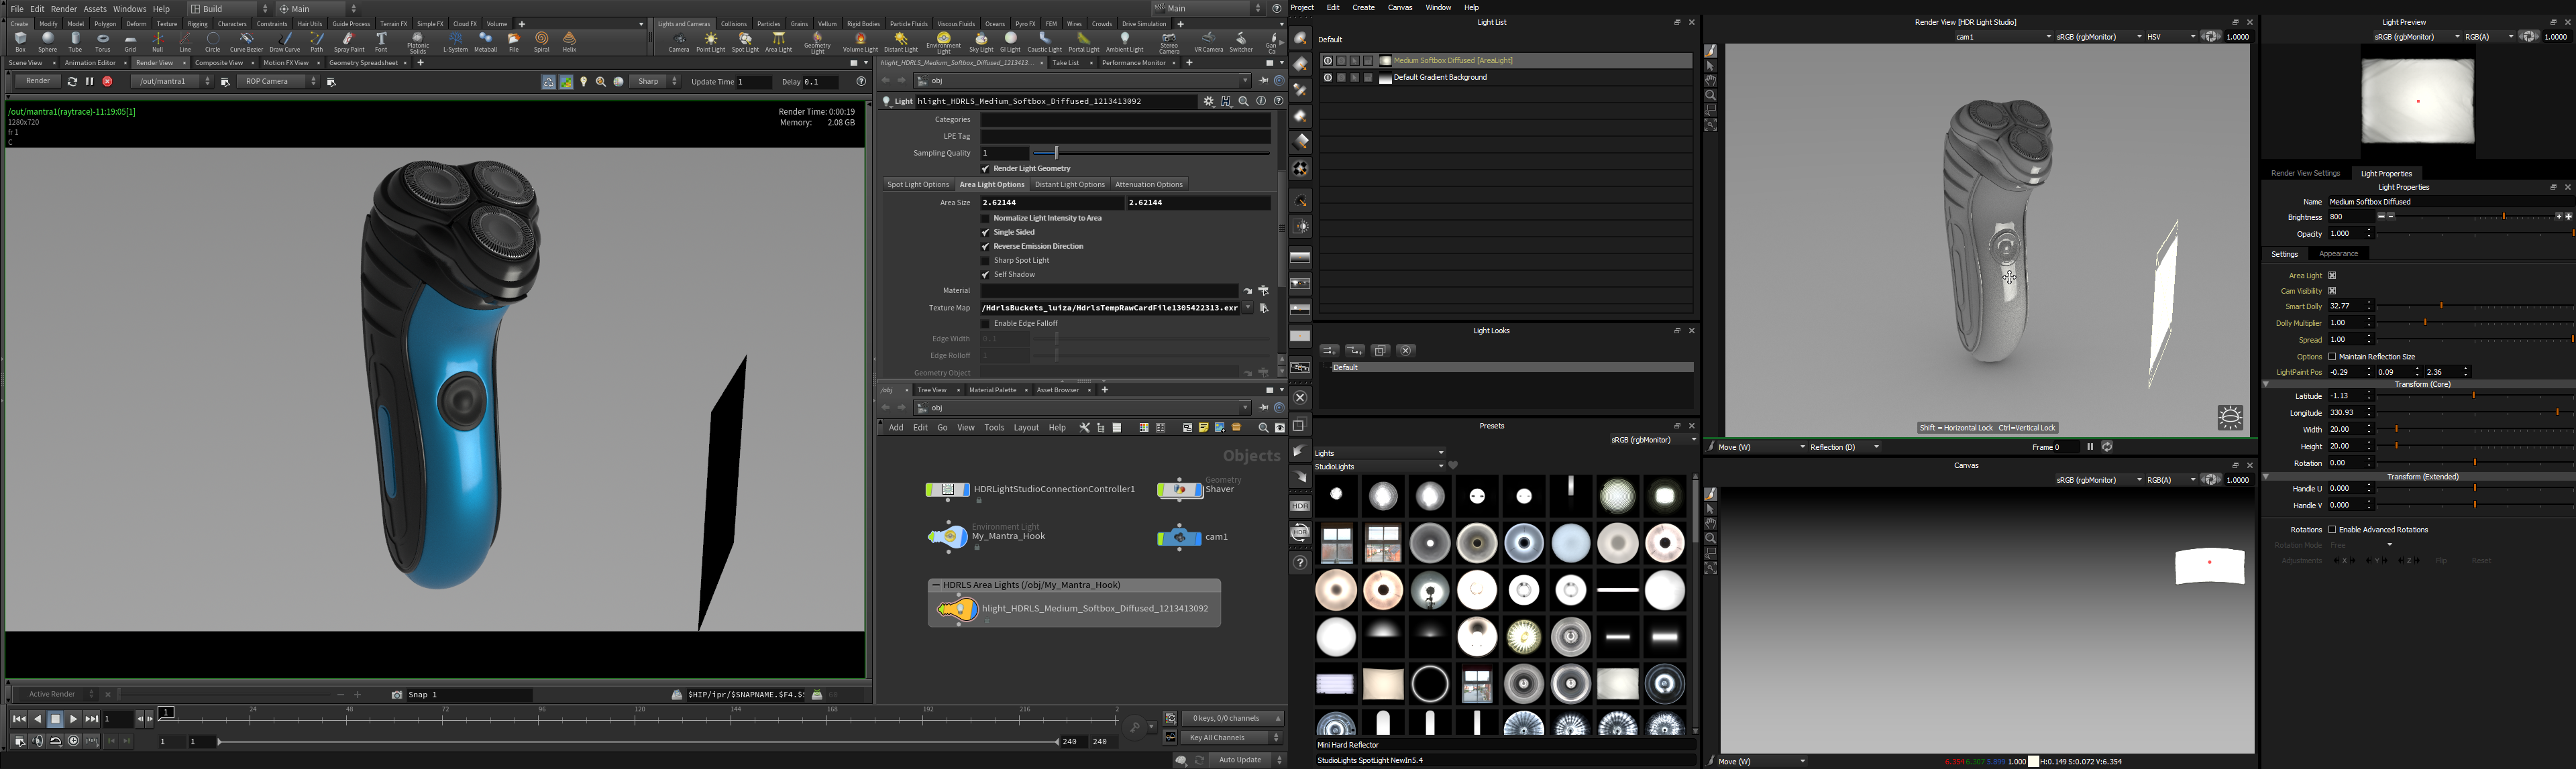
Default HDR Light Studio Interface Layout with Houdini
By default, the HDR Light Studio interface should look something like the image shown below.
If not, you can reset the HDR Light Studio interface layout by going to the menu: Window > Layout > Load > Default > Houdini
Most professional 3D artists have at least 2 displays. Using 2 displays provides the best workflow because you can place Houdini on one display and HDR Light Studio on the other. If you have one display.
Exporting your scene into HDR Light Studio's Internal Renderer
When we used HDR Light Studio standalone, we used the Render View [HDR Light Studio] to position the lights on an interactive render of the scene. Let's get the Houdini scene into HDR Light Studio's Render View so we can paint it with light.
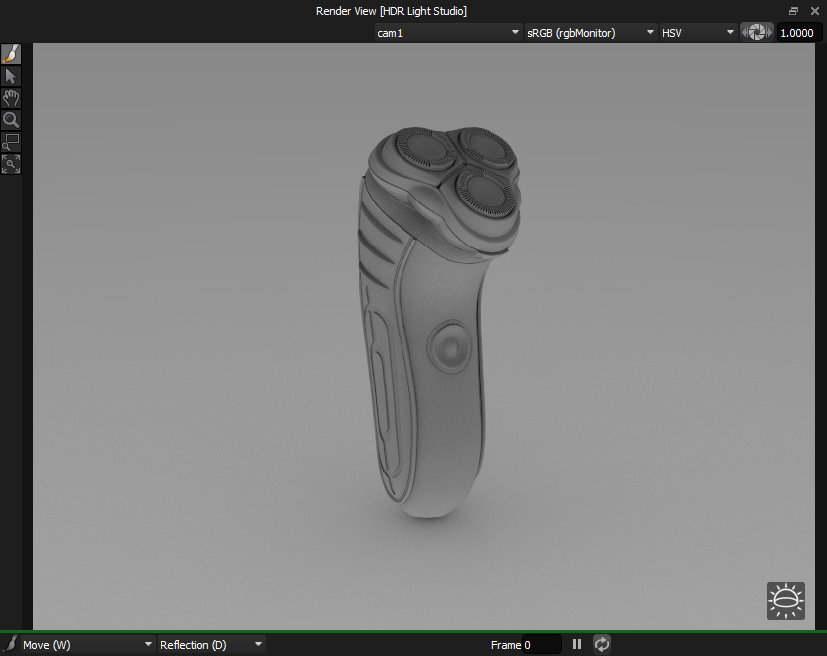
The easiest way to do this is by pressing the Play button on Render View [HDR Light Studio]

Figure 5: Starting HDR Light Studio Render View
Because HDR Light Studio is connected with Houdini, the Import Scene Geometry panel pops up.
Leave the settings at their default and press the Import button
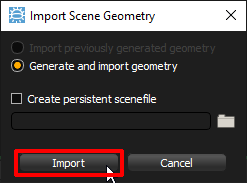
By default, the whole Houdini scene is exported as an Alembic file (that's automatically deleted after your lighting session) and loaded into the Render View [HDR Light Studio].
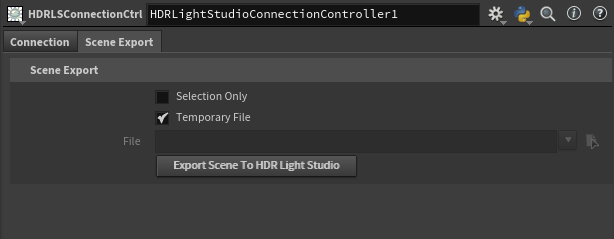
However, selected scene geometry can be exported using the Scene Export tab in the HDR Light Studio Connection panel if required.
Using the Scene Export Tab in the Connection
We will now use this Render View in HDR Light Studio as the interface for positioning lights on the model, with real-time rendered feedback.
Let's make our first Light
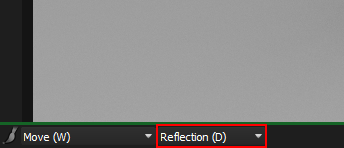
By default, LightPaint is set to Reflection in this view. So lights are moved to reflect in the clicked or dragged location on the 3D model.
Learn about LightPaint here.
Drag and drop a Preset Light onto the 3D model in the Render View.
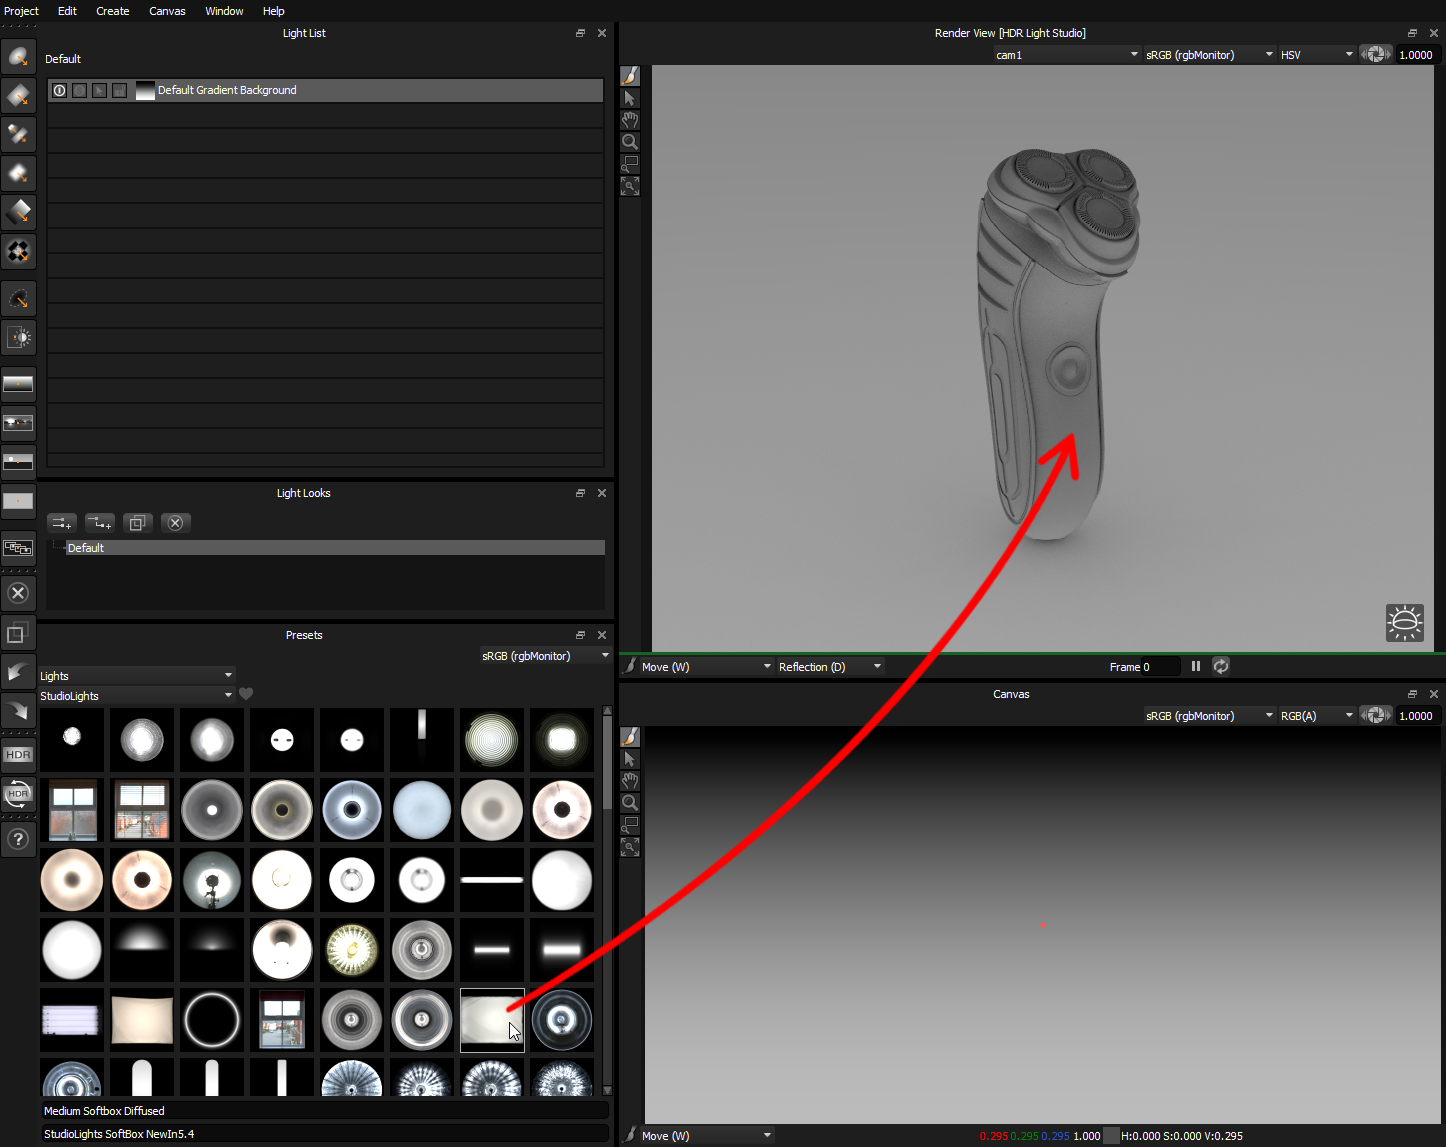
A new light is added to the lighting design - it's reflecting where the light was dropped on the 3D model.
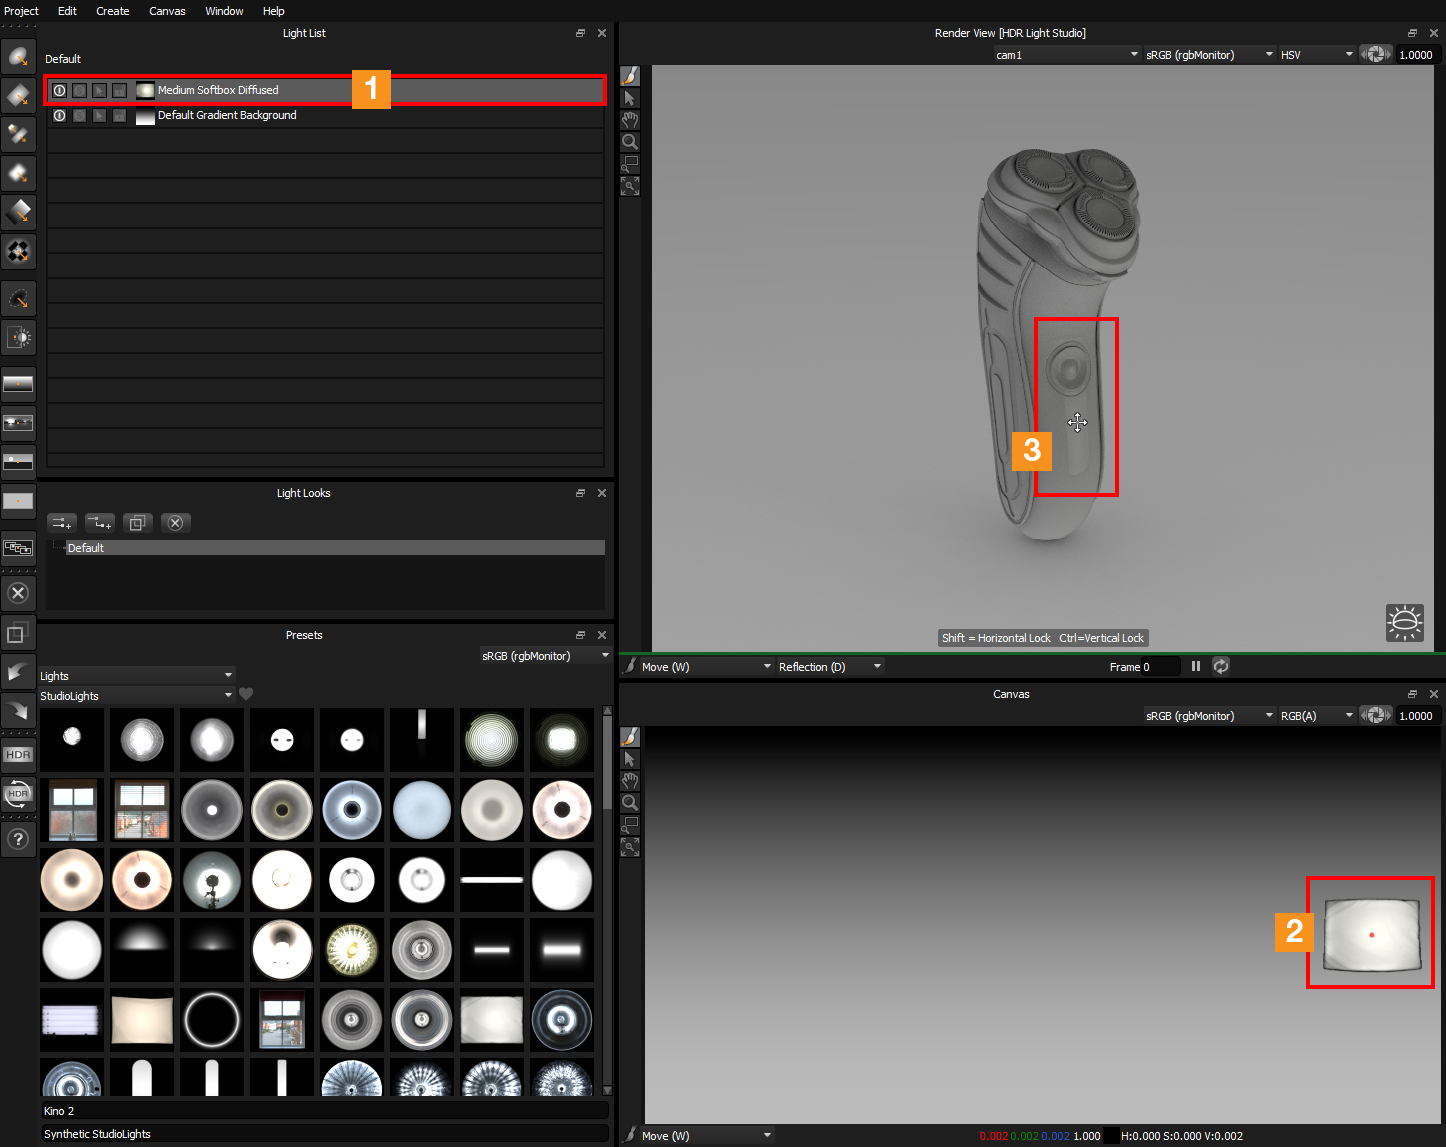
You will see:
• 1. New light added in the Light List
• 2. New light can be seen on the Canvas
• 3. Render View has been updated to show the new light on the model
Just the same as when we used HDR Light Studio standalone, but we have the Houdini scene in our Render View.
Move and Brighten the Light
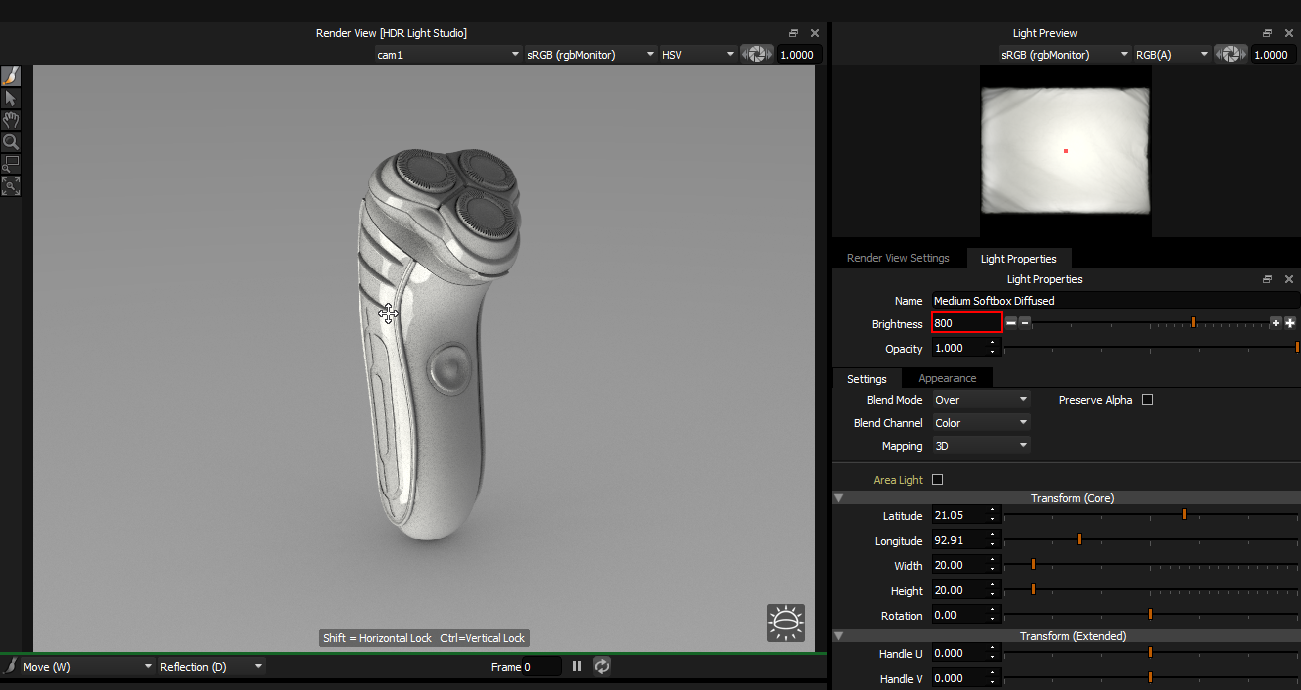
You can see that the LightPaint tool is active in the toolbar in the Render View [HDR Light Studio].
Click on the 3D model to reposition the selected light (highlighted on the Light List).
Then, increase the brightness of the light in the Light Properties panel.
Interactive Rendering in Houdini
Whilst we have been working in HDR Light Studio, Houdini has been updated with every lighting change, via the Connection. Let's start interactive rendering in Houdini so we can see the lighting.
Start Mantra interactive rendering in Houdini.


Mantra starts interactive rendering using the current lighting from HDR Light Studio.
You can see the lighting in HDR Light Studio's render view is matching with the interactive render in Houdini.
We can leave Mantra interactive rendering in Houdini as we work on the lighting in HDR Light Studio.
Tip: If the scene is large/complex and interactive rendering in your renderer is too slow, then produce test renders from time to time.
Making Area Lights - A 3D light mapped with an HDR texture
So far, the lighting we created is on the HDRI map shared with Houdini. This is about to change!
Please Note: Only Lights with 3D mapping show the option to be converted into area lights, as these are the only lights that make sense to become area lights.
Enable the Area Light check box in the Light Properties panel for the selected light.

Figure 5: Converting a light into an area light
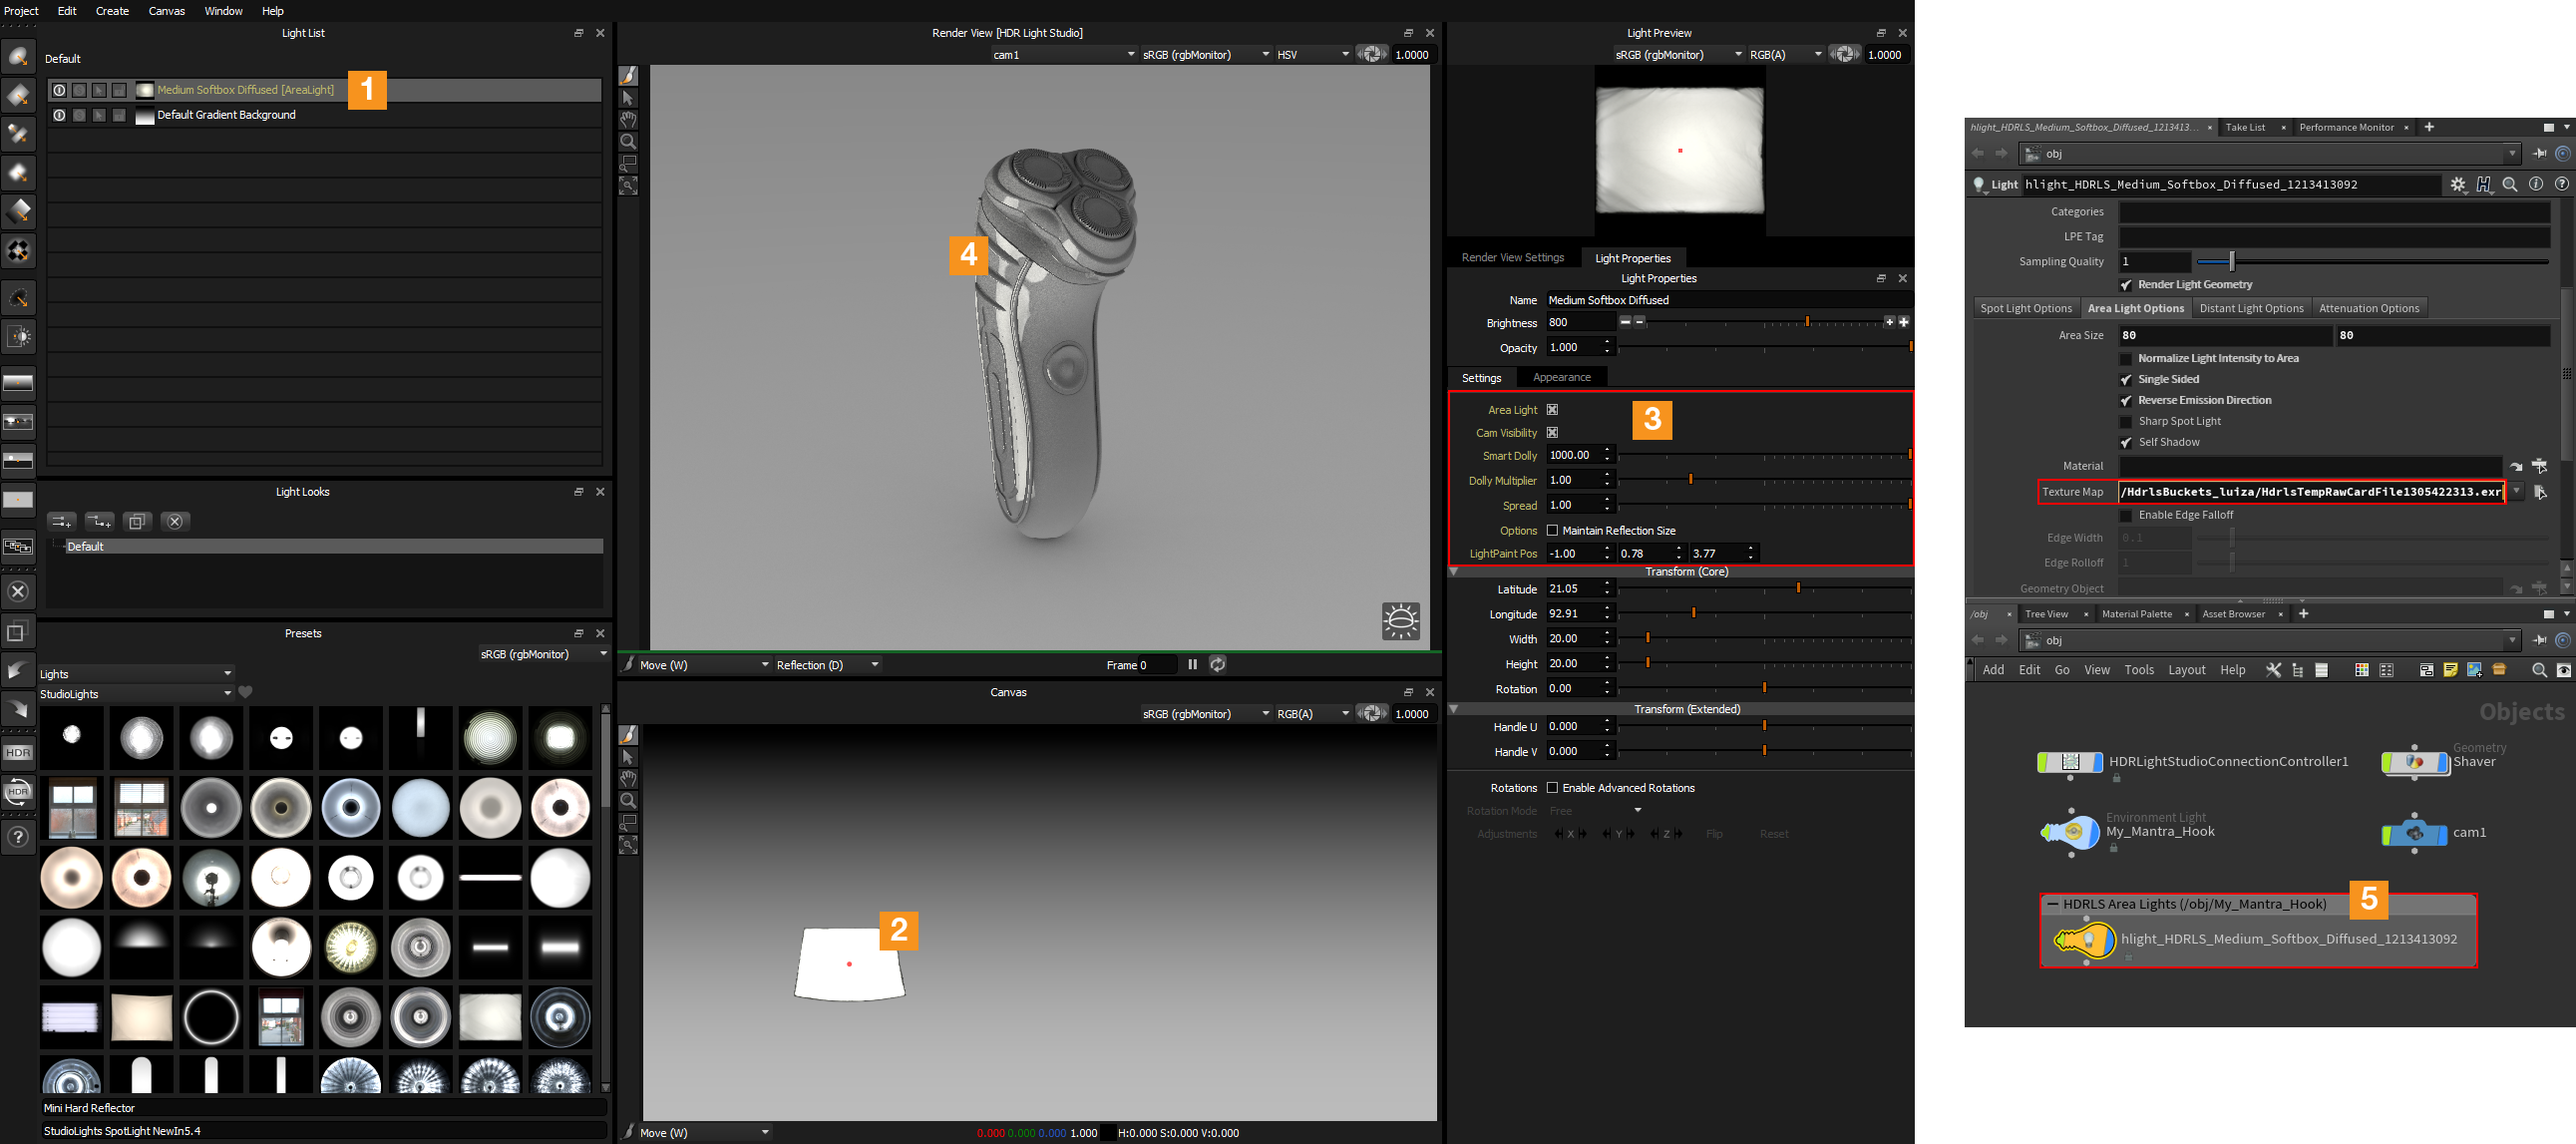
As a result of enabling this Area Light setting, the lighting looks very similar to before, but lots of things just happened with that single setting:
• 1. The light in the Light List gets the suffix [AreaLight] and its text is now yellow.
• 2. The light has been removed from the HDRI map but is still represented on the Canvas as a view of the light as seen from the center of the world. Don't be confused, it's really no longer on the HDRI map lighting the shot!
• 3. Additional Area Light properties have been added to the Light Properties for this light, with a default Smart Dolly distance of 1,000 units.
• 4. An area light has been created in the Render View [HDR Light Studio], mapped with the HDR texture to control its appearance.
• 5. An area light has been created in Houdini for the selected renderer - mapped with the HDR texture from HDR Light Studio, and matching the size and position of the area light in HDR Light Studio.
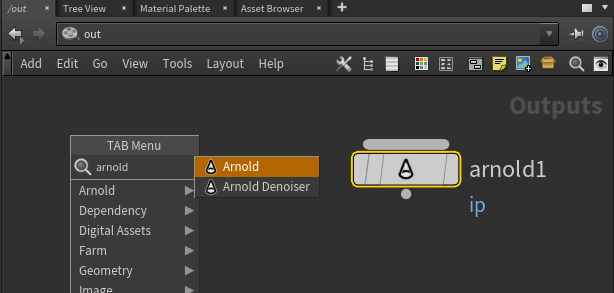
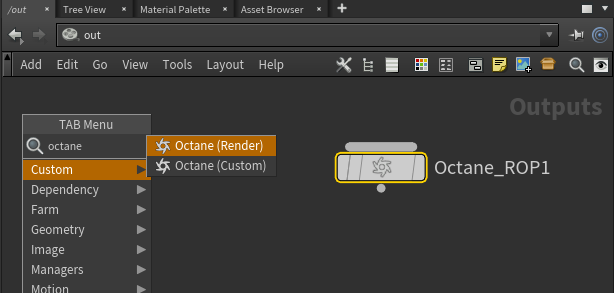
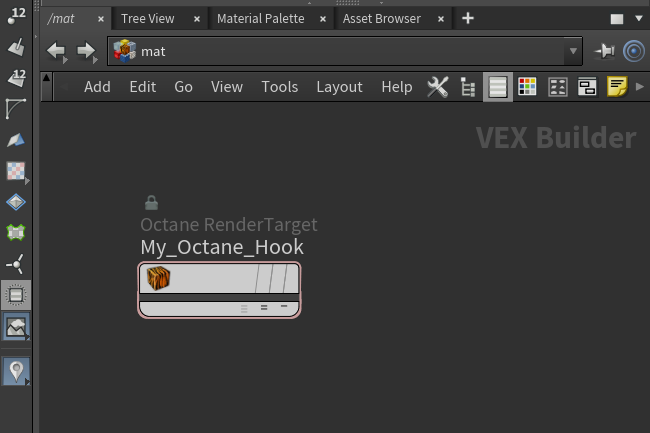
 Information for Arnold and Octane Users
Change the Area Light Distance
Initially, the Area Light will be far away from your model providing a similar lighting effect to when it was on the HDRI environment light. We need to move it closer to the model so you can see it in the Render View and in the Houdini viewport.
Reduce the Smart Dolly slider value to move the light closer to the 3D model.
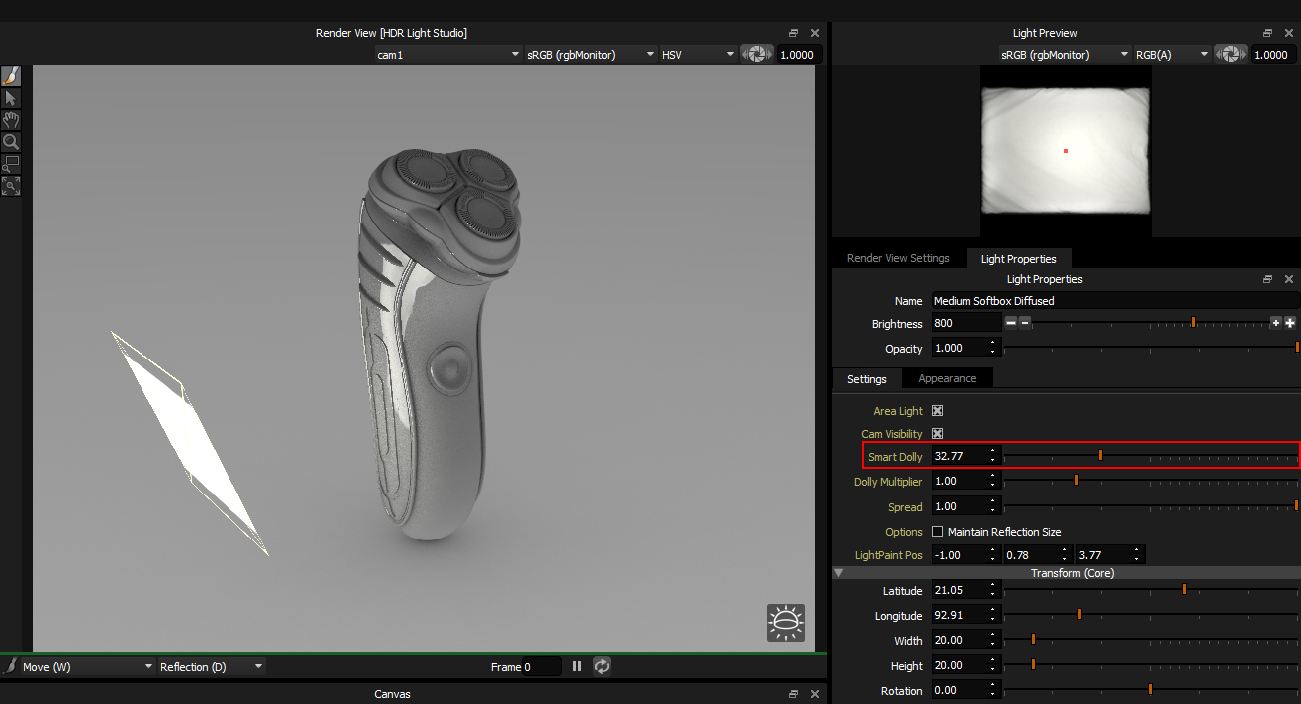
Tip: HDR Light Studio has a scene scale setting that is useful when working with Area Lights in Houdini. If the area lights are too close or too far away by default, adjust the Smart Dolly Scalar value in Preferences. This value scales all area light distances in HDR Light Studio.
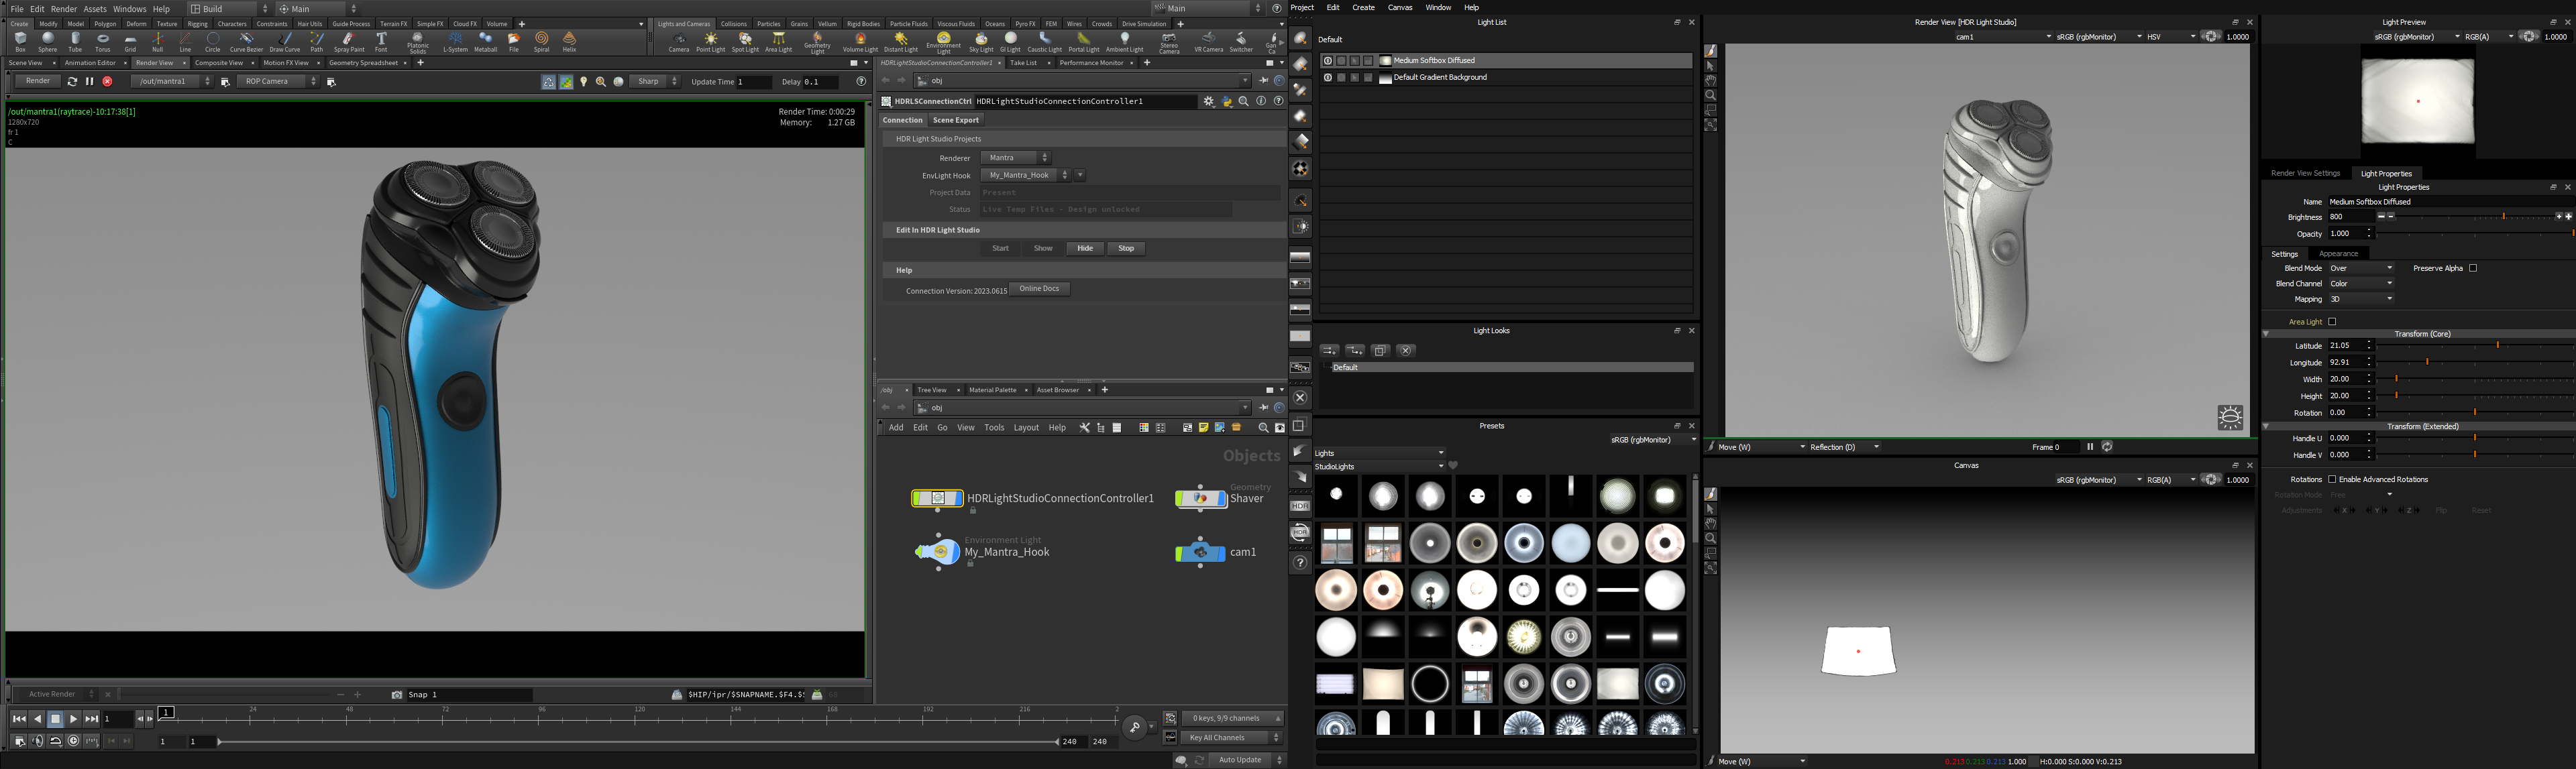
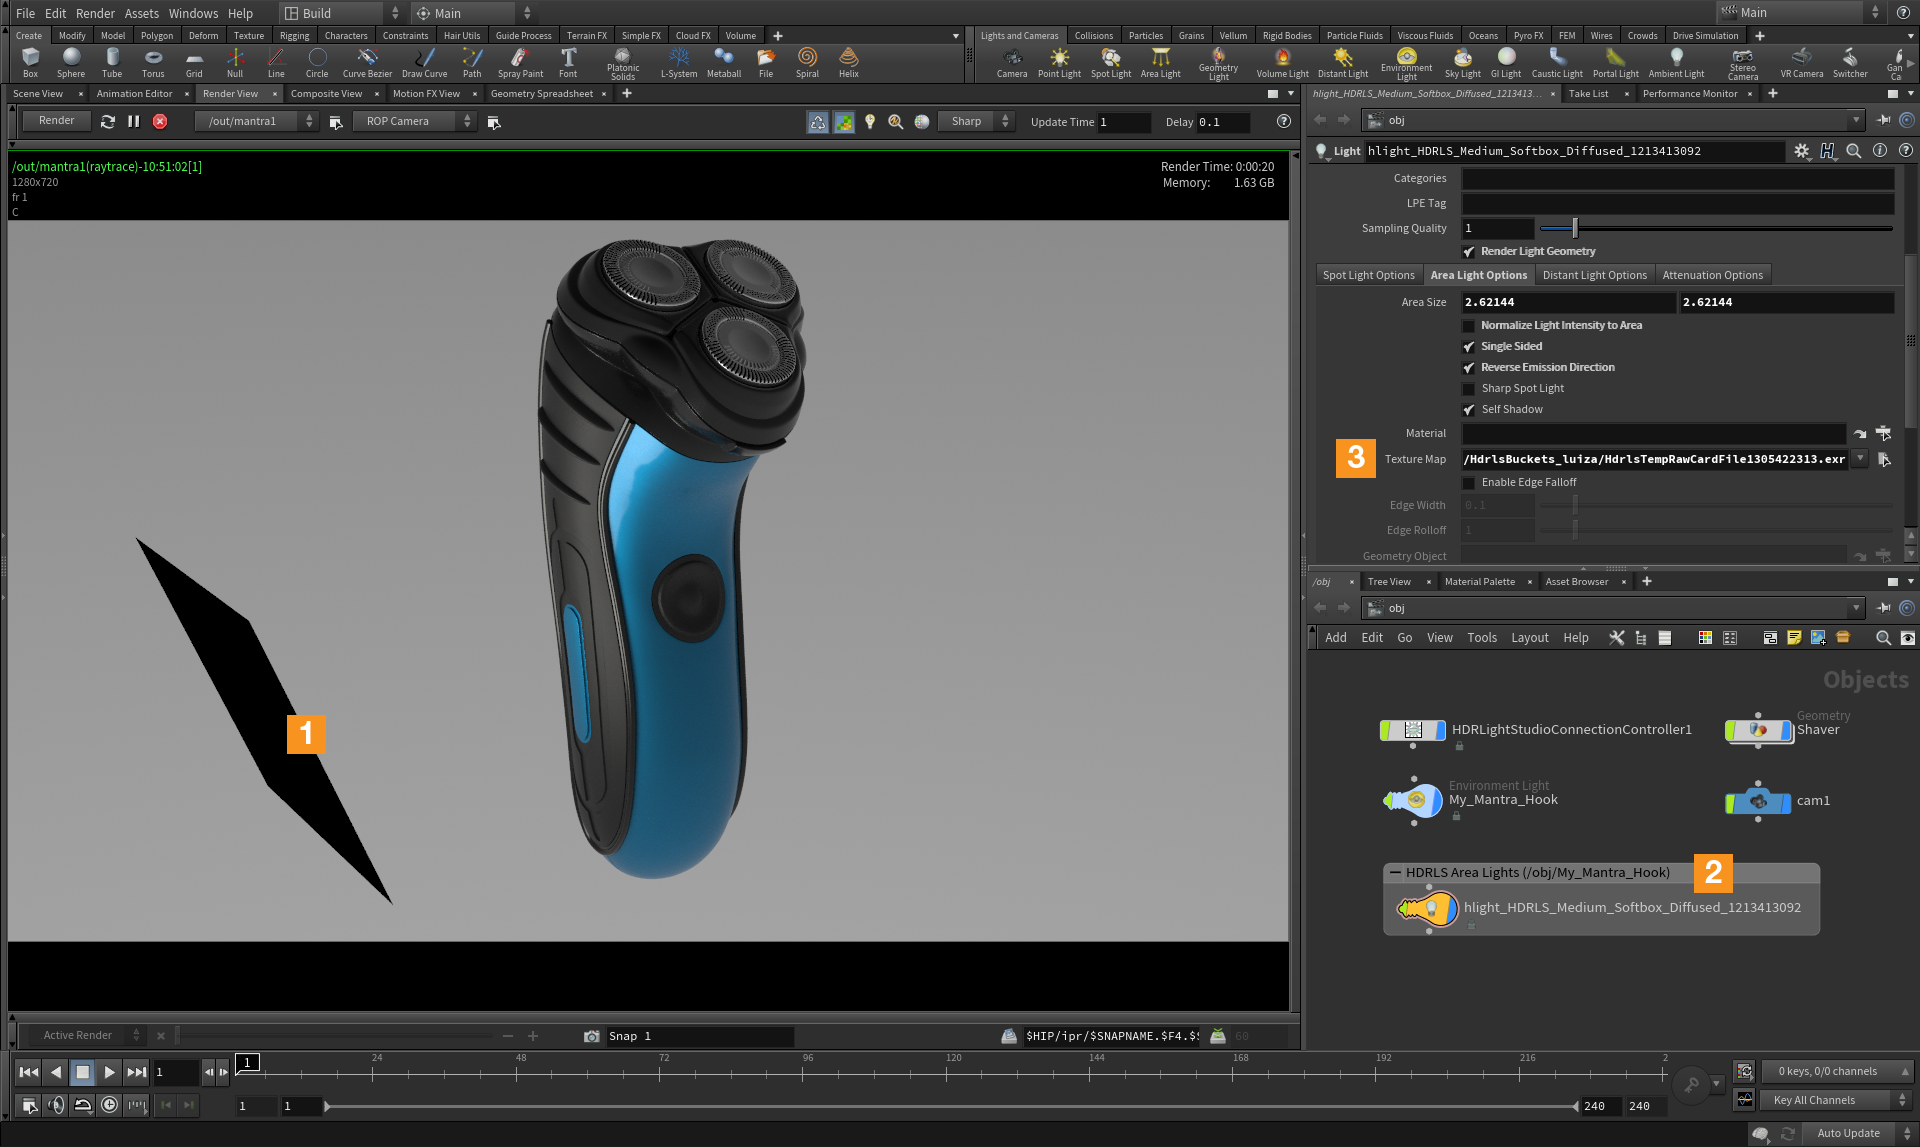
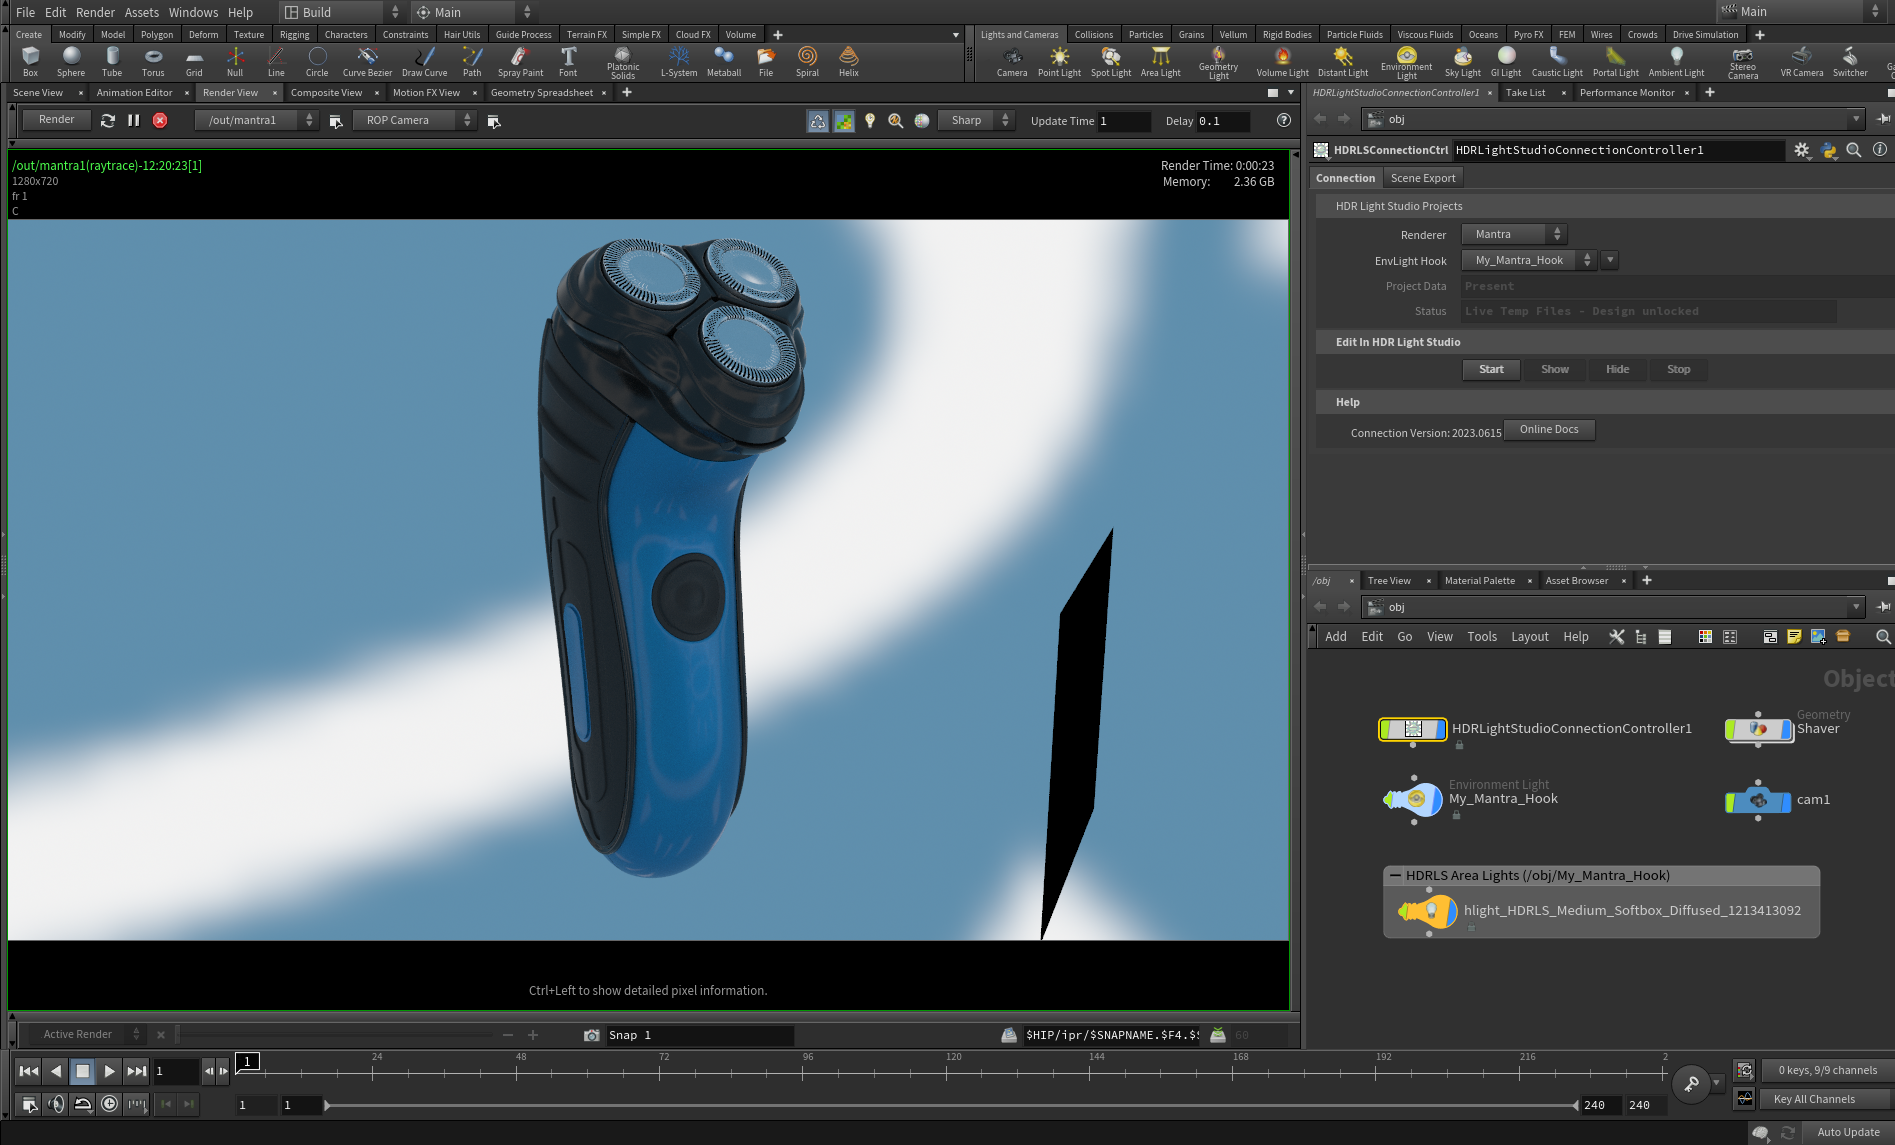
Let's take a look at the Houdini interface now. You can see:
• 1. The Area Light that HDR Light Studio created can be seen in the interactive render.
• 2. Area Lights made with HDR Light Studio are shown inside the HDRLS Area Lights network box associated with our EnvLight Hook. In this example inside the HDRLS Area Lights (obj/My_Mantra_Hook) network box.
• 3. The Area Light has been set up for your renderer. You can see the texture from HDR Light Studio mapped to the light properties. This texture is updated when the light's appearance is changed in HDR Light Studio.
Please Note: Renaming/deleting/duplicating HDR Light Studio area lights in Houdini (or any part of their associated shader network/file nodes) will cause problems!
Moving Area Lights
In HDR Light Studio, use LightPaint in the Render View [HDR Light Studio] to move the Area Light.
Area lights are controlled just like any other light in HDR Light Studio with the addition of distance controls.
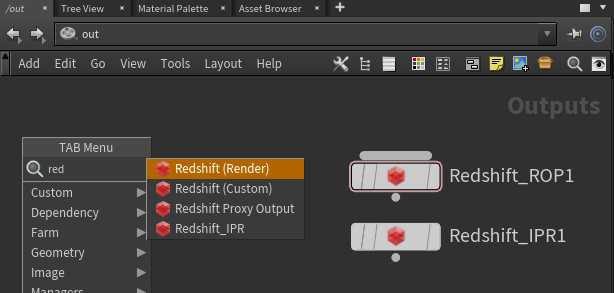
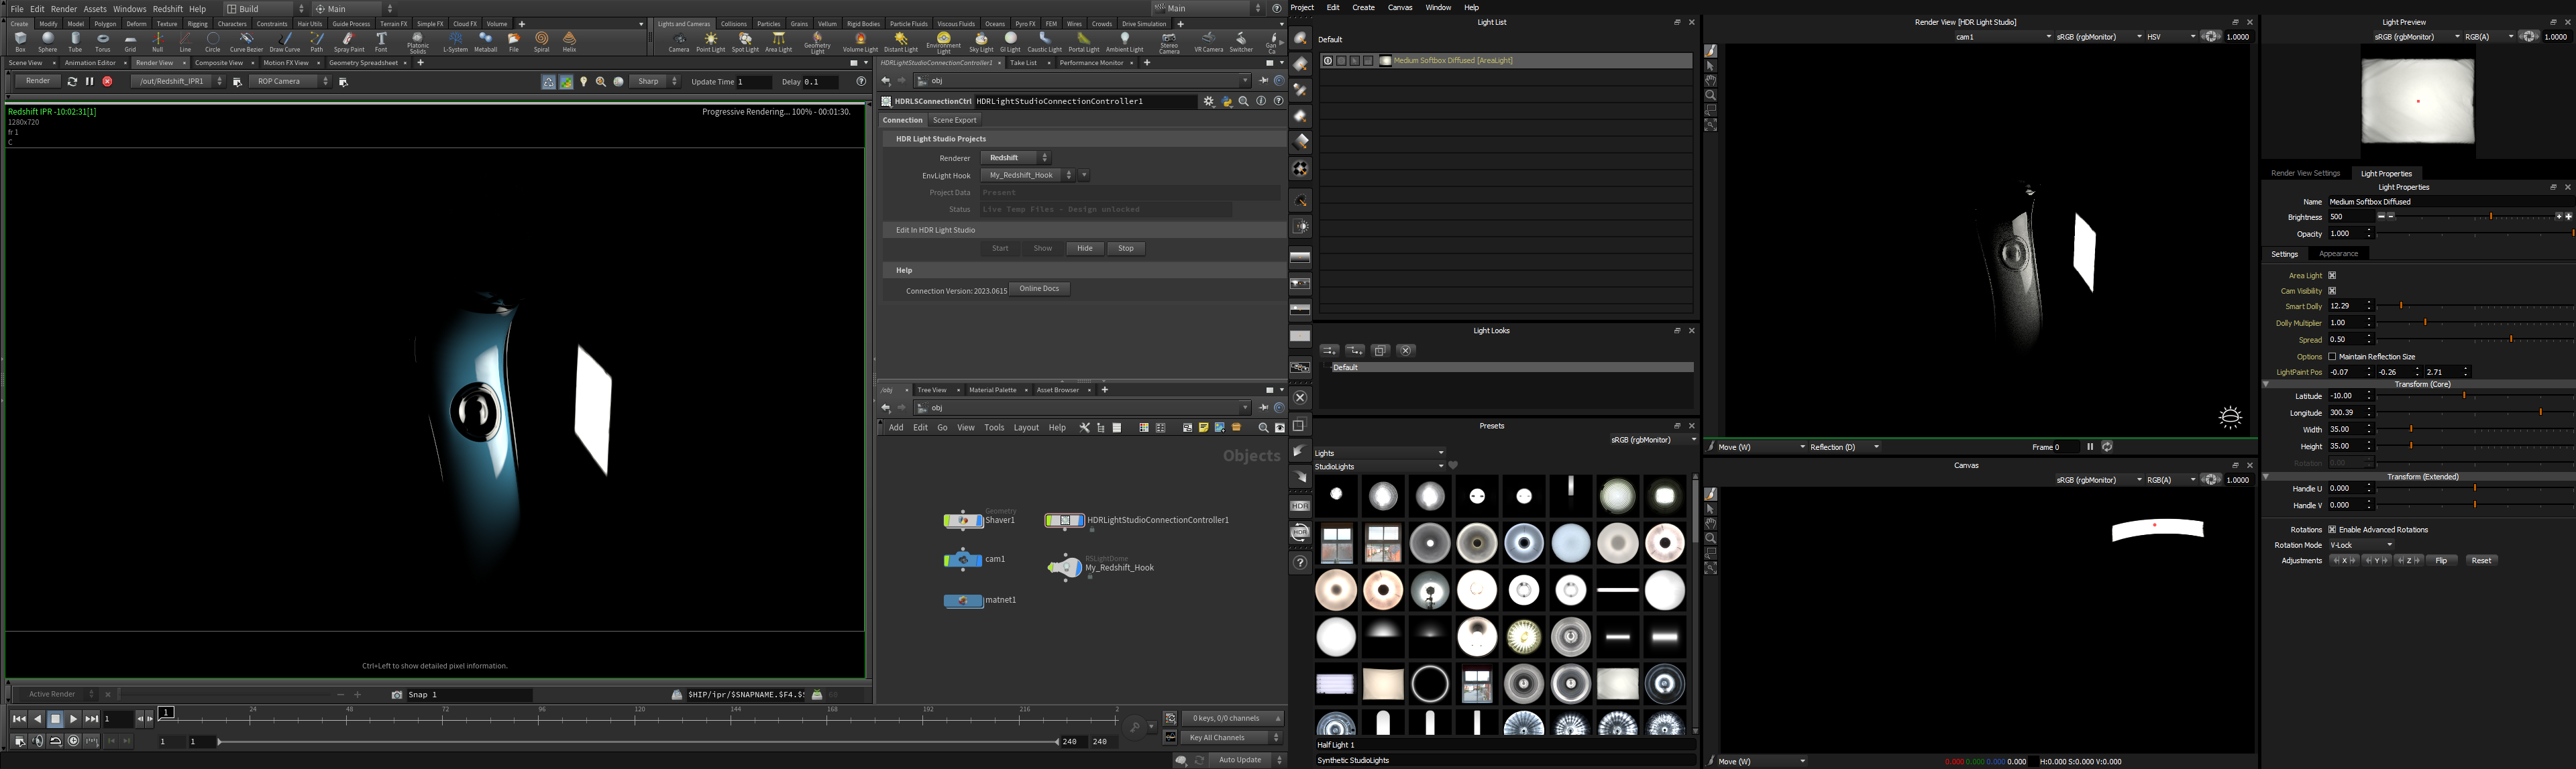
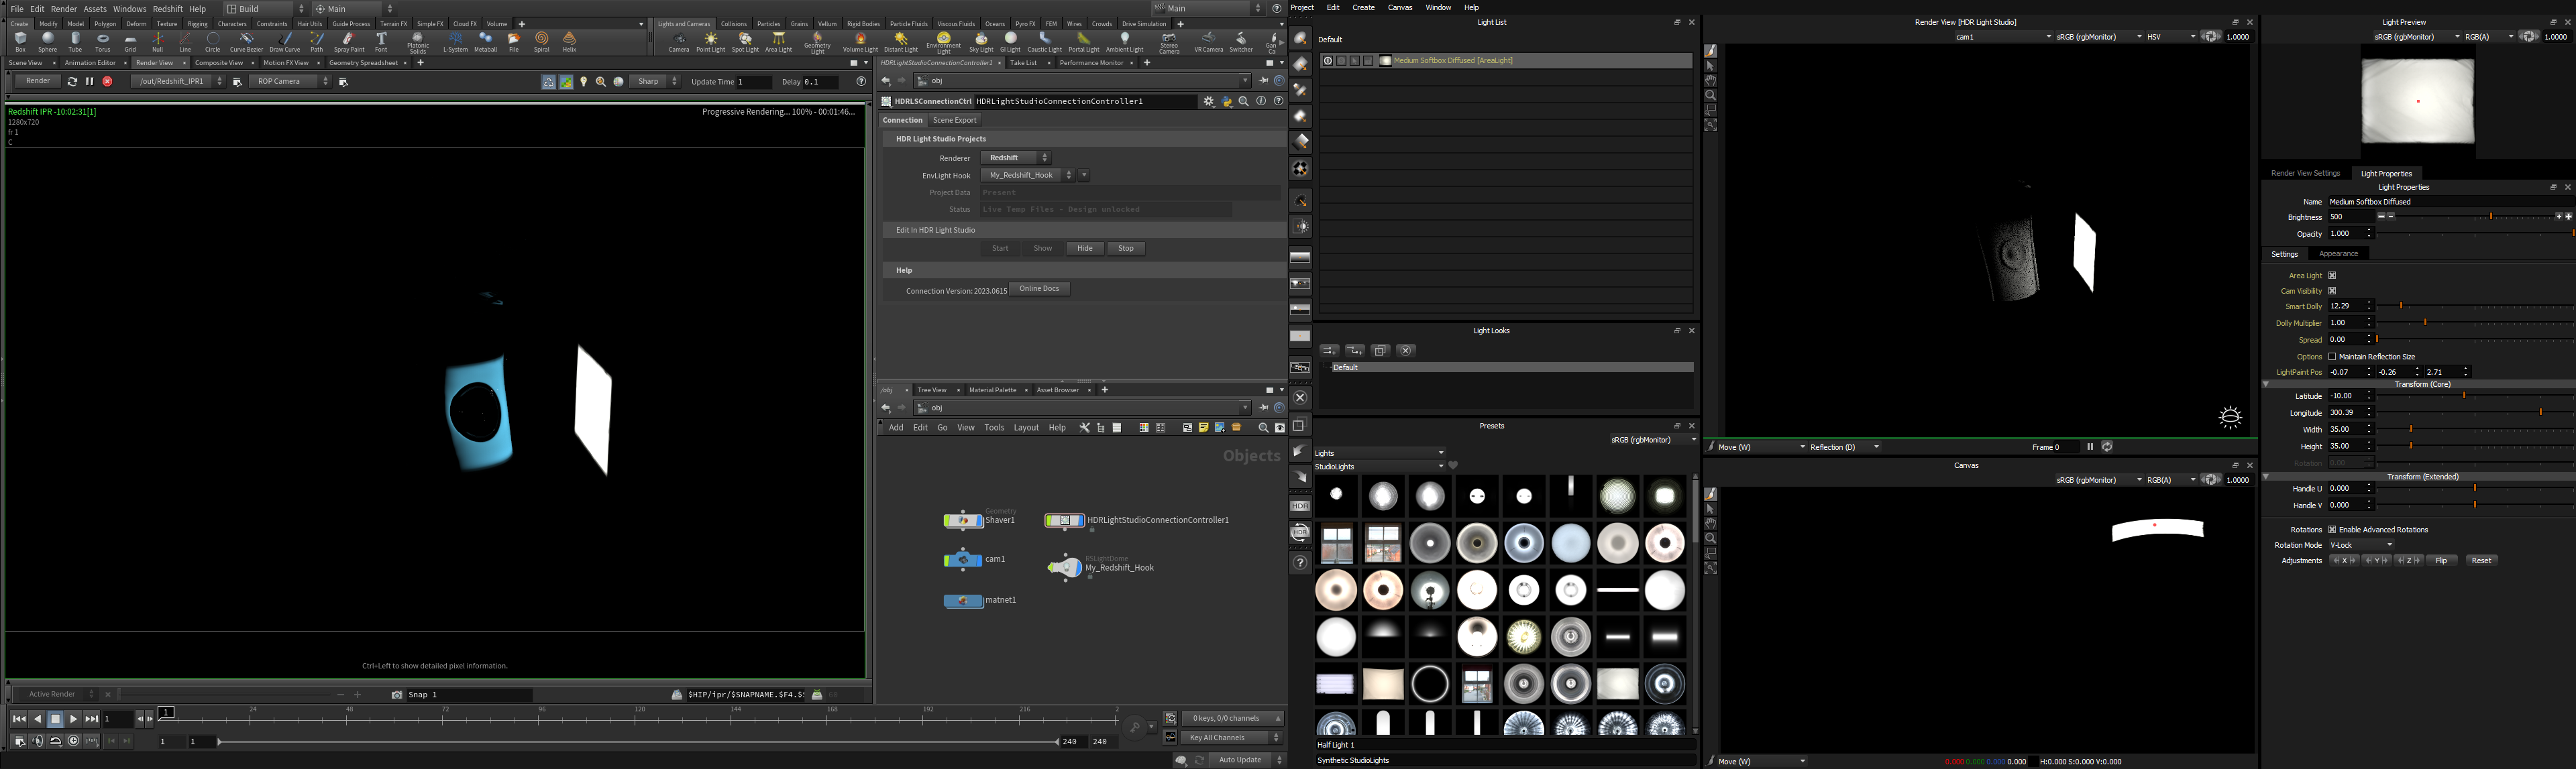
![]() Information for Redshift Users
Information for Redshift Users
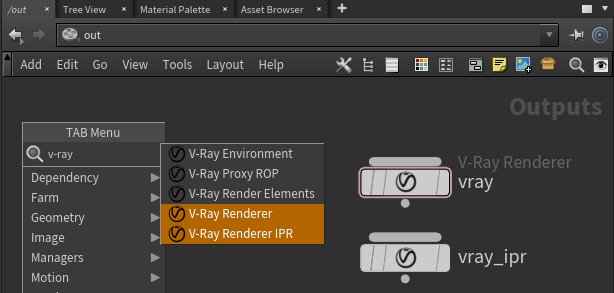
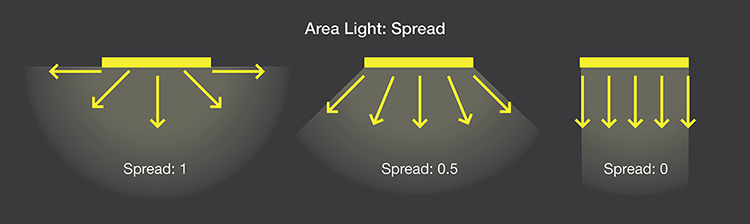
Area Light Spread - Redshift, V-Ray, Arnold, RenderMan


Finalizing the Lighting Design
Rendering the Final HDRI Lighting Textures
So far we have been sharing lo-res temporary textures with Houdini for your lighting - to keep things fast during the lighting design process.
Now let's complete the lighting process by producing higher resolution and higher quality sub-sampled HDR textures on disk.
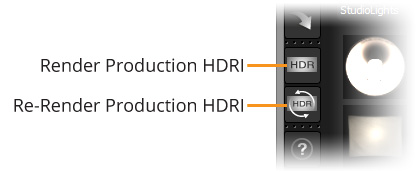
Press the Production Render button in HDR Light Studio.
The top HDR button on the toolbar
Set your Production Render settings
Notice how the Orientation is already set for Houdini and your set renderer. This ensures that the rendered HDRI map is orientated correctly when rendered.
For more information on these settings see: Production Render Dialog
Press the Browse button to choose a file location and give the lighting file a name.
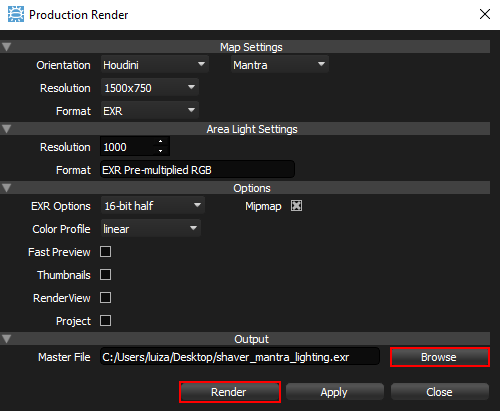
Press the Render button in this panel.
The production quality HDR textures will now be calculated and saved as permanent files on disk.
Once complete, the connection automatically updates Houdini to use these new textures.
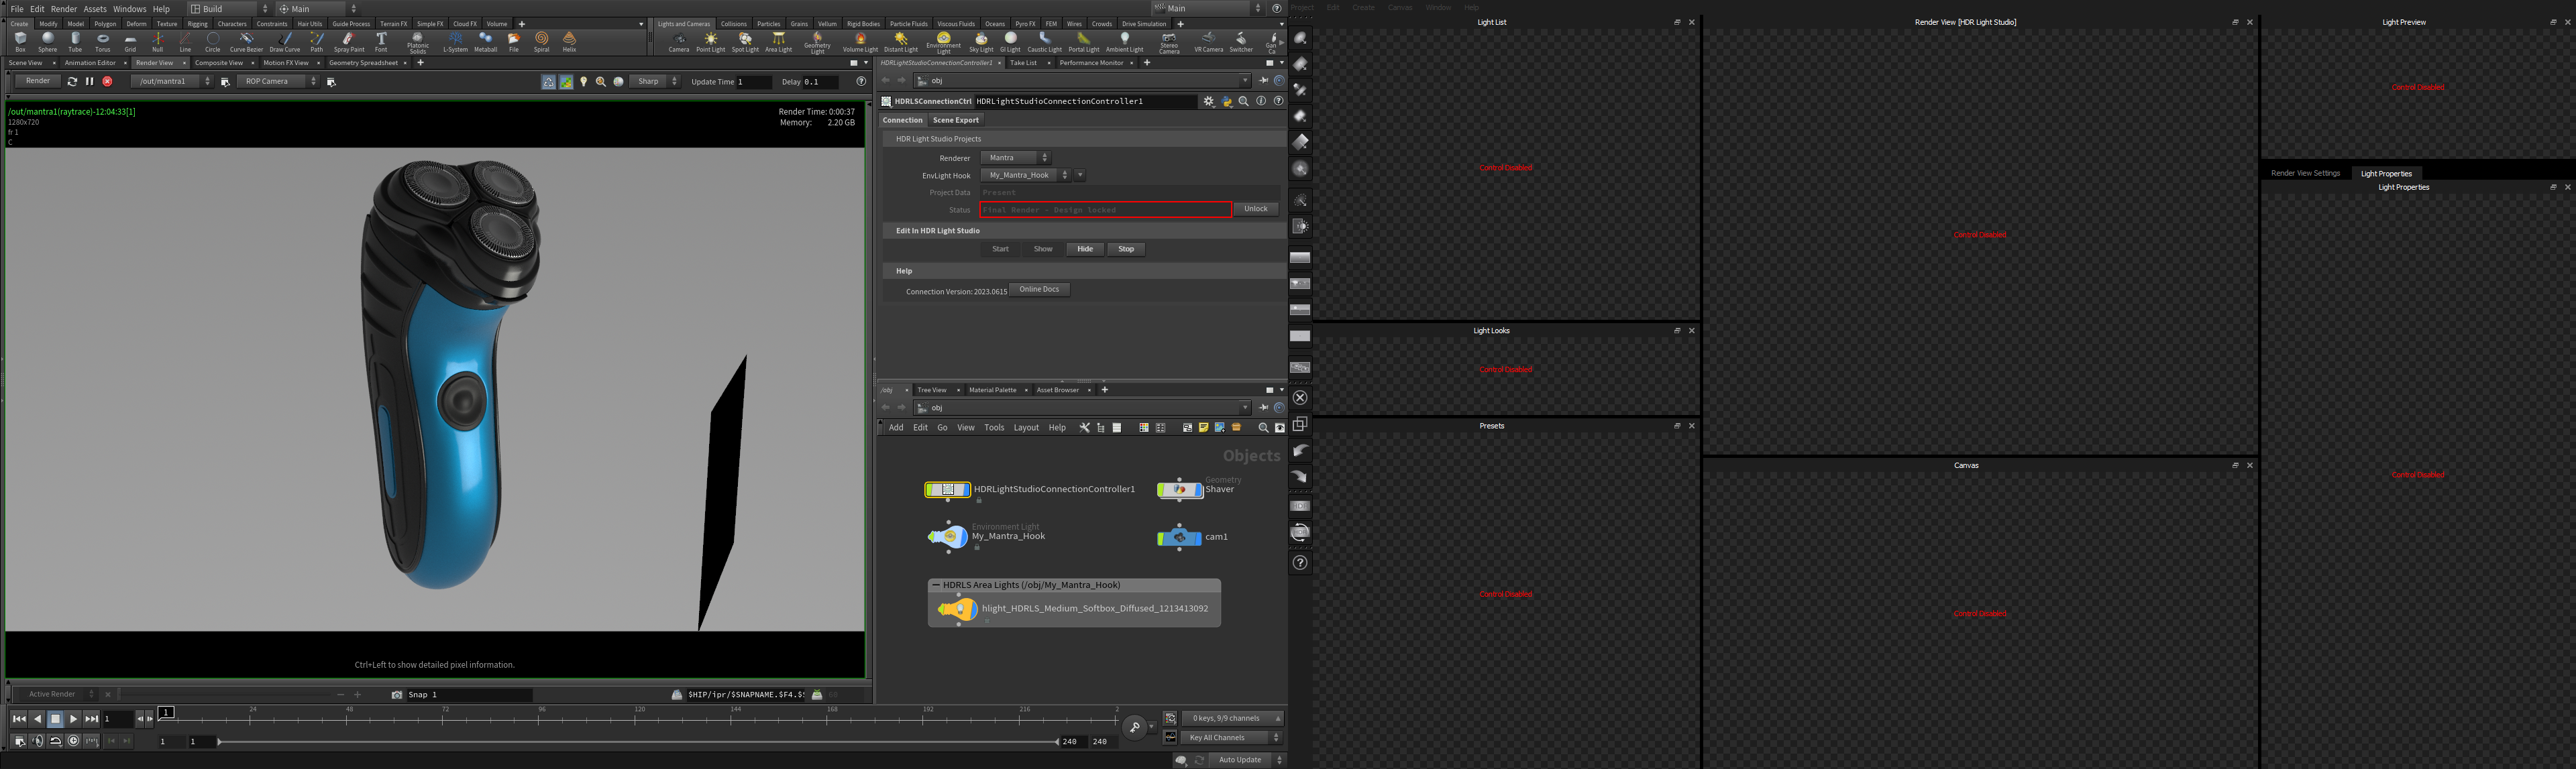
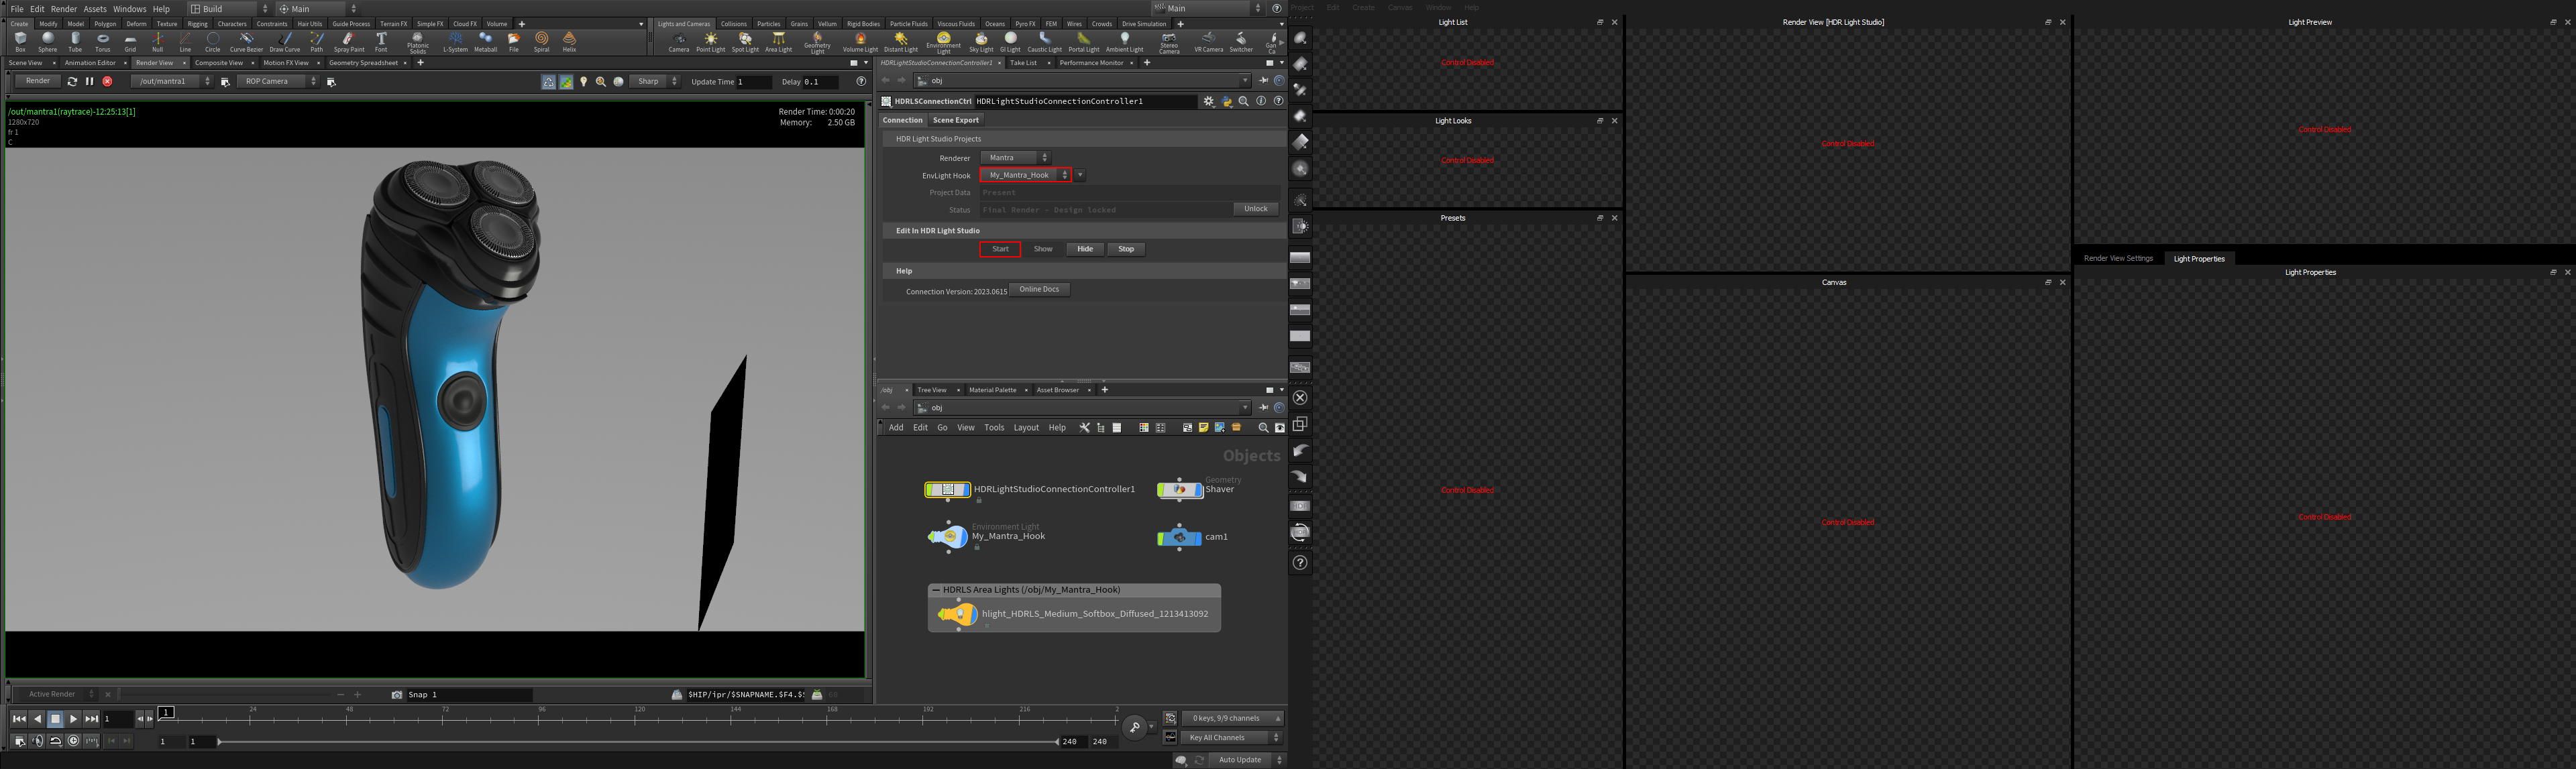
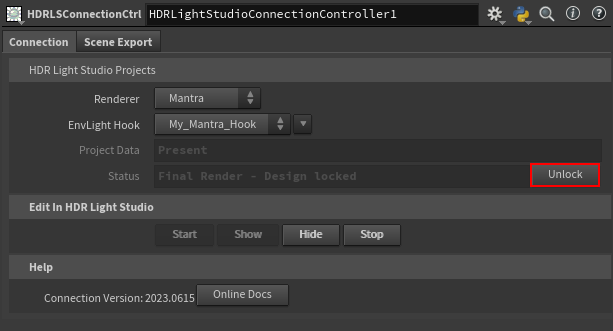
The HDR Light Studio interface will disable control and the Status inside the connection panel in Houdini will change to Final Render – Design Locked. This is to stop you from accidentally making any further changes to the lighting in HDR Light Studio, which would cause all lighting textures to update to use new temporary images, and the link to the rendered permanent files to be broken.
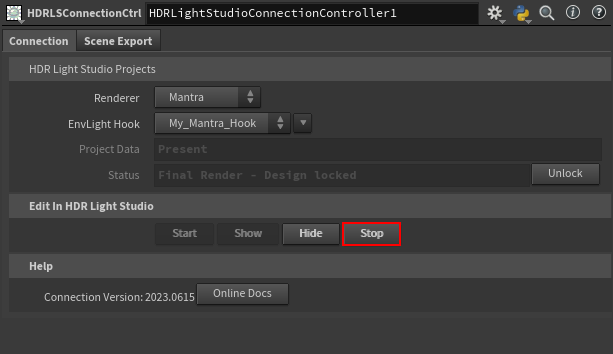
Stopping HDR Light Studio
Please ensure you Stop the HDR Light Studio connection after you have rendered your final lighting files.
Press the Stop button.
HDR Light Studio now closes and leaves your Houdini scene with an awesome lighting setup for your renderer. This scene uses standard lights and can be rendered anywhere, even on computers without HDR Light Studio licenses.
Please note: Scenes lit with HDR Light Studio can be loaded and rendered without the HDR Light Studio connection installed. This means you can put the scene through a render farm or share it with others. However, if HDR Light Studio OTL is left present in the scene and it has been shared with a computer that does not have HDR Light Studio OTL present (e.g. the HDR Light Studio connection for Houdini was never installed on that machine), then the user will see a standard Houdini error message informing that the OTL is not complete. To avoid this, simply remove the HDR Light Studio OTL before sharing/submitting the scene.
What happens when you stop the HDR Light Studio connection without rendering the final HDRI lighting textures?
Editing Existing Lighting
If you want to edit existing lighting, choose the lighting design you want to edit from the EnvLight Hook drop-down and Start HDR Light Studio from the connection panel in Houdini. Depending on the state of the lighting project, your HDR Light Studio interface may or may not be disabled upon opening.
The state of the lighting project is judged by the Status and whether the Project Data is present - as seen in the HDR Light Studio connection panel in Houdini.
Project Data
None
The selected EnvLight Hook was never opened in HDR Light Studio. This is the state of a brand new EnvLight Hook.
Present
The selected EnvLight Hook was opened in HDR Light Studio at some point and has Project Data associated with it which is embedded in the Houdini scene.
Status
Not used by HDR Light Studio
If there’s no Project Data associated with the selected EnvLight Hook then this lighting design was never opened in HDR Light Studio.
Live Temp Files - Design Unlocked
The selected EnvLight Hook has Project Data and the HDRI lighting textures from HDR Light Studio are being shared with Houdini as temporary low-res images (a proxy). The lighting design is unlocked so the HDR Light Studio interface will not be disabled upon opening.
Final Render - Design Locked
The HDRI lighting textures from HDR Light Studio are being shared with Houdini as permanent high-res files on disk. The lighting design is locked so the HDR Light Studio interface will be disabled upon opening – the user will need to unlock the lighting design if they wish to edit it in HDR Light Studio.
Final Render - Design Unlocked
The HDRI lighting textures from HDR Light Studio are being shared with Houdini as permanent high-res files on disk. The lighting design is unlocked so the HDR Light Studio interface will not be disabled upon opening.
No matter the state of your lighting project, HDR Light Studio will open and if the project data already exists, it will load the lighting design that’s embedded in the Houdini scene. You can then unlock the lighting design (if applicable) and edit the lighting. Just make sure to render the final HDR textures at the end of the process.

Save the Houdini scene
The current state of the HDR Light Studio project is embedded in the Houdini project. You should save your Houdini scene now.
Saving and loading HDR Light Studio projects
HDR Light Studio projects can be saved from the HDR Light Studio interface at any time during the lighting process as an HDi file (native HDR Light Studio project file), even when using HDR Light Studio via a connection. If you were to open HDR Light Studio in a connection with Houdini, this project can be loaded into HDR Light Studio using Project > Open Project. The lighting design would load into HDR Light Studio replacing its current design, and would then be synced back into Houdini. This is how you can move lighting between Houdini projects or between other supported 3D software.
