New in Tungsten
'Composite' is a new Content Type for lights in HDR Light Studio. When using Composite content, the image texture for the light is the result of a nested set of HDR Light Studio lights with their own Light List and Canvas.
Watch the video demonstrations here if you want.
The diagram below illustrates this concept.
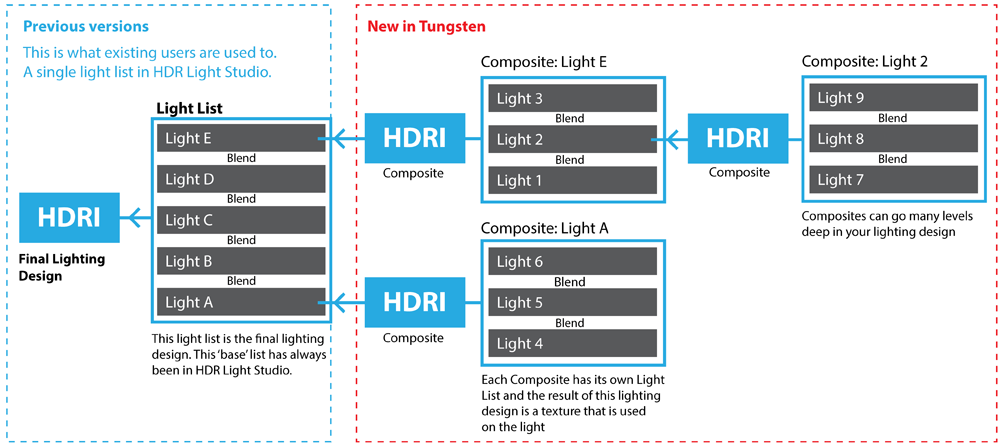
At its most basic, Composite lights are a way of grouping lights and managing lighting designs - this is a much requested feature from our users. However, because the Composite results in a texture on the parent light - the parent light can then be adjusted like any other light in HDR Light Studio. This includes changing its brightness, mapping, blend mode, size, rotation and position. This allows much more flexibility than simply grouping lights in the Light List. In addition, as the name suggests, the texture on the parent light comes from the composite result of blending those lights. This means effects can be created that were simply not possible before in HDR Light Studio with a single Light List.
You can use Composites to:
•Group Lights
•Control a group of lights (brightness, position, color etc)
•Store Multiple Lighting Designs in one HDR Light Studio project
•Isolate and Edit Individual Lights
•Mask Lights
•Clone and move areas of the HDRI map
•Combine different regions of multiple HDRI maps
•Dissect and take controls of light regions in existing HDRI maps
•Add effect to lighting using Filters
Let's make our first Composite in HDR Light Studio
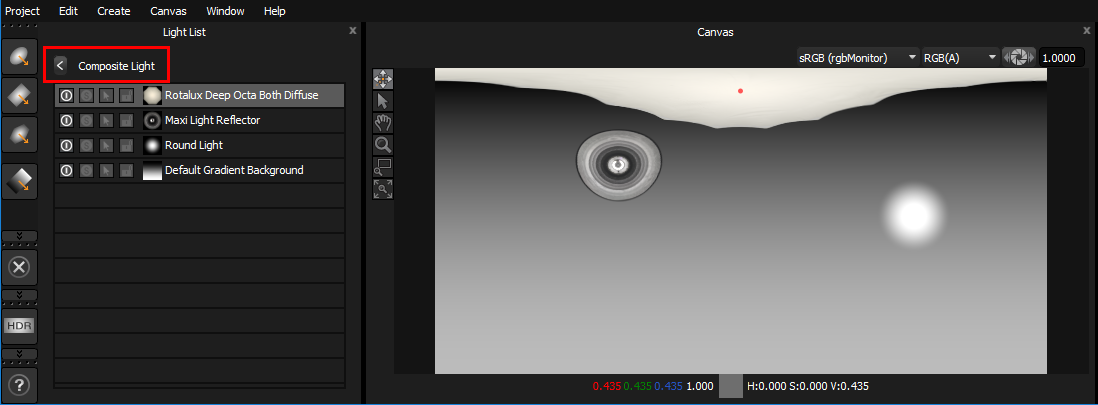
Here is a lighting design containing 4 lights.
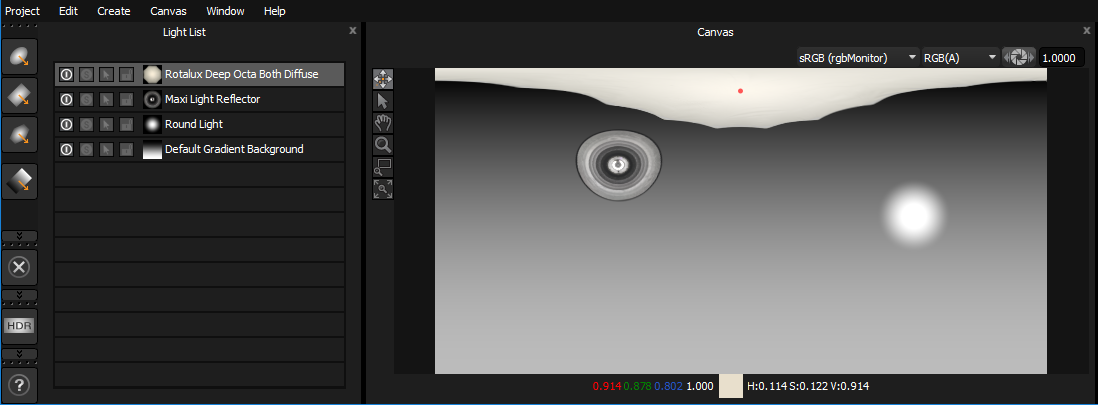
Let's select all 4 lights in the Light List.
Selecting multiple lights is a new feature and has been added to use with Composites.
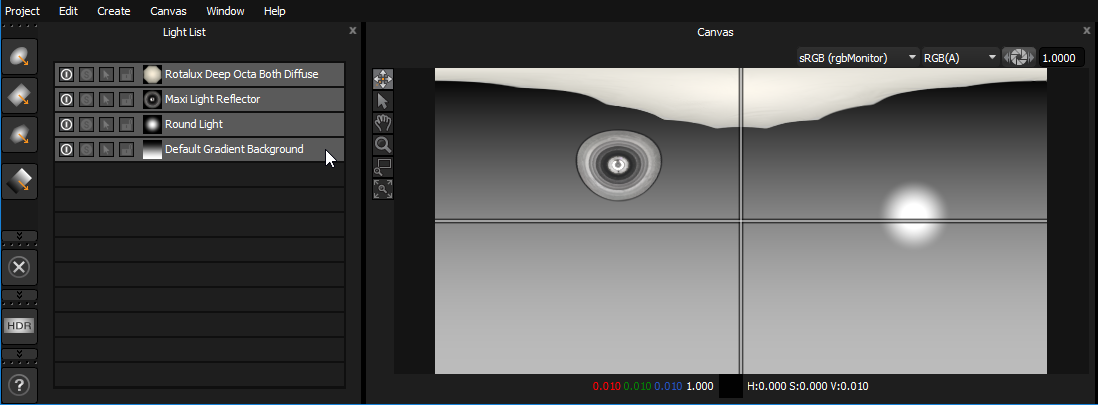
With the top light in the list already selected, hold the Shift key and click on the bottom light in the list.
Now all 4 lights have been selected.
(Please note, to add and remove individual lights from the selection, hold the CTRL key)
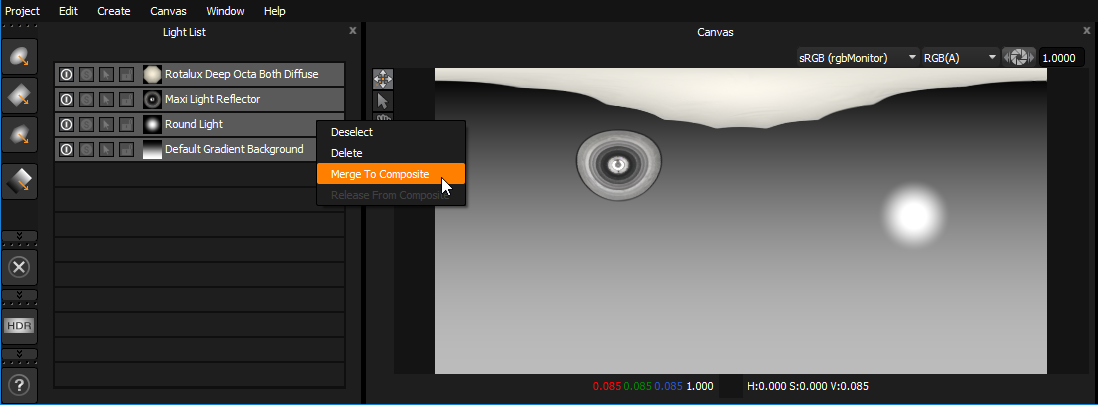
Right click on one of the selected lights in the list and select Merge To Composite from the pop-up menu.
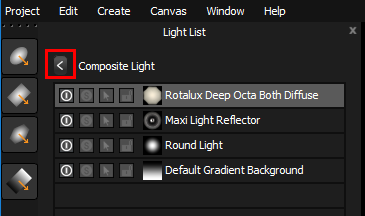
You will now see a single light on the Light List named Composite Light.
(This is the default name when making a light with Composite content, you can rename it.)
The Canvas will look the same, you can still see the 4 original lights on the Canvas even though they are no longer in this list.

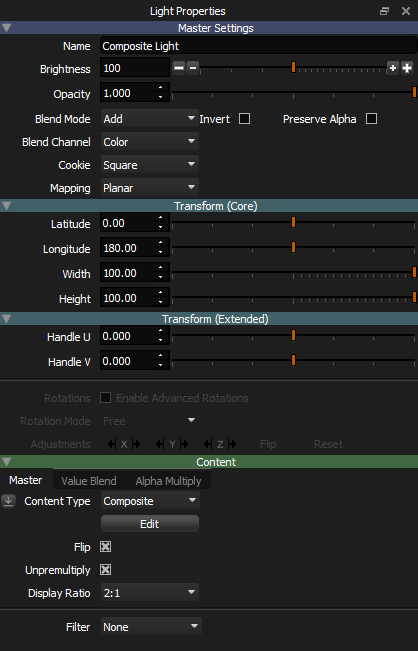
With the Composite Light selected, its properties are displayed like any other light.
Key properties to note are:
Mapping: Planar
Width and Height: 100
So this light is filling the whole Canvas with the Composite content.
These are the default settings, for example, when making a Picture Background light and loading a HDRI map.
In addition the Composite Lights 'Content Type' is set to Composite. So rather than getting its visual appearance from a procedural Bulb or Image, this light's appearance (RGBA image data) is coming from the Composite set of lights.
We made the Composite Light using the 4 original lights. Now let's take a look at where they have moved to.
There are 2 ways to edit a Composite.
1. Press the Edit button in the Composite Content section of the Light Properties panel or
2. Press the Right Arrow button on the Light List, this appears on the right of lights with Composite Content.

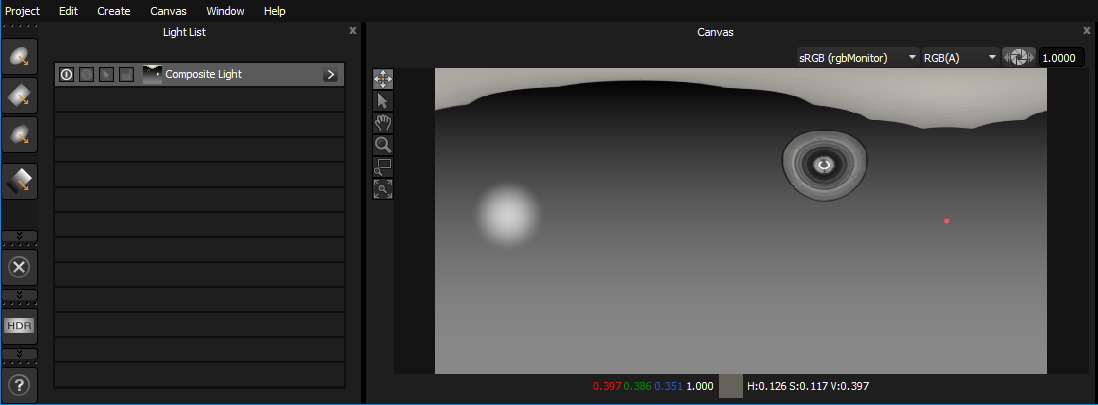
When editing a Composite, the Light List will update to display the lights within this Composite. In this example, we can see the original 4 lights again.
The Light List for a Composite will also display the name of the parent light at the top of the list. The Left Arrow button is used to return back to the Light List of the parent light.
The Canvas will also update when editing the Composite and now shows only the lights within the Composite.
However, the entire lighting design will still be lighting your Render View.
Once you are editing a Composite and seeing its lights in the Light List - you work with this Light List in the normal way in HDR Light Studio.
You can add new lights, select them, delete lights, re-order them, move them, solo, hide etc.
You can even select a light within a Composite and use LightPaint in the Render View to re-position it on the model!
Another example, if you use the menu command Edit > Delete All, this will delete all lights within the Composite Light List only.
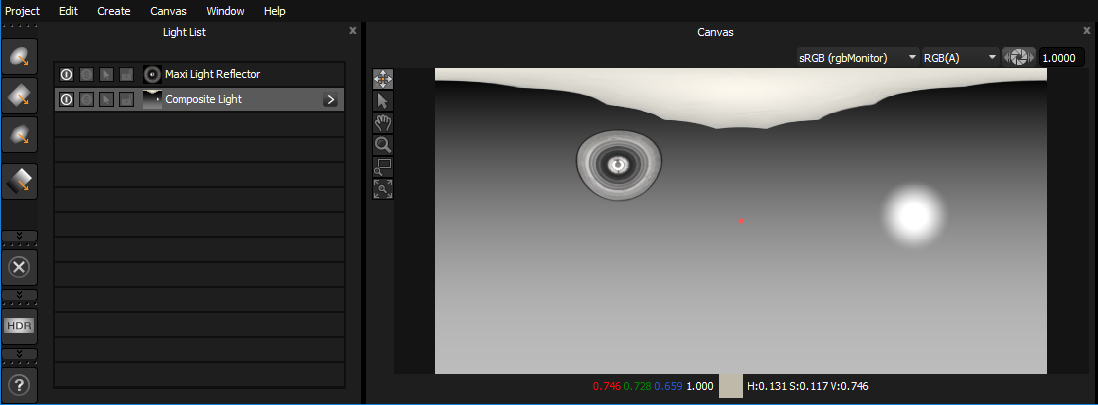
Let's press the Left Arrow button to return to the Light List where the parent light is, in this case the base Light List.
Now it's worth taking the time to understand the benefits of the Composite being a texture on a standard HDR Light Studio light.

With the Composite Light selected, we can now adjust its properties like any other light.
In this case below, we have decreased its brightness and adjusted its longitude setting - in effect rotating the lighting design horizontally.
We have rotated the entire lighting design and adjusted its brightness by adjusting just 2 settings on the parent light.
We didn't need to adjust each of the 4 lights individually to do this.
This parent light has planar mapping and fills the canvas. This is the default setting when merging lights to a Composite Light because the appearance and position of the lights do not change when they move into the Composite. This makes it ideal for grouping and organizing your lights.
Once lights are within a Composite, it's easy to move them out of the Composite and back to the main Light List.
Edit the Composite and select the light/s in the list you want to remove from the Composite.
Right click on the light/s and select Release from Composite from the pop-up menu
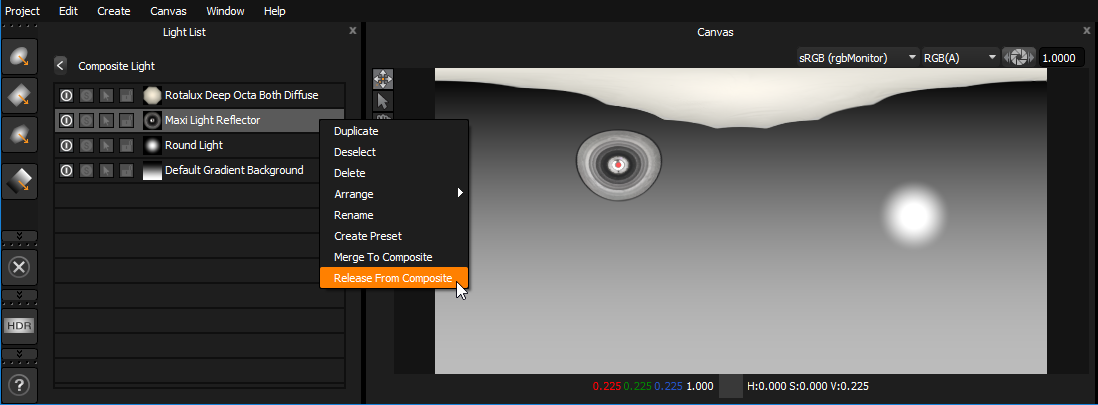
The light will disappear from the Composite list, and from the Canvas for the Composite.
Remember when editing a Composite, the Canvas will only display the lights within this Composite. Even though the Render View is always lit by all lights in the lighting design.
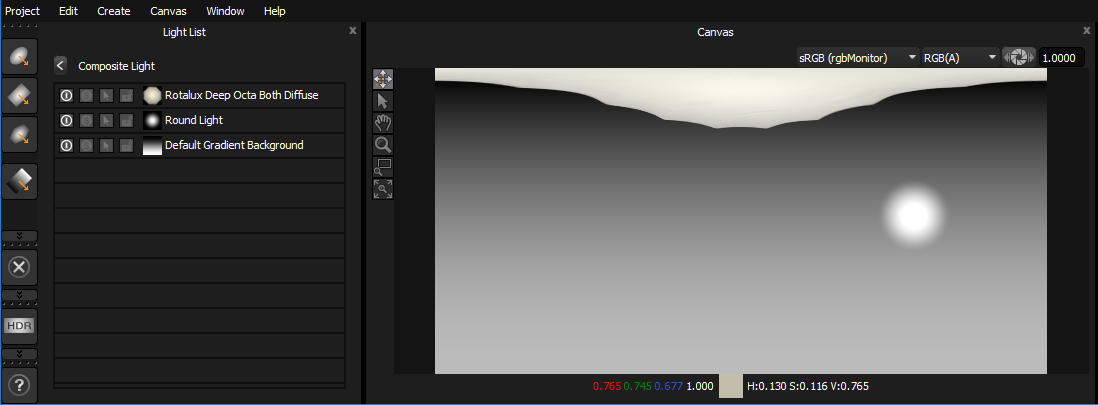
Press the Left Arrow button at the top of the Light list to return to the base Light List.
You can now see the light that was removed from the Composite, and it's also visible on the Canvas, because this is now showing the whole lighting design again.
If you want to move a single light from the Light List and into an existing Composite light, simply drag and drop the Light onto the Composite light in the list. It will then be moved into the Composite.

Showing the light being dropped onto a Composite Light which highlights.
Please Note:
A Composite Light can contain another Composite Light, multiple levels deep if required.
Area Lights cannot be placed in a Composite - they are 3D lights and make no sense in this Composite context.
That concludes the overview of how to use the new Composite content in HDR Light Studio.
Next we need to take things further and show some examples of what is possible using Composites.
Check out these examples:
Example 1: Studio lighting mixed with a HDRI map
Example 2: Making windows through to a HDRI map
Example 3: Mixing regions of different HDRI maps
Example 4: Enhancing a single light source
Example 5: Moving a region of an existing HDRI map
Example 6: Taking Control of individual lights sources in an existing HDRI Map
