Taking Control of individual lights sources in an existing HDRI Map
This is the most complex example, it shows what is possible using Composites.
(Thank you to Raphael Rau for the Demo Scene - www.silverwing-vfx.de)
We have made a Picture Background light and loaded a HDRI map of a room with various lights/windows. We are going to take control of the brightness of groupings of lights/windows using Composites.
This will allow us to turn up and down the brightness of those areas of the HDRI map.

Clamping the base HDRI map
First we will clamp the brightness of the base HDRI map using a Low Pass blend mode - in order to get our ambient lighting.
Here is a good method to choose the correct level to use for this Low Pass light.
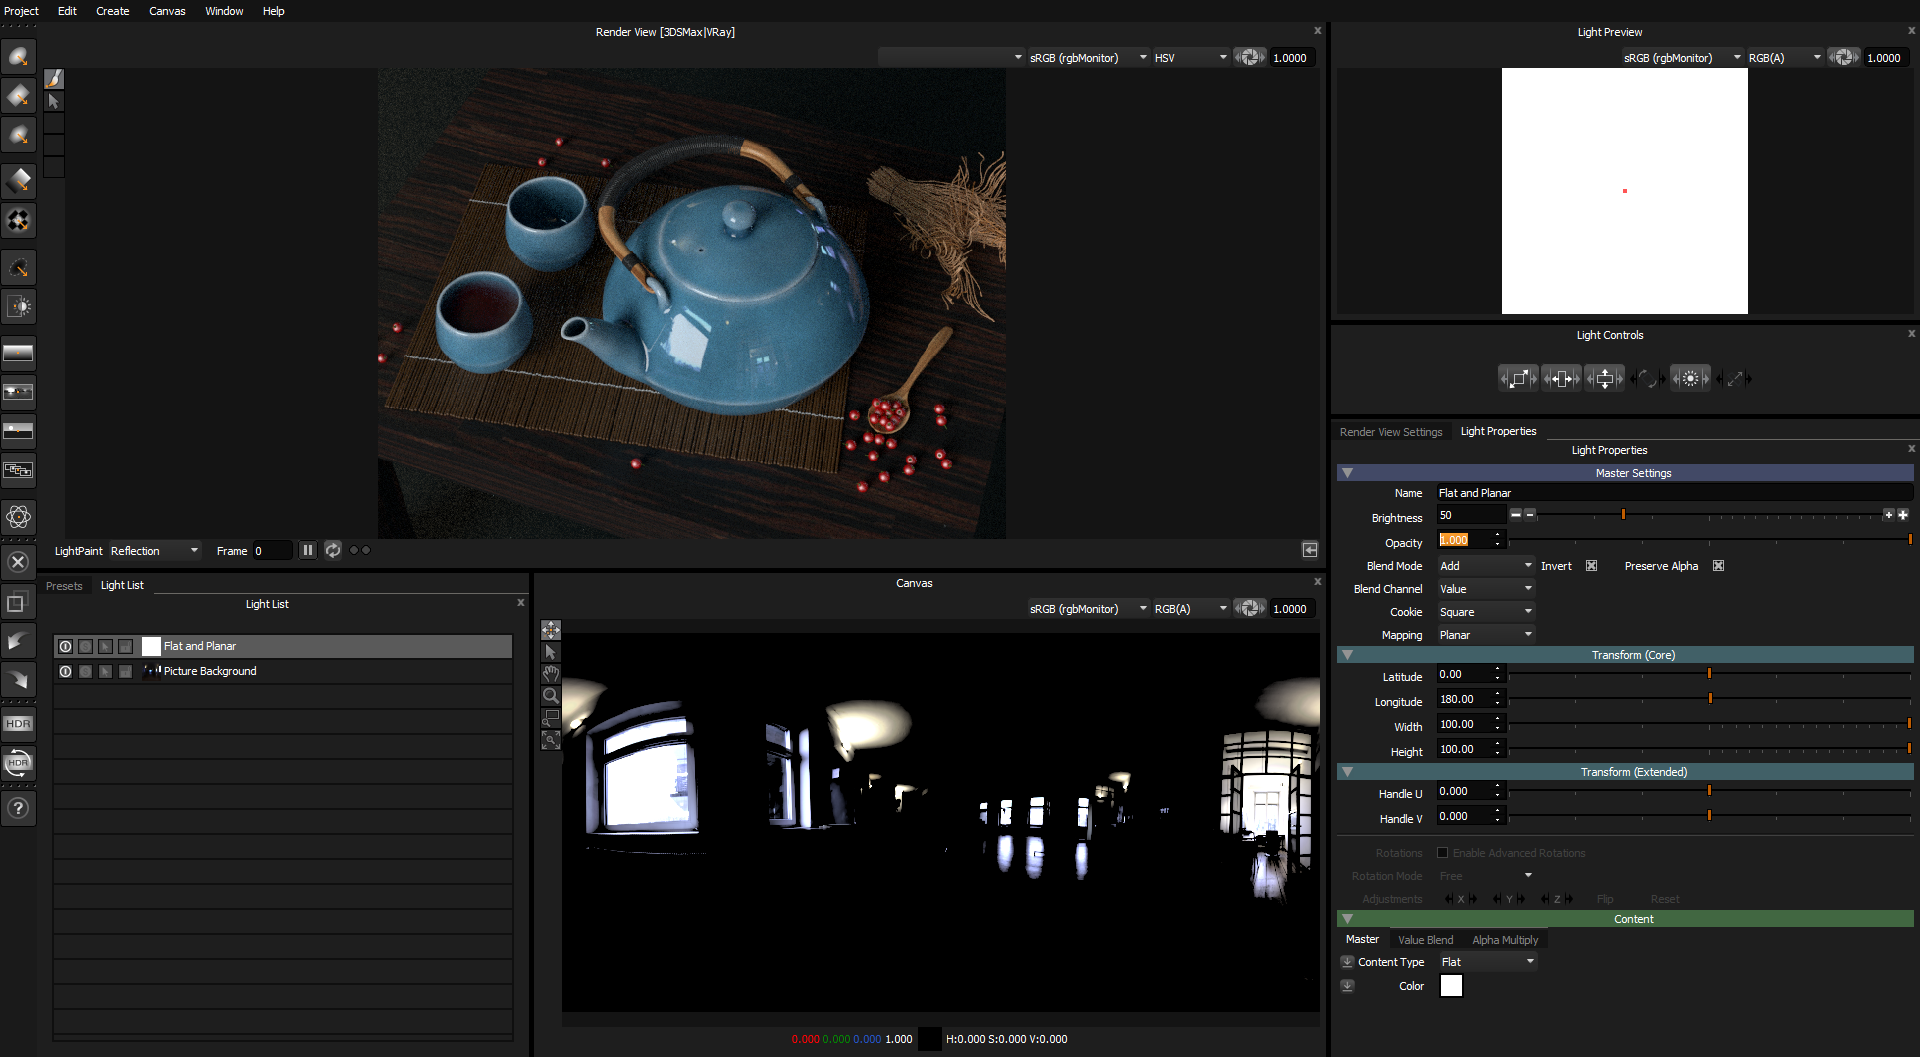
Make a new light with Flat Content, Planar mapping and scale it to fill the canvas.
Change its blend mode to Add, enable Invert on the blend, and change the Blend Channel to Value.
This light will now reduce the brightness of the whole HDRI map by the brightness value you have set on the light.
Adjust the brightness of the light until you can clearly see the distinct areas of light of the HDRI map. This will become the threshold for the base HDRI map.
You can see in the image below that distinct areas of lighting in the lights and windows are clearly visible using a value of 50 for the light.
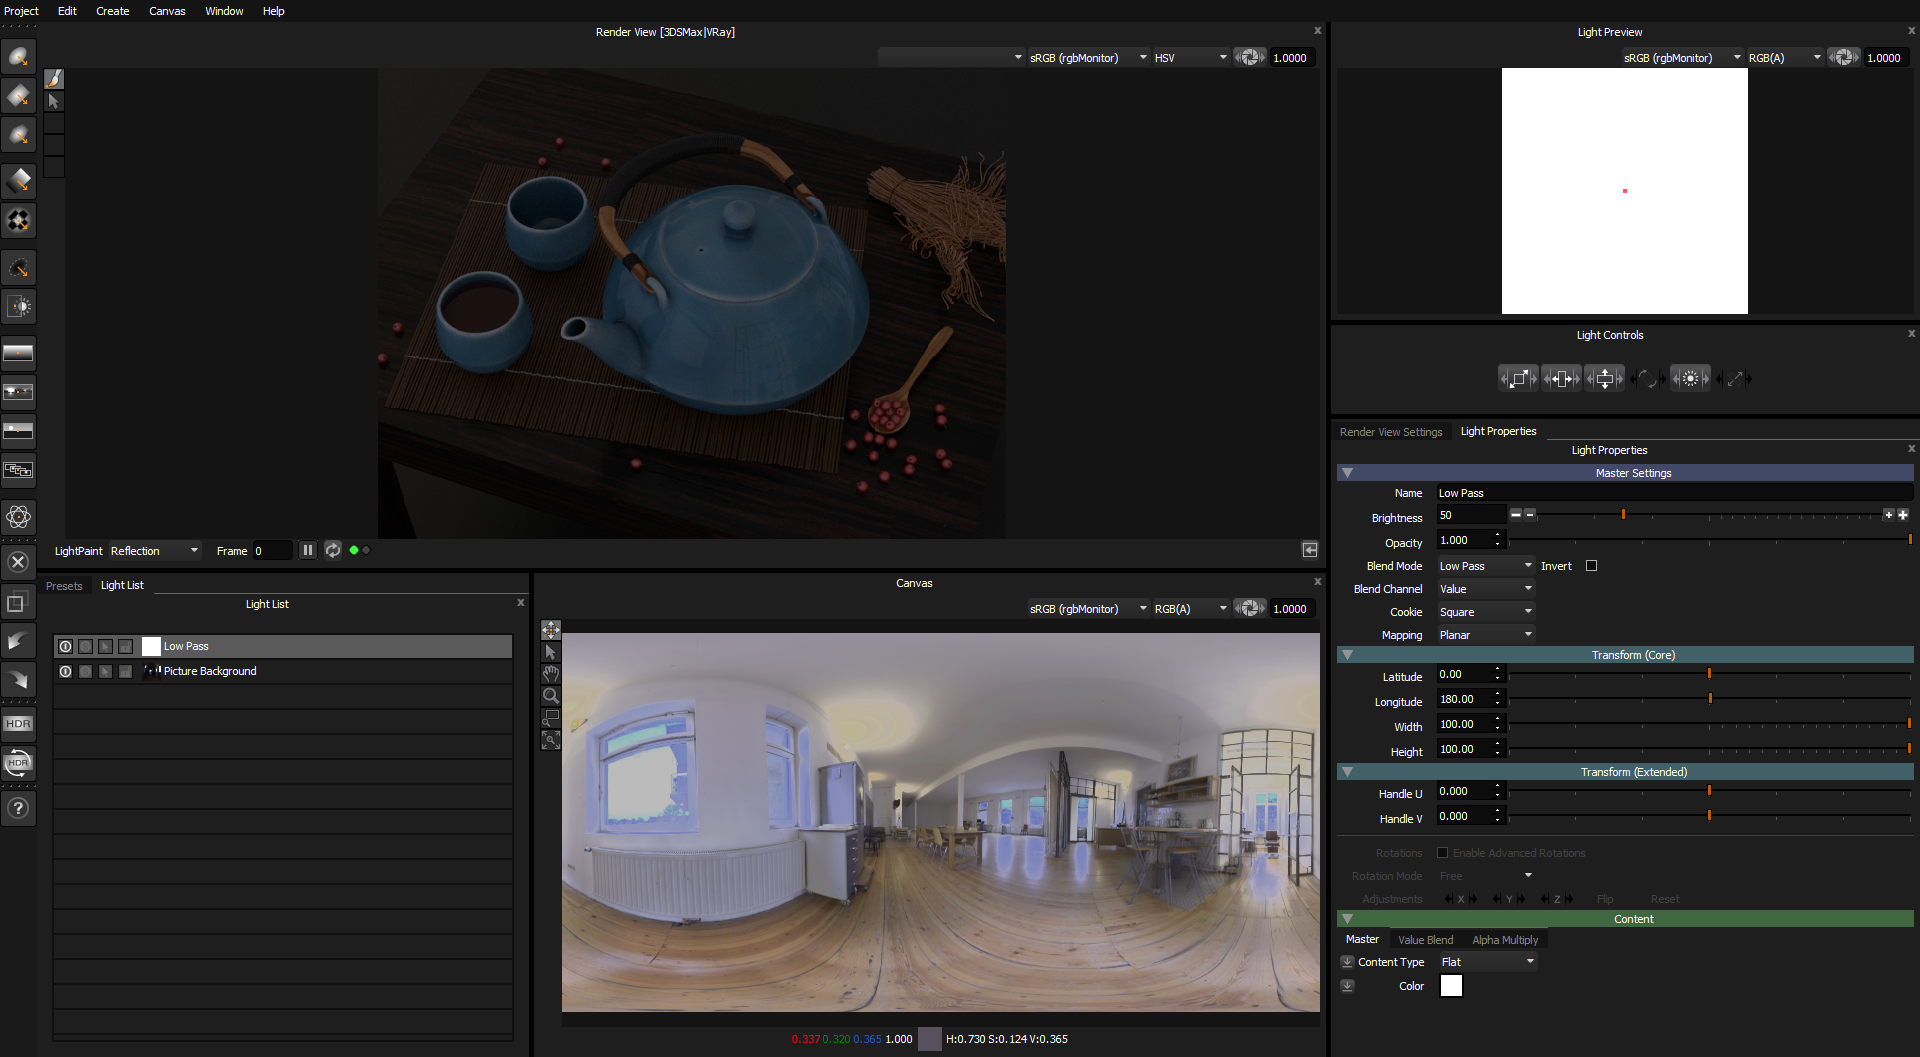
Change the blend mode of this light to Low Pass. This will now limit the brightest pixels to be 50. Effectively removing the lights from the HDRI map.
You can see this in the rendered view below, that there are no longer any bright reflections.
You will notice color appear in areas of the HDRI map that have been clamped by Low Pass. This color was there before, but the brightness of the pixels meant you could not see it.
Rename the Light to 'Low Pass'.
Making a Composite Light to Recover the Brightness in a Region
Next we are going to make a Composite Light which will result in a light containing the lights from a region of the HDRI map. This will then be added back to the clamped base HDRI map, and will mean you have an adjustable brightness light source.
Duplicate both existing lights, the base Picture Background light and the Low Pass light.
Then select both lights and Merge to Composite.
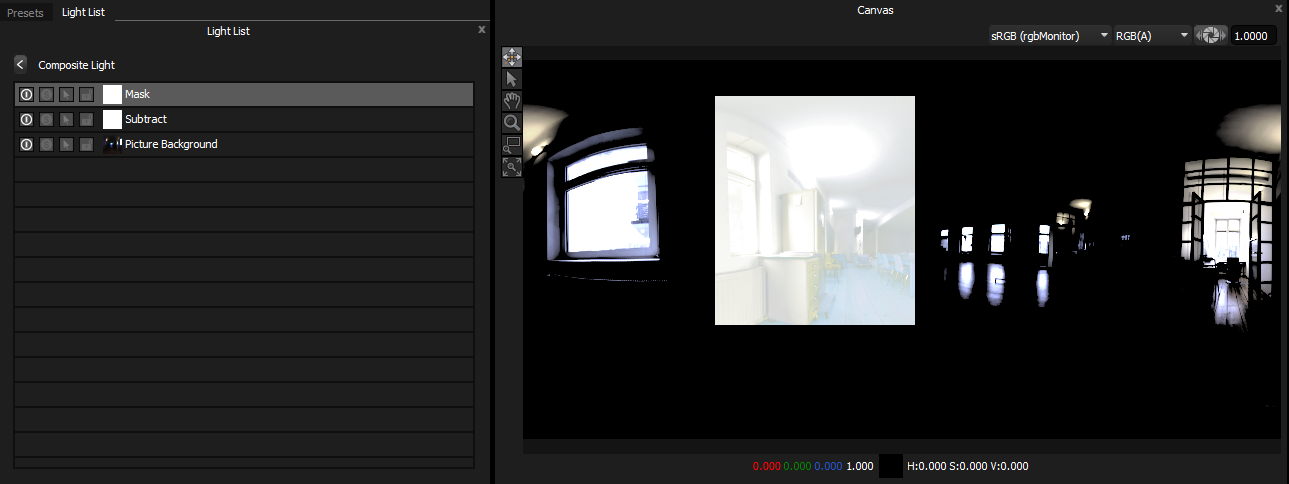
Edit the Composite.
Rename the Low Pass light to Subtract.
Change its blend mode to Add, enable Invert (making it subtract), change Blend Channel to Value
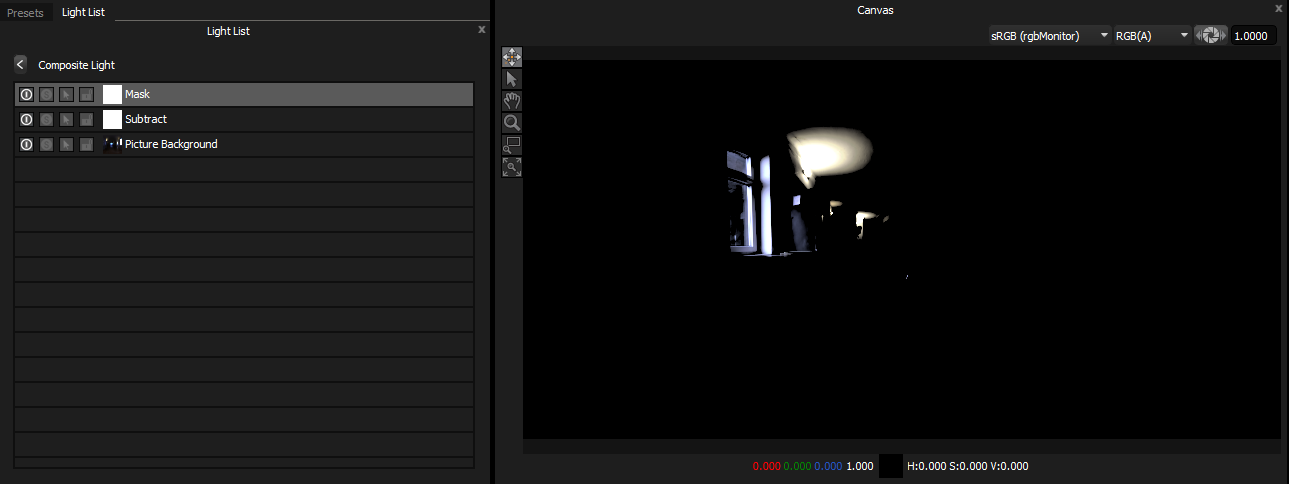
The canvas now shows the regions of lighting that we can now mask.
Make a new light with planar mapping and flat content.
Rename it to 'Mask'
Move/scale this light to cover a group of lights you want to control together.
You can see below the light is covering a group of lights.
Once positioned, change the blend mode of this light to Multiply and enable Mask.
That region is now masked and has isolated those lights.
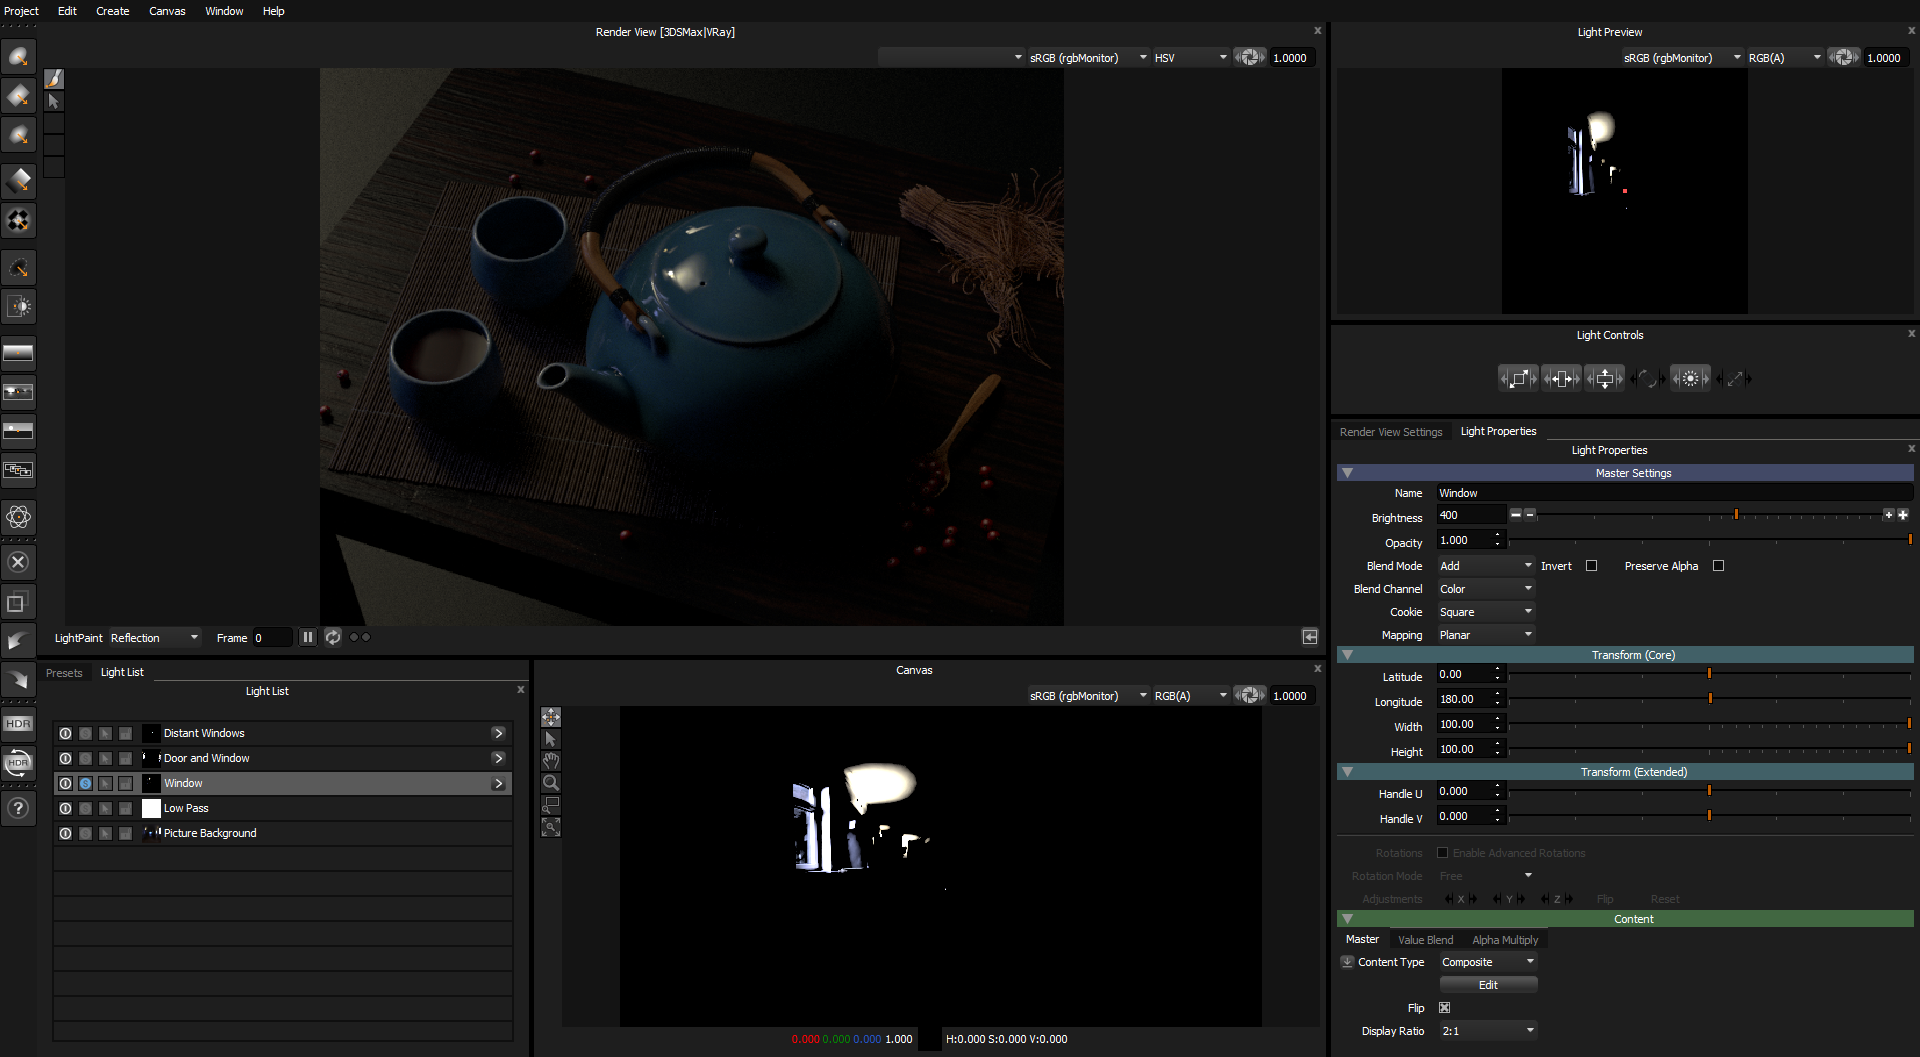
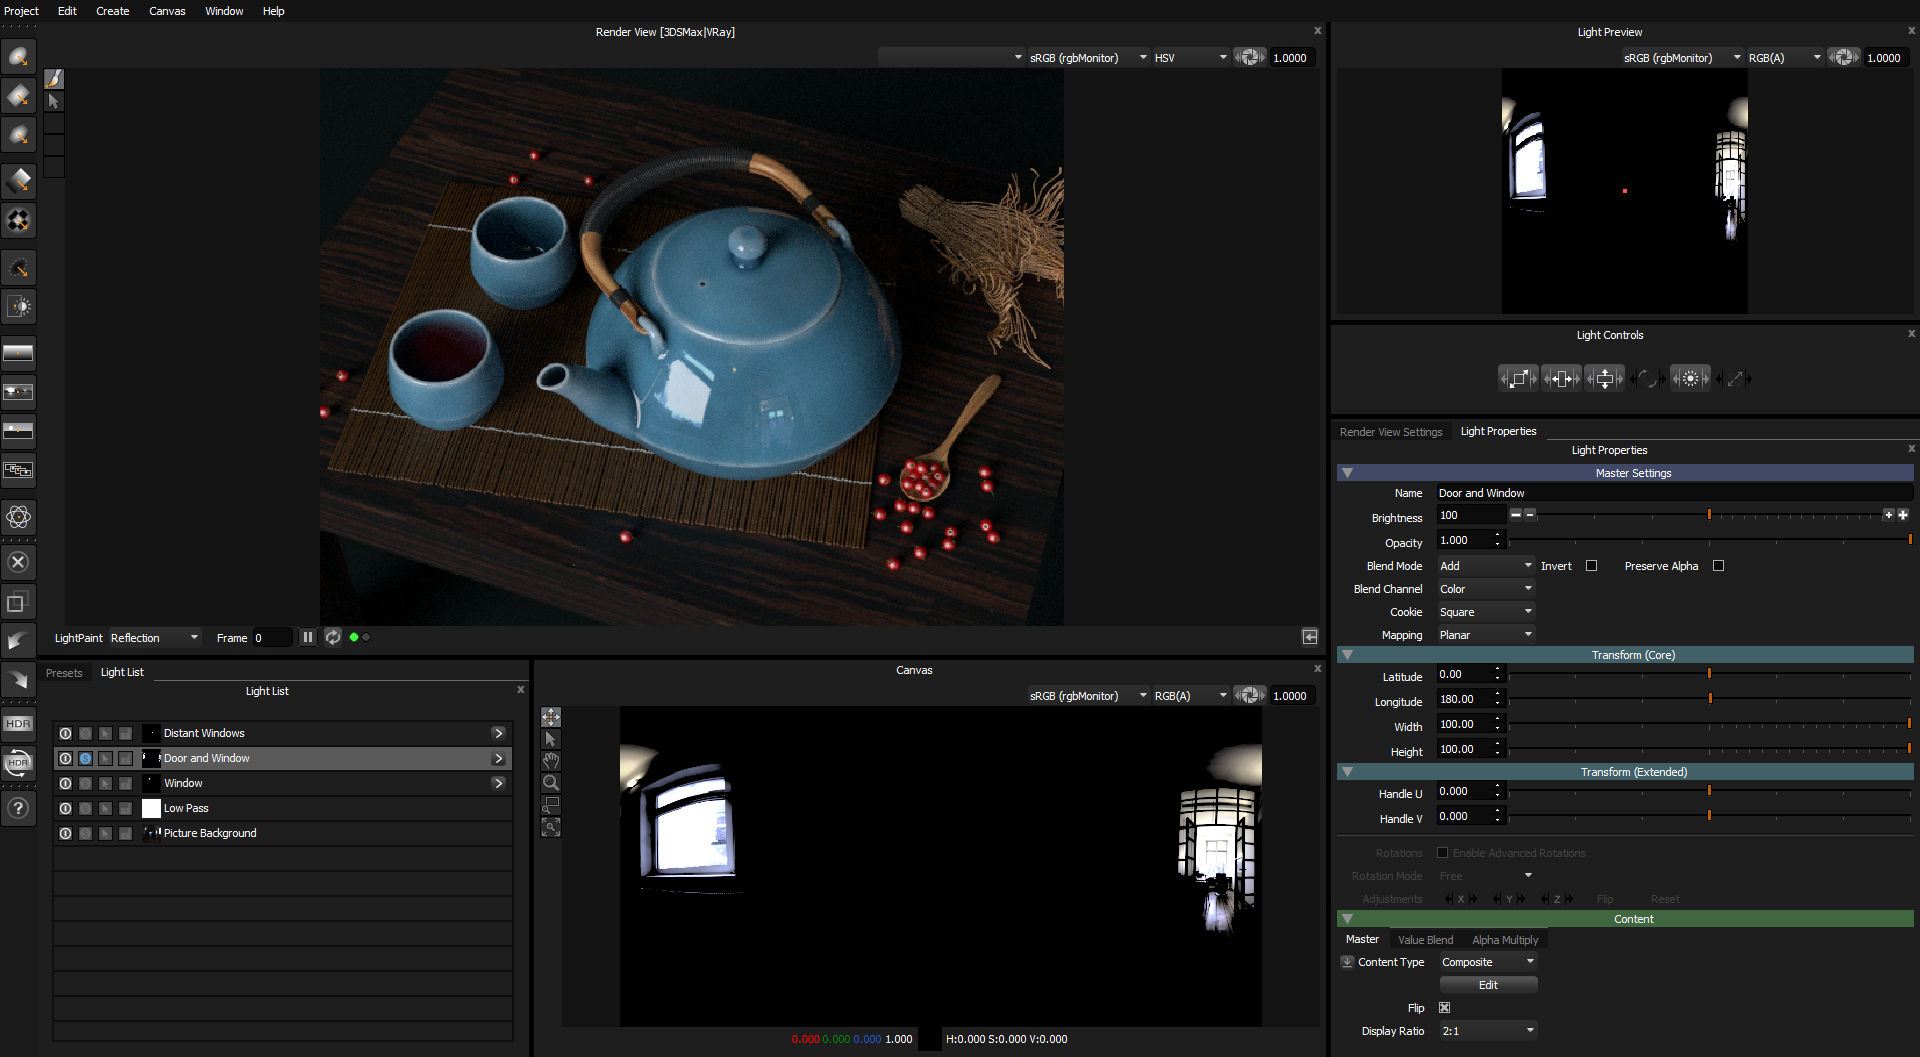
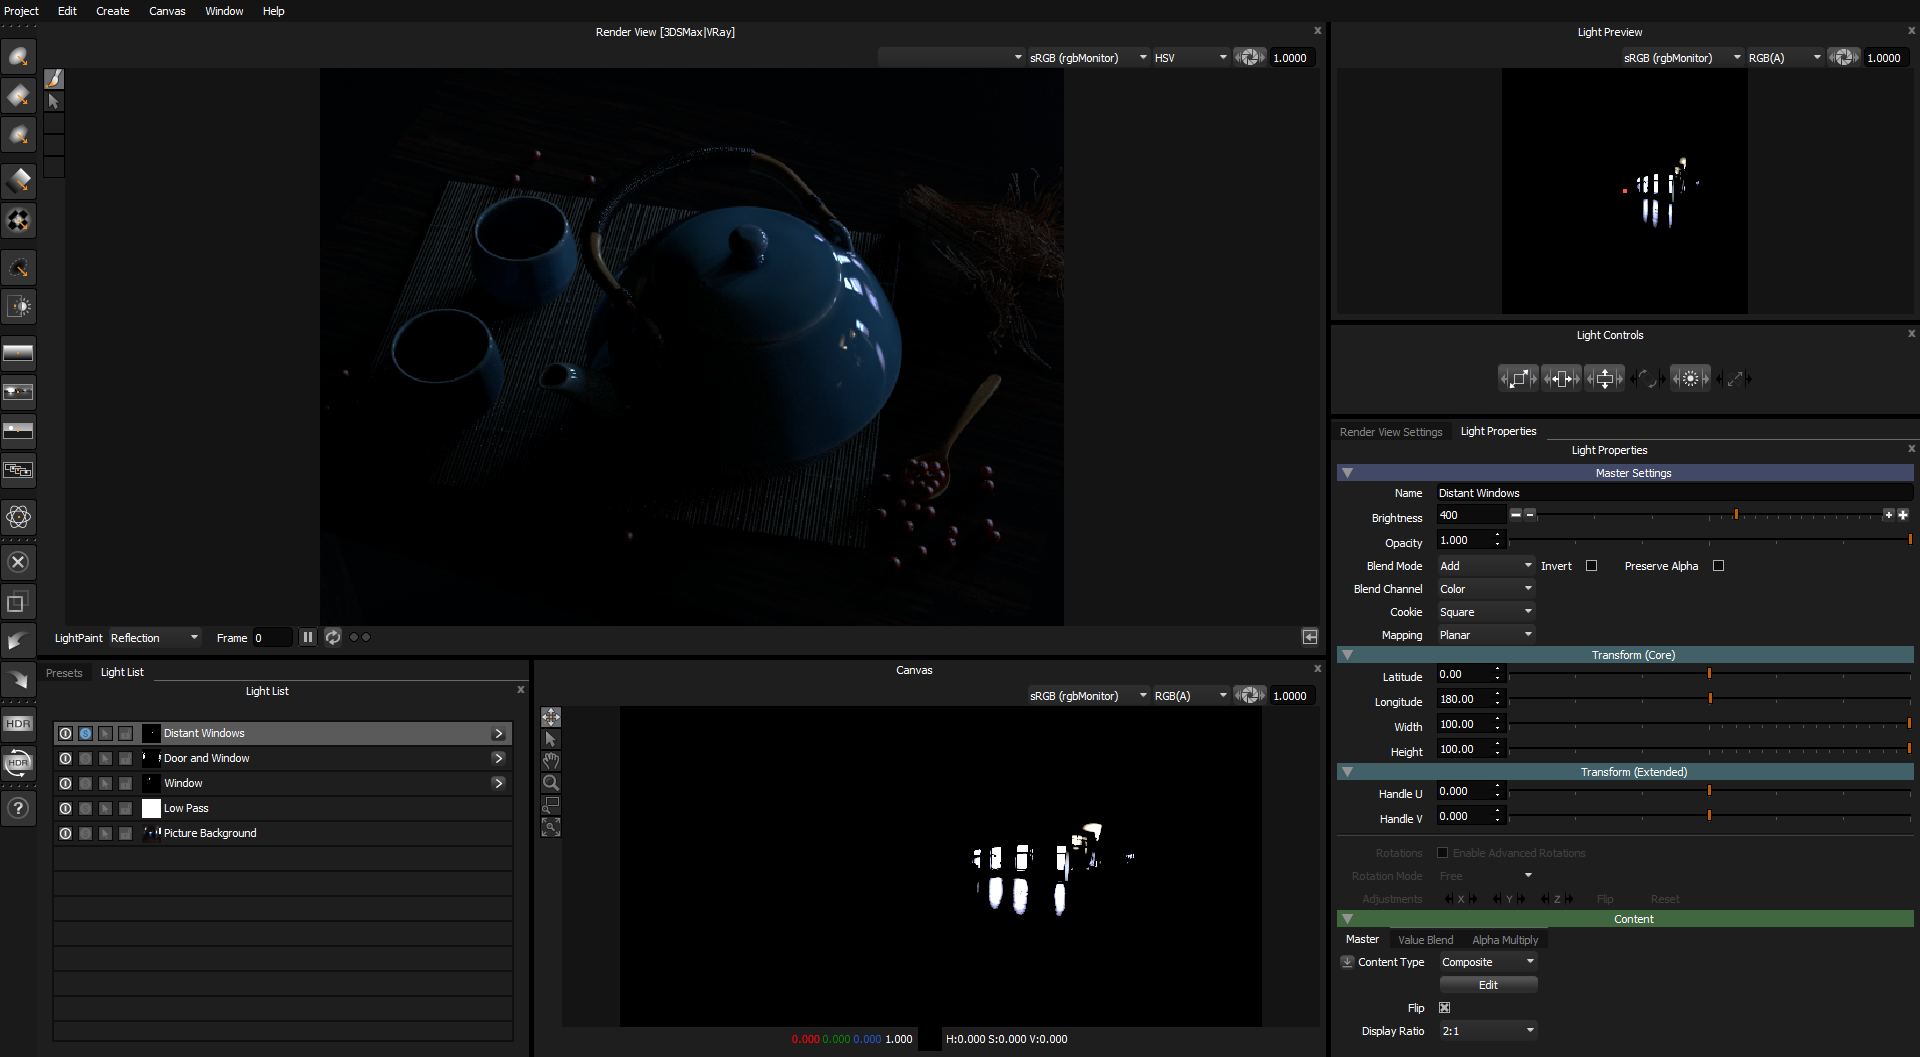
If we return to the base light list, by pressing the back arrow at the top of the list.
We can then duplicate this composite light, to make 2 more composite lights and then adjust the mask light within those lights, to define 2 other regions.
This is what we have done below, and we have renamed the Composite Lights so they make sense to the user.
Once all regions have been added. The resulting HDRI map design will look the same as the original HDRI map.
But the difference is, we can now adjust the individual brightness of those regions of the HDRI map.
Let's solo each Composite light so you can see the isolated lighting effect on the 3D scene.
If we turn all the lights on, we can now adjust the brightness of each group of lights to get the optimum lighting effect in our 3D scene.
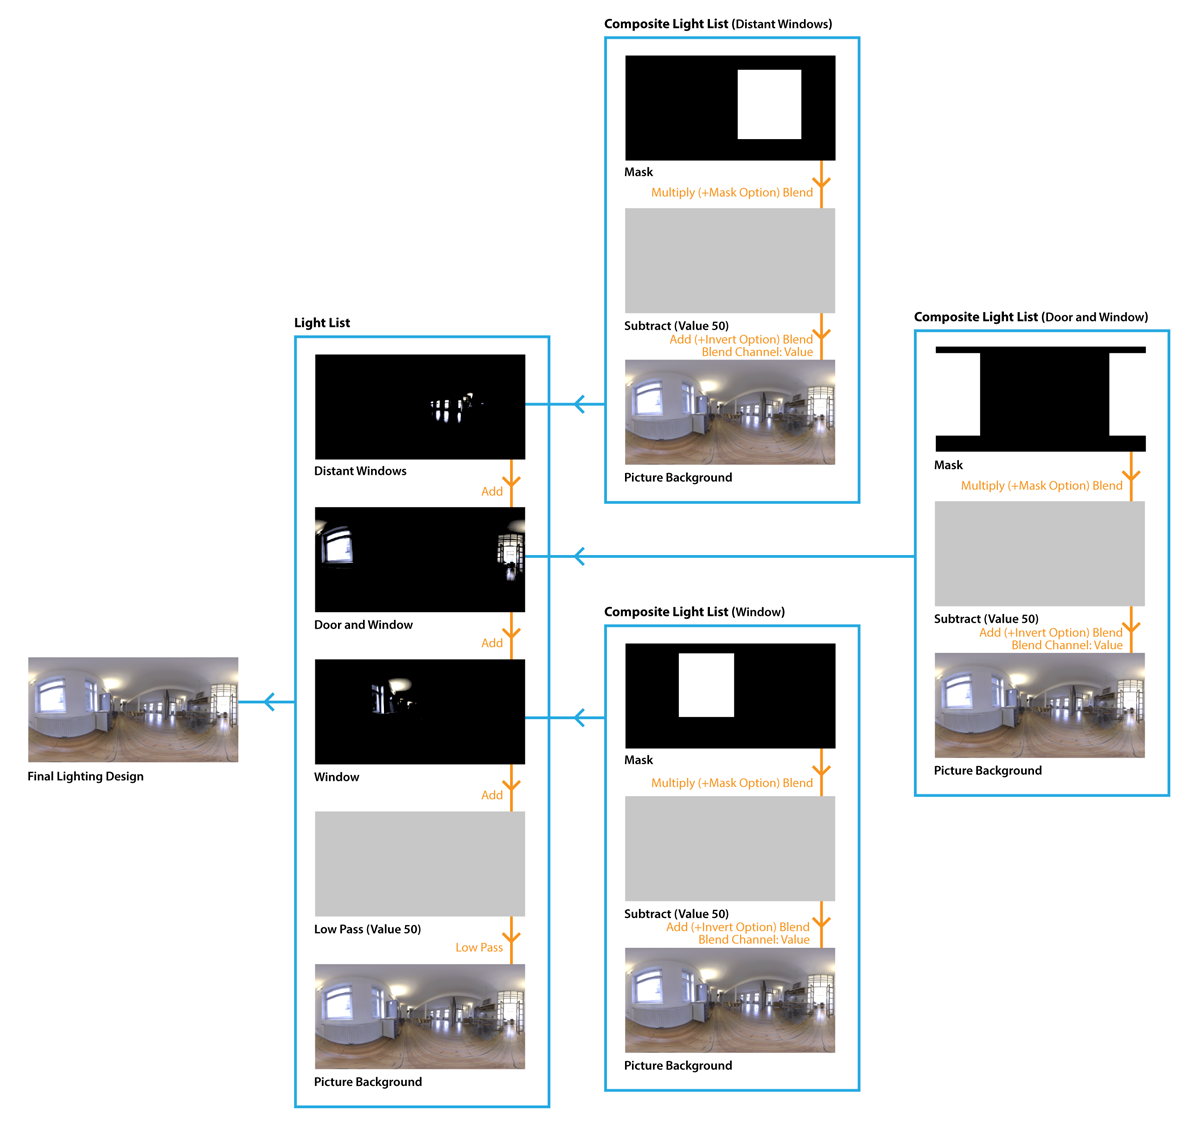
This diagram shows what we have just created, and how the lighting project is constructed.