To follow this tutorial, please make sure you have installed HDR Light Studio 9 drop 2 or higher and installed the new VRED additional plug-in
Requires VRED 2025.2 and higher
This workflow tutorial demonstrates the connection between HDR Light Studio and Autodesk VRED.
To learn the core concepts of lighting with HDR Light Studio watch our 'Getting Started' video here.
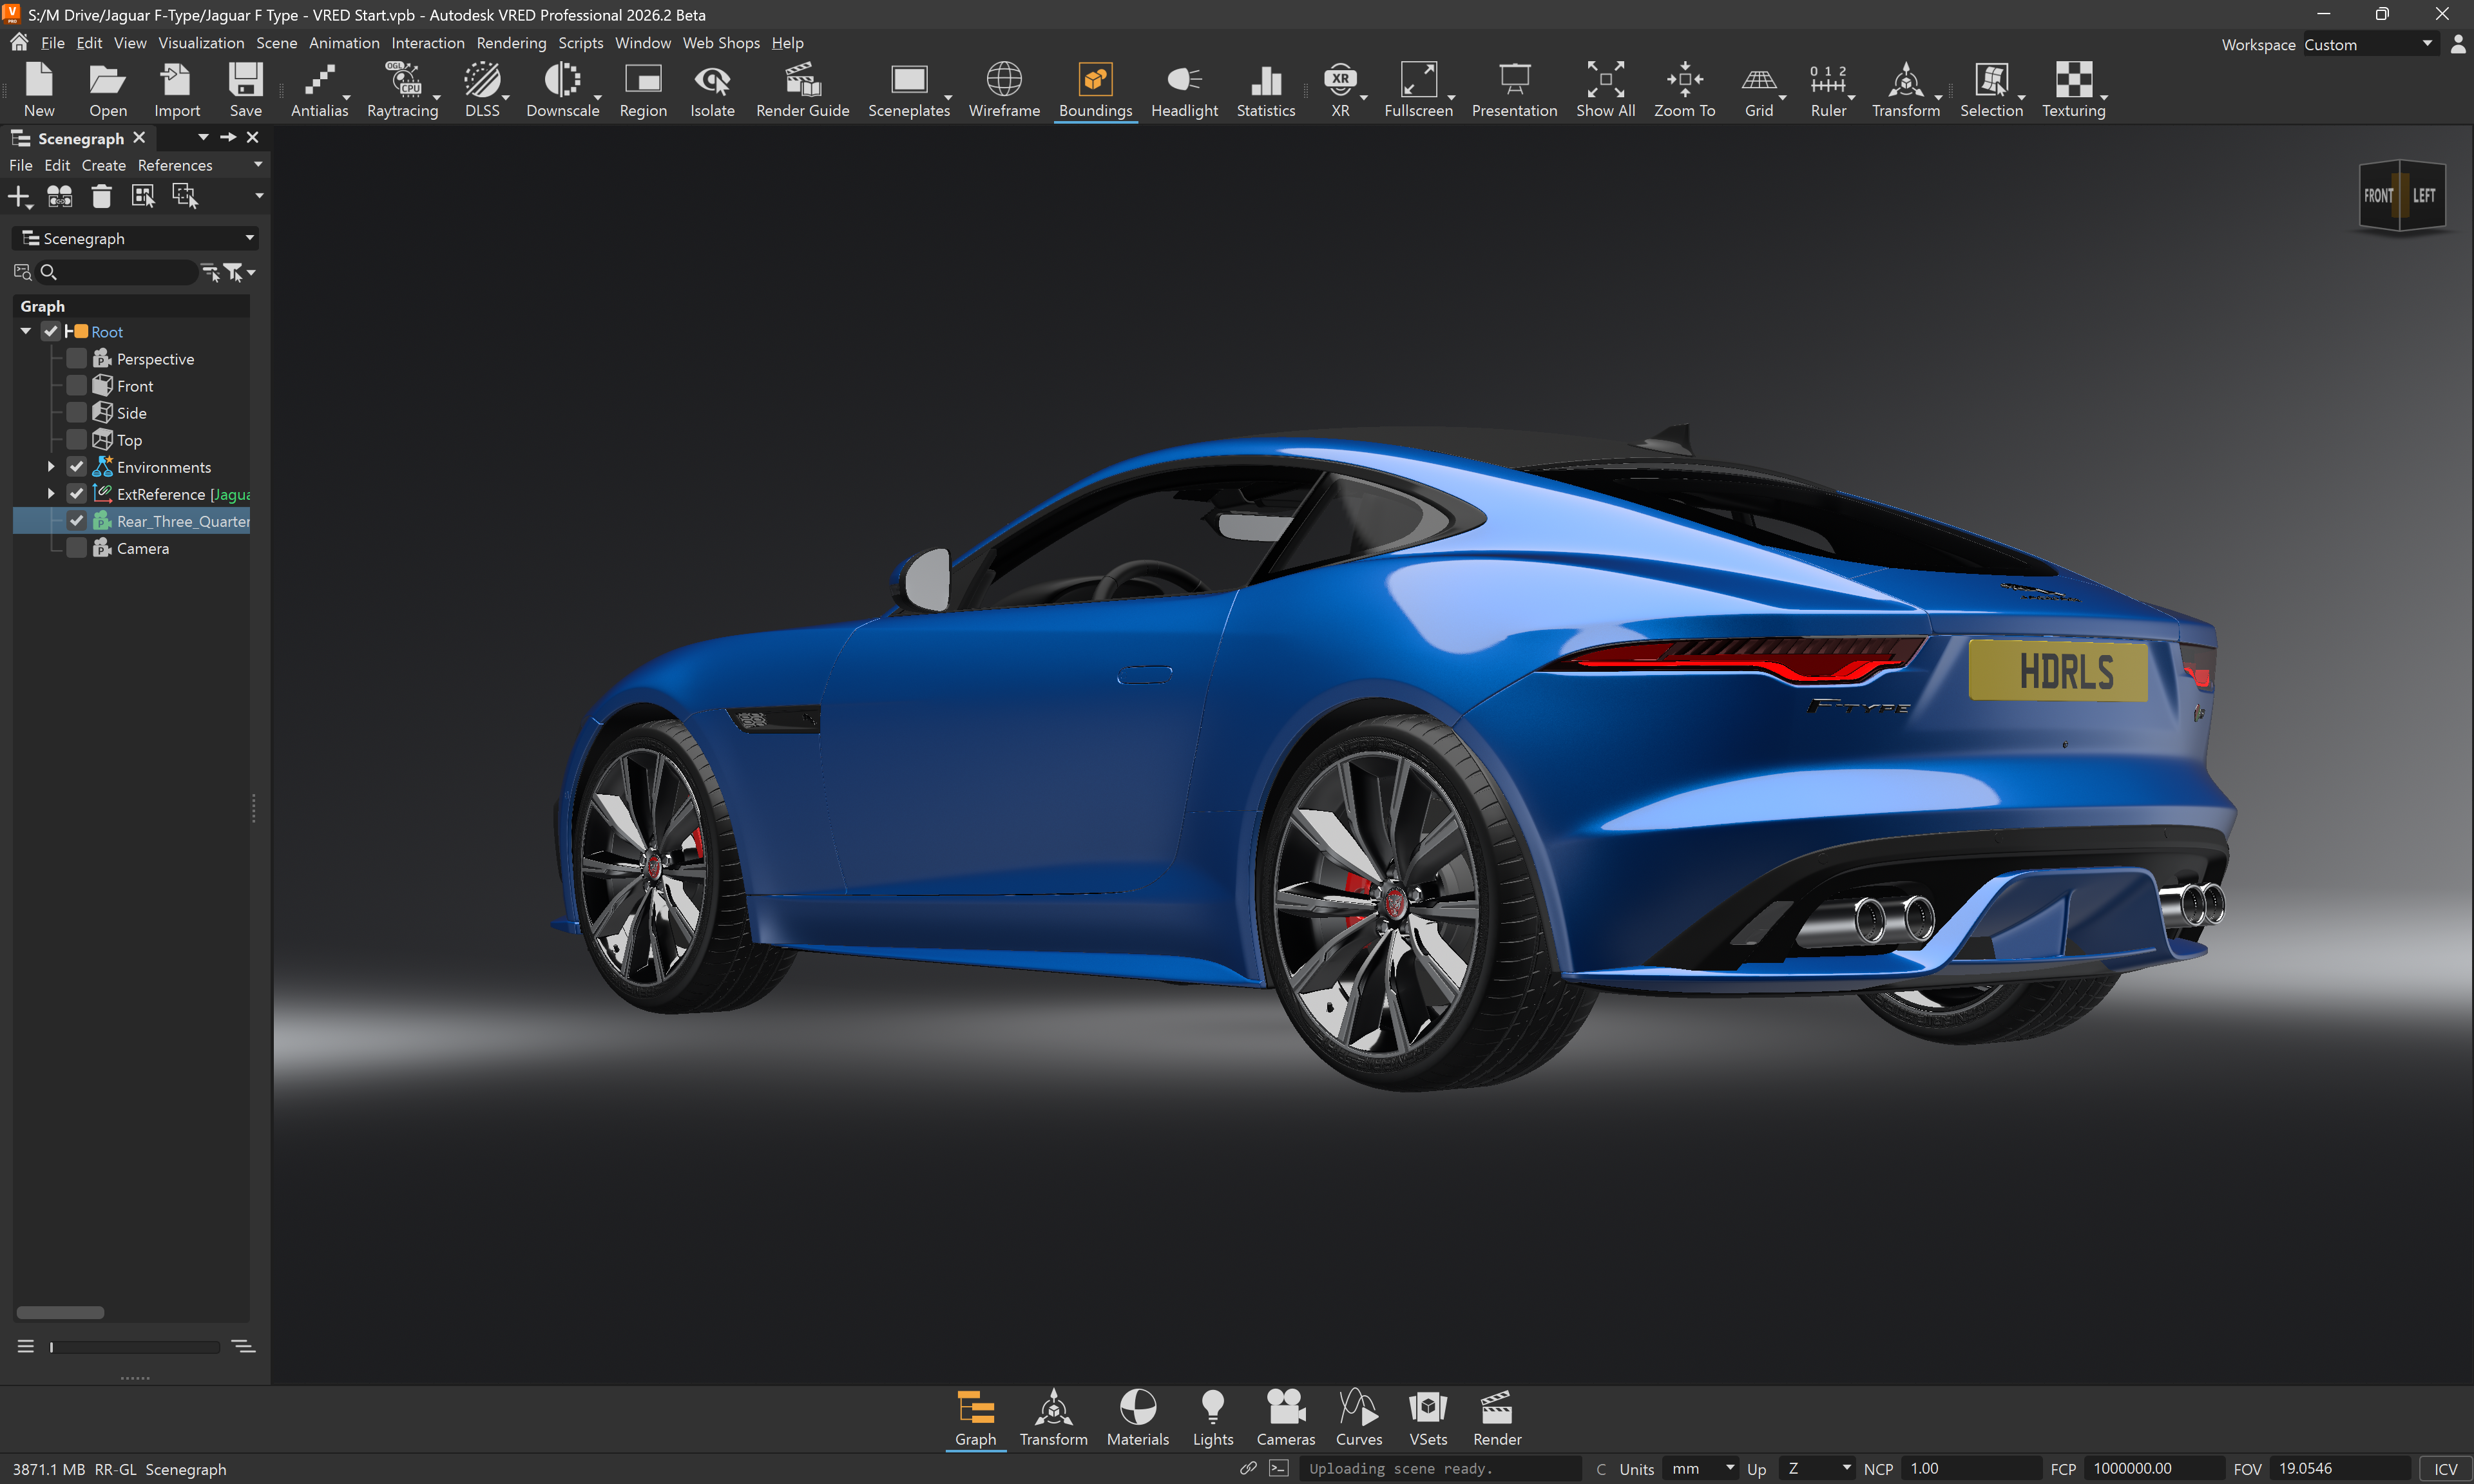
Open your scene in VRED
Choose the camera view you want to light
For studio lighting
Change the Environment Geometry from Dome to Sphere.
A Sphere gives you more control over lighting from the lower half of the HDRI map.

Environment Geometry set to Sphere
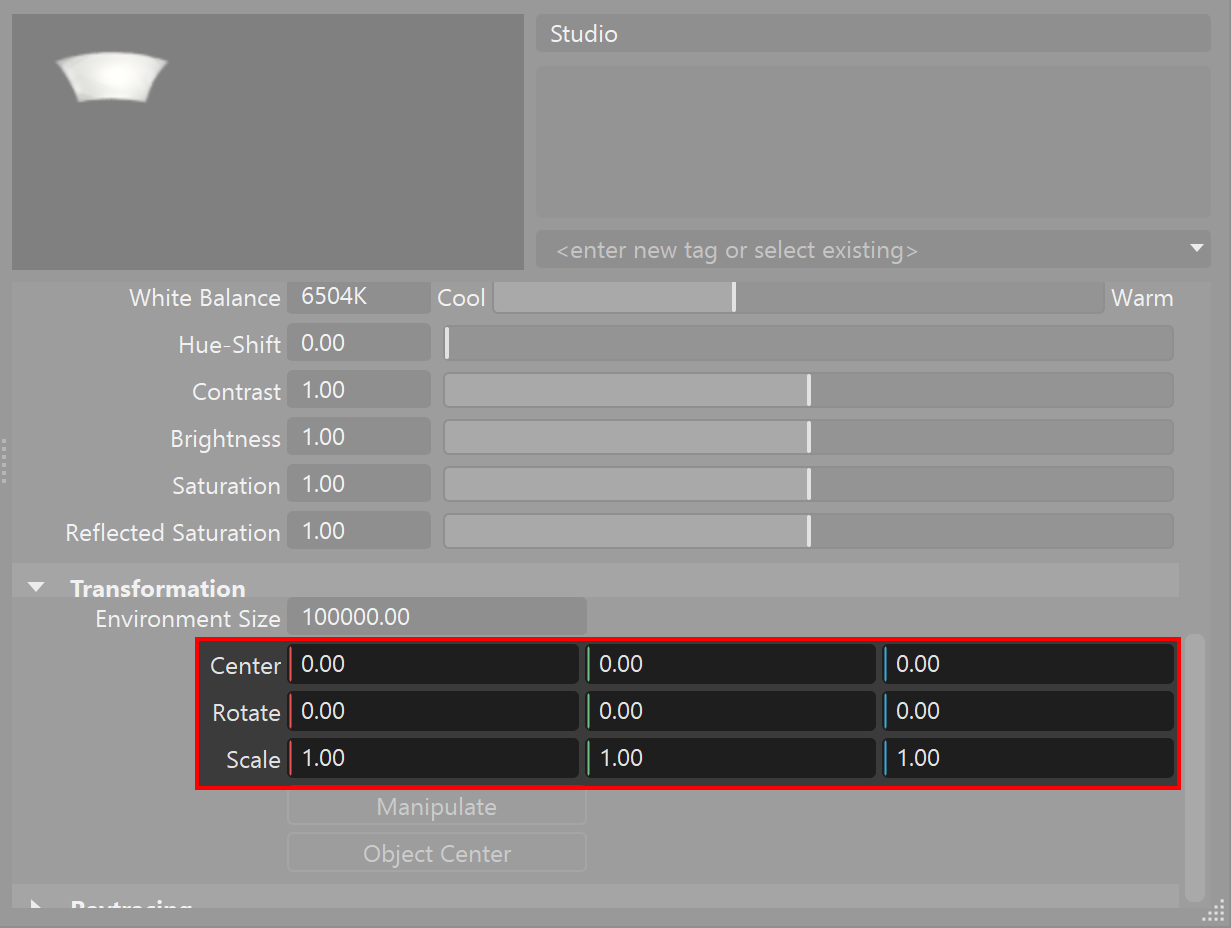
Light orientation settings
Scroll down to the Transformation section of the Environment Material
Set all Rotation and Center values to 0
This ensures accurate LightPaint positioning in both VRED and HDR Light Studio for both HDRI map lights and Area Lights
Scale the Sphere geometry
Scale the Sphere geometry to 100 times larger.
Why: Without this adjustment, small light reflections will shift position when you switch between real-time mode and ray-tracing mode.
How it works:
•Real-time mode assumes an infinite sphere
•Ray-tracing mode uses the actual sphere geometry in your scene
If the Sphere is too small, LightPaint positioning will look incorrect in ray-tracing mode. A larger sphere makes LightPaint more accurate.

Scaling Sphere Geometry
Finding HDR Light Studio controls
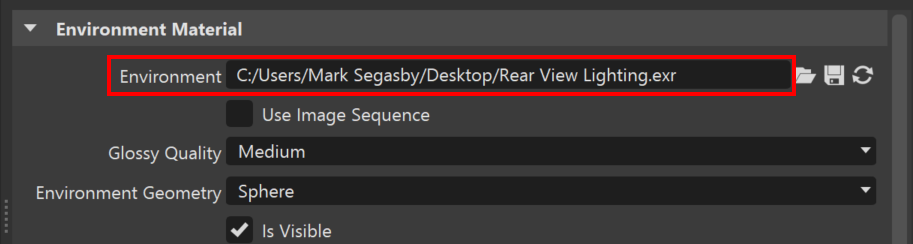
HDR Light Studio is built into VRED. Find the controls in the Material Editor panel on each Environment Material.
Look for the HDR Light Studio section in the Environment Material properties (highlighted below).

HDR Light Studio Controls in VRED
Starting HDR Light Studio
Click the Edit & Load Settings button.
HDR Light Studio will start and control the HDR texture on that Environment Material.
If a popup asks about loading a new interface layout, click Yes to use the latest UI layout.
Please note: A license for HDR Light Studio is now being used as the HDR Light Studio application has started connected with VRED

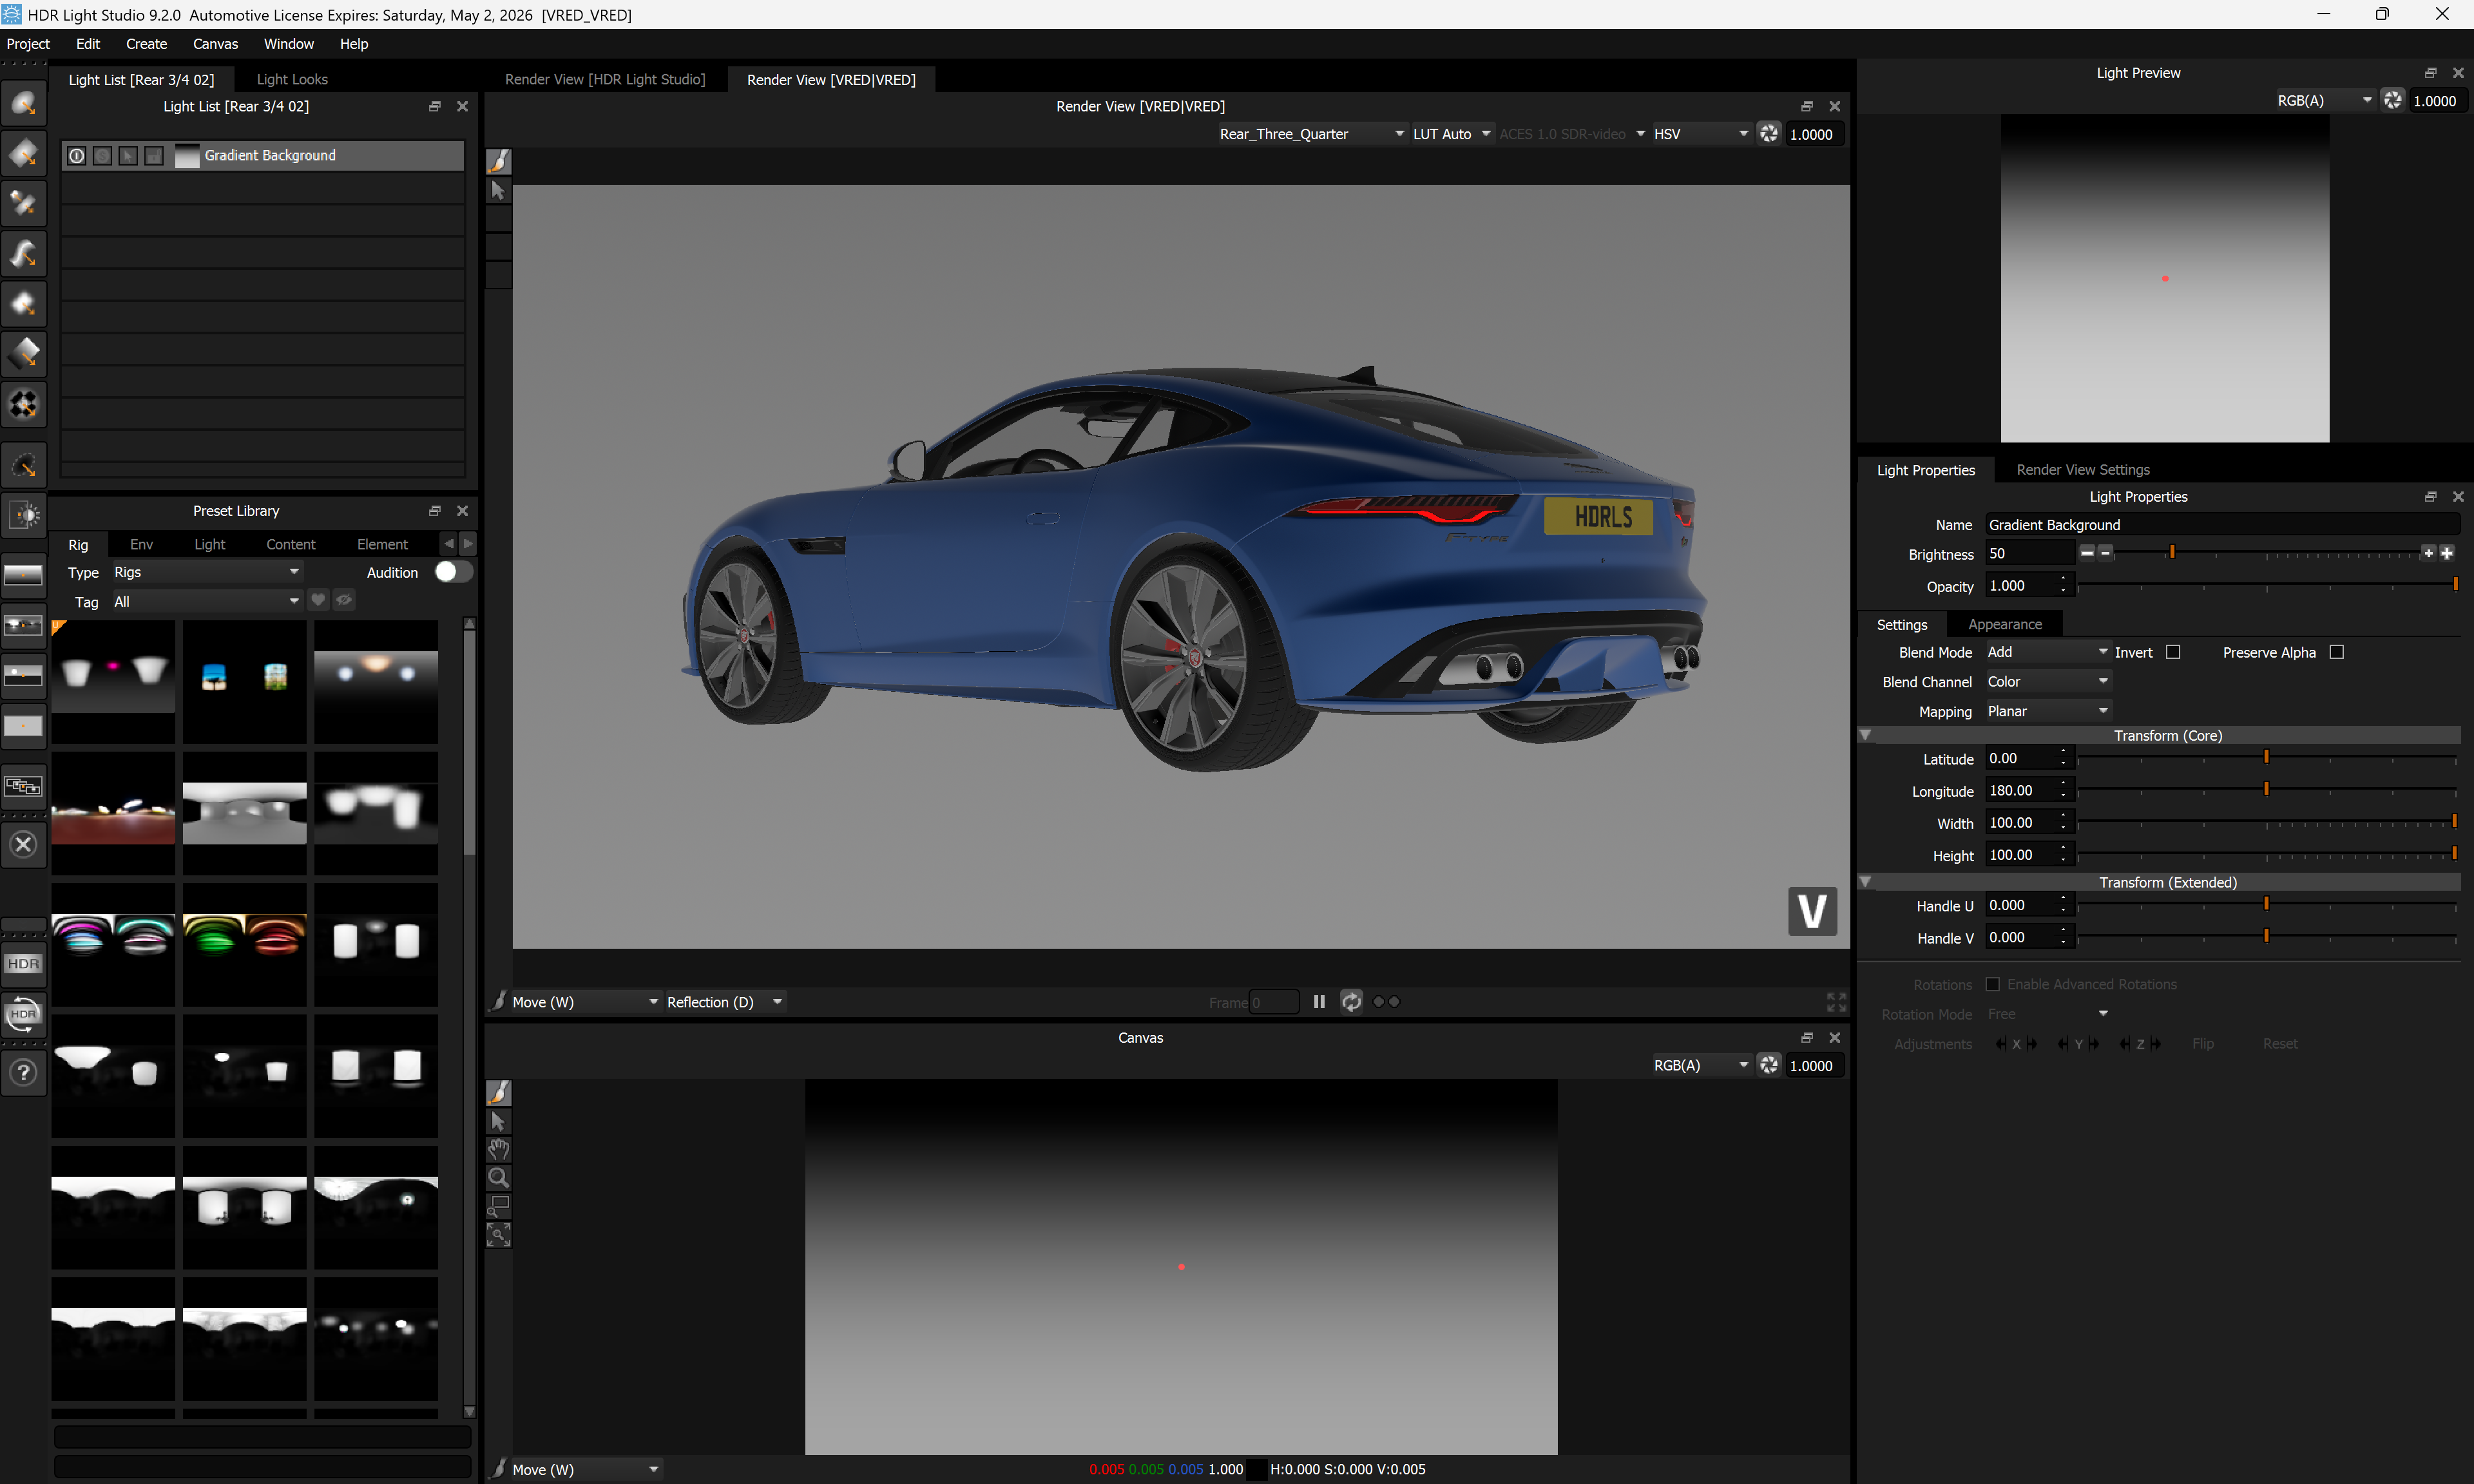
HDR Light Studio app has opened in connection with VRED
Maximize HDR Light Studio to fill your screen. Adjust the interface layout as needed.

Click the Play button on the Render View (VRED/VRED). This streams the VRED viewport image into this panel.
This is a new feature available in HDR Light Studio 9 Drop 2 and higher, and requires an additional plug-in to be installed.
You can now light the shot using all HDR Light Studio features.
When you change the HDR lighting in HDR Light Studio, the environment texture updates automatically in VRED.
Important: Anti-Aliasing mode issue
Problem: In some VRED versions, Anti-Aliasing causes HDRI map updates to go out of sync.
Solution:
Use VRED 2026.2 or later: This issue is fixed
Earlier versions: Avoid updating the lighting in HDR Light Studio with Anti-aliasing on. Turn off Anti-Aliasing while working. Turn it back on when you want to see the final lighting effect.
Low resolution during design
While you work, HDR Light Studio uses a low-resolution HDRI map (646 x 323 pixels by default). This makes updates very fast.
The background may look very pixelated. This is normal - not a problem.
At the end, you will generate the HDR lighting at a much higher resolution.
Increasing live image resolution
To use a higher resolution while working:
Go to Edit > Preferences in HDR Light Studio
Change the Proxy Map Size setting
Note: Larger proxy maps make updates slower.

Live HDRI map seen in background is pixelated and normal during the design process
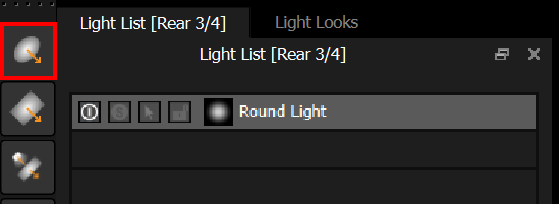
Add a light
Click the Round Light button on the toolbar. This adds a new soft round light to the center of the canvas in HDR Light Studio.
LightPainting light positions in the VRED UI
•Enable the Light Paint checkbox in VRED
•The default method in the drop-down is Reflection Painting - keep this setting

Hold Shift and click on the 3D model in VRED. The light moves in HDR Light Studio to reflect at the clicked location.
Please note: Lighting updates are much faster in real-time view mode (without raytracing). You can even Shift-click and drag across the 3D model to position lights. With raytracing on, lighting updates process more slowly.
In this example below, we clicked on the side of the car. The light moved and now reflects in that spot in VRED.

Please Note: The Environment and Shadow Plane are treated as geometry that can be LightPainted. This could cause unexpected results when using LightPaint and the cursor clicks on these areas of the view.
Please Note: The Rim LightPaint method may become less accurate depending on the environment sphere size and camera lens settings. This is expected behavior - when the background displays only a small section of the HDRI map, precision naturally decreases. You can fine-tune light positions by dragging their handles to slide the light into place.
Please Note: If you use Dome geometry (or any geometry other than Sphere), LightPaint directly in the VRED interface for the most accurate light placement.
In the past, Shift-clicking in the VRED viewport was the only way to use the LightPaint feature. With HDR Light Studio's new streaming view, you now have access to many additional LightPainting options and methods.
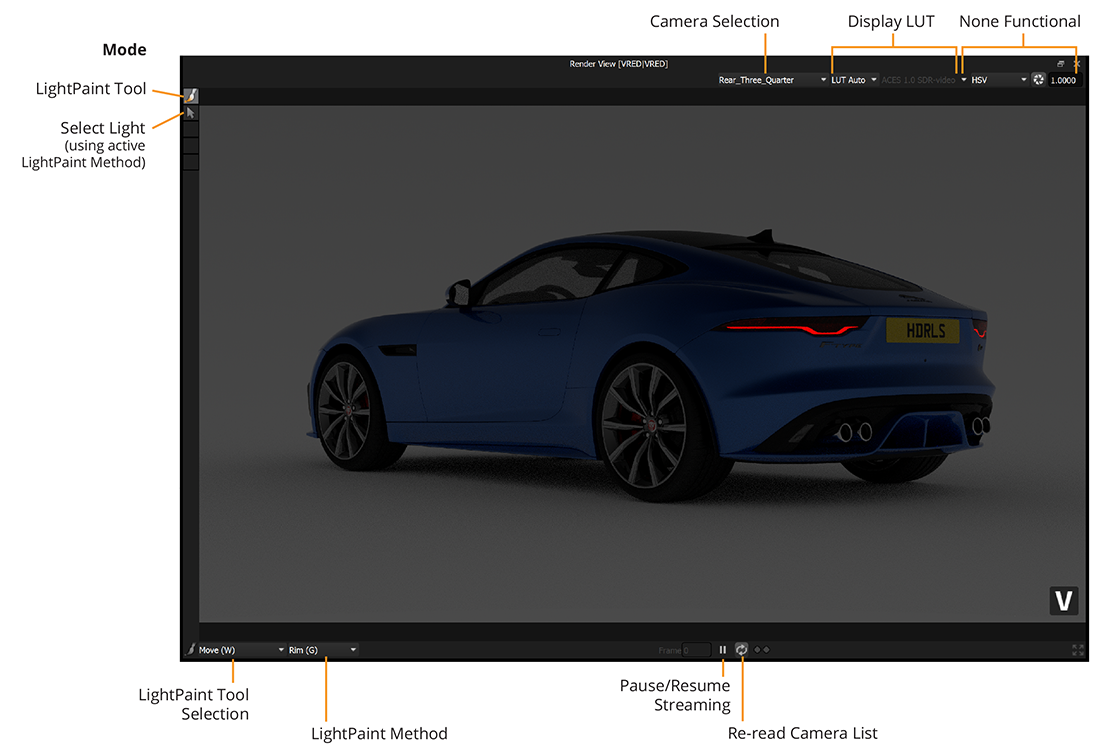
Streaming Render View controls
Below are the Streaming Render View controls.
Game-changing workflow improvement
The new streaming Render View in Version 9 Drop 2 transforms how you work. You can now do everything inside HDR Light Studio - no need to switch between VRED and HDR Light Studio while lighting.
Default view settings
•Active tool: Move LightPaint Tool
•LightPaint Method: Reflection
Selecting lights - Right-click in the view to select lights. This uses the LightPaint Method in reverse.
Why streaming matters
•Work on one display - Everything you need is in HDR Light Studio. Perfect for single-display setups.
•Access all LightPaint features - All LightPaint Methods and Tools are now available for VRED users.
New features for VRED users using this view
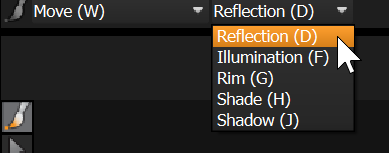
•Reflection
•Illumination
•Rim
•Shade
•Shadow
Click and drag in the view to reposition the selected light.
Please note: For Rim LightPaint mode to work correctly, set your VRED camera to "Field of View Mode: Horizontal" in the camera settings. This setting affects how the Rim calculation works.
Drag and Drop Presets
Drag Presets directly onto the streamed view. Lights are added and positioned using the active LightPaint Method where relevant.
All LightPaint Tools
Change tools using the drop-down or keyboard shortcuts (shortcuts work in the Render View, Canvas, and Scrim Light UI).
Using these tools in the streamed view means less time in the Light Properties panel - a more fluid workflow.
LightPaint Tools (including keyboard shortcuts)

•Move (W) - Reposition light using active LightPaint Method
•Move Relative (Shift+W) - Reposition light using screen space mouse movement
•Smart Dolly (Alt+W) - Change Area Light distance using screen space mouse movement
•Rotate (E) - Rotate light using screen space mouse movement
•Scale (R) - Scale light using screen space mouse movement
•Free Scale (Shift+R) - Non proportionally scale light using screen space mouse movement
•Brightness (Q) - Adjust light brightness using screen space mouse movement
•Spread (T) - Adjust Area Light spread using screen space mouse movement
•Handle (Y) - Slide handle position on light using screen space mouse movement
Contextual LightPaint Tools (no shortcuts for these)
These appear in the drop-down when relevant
•Scrim Light Position - Positions the light within the Scrim Light content
•Position Sun - Positions the Sun in Sky content by clicking on the 3D model
•Add Lumi-Curve Point - Place bezier curve points on the 3D model in Lumi-Curve content
•Motion Blur - Position the motion blur direction in the Motion Blur and Motion Blur Advanced filters
•Reflection Axis - Position the reflection axis in the Reflection filter
Please note: Most of these LightPaint tools and keyboard shortcuts also work on the Canvas too.
Here are some examples of the contextual LightPaint tools
Motion Blur
LightPainting the Motion Blur Direction using:
LightPaint Tool: Motion Blur
LightPaint Method: Illumination
By clicking on the number plate, the direction of travel is placed normal to the number plate surface directly behind the car.

LightPaint: Motion Blur
Scrim Light Position
LightPainting the Light position within the Scrim Light content type - placing the hotspot within the light:
LightPaint Tool: Scrim Light Position
LightPaint Method: Reflection
By clicking on the car, the light in the scrim light is moved to reflect in the clicked location.

LightPaint Scrim Light Position
Position Sun
LightPainting the Sun position within the sky on the procedural sky content:
LightPaint Tool: Position Sun
LightPaint Method: Reflection
By clicking on the car, the sun in moved in the sky to reflect where clicked.
In the example below, the lower half is a photographic HDRI map and the top half is a the procedural sky.

LightPaint Sun Position
Final lighting design
The example below shows a completed HDR lighting design.

Generate the final HDRI map
Now create the high-resolution HDRI map file that VRED will use.
Click the HDR button on the toolbar
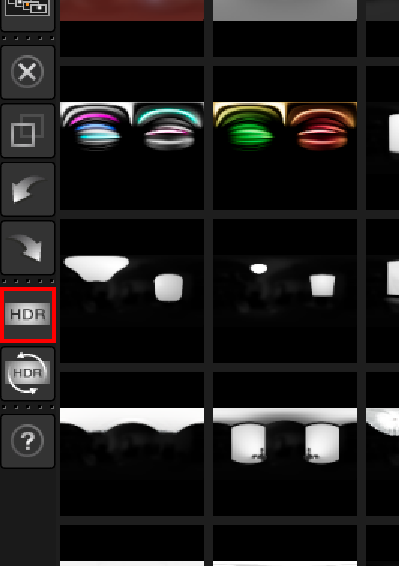
This will open the Production Render panel.
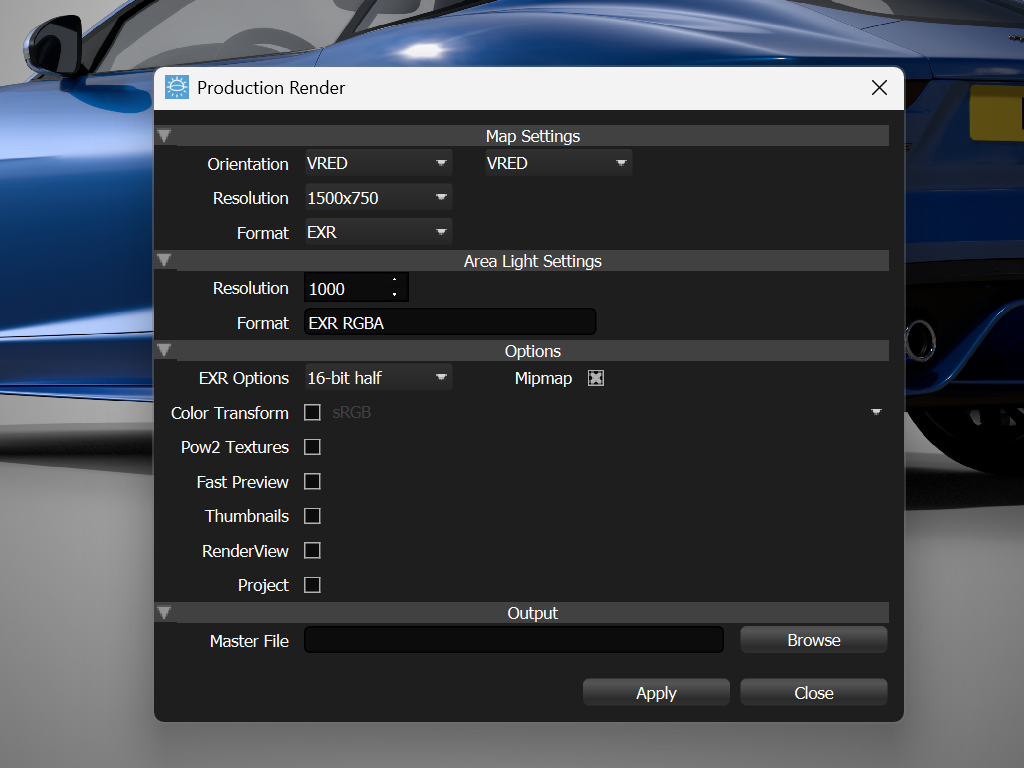
In the Map Settings section, select the HDRI map resolution from the Resolution drop-down
Click Browse to choose a file location and provide a file name
Click Save

Click Render button to generate the final HDRI map file

The HDRI map generates. A progress bar shows the progress.
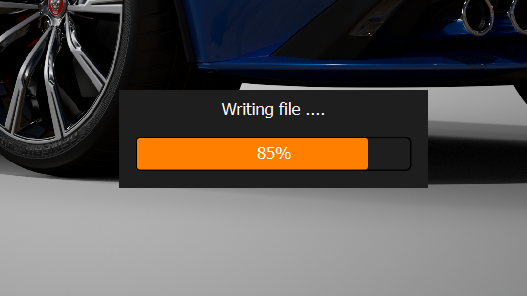
When complete, the final HDR file is saved and VRED updates to use it.
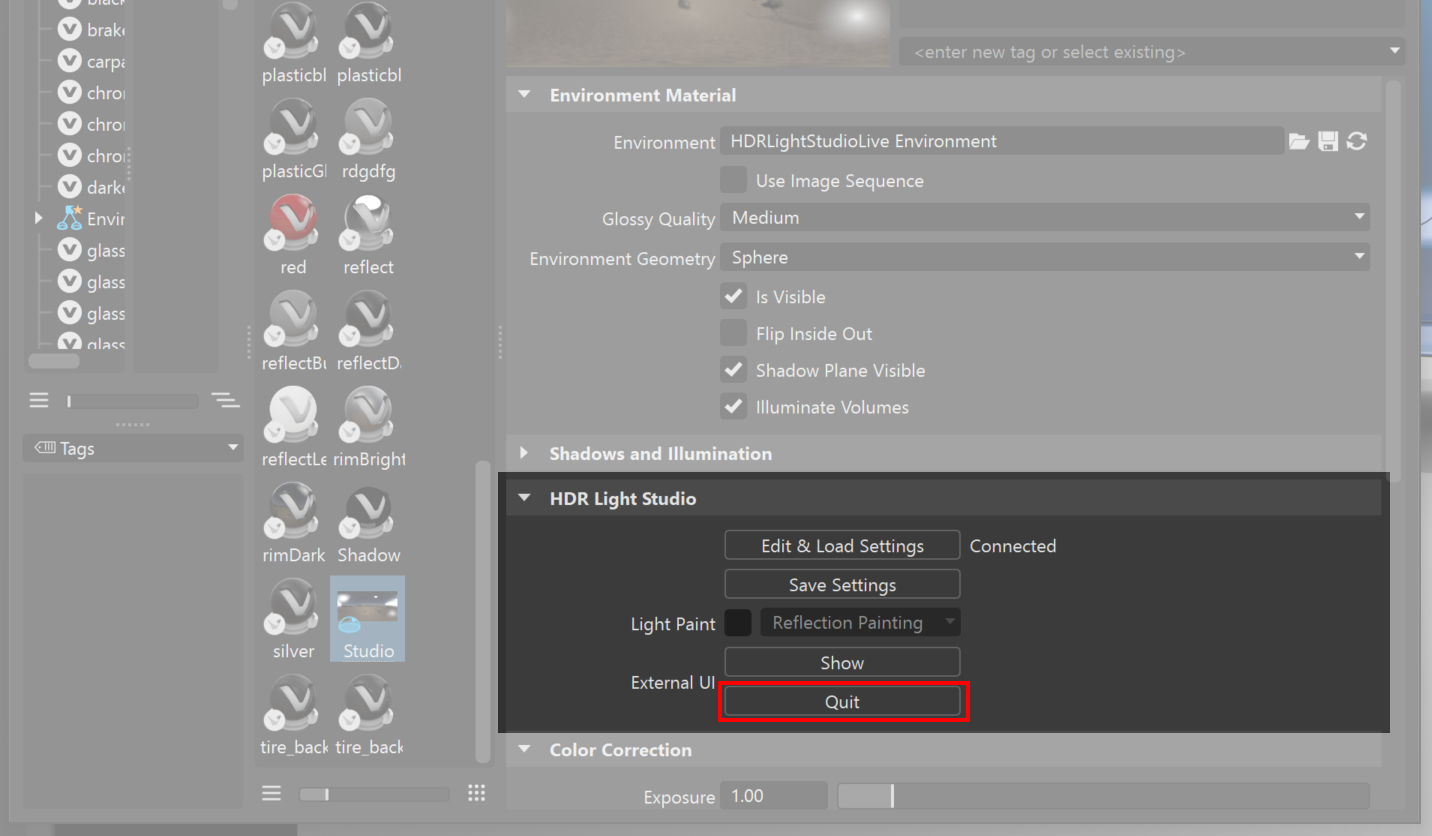
Closing HDR Light Studio
•Minimize the HDR Light Studio interface
•Click Quit in the Environment Material's HDR Light Studio section
This closes HDR Light Studio.
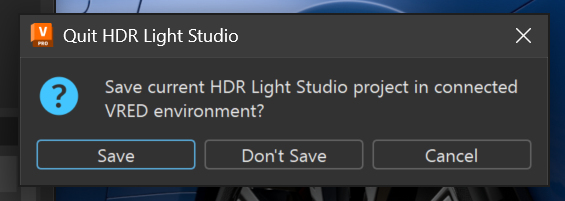
When asked to save the HDR Light Studio project, click Save
This embeds the project into your VRED scene so you can edit it later.
HDR Light Studio is now closed.
You're done!
You've lit your VRED shot using HDR Light Studio. Your scene now uses the high-resolution HDRI map to light it.
Next time you edit
The HDR Light Studio project is saved in your VRED scene. To edit the lighting again:
•Click Edit & Load Settings
•HDR Light Studio will load your saved project
•VRED will switch to the low-resolution live texture (instead of the saved file)
Please note: A license for HDR Light Studio is no longer being used by this user now that the HDR Light Studio application has been closed.
Reconnecting HDR Light Studio after changing VRED projects
Problem: If HDR Light Studio is open when you start a new project or load a different project in VRED, the connection breaks. HDR Light Studio stays open showing the previous project's lights.
Solution: Click Edit & Load Settings to reconnect HDR Light Studio.
Using HDR Light Studio with Multiple Environments in VRED
VRED scenes can contain multiple environments that you can switch between. HDR Light Studio can create and edit lighting for each environment separately—useful for testing different lighting styles, locations, or camera-specific designs. Each environment stores its own HDRI map and area lights. When you switch environments in VRED, only that environment's area lights are visible and active.
Important Workflow Steps:
•Before switching environments: Click 'Save Settings' in HDR Light Studio to save your current lighting design to the active environment. Without this, your changes will be lost.
•After switching environments: Click 'Edit & Load Settings' to connect HDR Light Studio to the new active environment. This doesn't happen automatically—skipping this step means HDR Light Studio will continue editing your previous environment.
