HDR Light Studio's interface and features can be configured in many different ways to work with Cinema 4D.
This gallery provides a wide range of interface layouts that you can use, with each having their own benefits. It's very important to make sure you set up HDR Light Studio to create an efficient workflow. Looking at these example layouts should stimulate you to find your own perfect way to use HDR Light Studio.
Page Content
Interface Layouts for 2 Displays
Interface Layouts for 1 Display
To learn about rearranging the HDR Light Studio interface, see Customizing the Interface
Interface Layouts for 2 Displays
For users with lower power computers
This layout can be used by those able to do viewport rendering in Cinema 4D - for example Redshift and the Cinema 4D physical renderer.
In HDR Light Studio, select the default standalone UI layout, then close the Render View panel. Use the LightPaint buttons in Cinema 4D to move your lights by clicking on the rendered viewport.
This is a very efficient workflow, as the rendered view does not need to be shared with HDR Light Studio and the model is not loaded and rendered by HDR Light Studio.
With large scenes however, the LightPaint calculation can be slow, causing a delay between clicking on the model and the light moving.

Left: Cinema 4D Right: HDR Light Studio
For users with lower power computers
This layout can be used by those unable to do viewport rendering in Cinema 4D - for example Octane and V-Ray.
In HDR Light Studio, select the default standalone UI layout, then close the Render View panel. Use the LightPaint buttons in Cinema 4D to move your lights by clicking on the viewport.
This is a very efficient workflow, as the rendered view does not need to be shared with HDR Light Studio and the model is not loaded and rendered by HDR Light Studio.
With large scenes however, the LightPaint calculation can be slow, causing a delay between clicking on the model and the light moving.

Left: Cinema 4D Right: HDR Light Studio
For all users
In HDR Light Studio, select the default standalone UI layout.
Click and drag on the scene in HDR Light Studio's Render View to position the lights. See your final lighting update the interactive render inside Cinema 4D - either in the viewport or the Render View for your renderer.
You can zoom and pan around the Render View in HDR Light Studio to light details, whilst seeing the whole render in Cinema 4D.
In this layout, 2 renderers are running at the same time. So ensure your renderer is using the GPU or not using all CPU threads, leaving some CPU resources for HDR Light Studio and its renderer.

Left: Cinema 4D Right: HDR Light Studio
This layout can be used by those using Arnold, Redshift and Octane only.
In HDR Light Studio, select the default standalone UI layout, then swap the Render View to show the Render View connected to Cinema 4D.
All of your lighting can be done inside the HDR Light Studio interface directly onto the Cinema 4D Render.

Left: Cinema 4D Right: HDR Light Studio
For users with powerful computers using Arnold, Redshift and Octane
In HDR Light Studio, select the default standalone UI layout, then show and undock the Render View that can show the Cinema 4D render and drag it onto the display where Cinema 4D is.
You can paint your lights on either Render View, perhaps using HDR Light Studio's own renderer for zooming and panning into the shot to place lights on smaller details.
Make sure the resolution of the Render coming from Cinema 4D into HDR Light Studio is not higher than needed.
In this layout, 2 renderers are running at the same time. So ensure your renderer is using the GPU or not using all CPU threads, leaving some CPU resources for HDR Light Studio and its renderer.

Left: Cinema 4D with HDR Light Studio Render View on top Right: HDR Light Studio
Interface Layouts for 1 Display
For users with lower power computers
This layout can be used by those able to do viewport rendering in Cinema 4D - for example Redshift and the Cinema 4D physical renderer.
In HDR Light Studio, reorganize your interface layout to look like the layout below. No HDR Light Studio Render Views are needed.
Turn on the 'Always On Top' setting in the Window menu. Now you can use the LightPaint feature inside the Cinema 4D rendered viewport if you wanted and HDR Light Studio will not be hidden by Cinema 4D. The LightPaint buttons from the HDR Light Studio connection are showing beneath the rendered viewport.
This is a very efficient workflow, as the rendered view does not need to be shared with HDR Light Studio and the model is not loaded and rendered by HDR Light Studio.
With large scenes however, the LightPaint calculation can be slow, causing a delay between clicking on the model and the light moving.
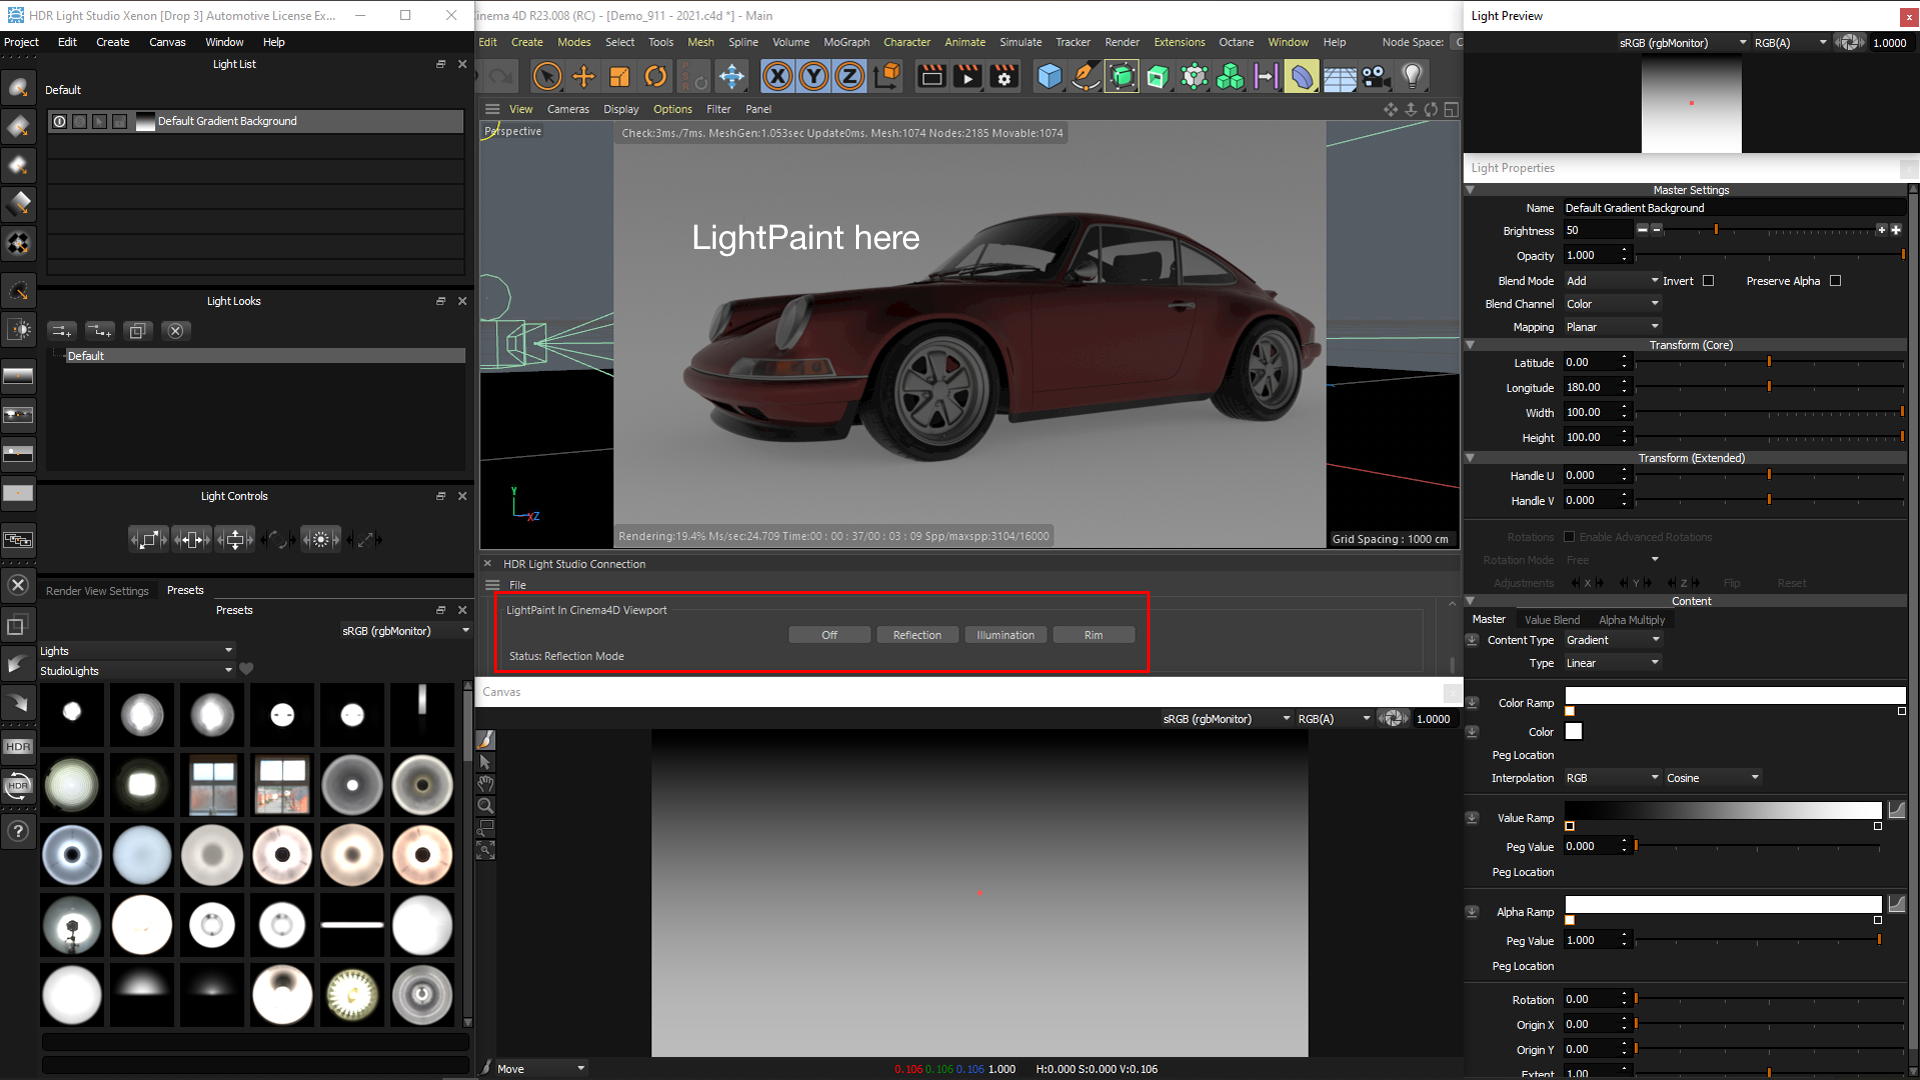
HDR Light Studio in front and arranged around the Cinema 4D viewport
For users with lower power computers
This layout can be used by those unable to do viewport rendering in Cinema 4D - for example Octane and V-Ray.
In HDR Light Studio, reorganize your interface layout to look like the layout below. No HDR Light Studio Render Views are needed.
Turn on the 'Always On Top' setting in the Window menu. Now you can use the LightPaint feature inside the Cinema 4D rendered viewport if you wanted and HDR Light Studio will not be hidden by Cinema 4D.
This is a very efficient workflow, as the rendered view does not need to be shared with HDR Light Studio and the model is not loaded and rendered by HDR Light Studio.
With large scenes however, the LightPaint calculation can be slow, causing a delay between clicking on the model and the light moving.
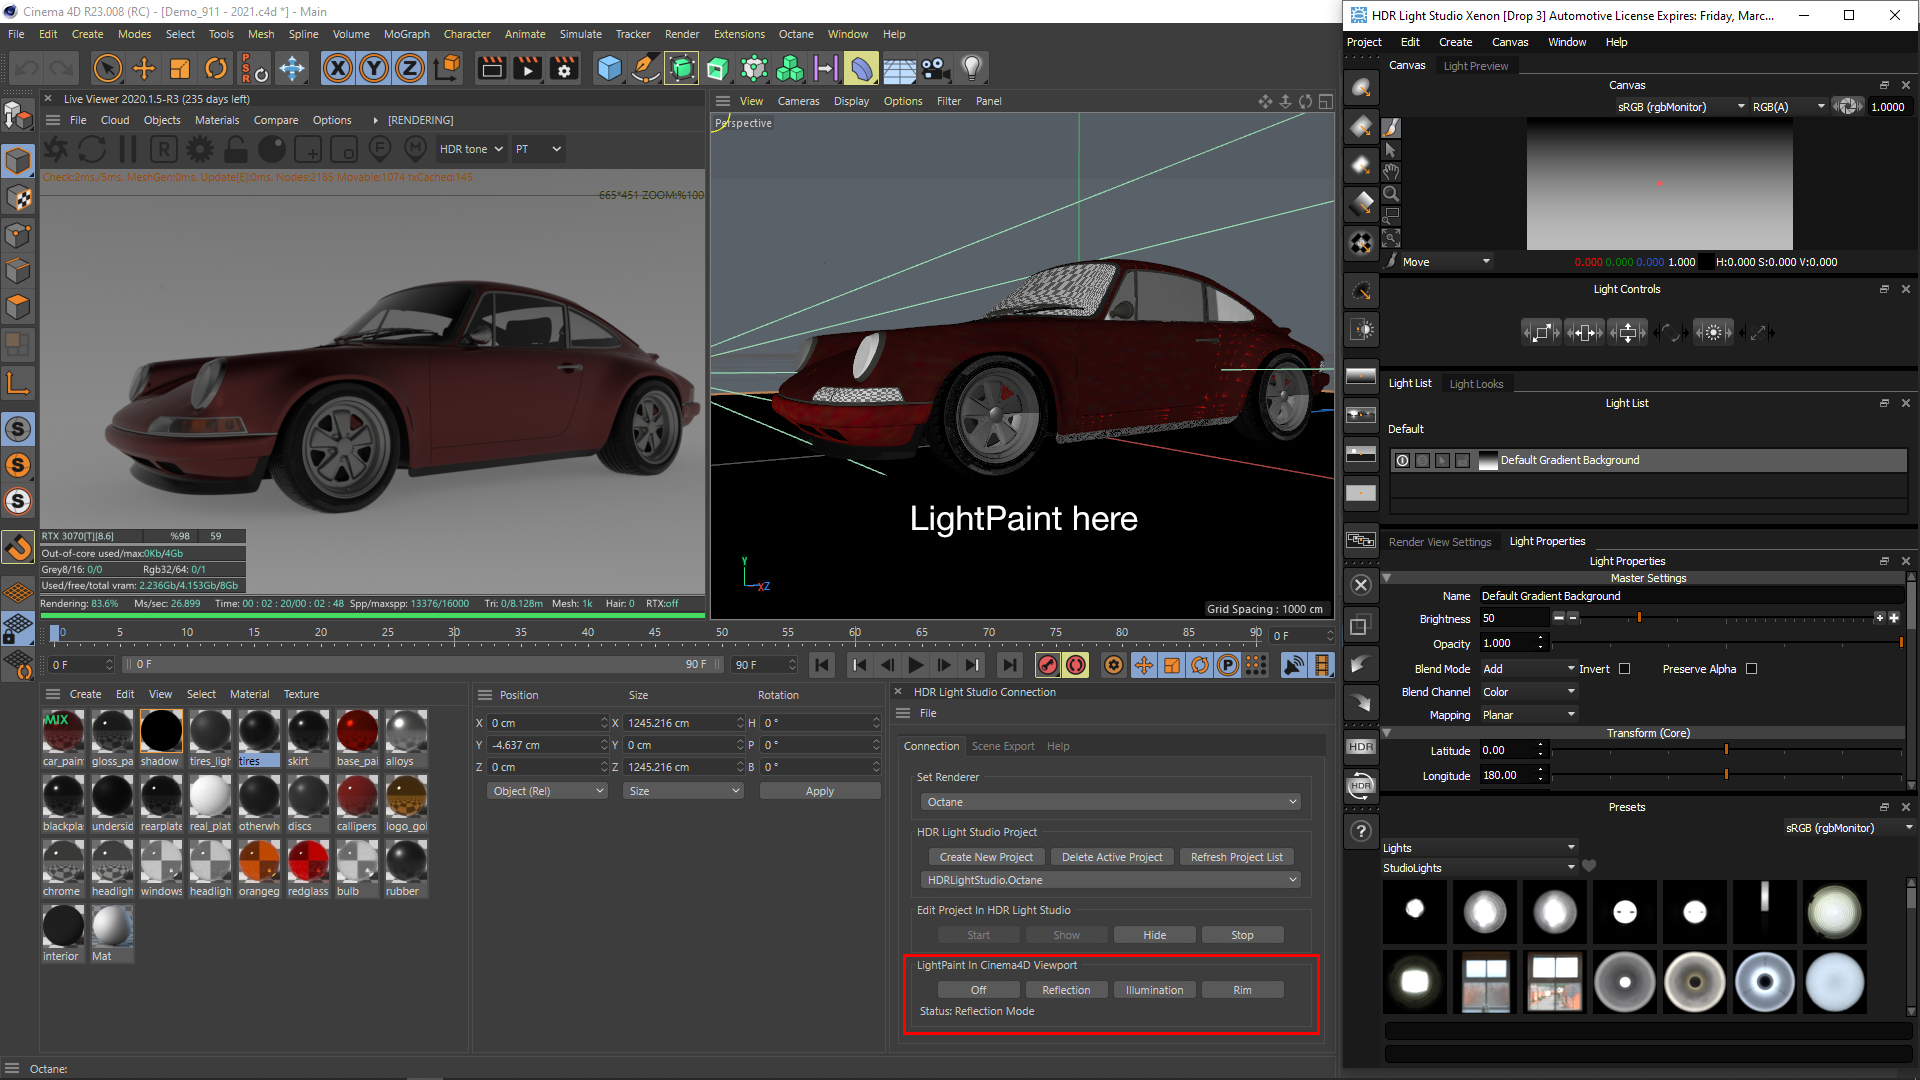
HDR Light Studio down the right side, in front of Cinema 4D
For all users
In HDR Light Studio, reorganize your interface layout to look like the layout below. With just the internal HDR Light Studio Render View.
Click and drag on the scene in HDR Light Studio's Render View to position the lights. See your final lighting update the interactive render inside Cinema 4D - either in the viewport or the Render View for your renderer.
You can zoom and pan around the Render View in HDR Light Studio to light details, whilst seeing the whole render in Cinema 4D behind.
In this layout, 2 renderers are running at the same time. So ensure your renderer is using the GPU or not using all CPU threads, leaving some CPU resources for HDR Light Studio and its renderer.
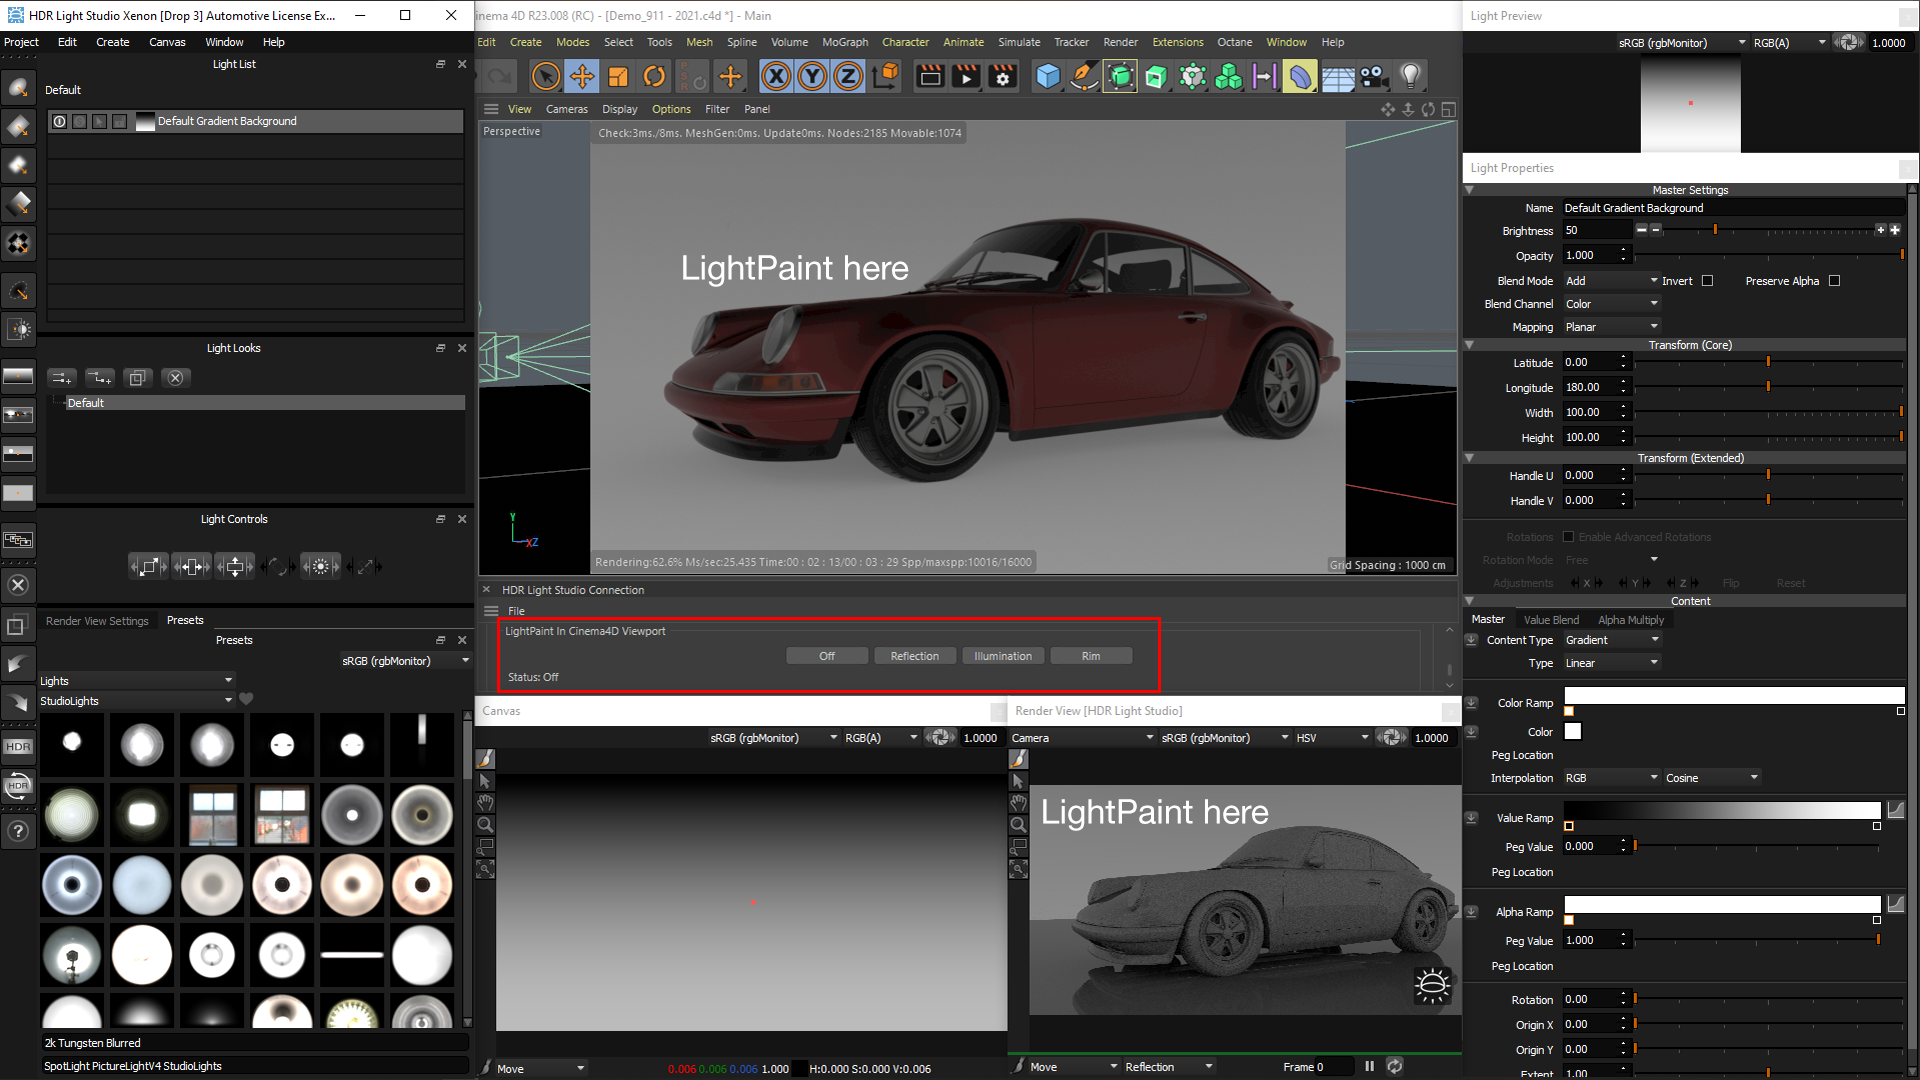
HDR Light Studio in front and arranged around the Cinema 4D viewport
This layout can be used by those using Arnold, Redshift and Octane only.
In HDR Light Studio, select the default standalone UI layout, then swap the Render View to show the Render View connected to Cinema 4D.
All of your lighting can be done inside the HDR Light Studio interface directly onto the Cinema 4D Render.
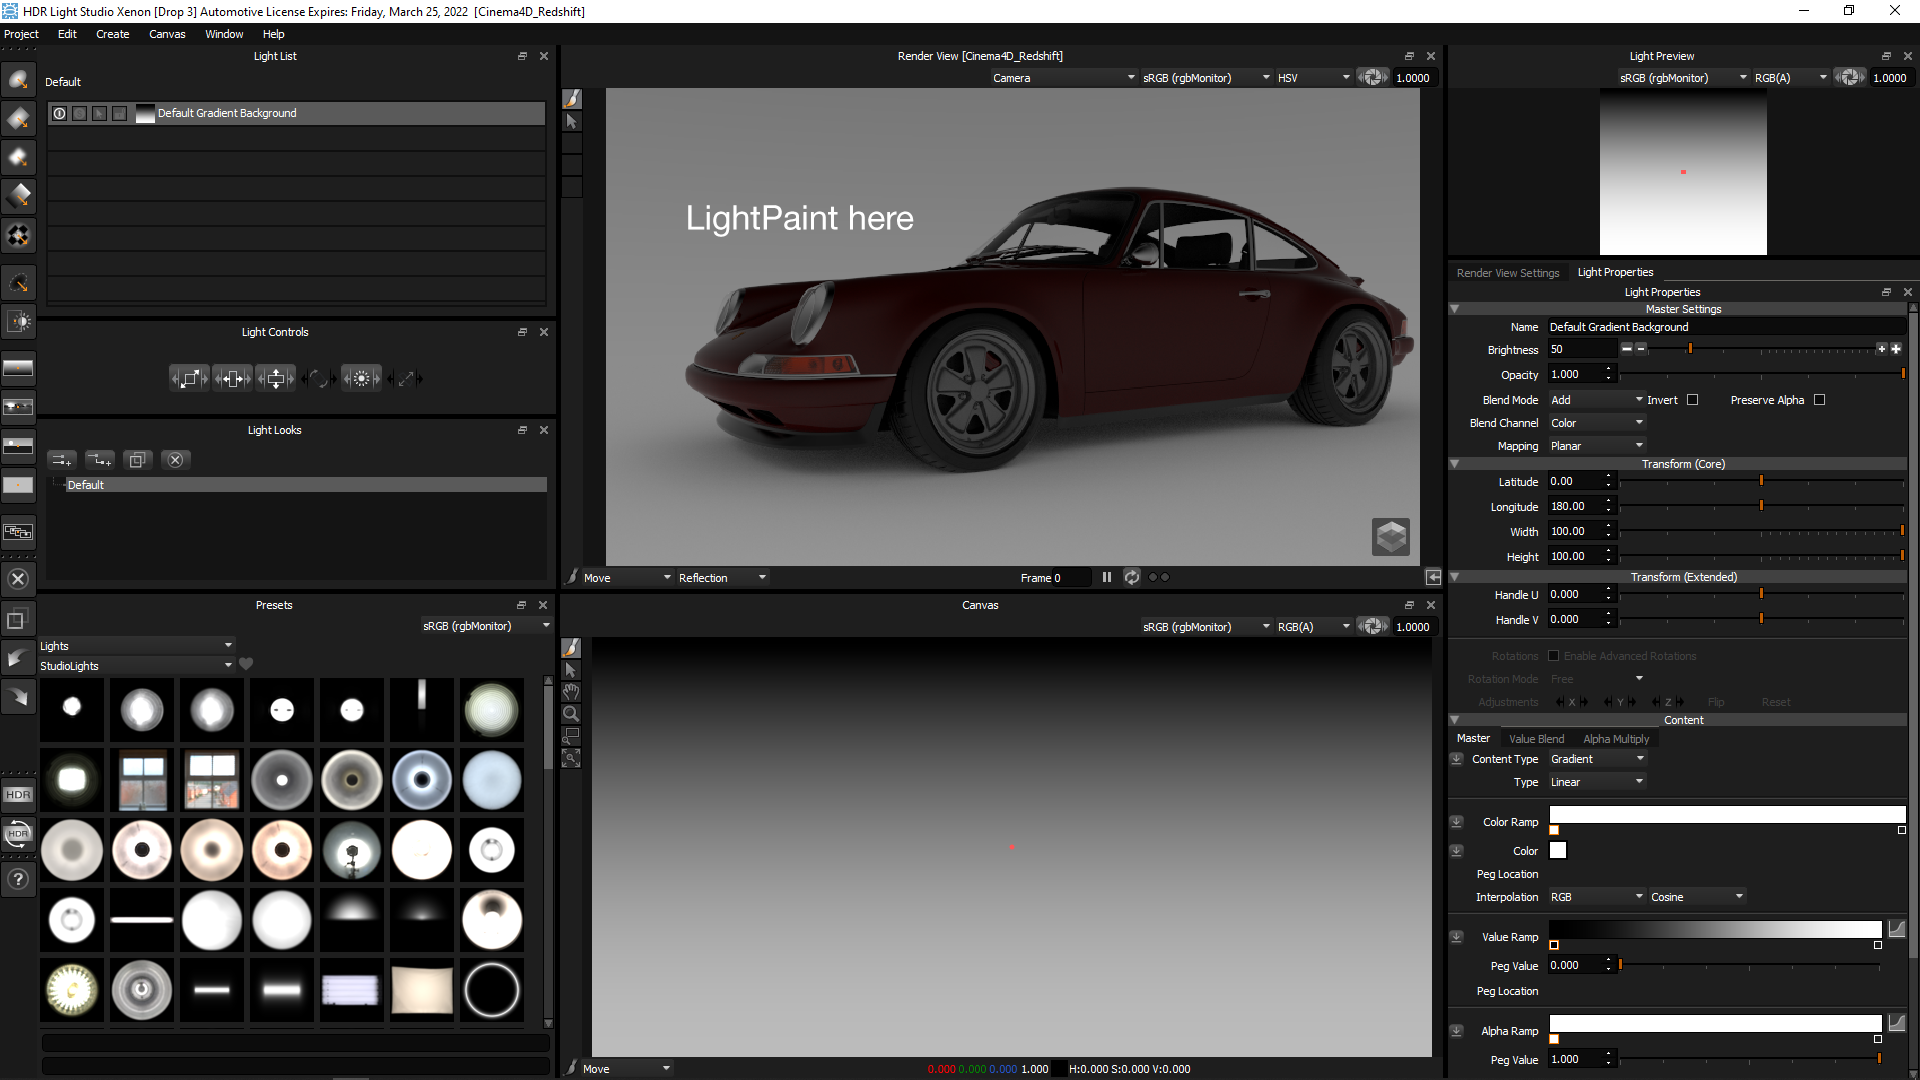
HDR Light Studio only (Cinema 4D is running and covered by HDR Light Studio)
For users with powerful computers using Arnold, Redshift and Octane
In HDR Light Studio, select the default Cinema 4D UI layout.
You can paint your lights on either Render View, perhaps using HDR Light Studio's own renderer for zooming and panning into the shot to place lights on smaller details.
Make sure the resolution of the Render coming from Cinema 4D into HDR Light Studio is not higher than needed.
In this layout, 2 renderers are running at the same time. So ensure your renderer is using the GPU or not using all CPU threads, leaving some CPU resources for HDR Light Studio and its renderer.
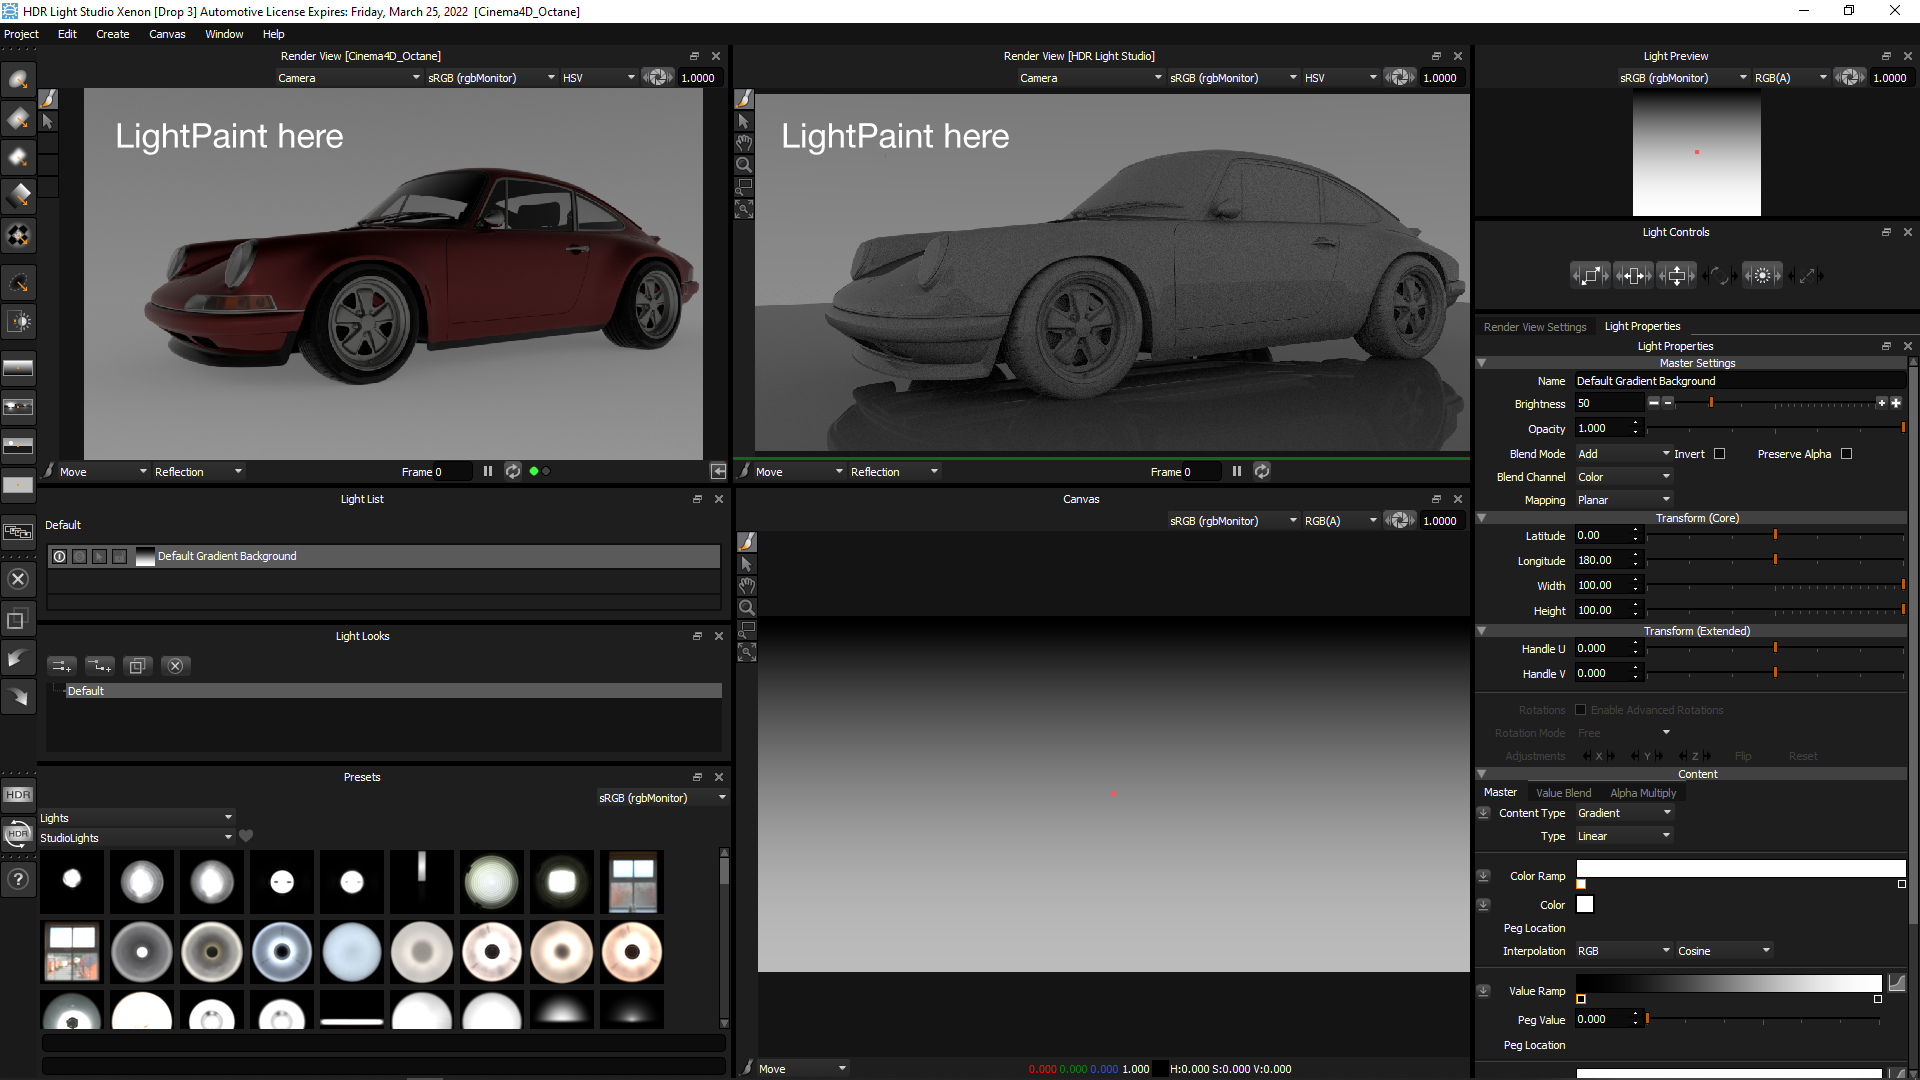
HDR Light Studio only (Cinema 4D is running and covered by HDR Light Studio)
