New in HDR Light Studio - 8 Drop 2
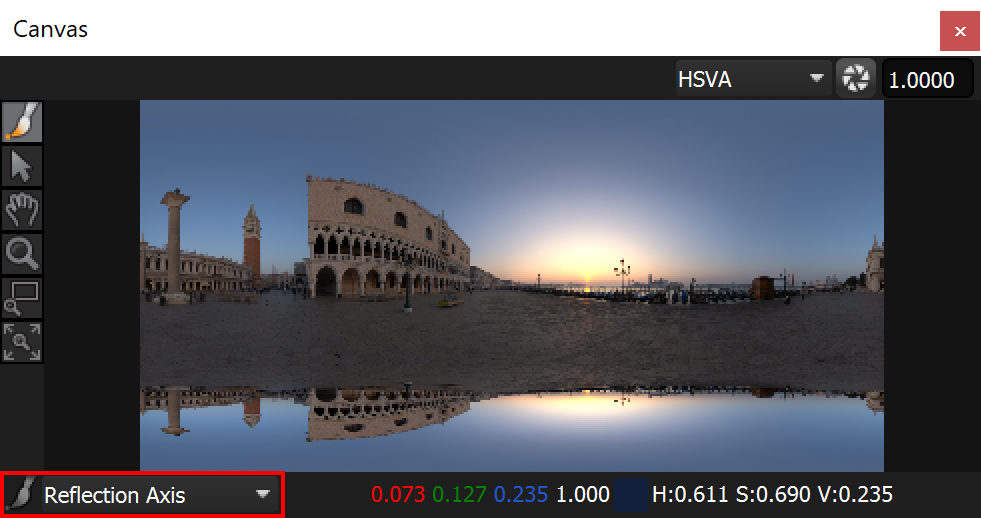
The Reflection filter is used to mirror the image within a composite across a vertical or horizontal axis.
Type
Wrap
This mode allows mirroring a HDRI map across an axis, taking into account the continuity of the image over the seam, between the left and right edges.
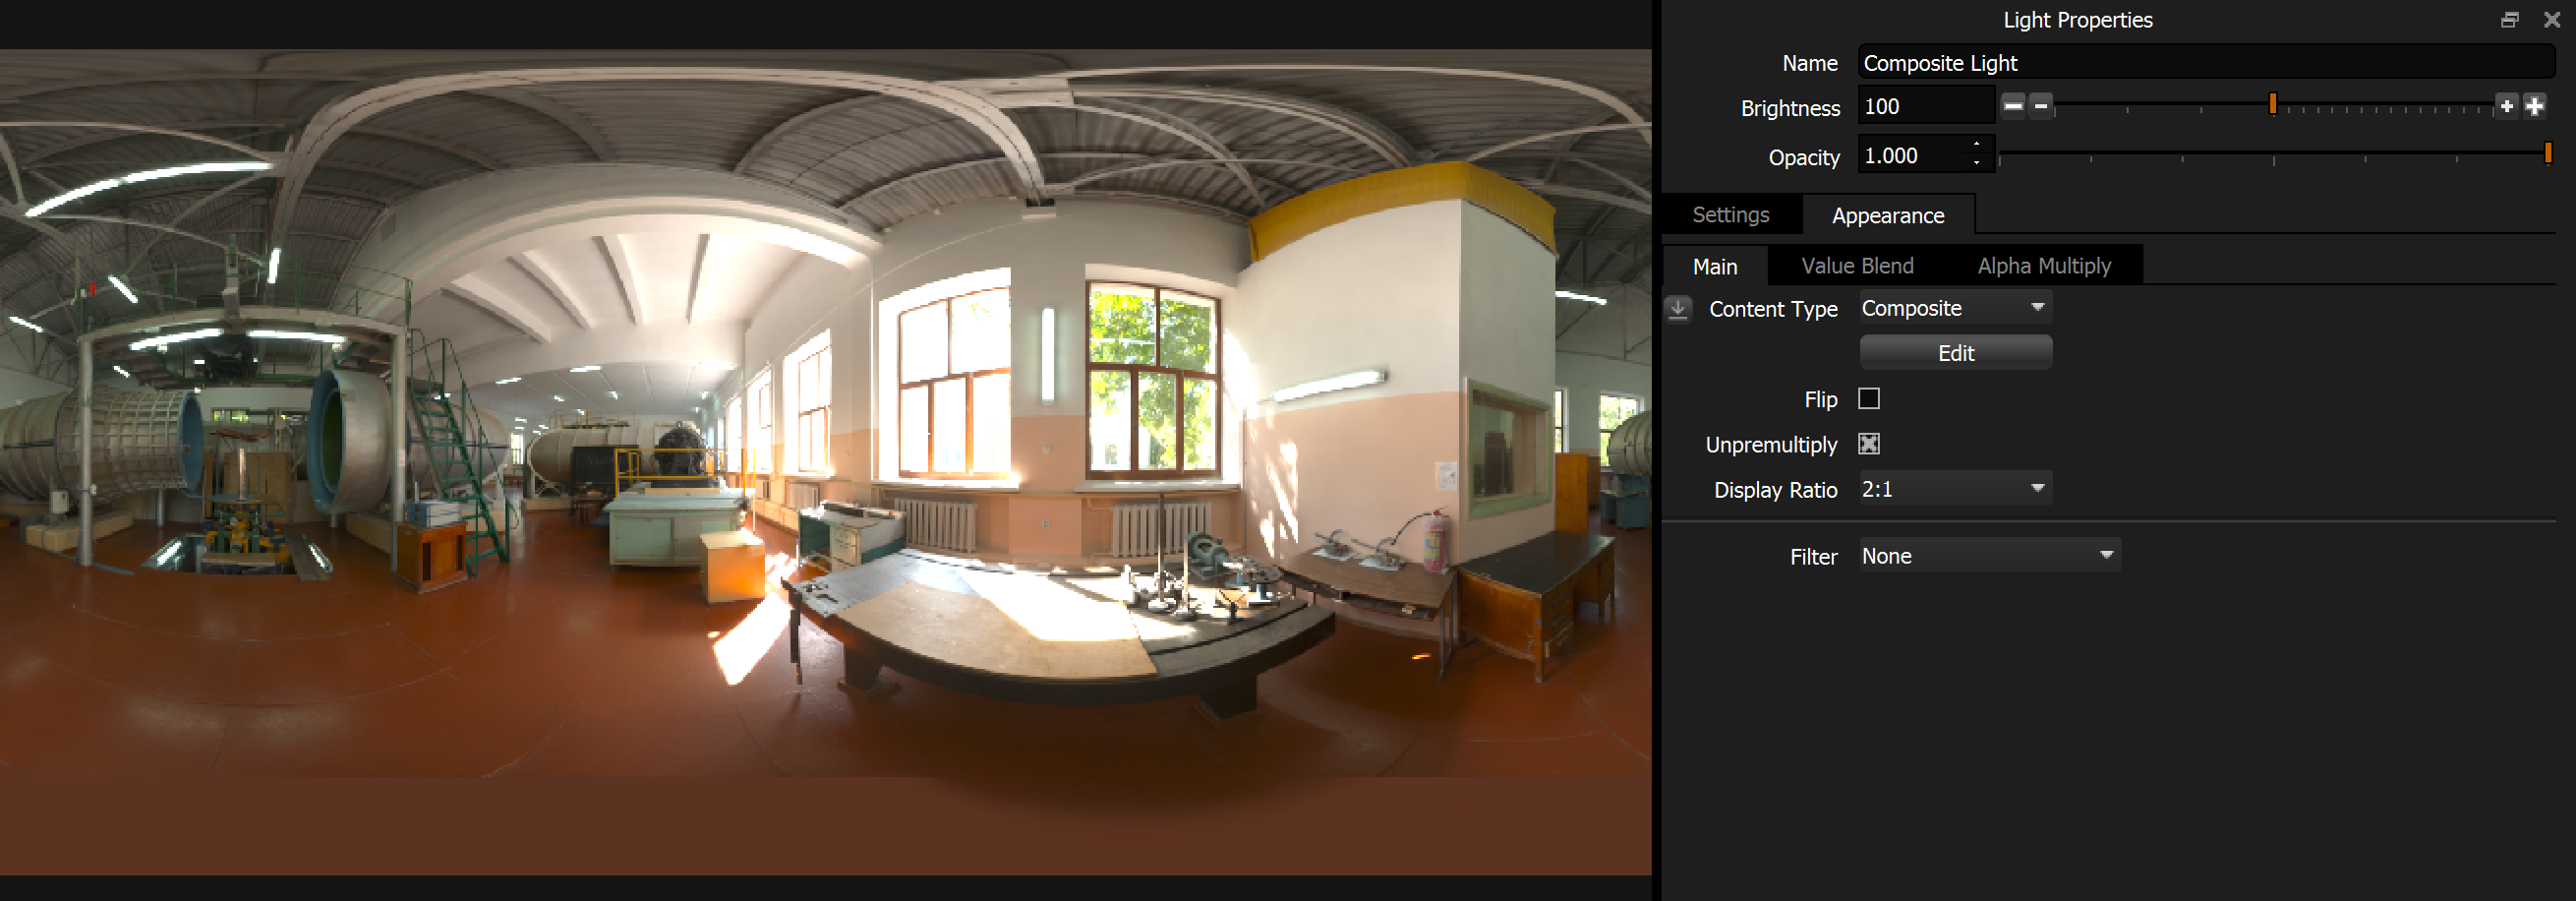
Original HDRI map with no reflection filter.
Dotted lines are not part of the interface and are added to help explain the feature.
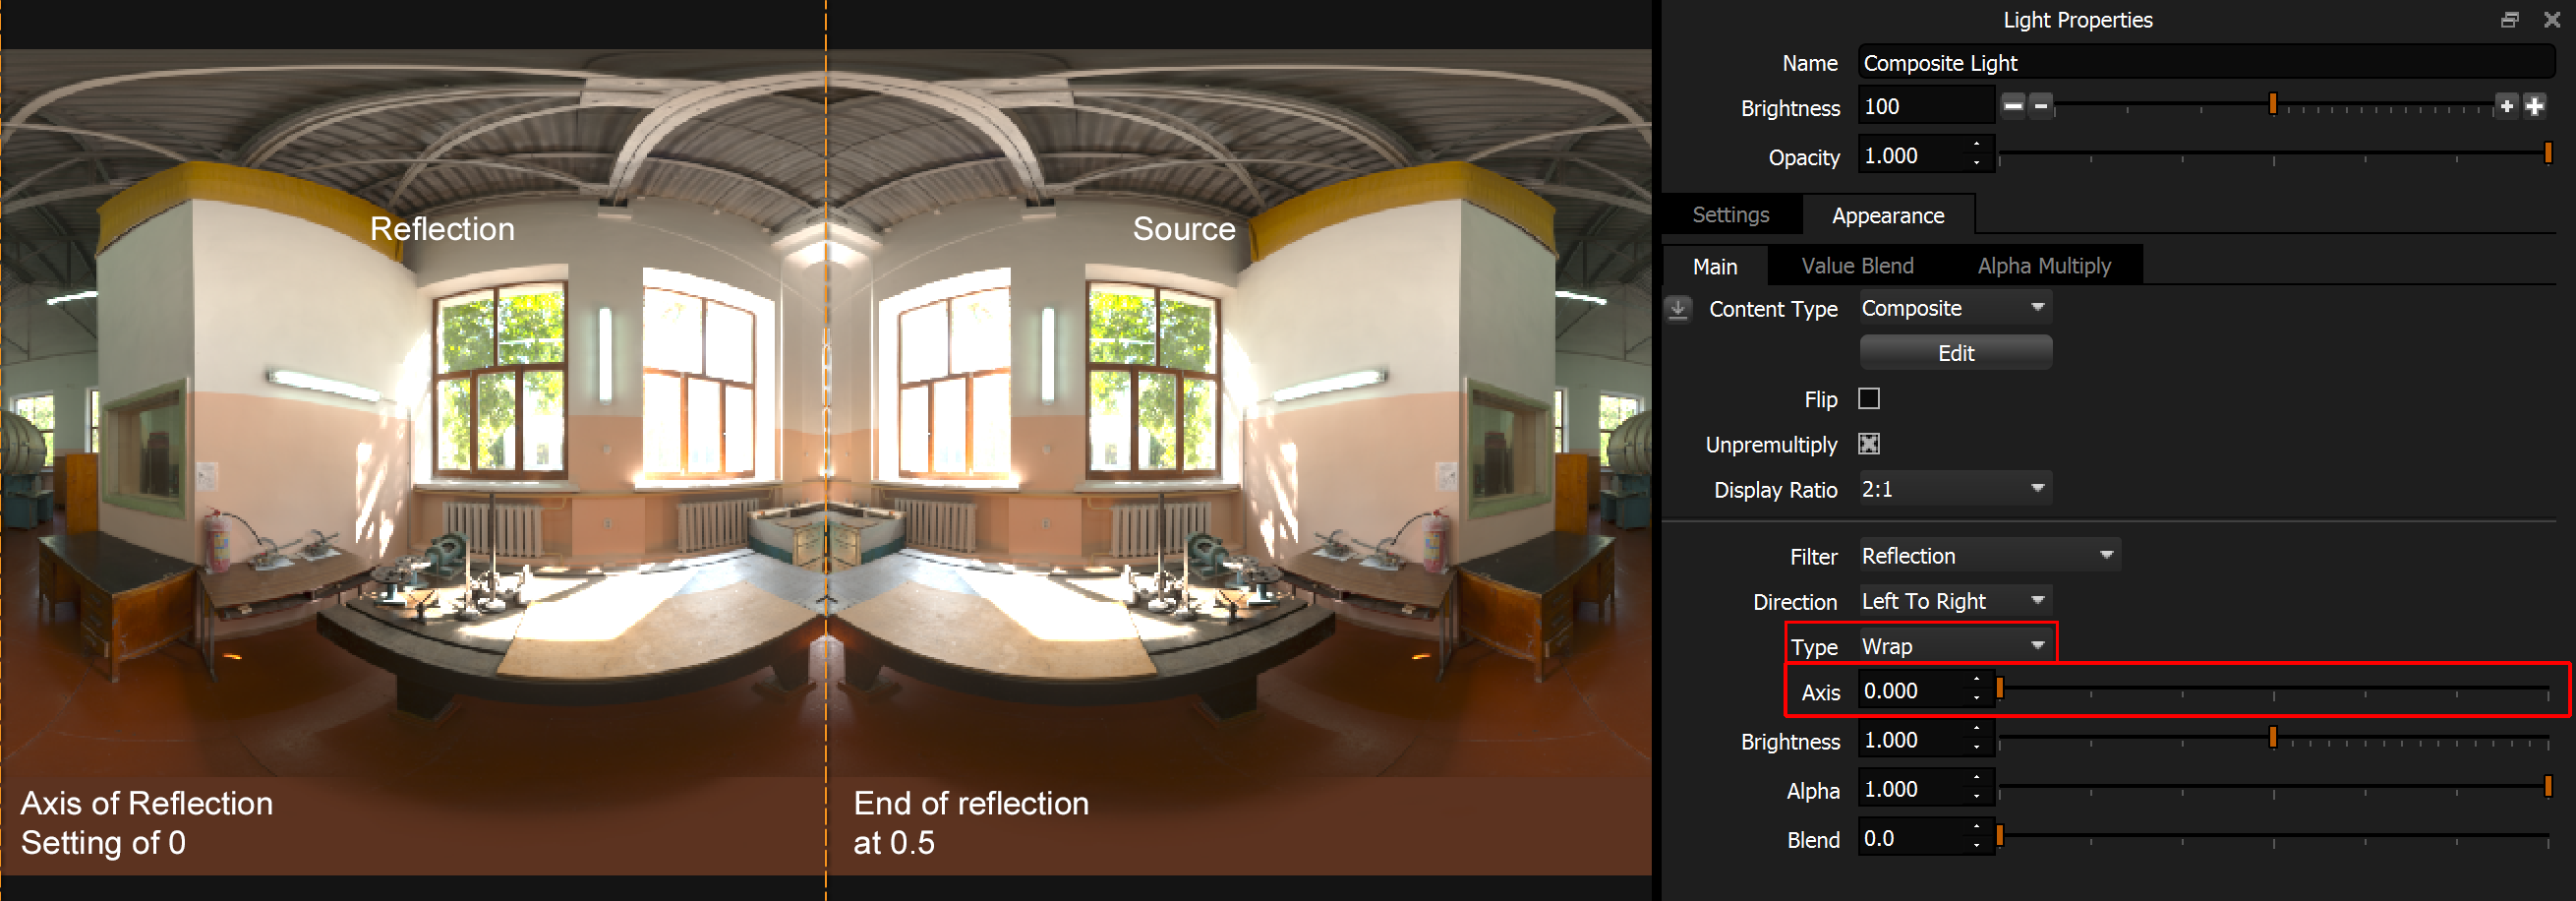
Reflection is on with type Wrap. The reflection setting is Left to Right, so image content on the left of the axis set at 0 is reflected to the right of it. Because of the wrap setting, image to the left of the axis is actually coming from the right of the HDRI map, because the image is treated as one continuous image wrapping from the left edge over to the right edge. So strangely, in this case, the left side of the axis is coming from the right side of the HDRI map. Wrap mode is therefore the only mode you can use for mirroring HDRI maps and whole lighting designs. This is why it's the default mode, as we believe this will be the most common use for reflection.
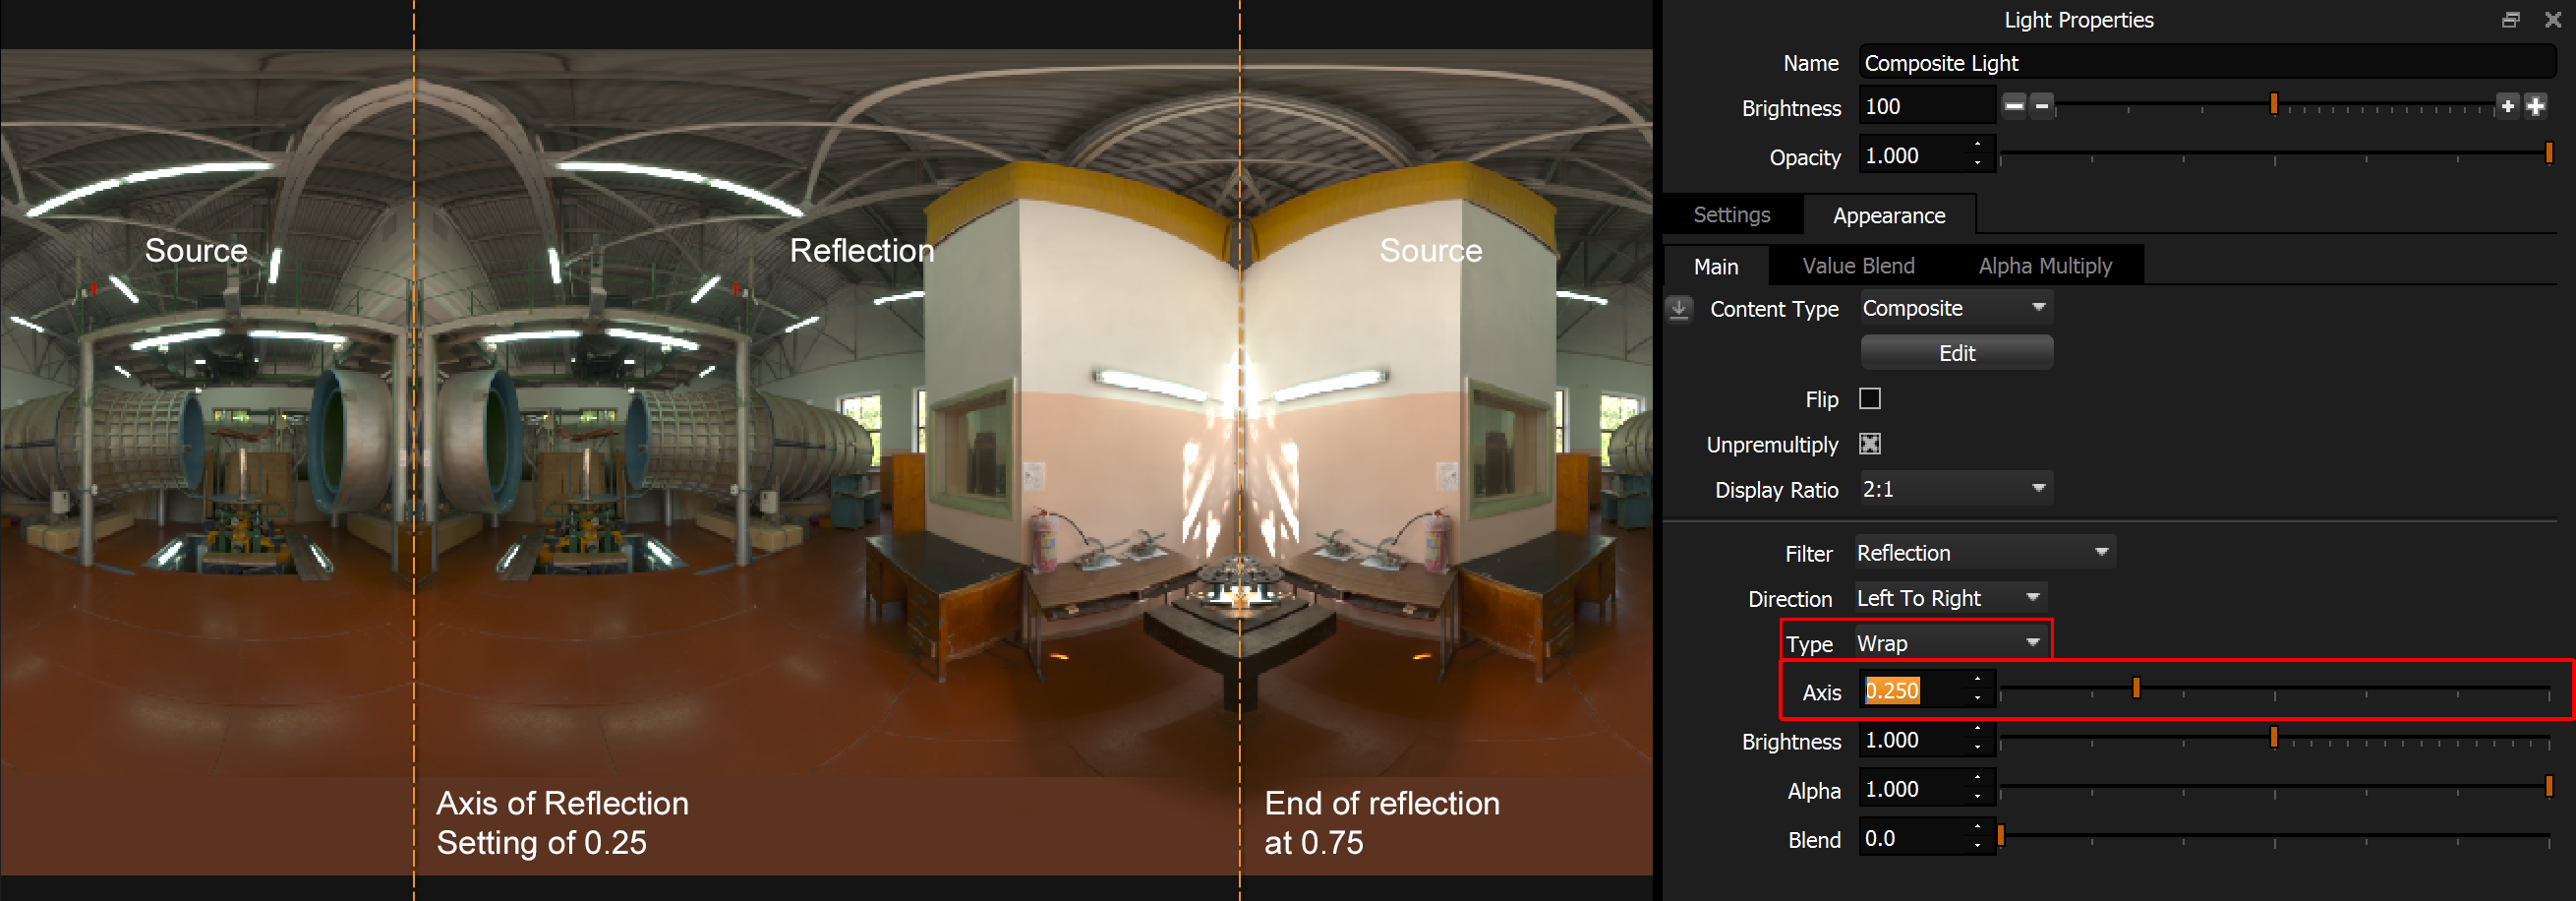
This has the same settings but we have moved the axis to 0.25 across the image. Here it's a little clearer what is happening. Source image content from the left of the axis is reflected to the right. This more clearly shows how the source content to the left actually wraps to the other side of the HDRI map too.
Mirror
This setting mirrors the content from one side of the axis to the other. This is ideal for using on light sources to remove unwanted details perhaps. Here are some example settings.
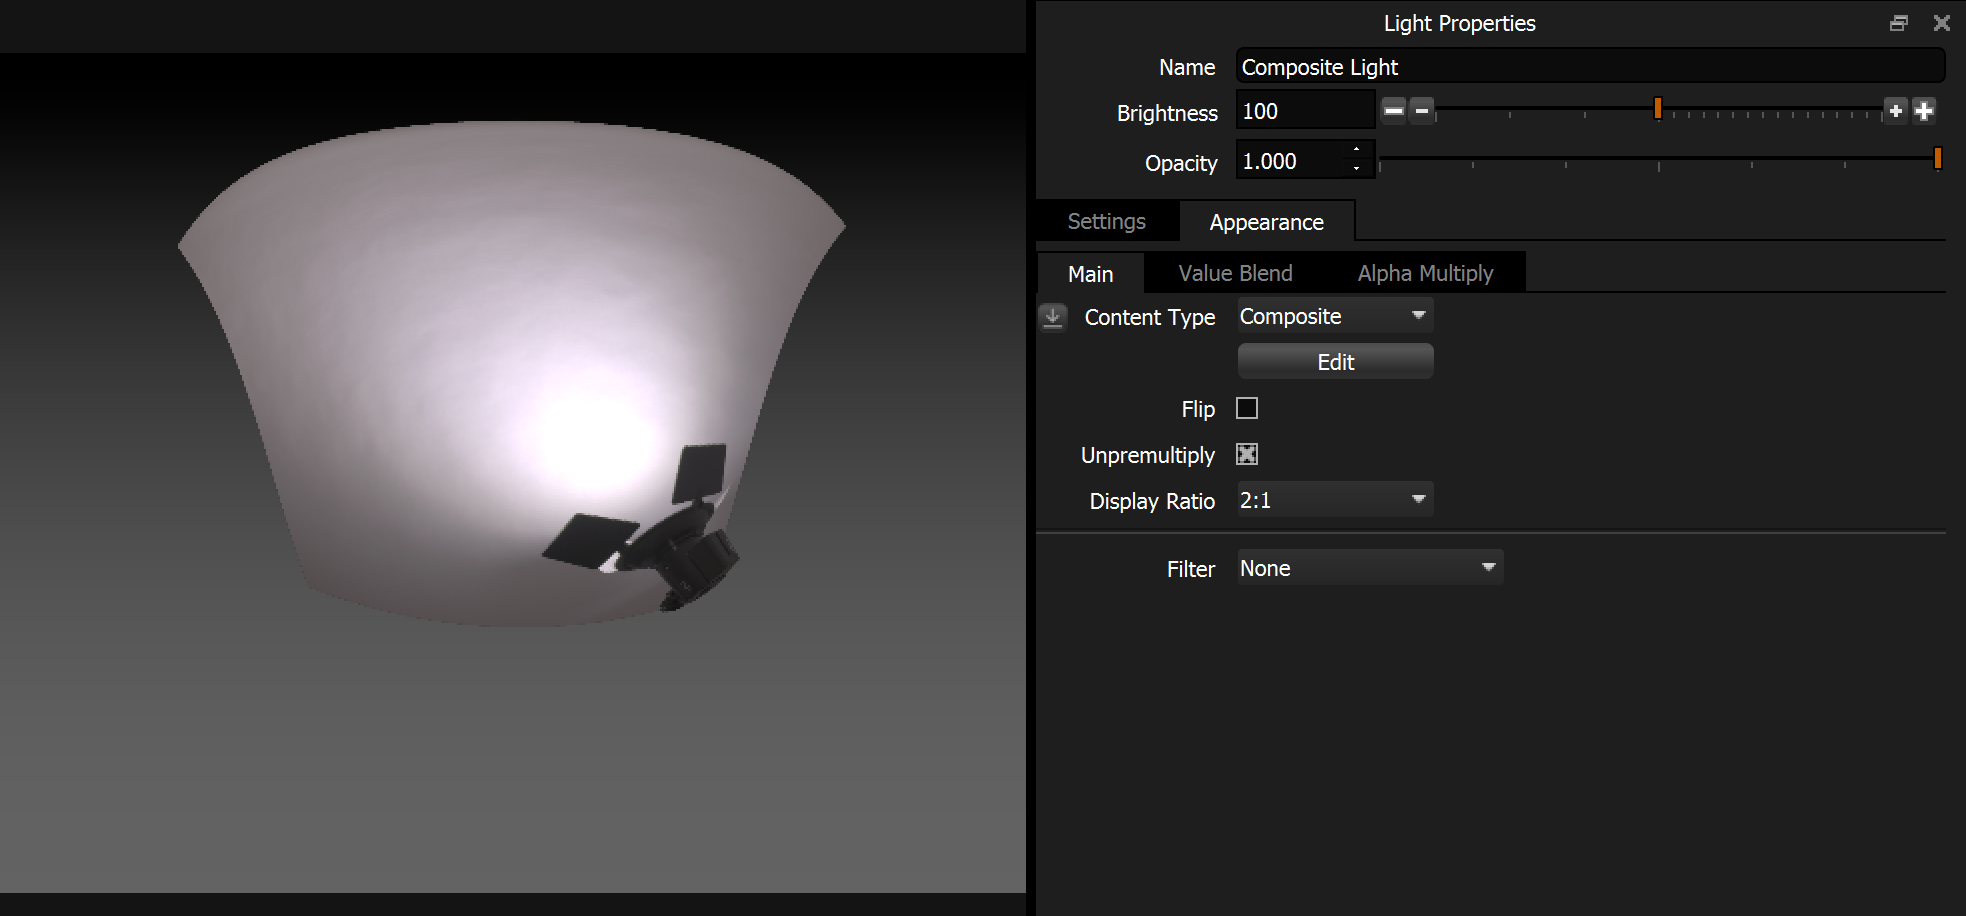
Here is the original light with no reflection setting.

Dotted lines are not part of the interface and are added to help explain the feature.
Mirror - Left to Right - Axis 0.5

Mirror - Right to Left - Axis 0.5
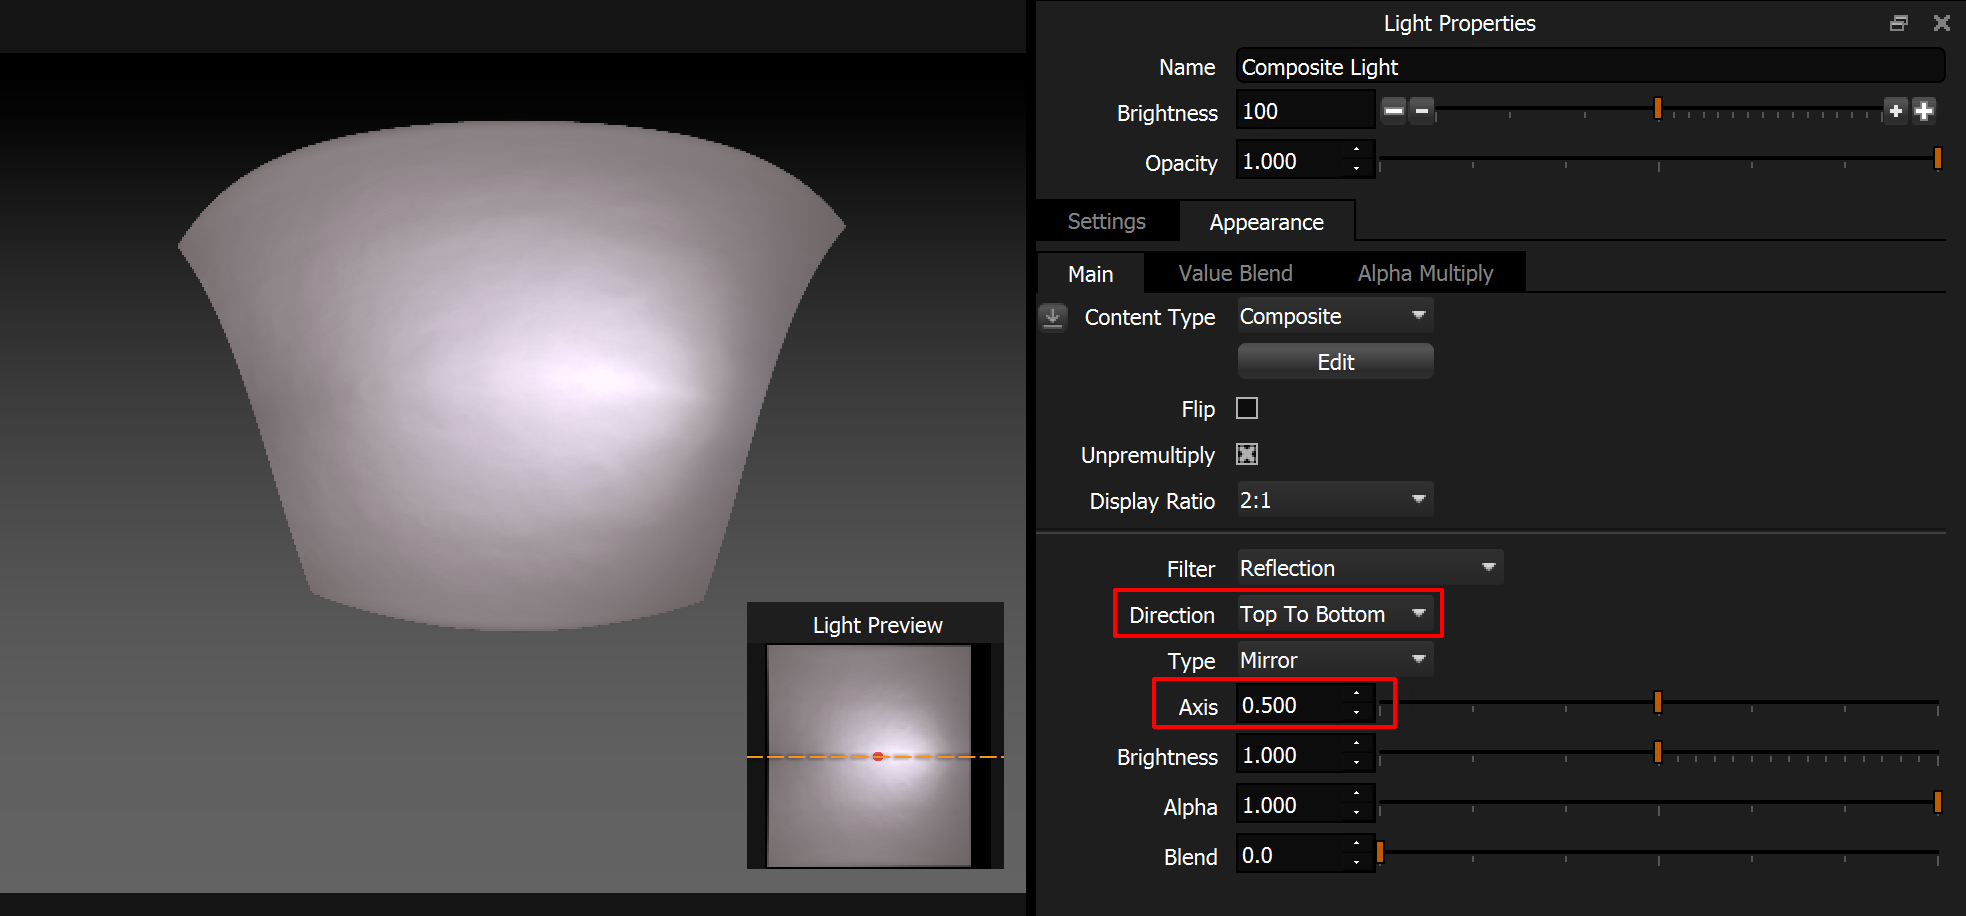
Mirror - Top to Bottom - Axis 0.5
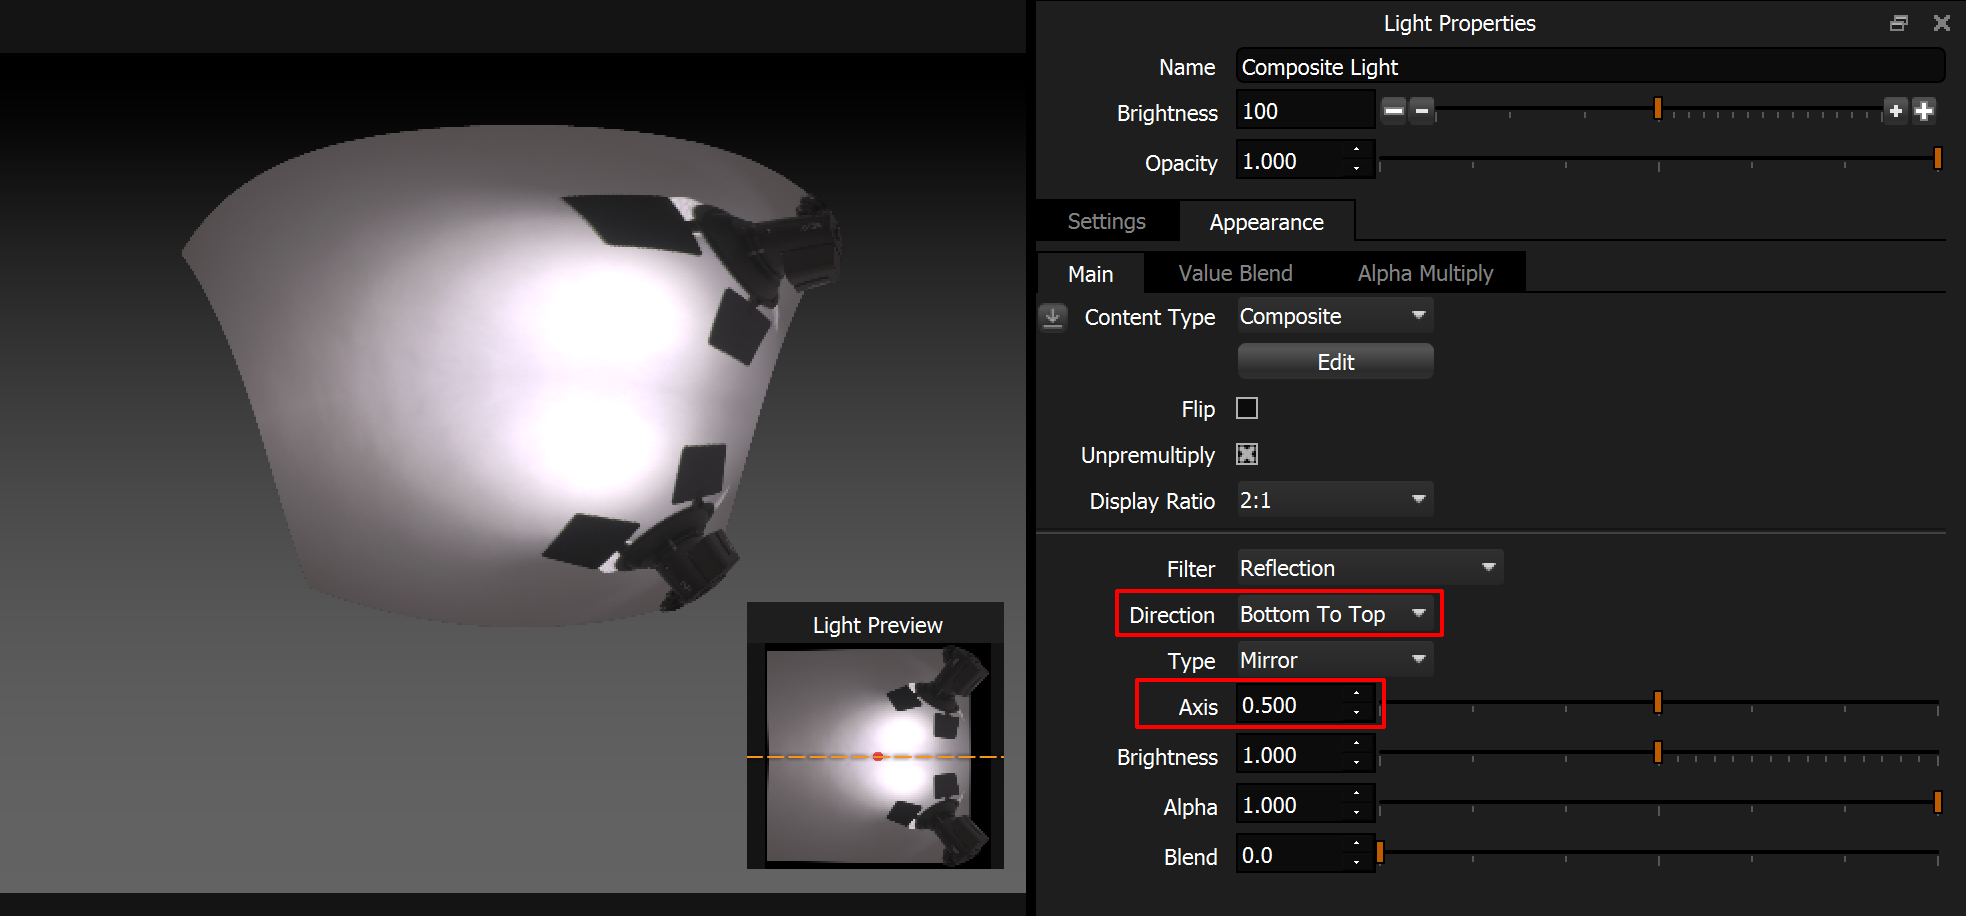
Mirror - Bottom to Top - Axis 0.5
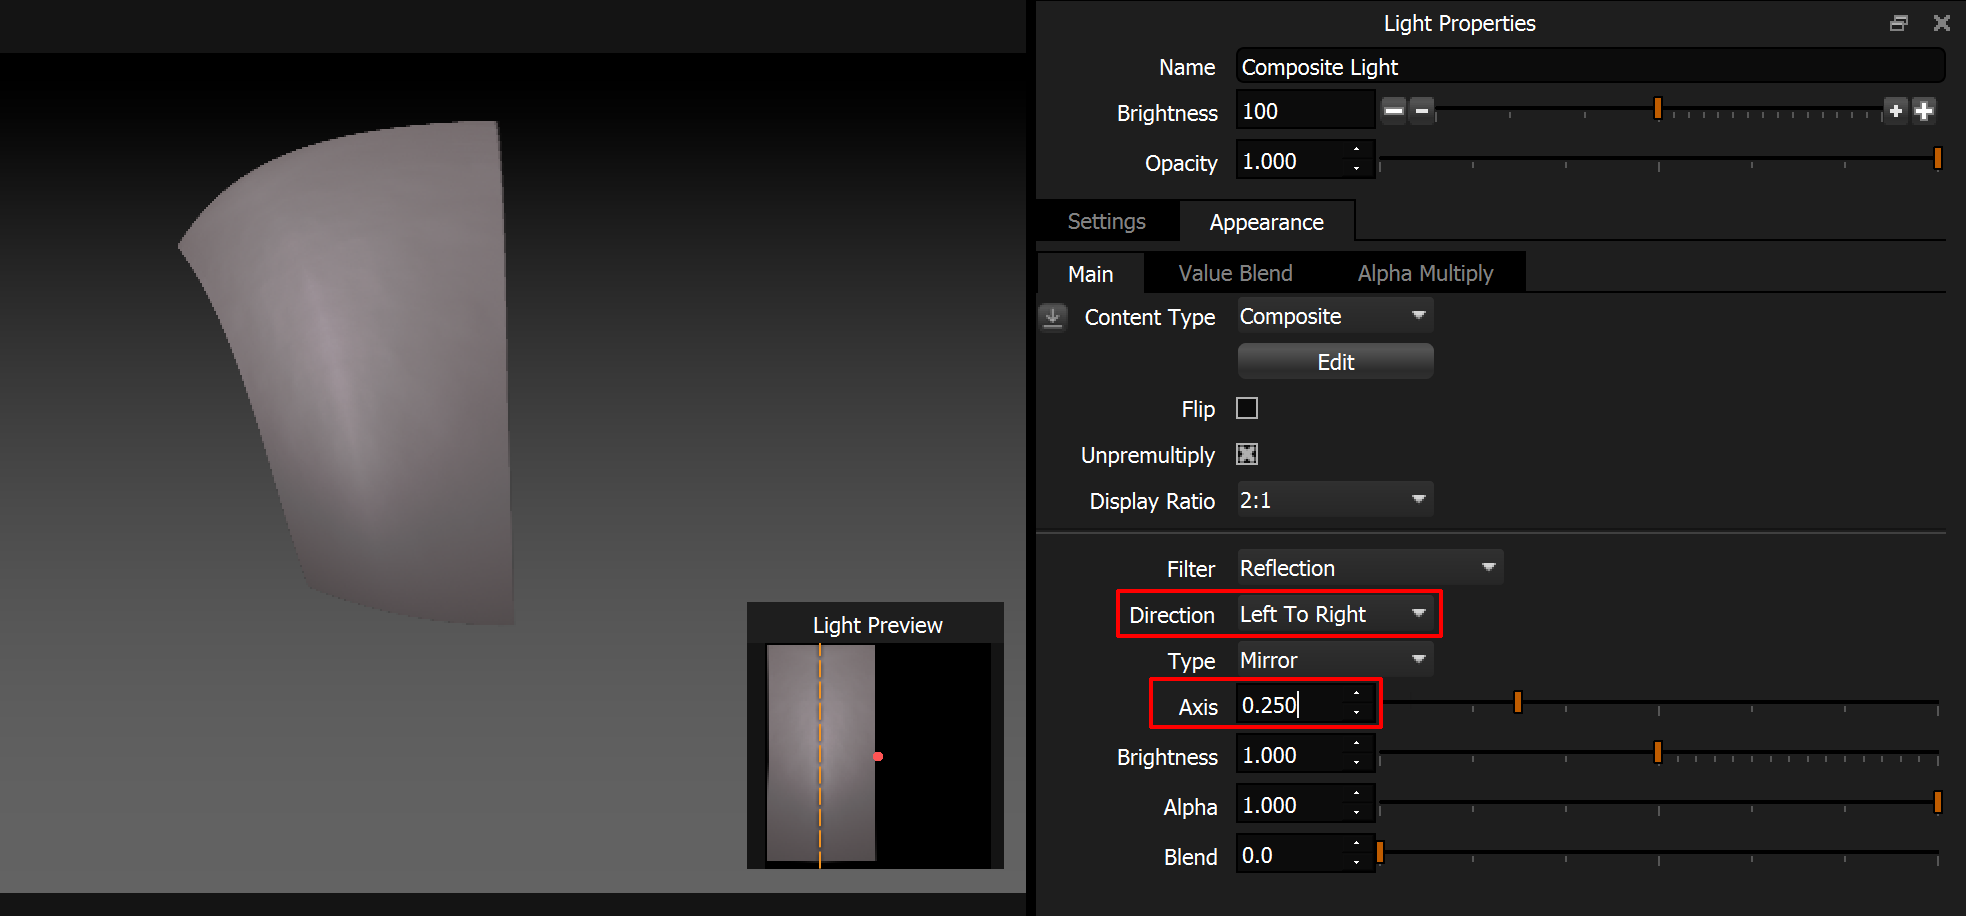
Mirror - Left to Right - Axis 0.25
With axis position lower than 0.5, there will be a blank area where there is no content to mirror.
If you were to add a Blend value to any of the Mirror examples above, the Blend region only appears over the axis.
Wrap mode is the only reflection type where the Blend would be applied to both the axis and the other side of the reflected content.
Fit
Mirrors the content across the axis and scales the reflected content to fit and fill the image space.
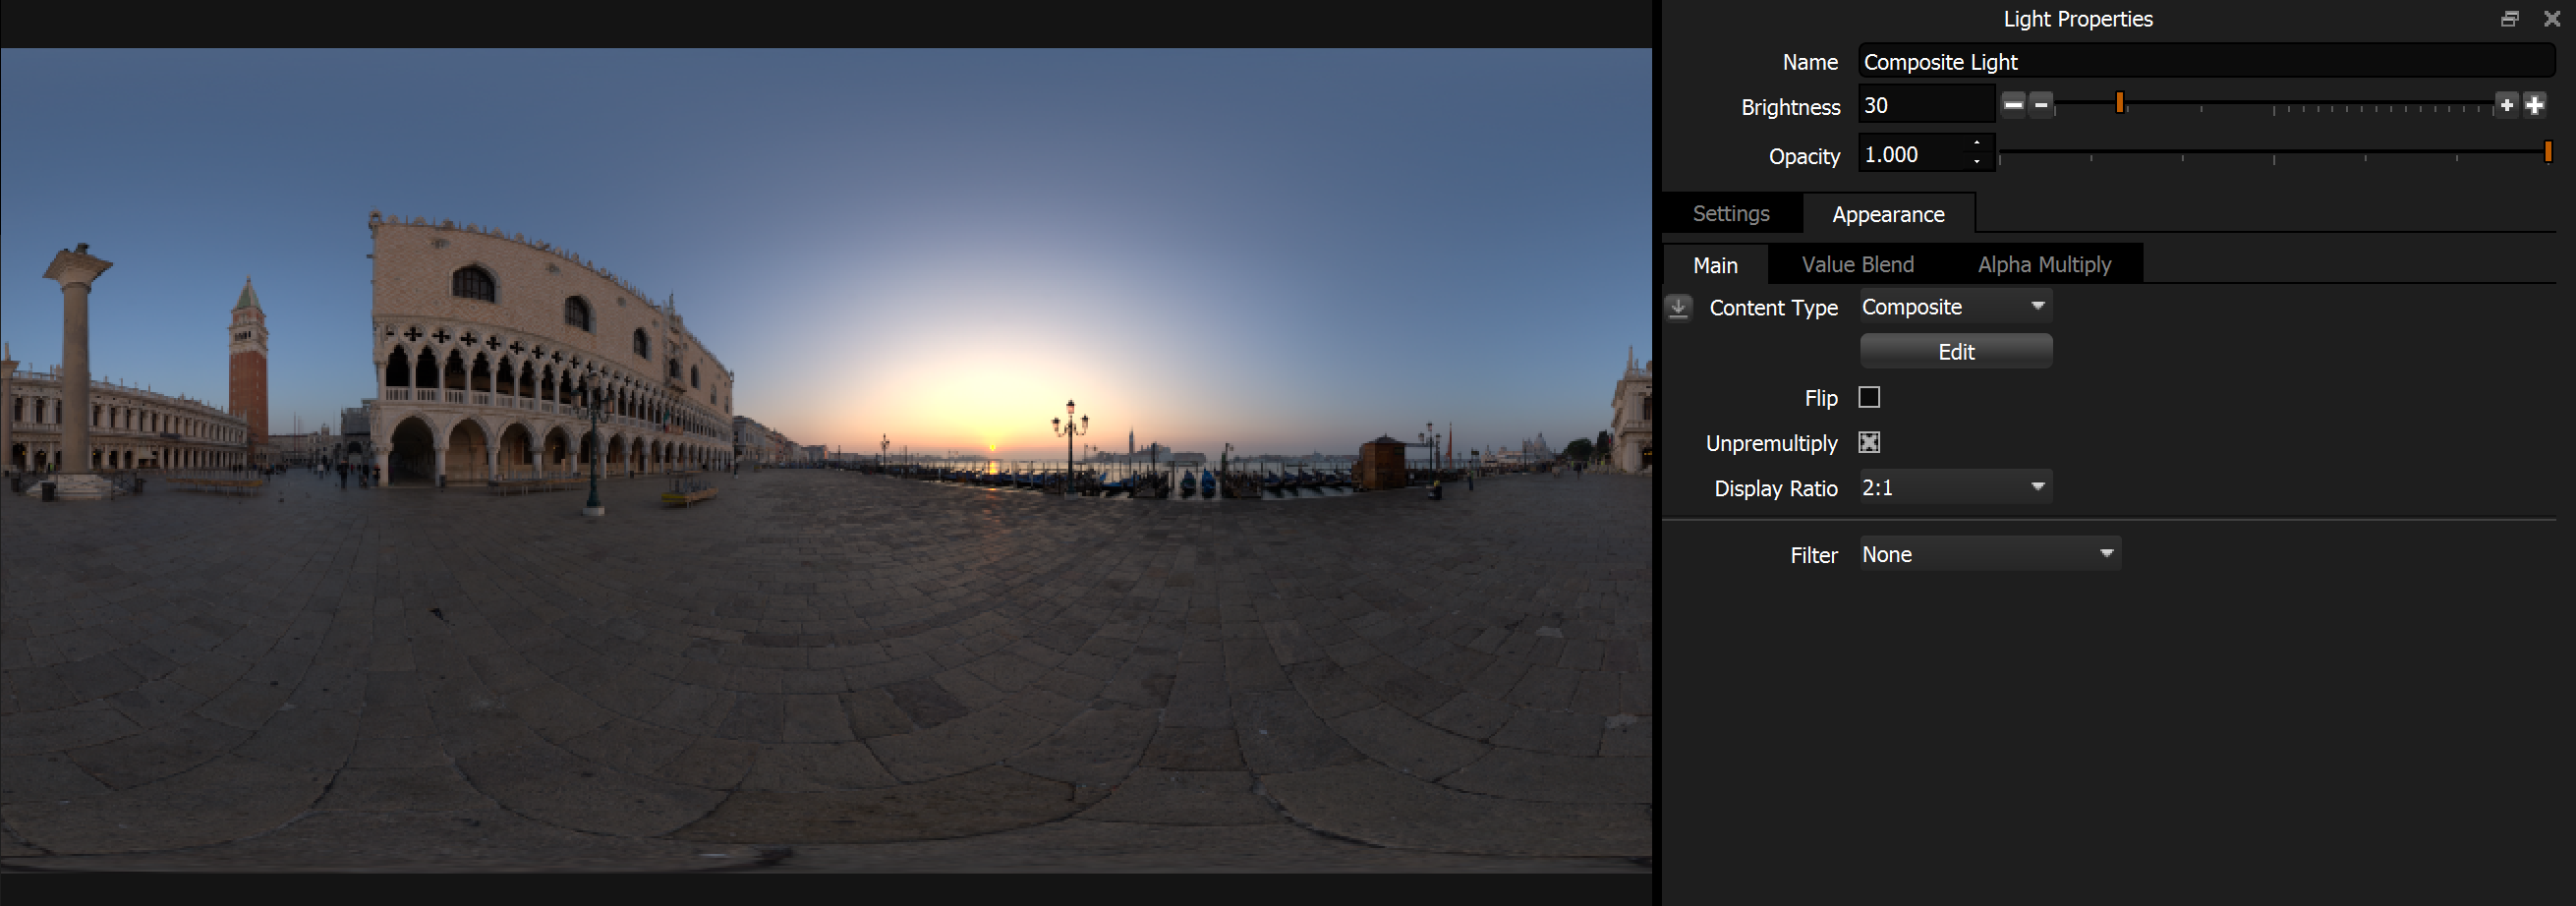
Here is the original light with no reflection setting.
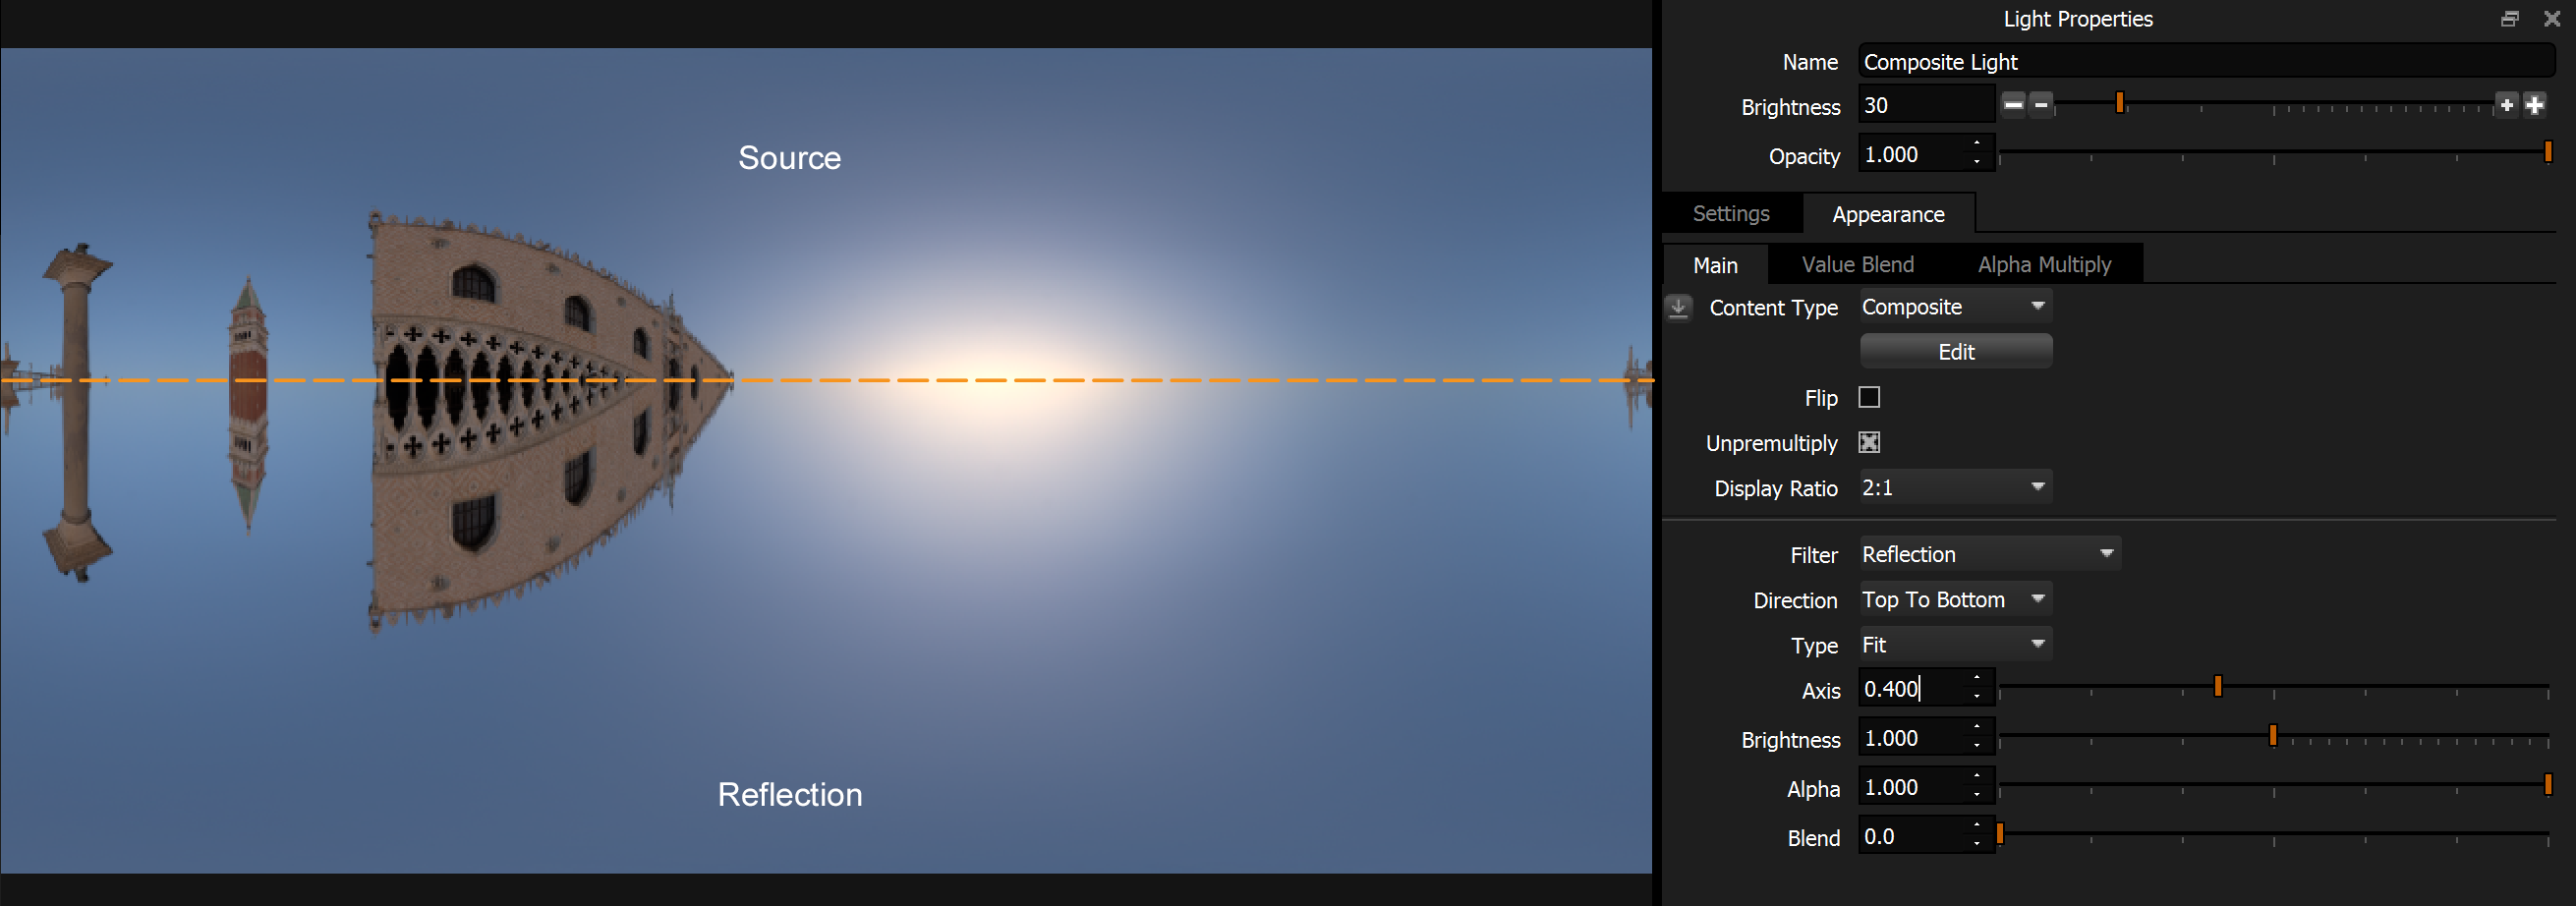
Fit - Top to Bottom - Axis 0.4. See how the reflected content at the bottom is stretched to fill the image space.
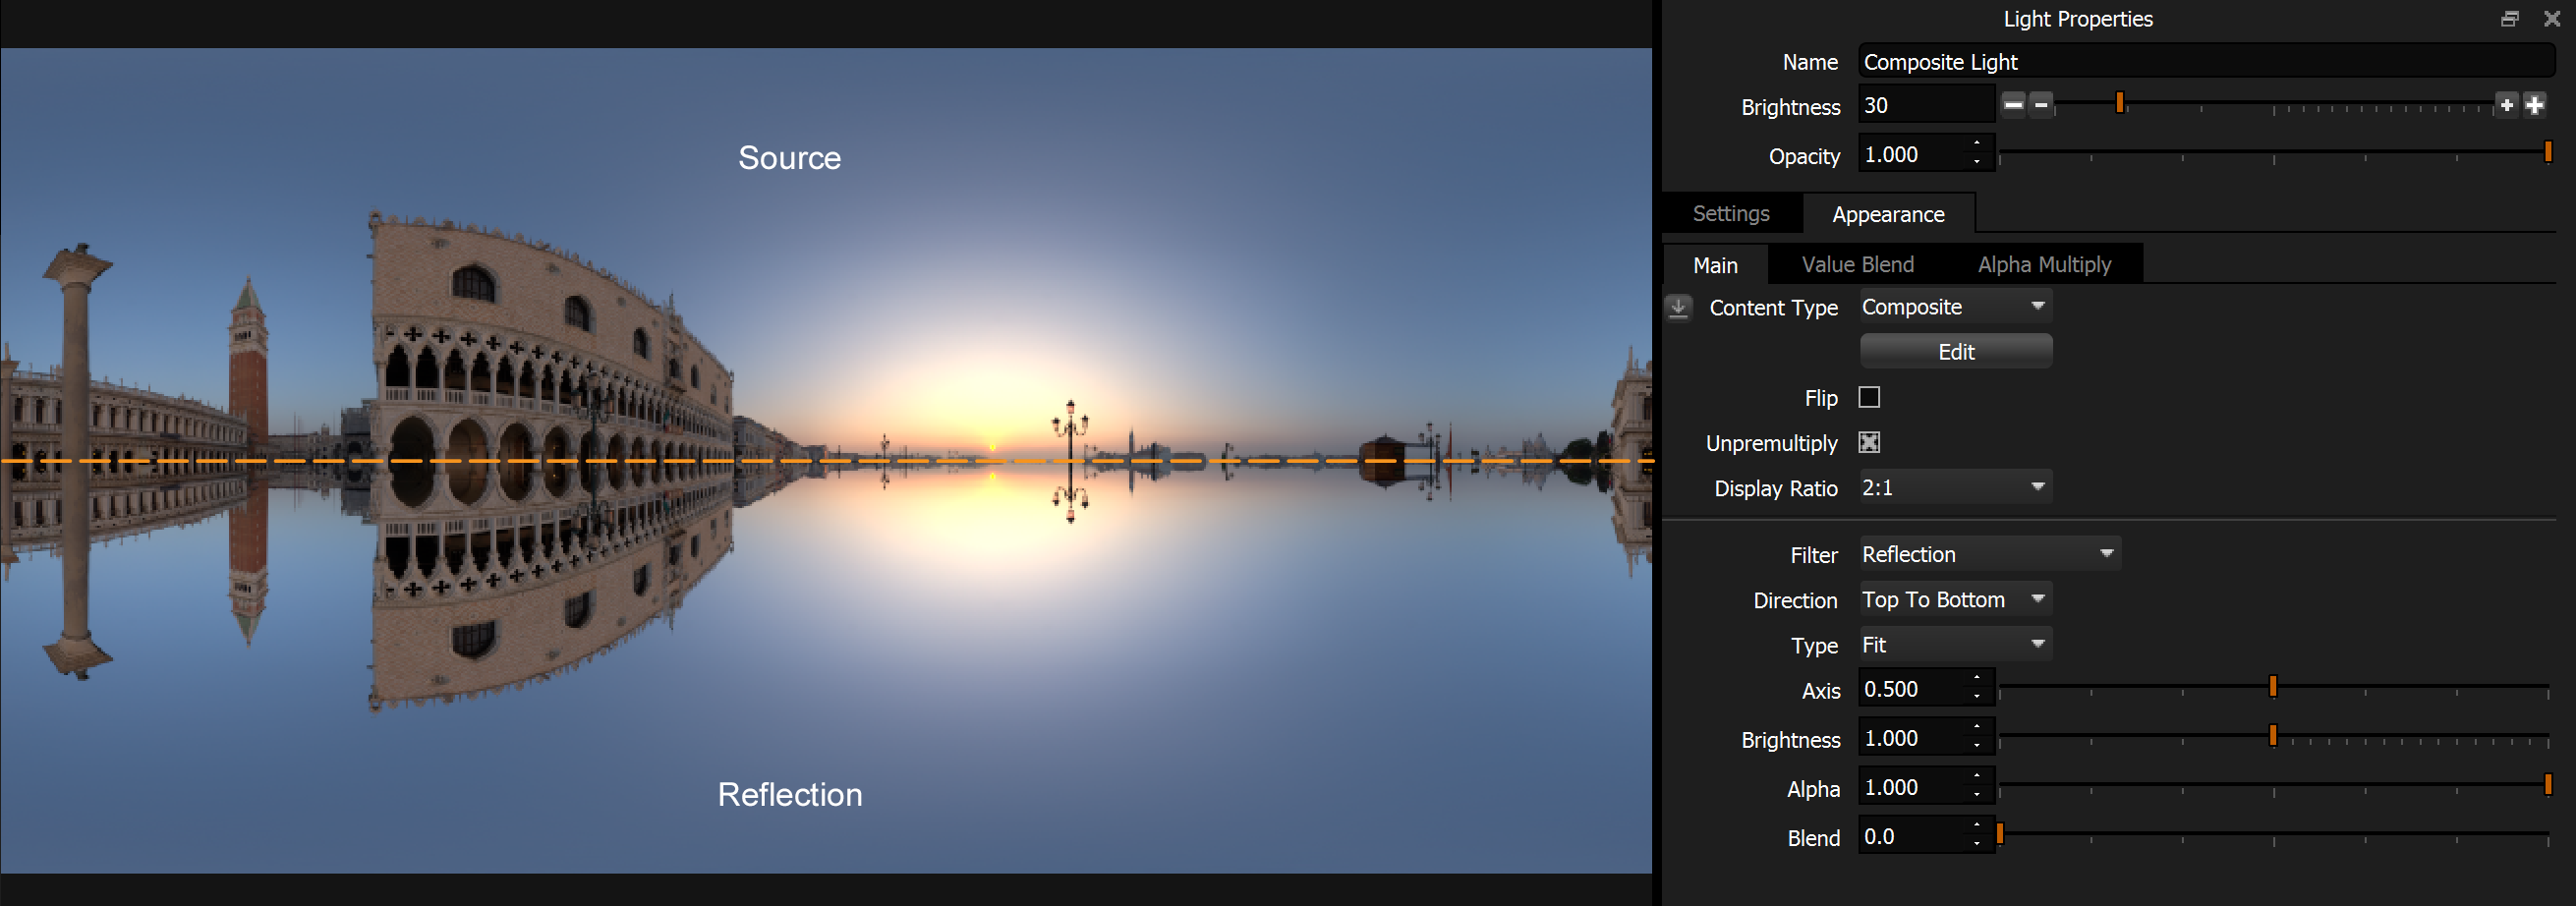
Fit - Top to Bottom - Axis 0.5. You actually see the same with these settings as mirror. The image doesn't need stretching to fit as the axis is exactly half way.
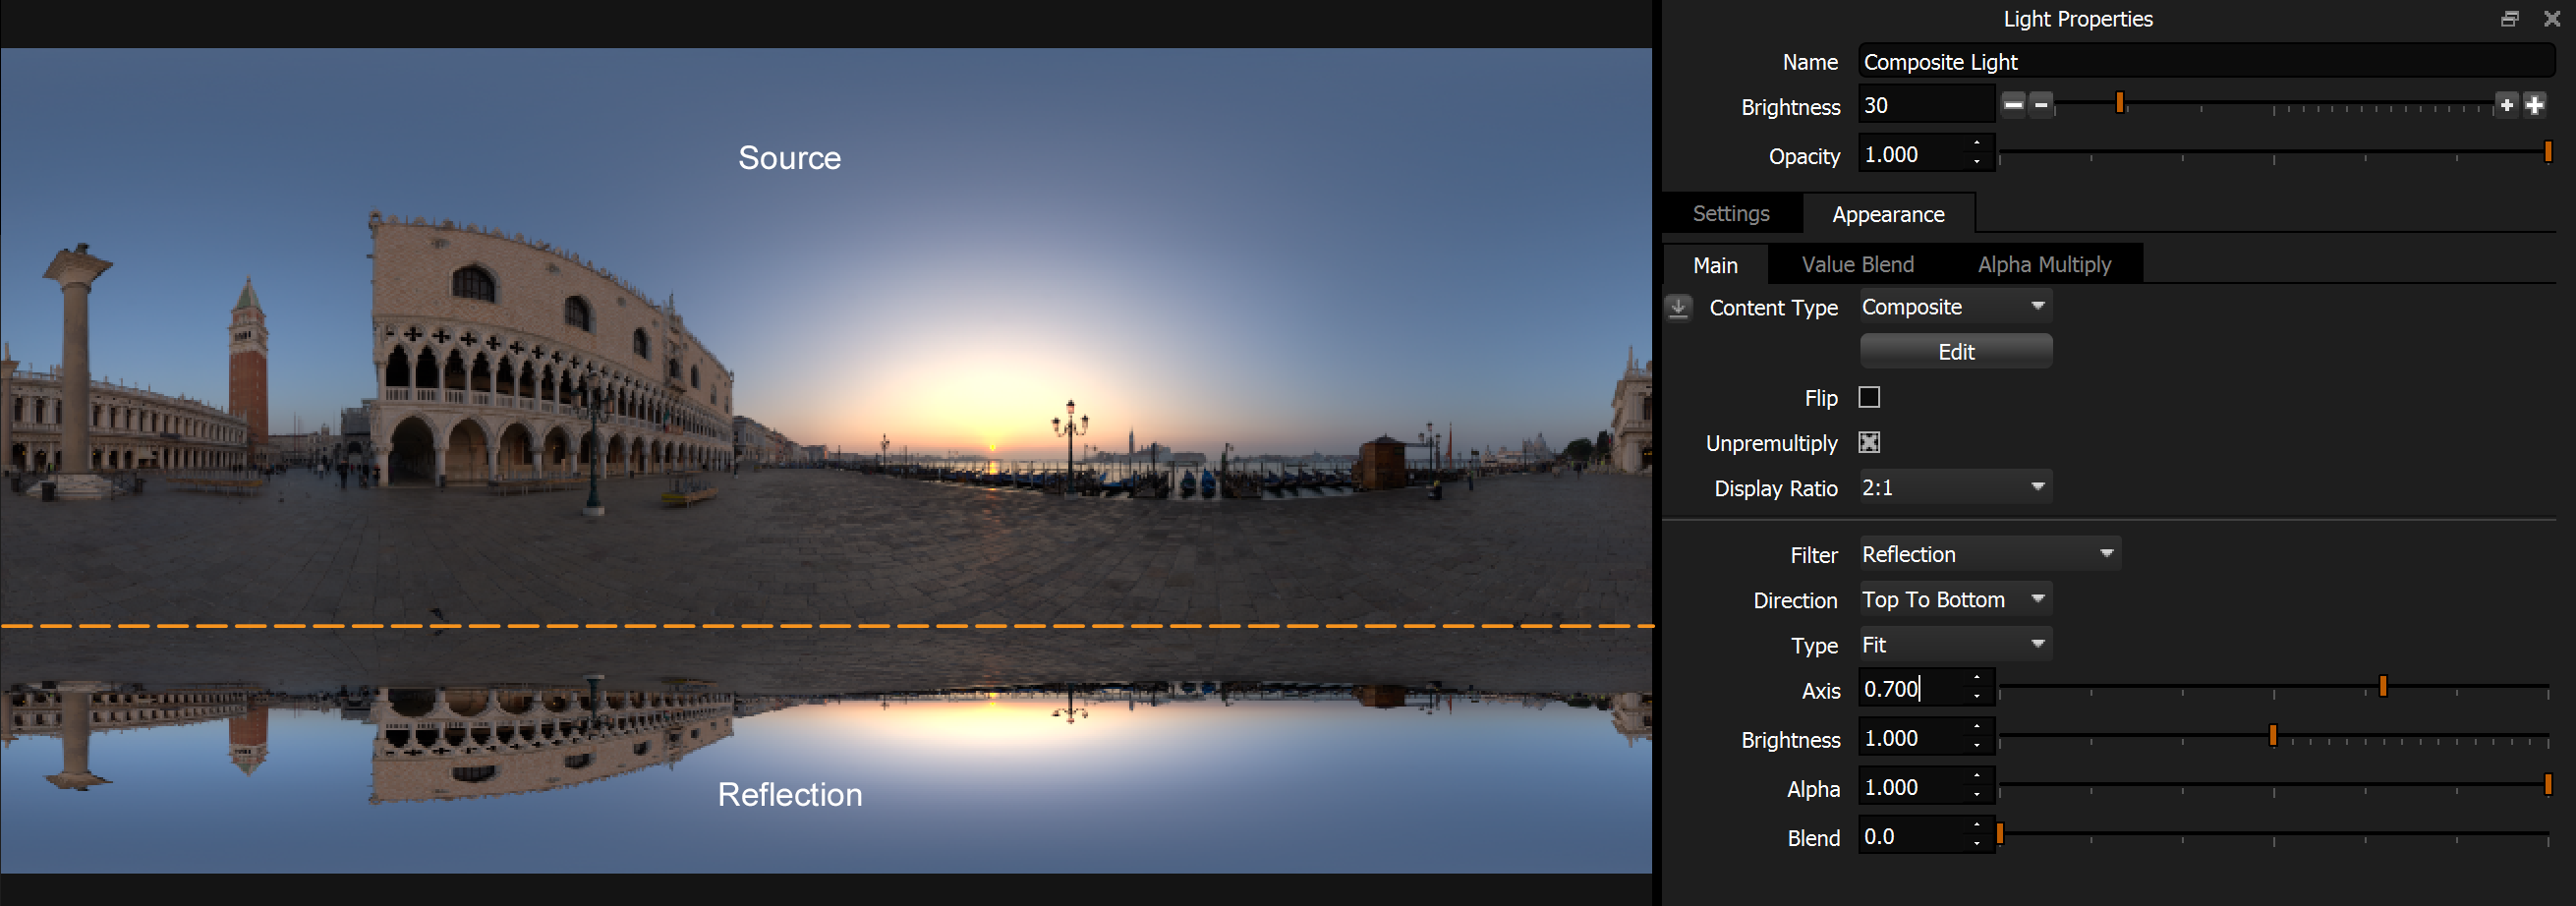
Fit - Top to Bottom - Axis 0.7. See how the reflected content is squashed to fit in the image space.
If you were to add a Blend value to any of the Mirror examples above, the Blend region only appears over the axis.
Wrap mode is the only reflection type where the Blend would be applied to both the axis and the other side of the reflected content.
Direction
Sets the direction of the reflection. See these examples:

Original source image with no reflection. A colorful rabbit designed to make it easy to see how the image will be reflected.
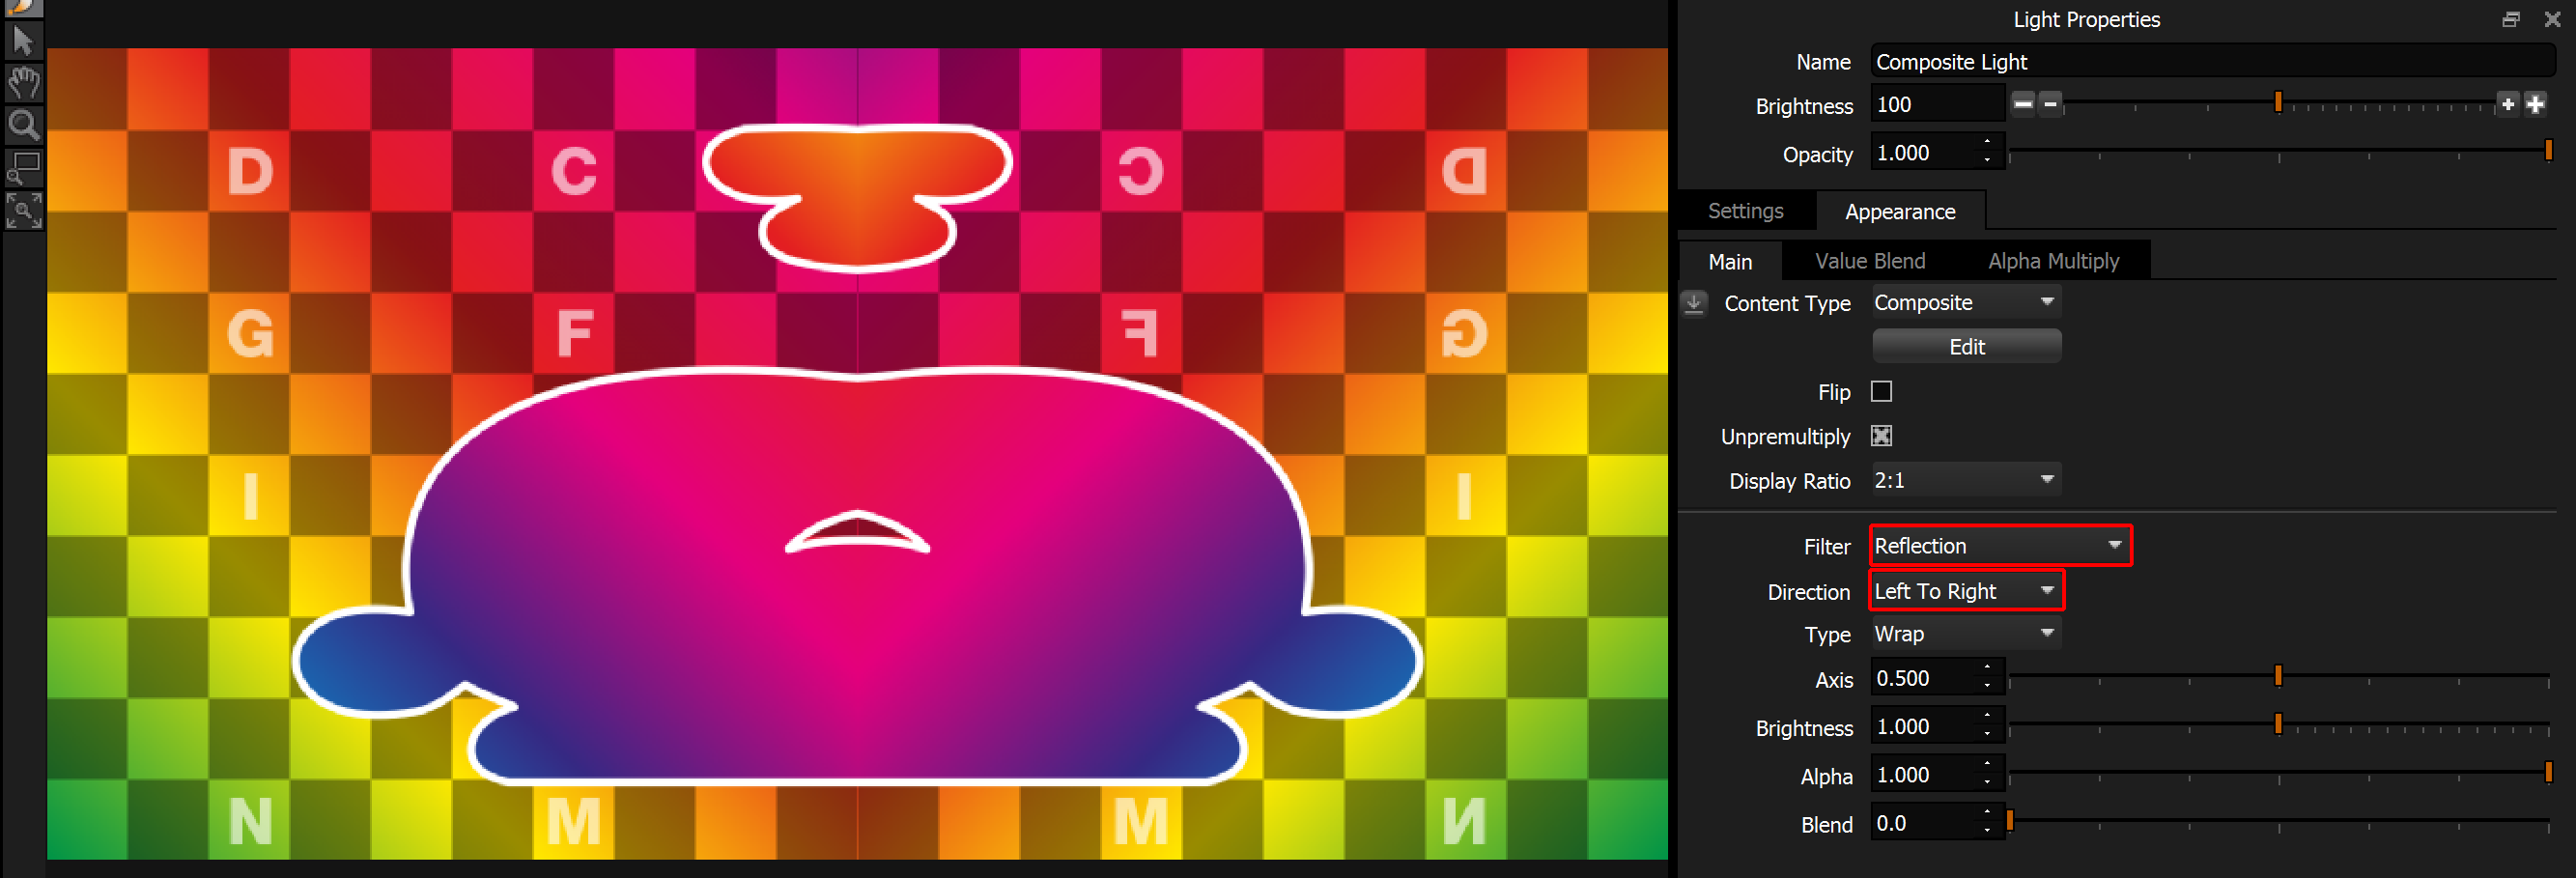
Left to Right
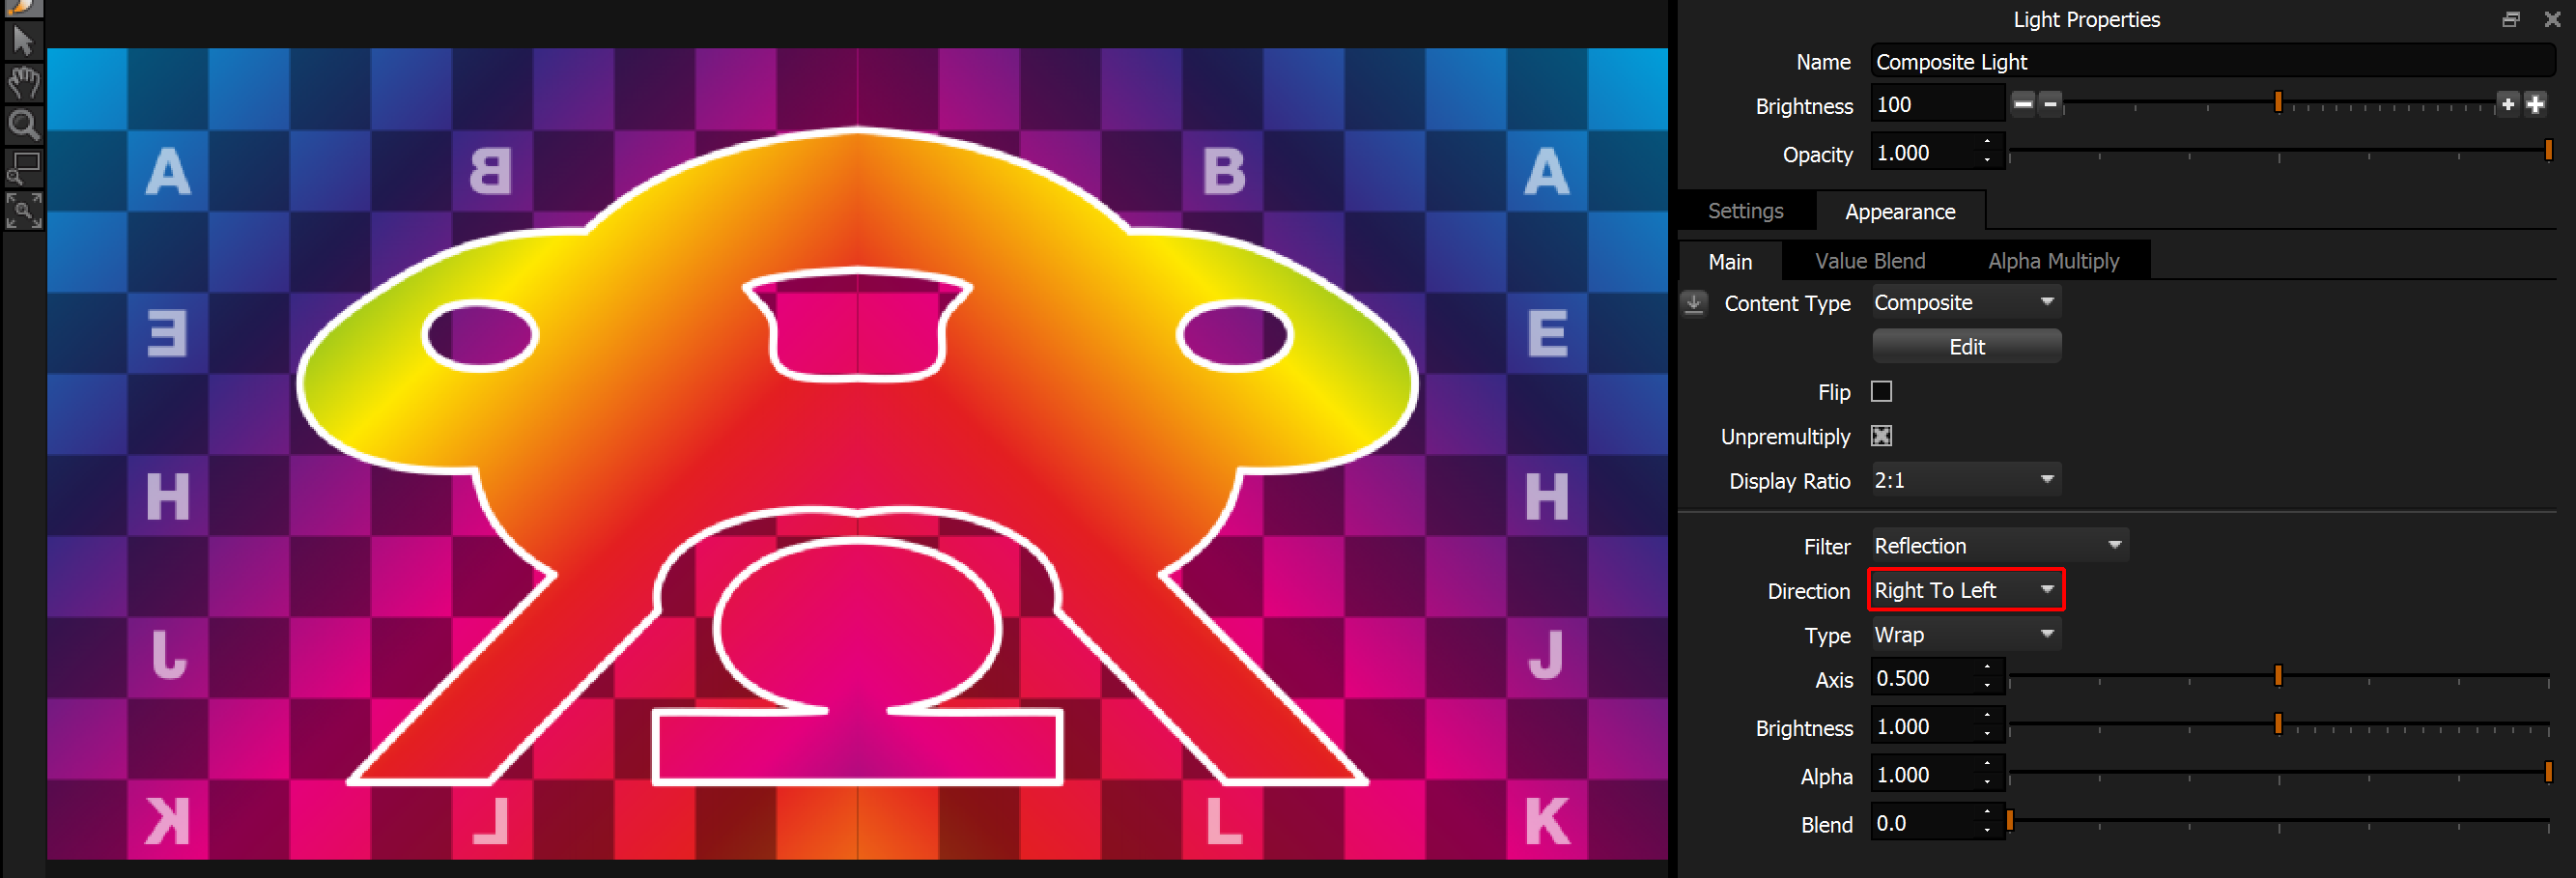
Right to Left
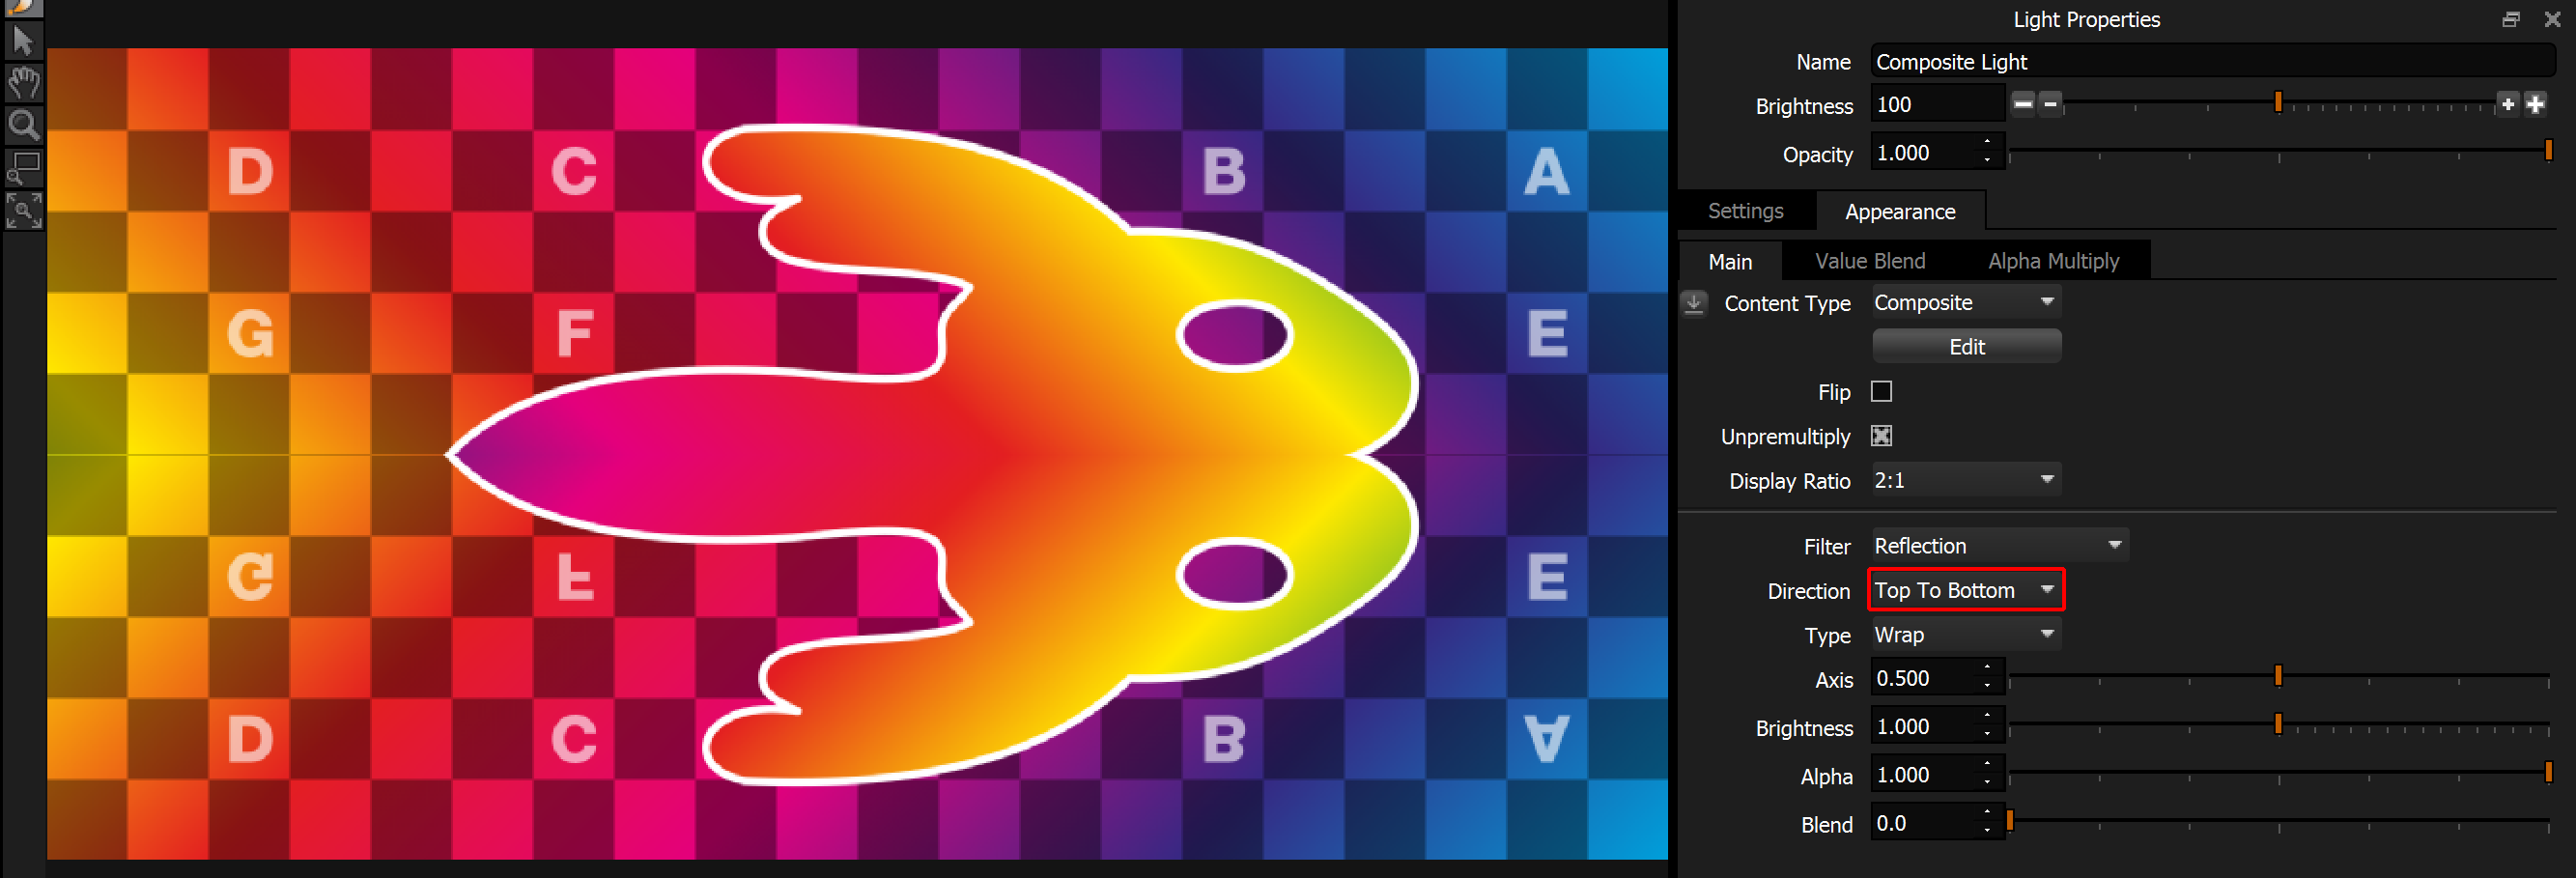
Top to Bottom
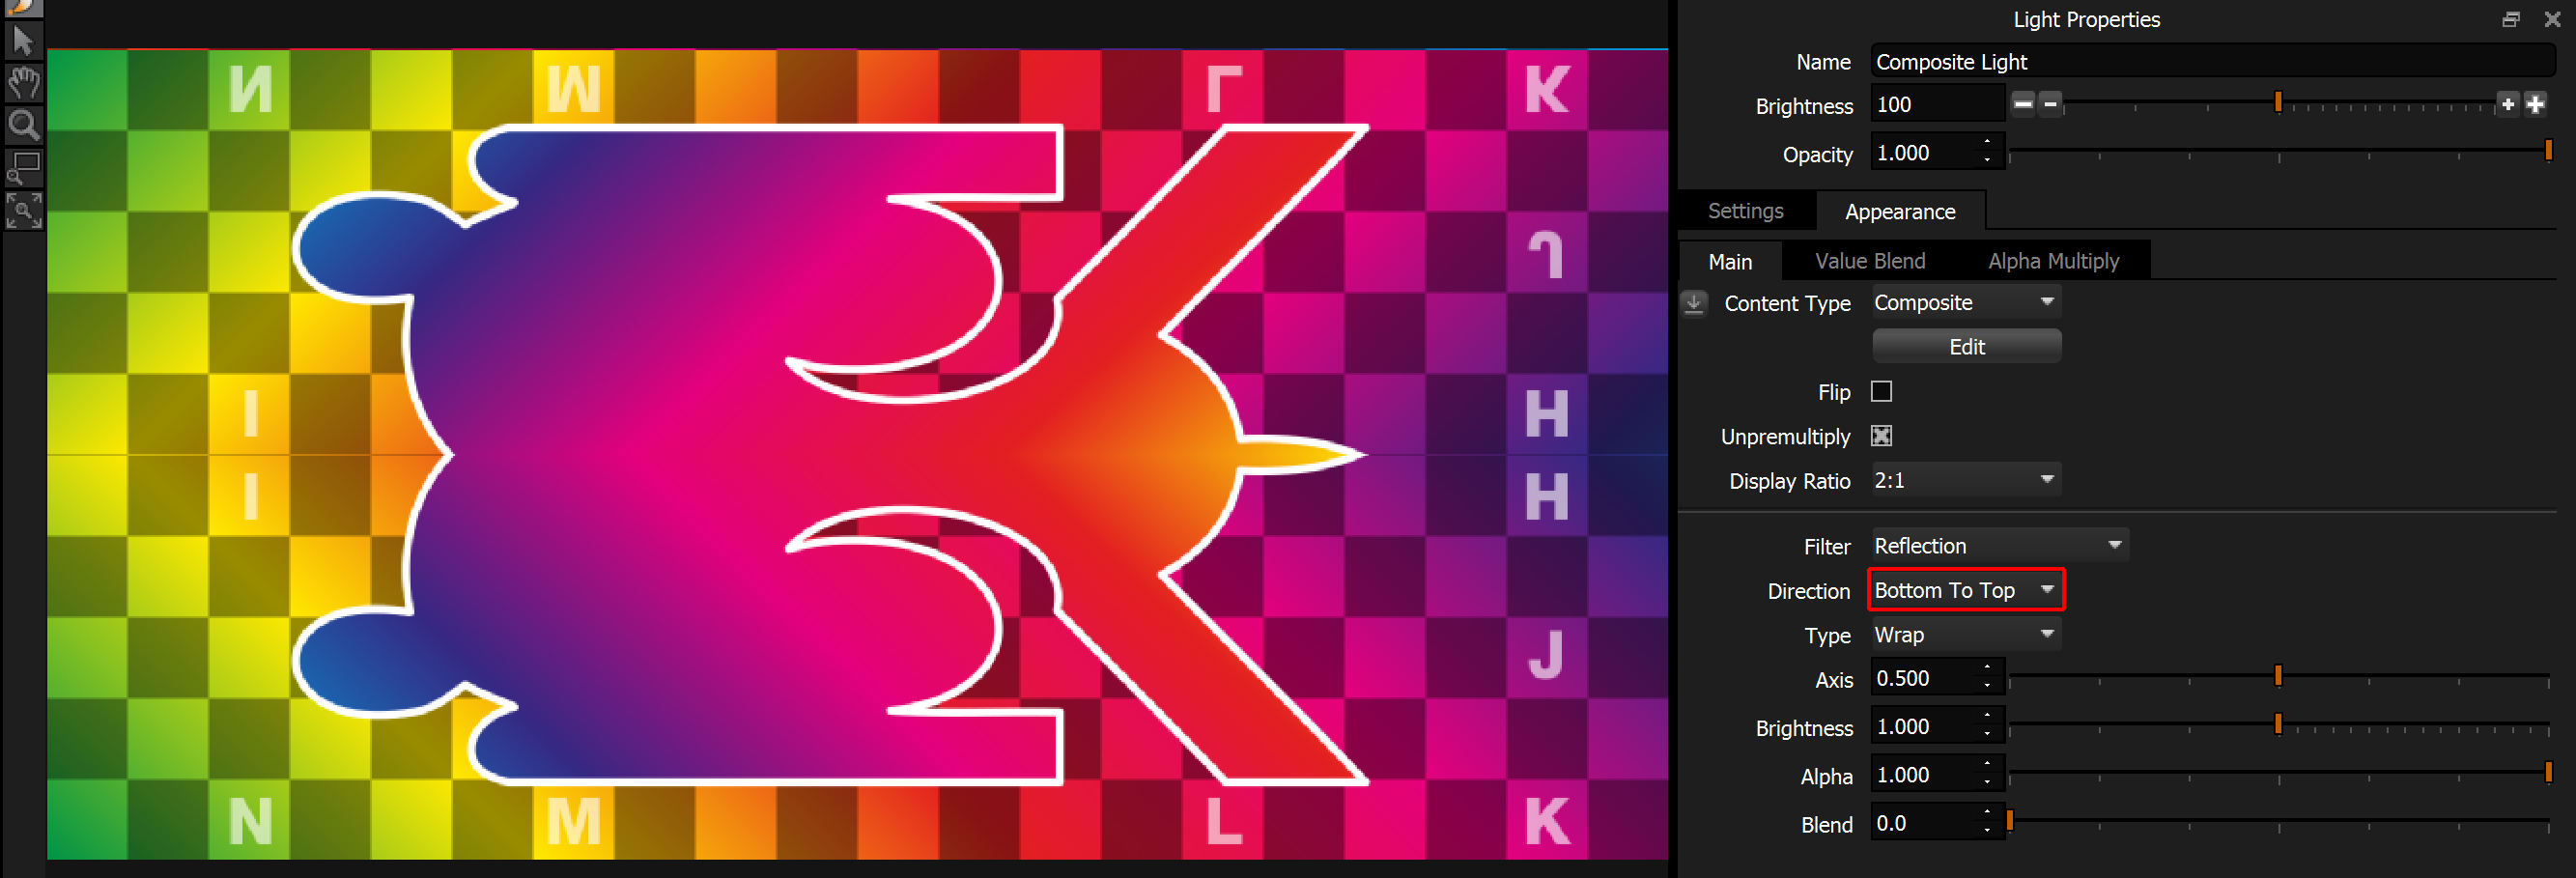
Bottom to Top
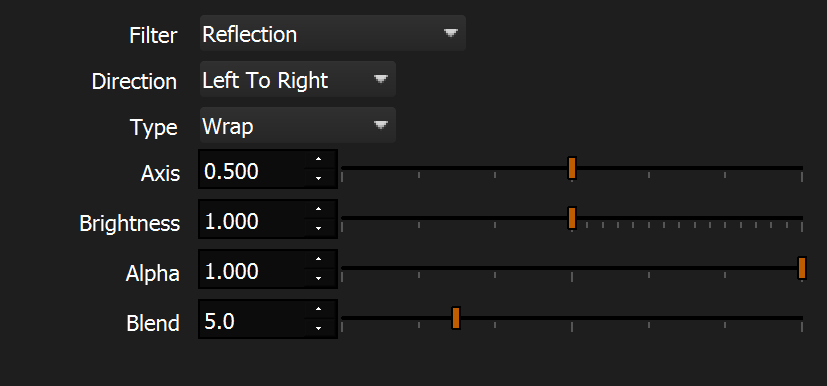
Axis
Sets the location of the reflection axis in image space, from 0 to 1.
The location of the axis can be set using the numeric input and slider.
However, it can also be set using a LightPaint mode on the Canvas and Render Views. Then you can click in the view to position the Axis.
Here are some example axis settings.
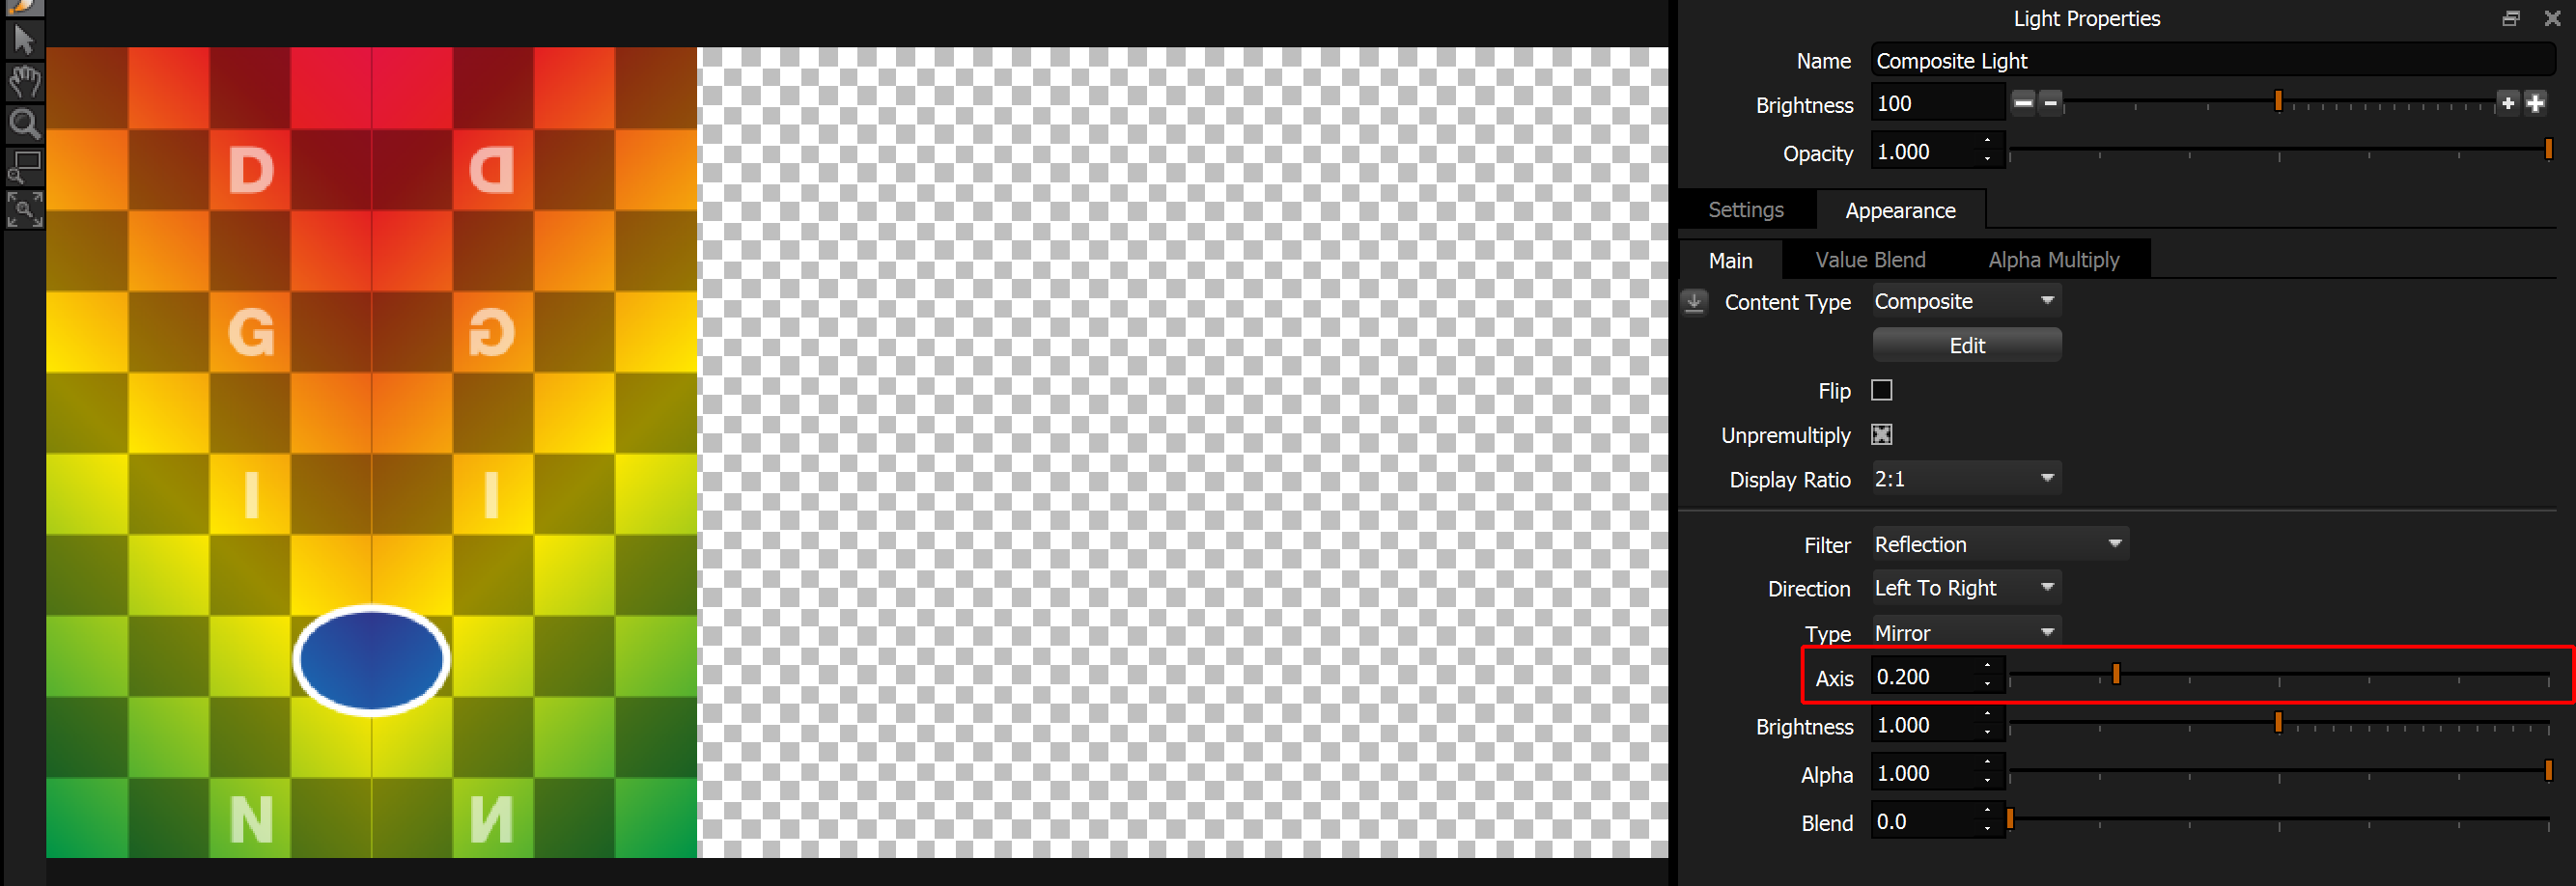
Vertical axis - Setting 0.2 (20% across the image)

Vertical axis - Setting 0.4 (40% across the image)
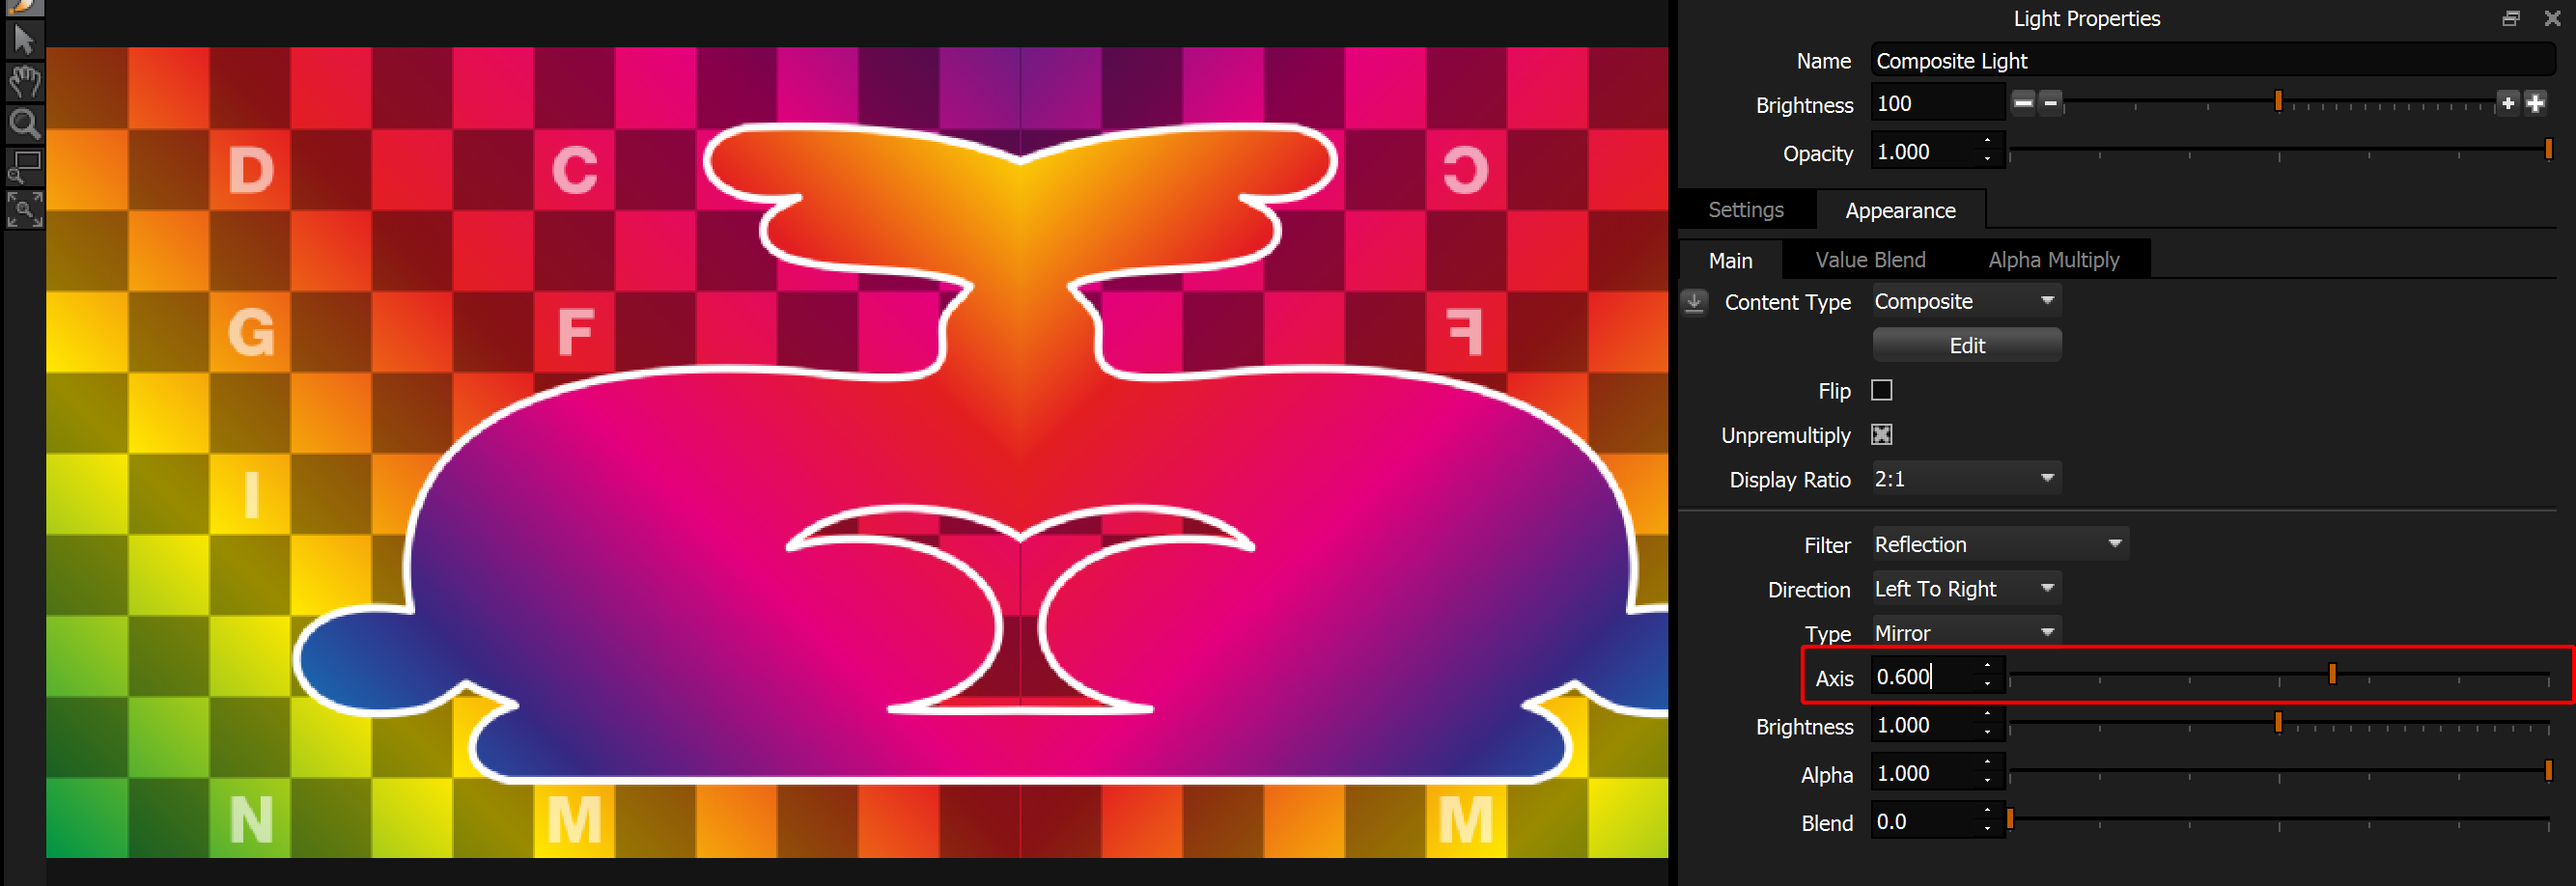
Vertical axis - Setting 0.6 (60% across the image)
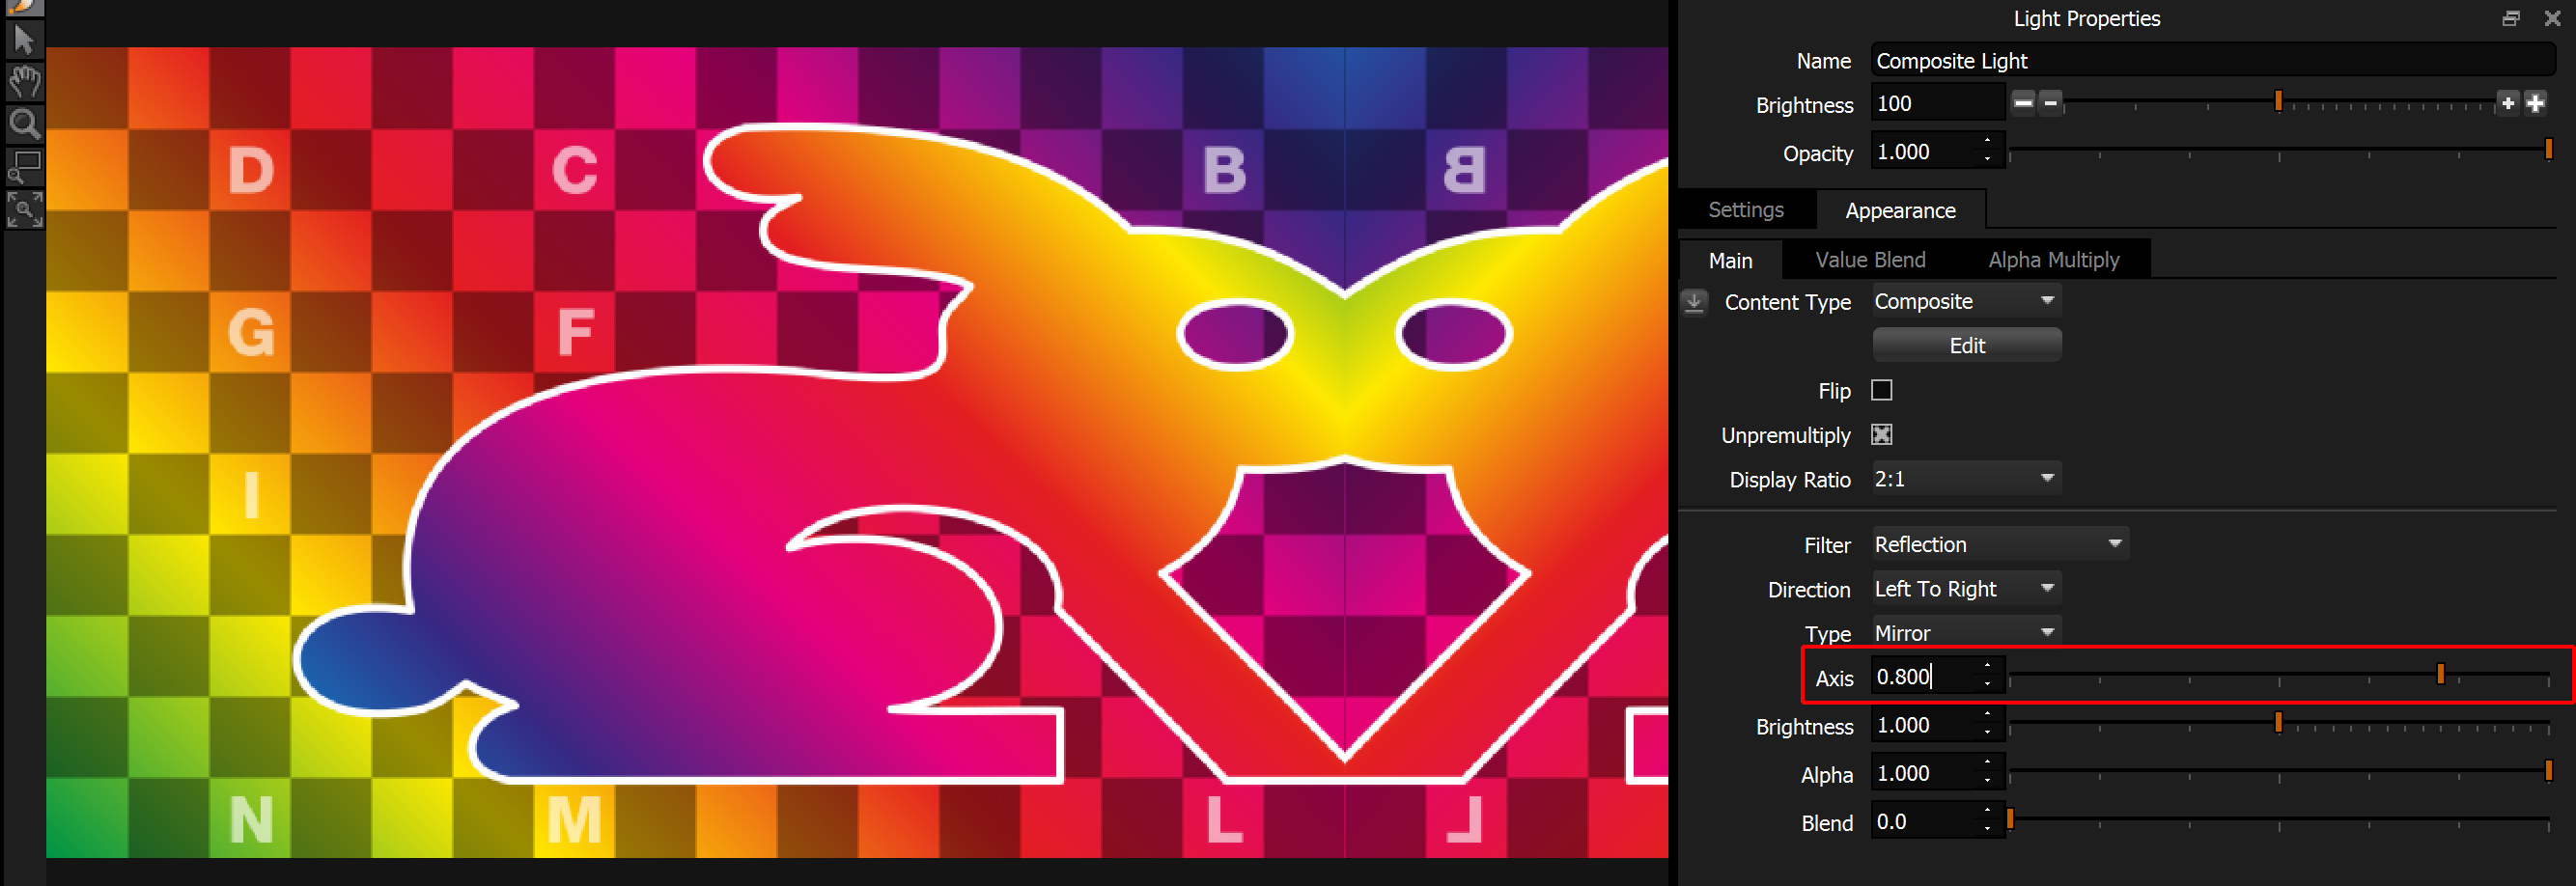
Vertical axis - Setting 0.8 (80% across the image)
Brightness
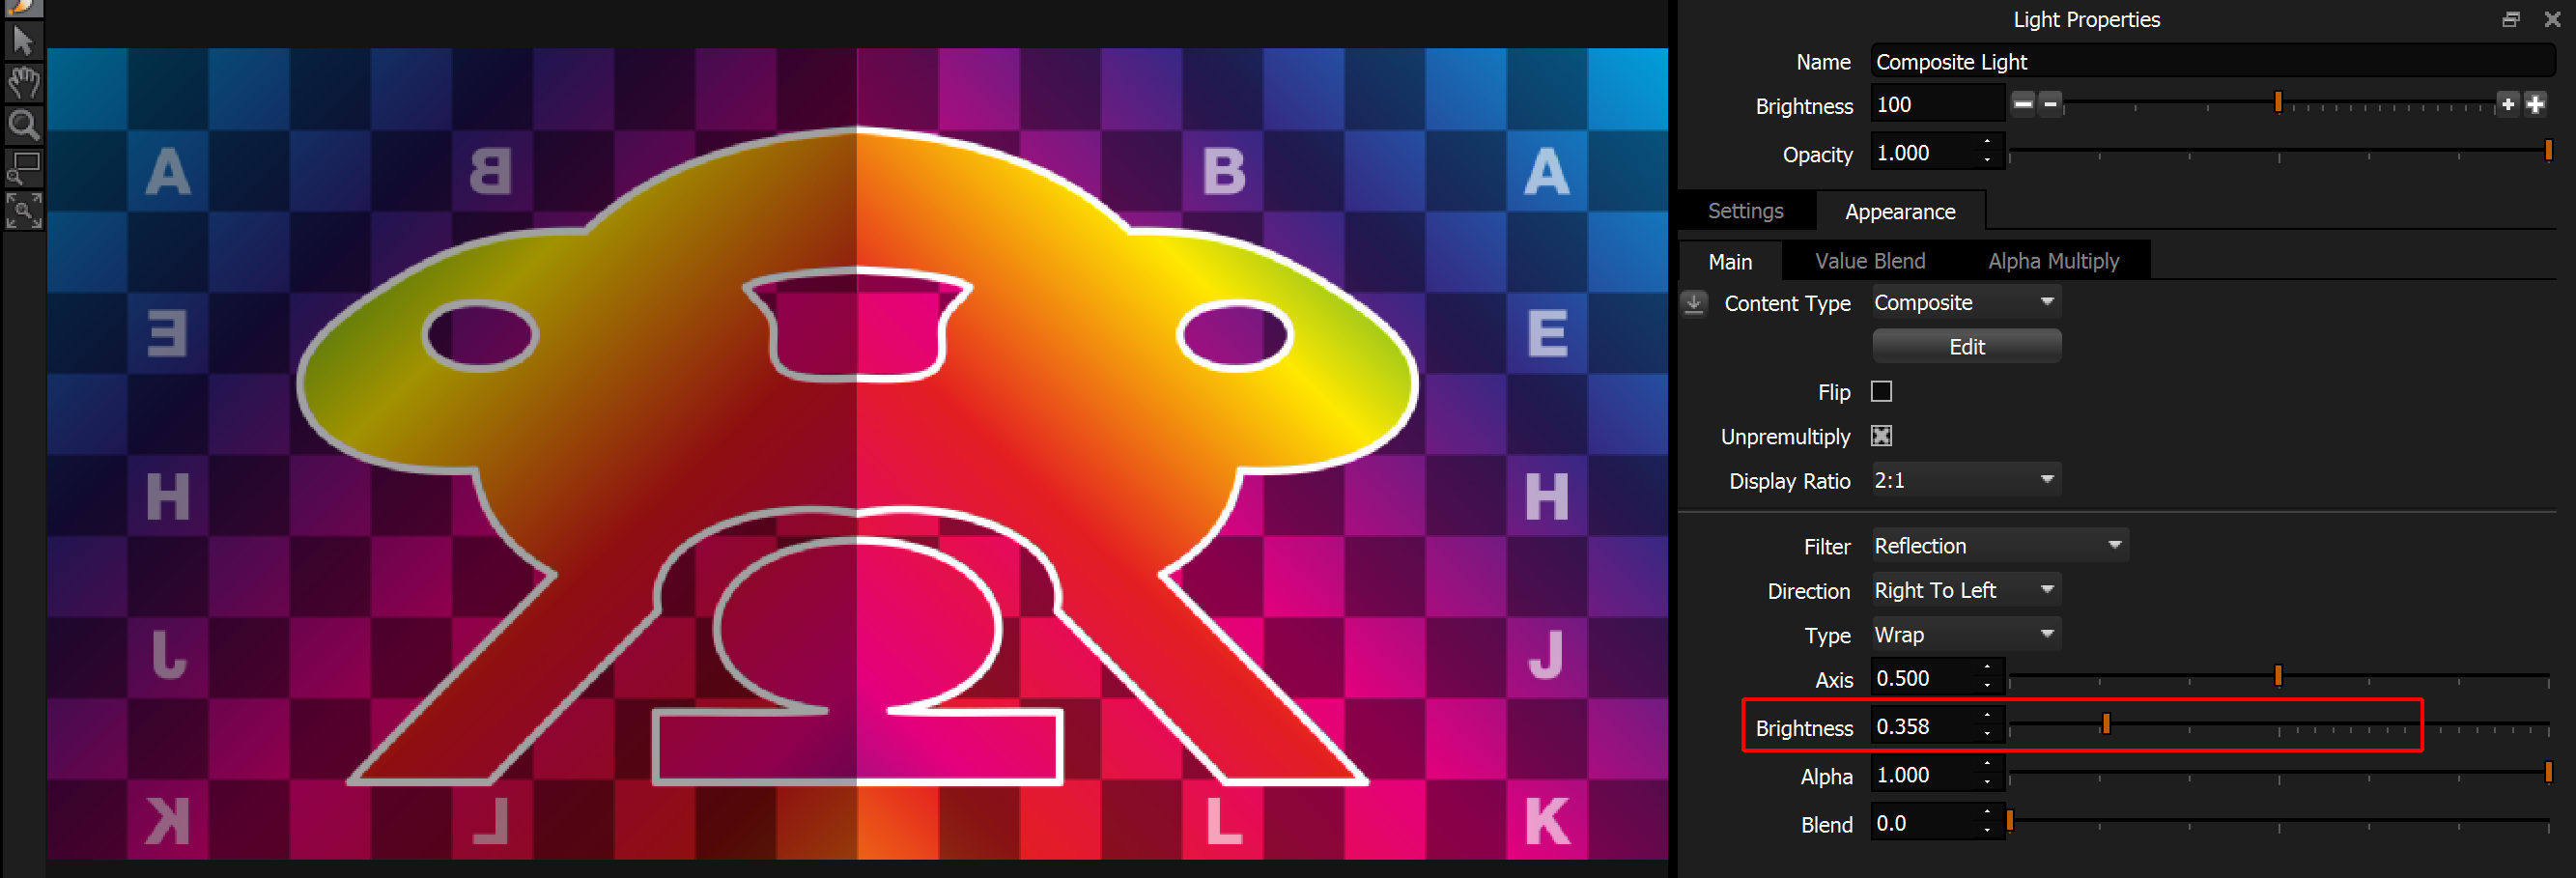
This setting scales the brightness of the reflected image content. Default is 1 = 100%.
This setting is useful when reflecting a studio lighting design. With this single setting you can change the relative brightness of the reflected half of the lighting design.

Example showing reflected left side with a brightness setting of 0.25. This is 25% of the brightness of the source image.
Alpha
To get the alpha effect you expect - you will need to turn off the Unpremultiply setting on the Composite content.
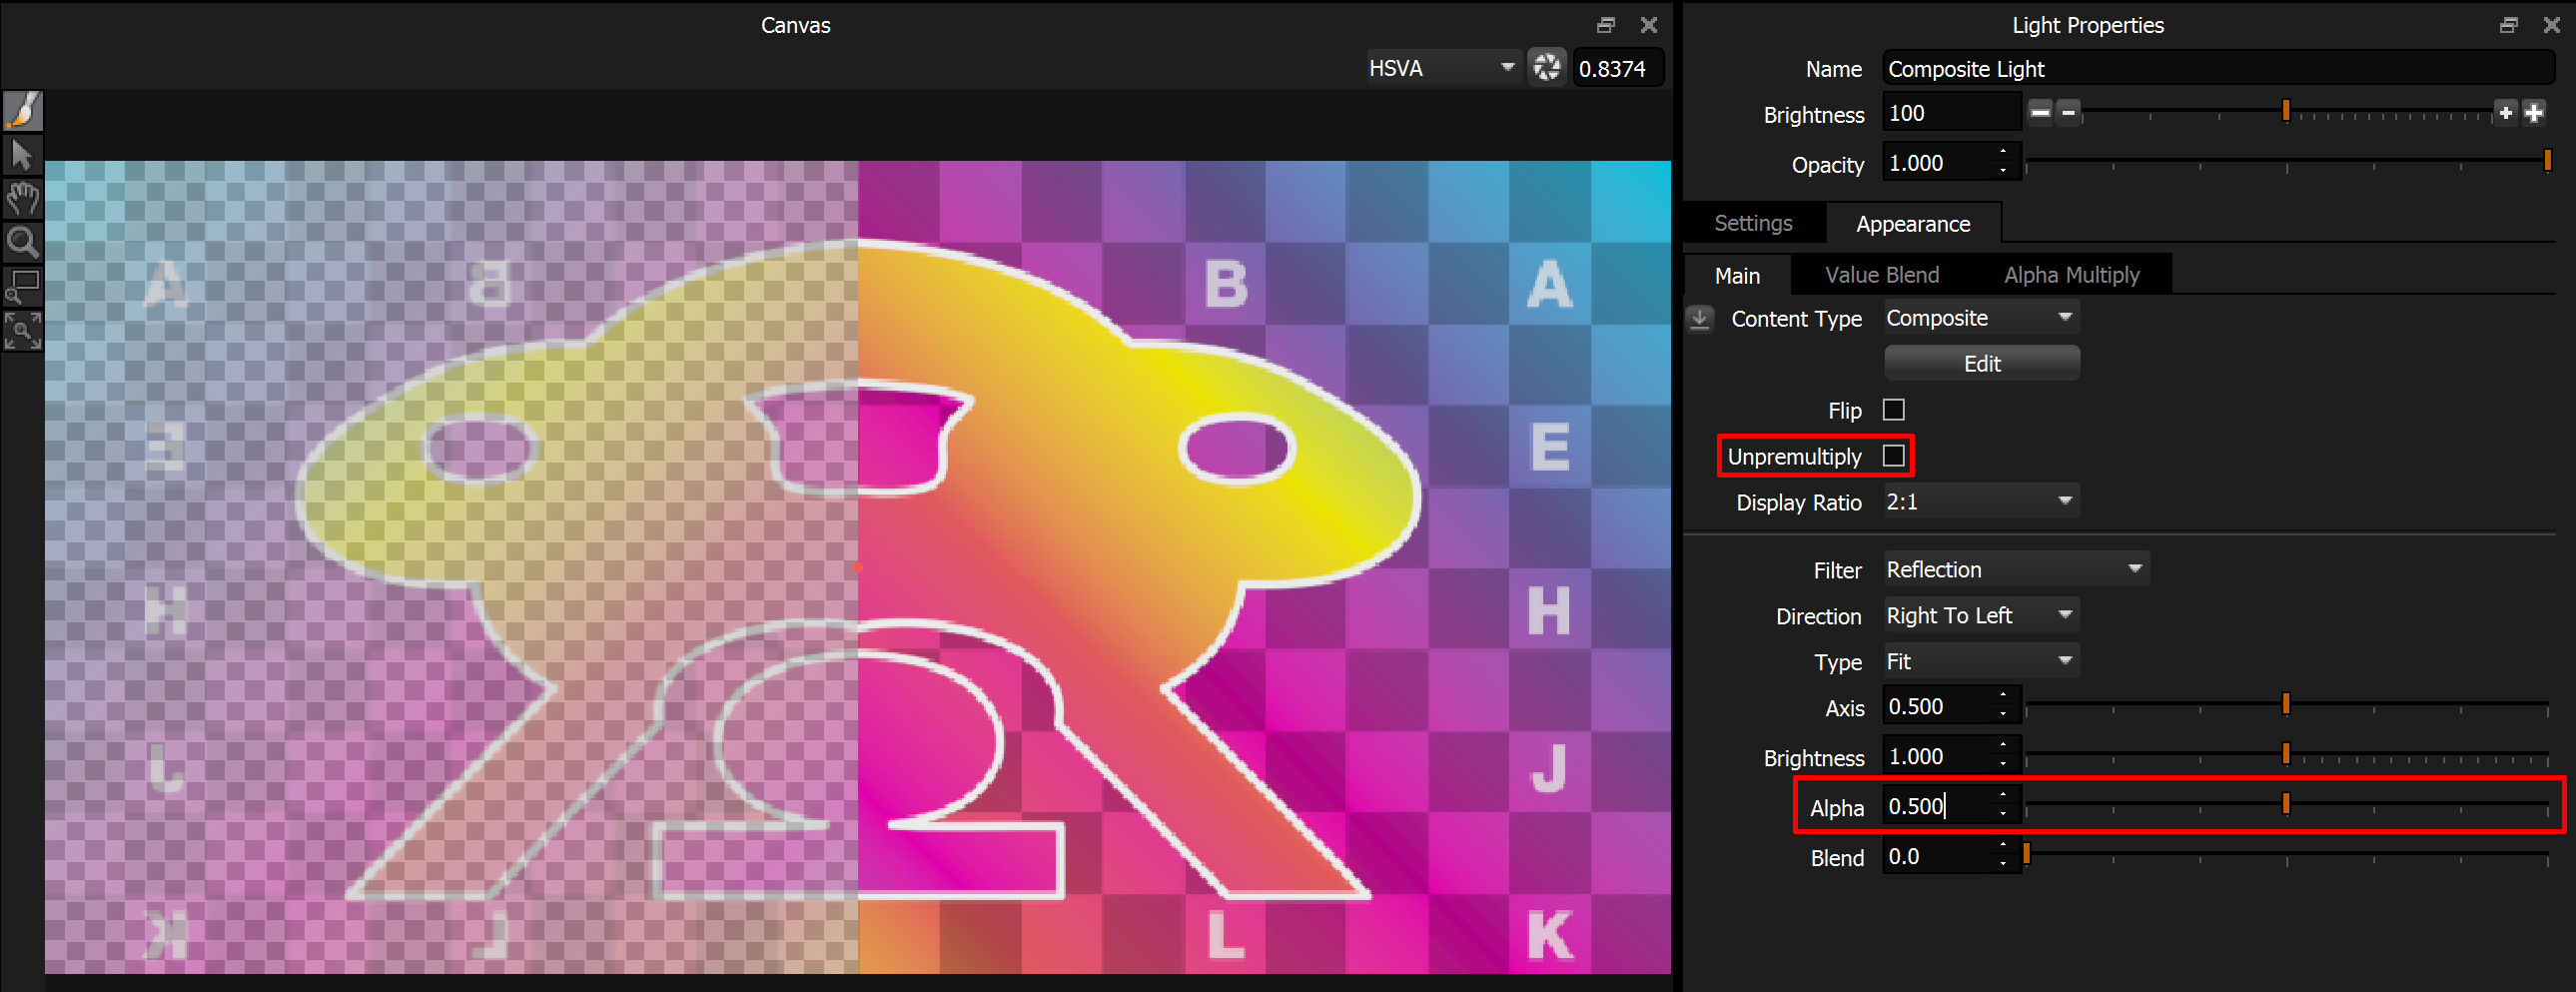
This setting sets the alpha value of the reflected content. 1 = 100% and solid, 0 = 0% and totally transparent.
This setting is useful for faking a reflection of the HDRI in a floor.
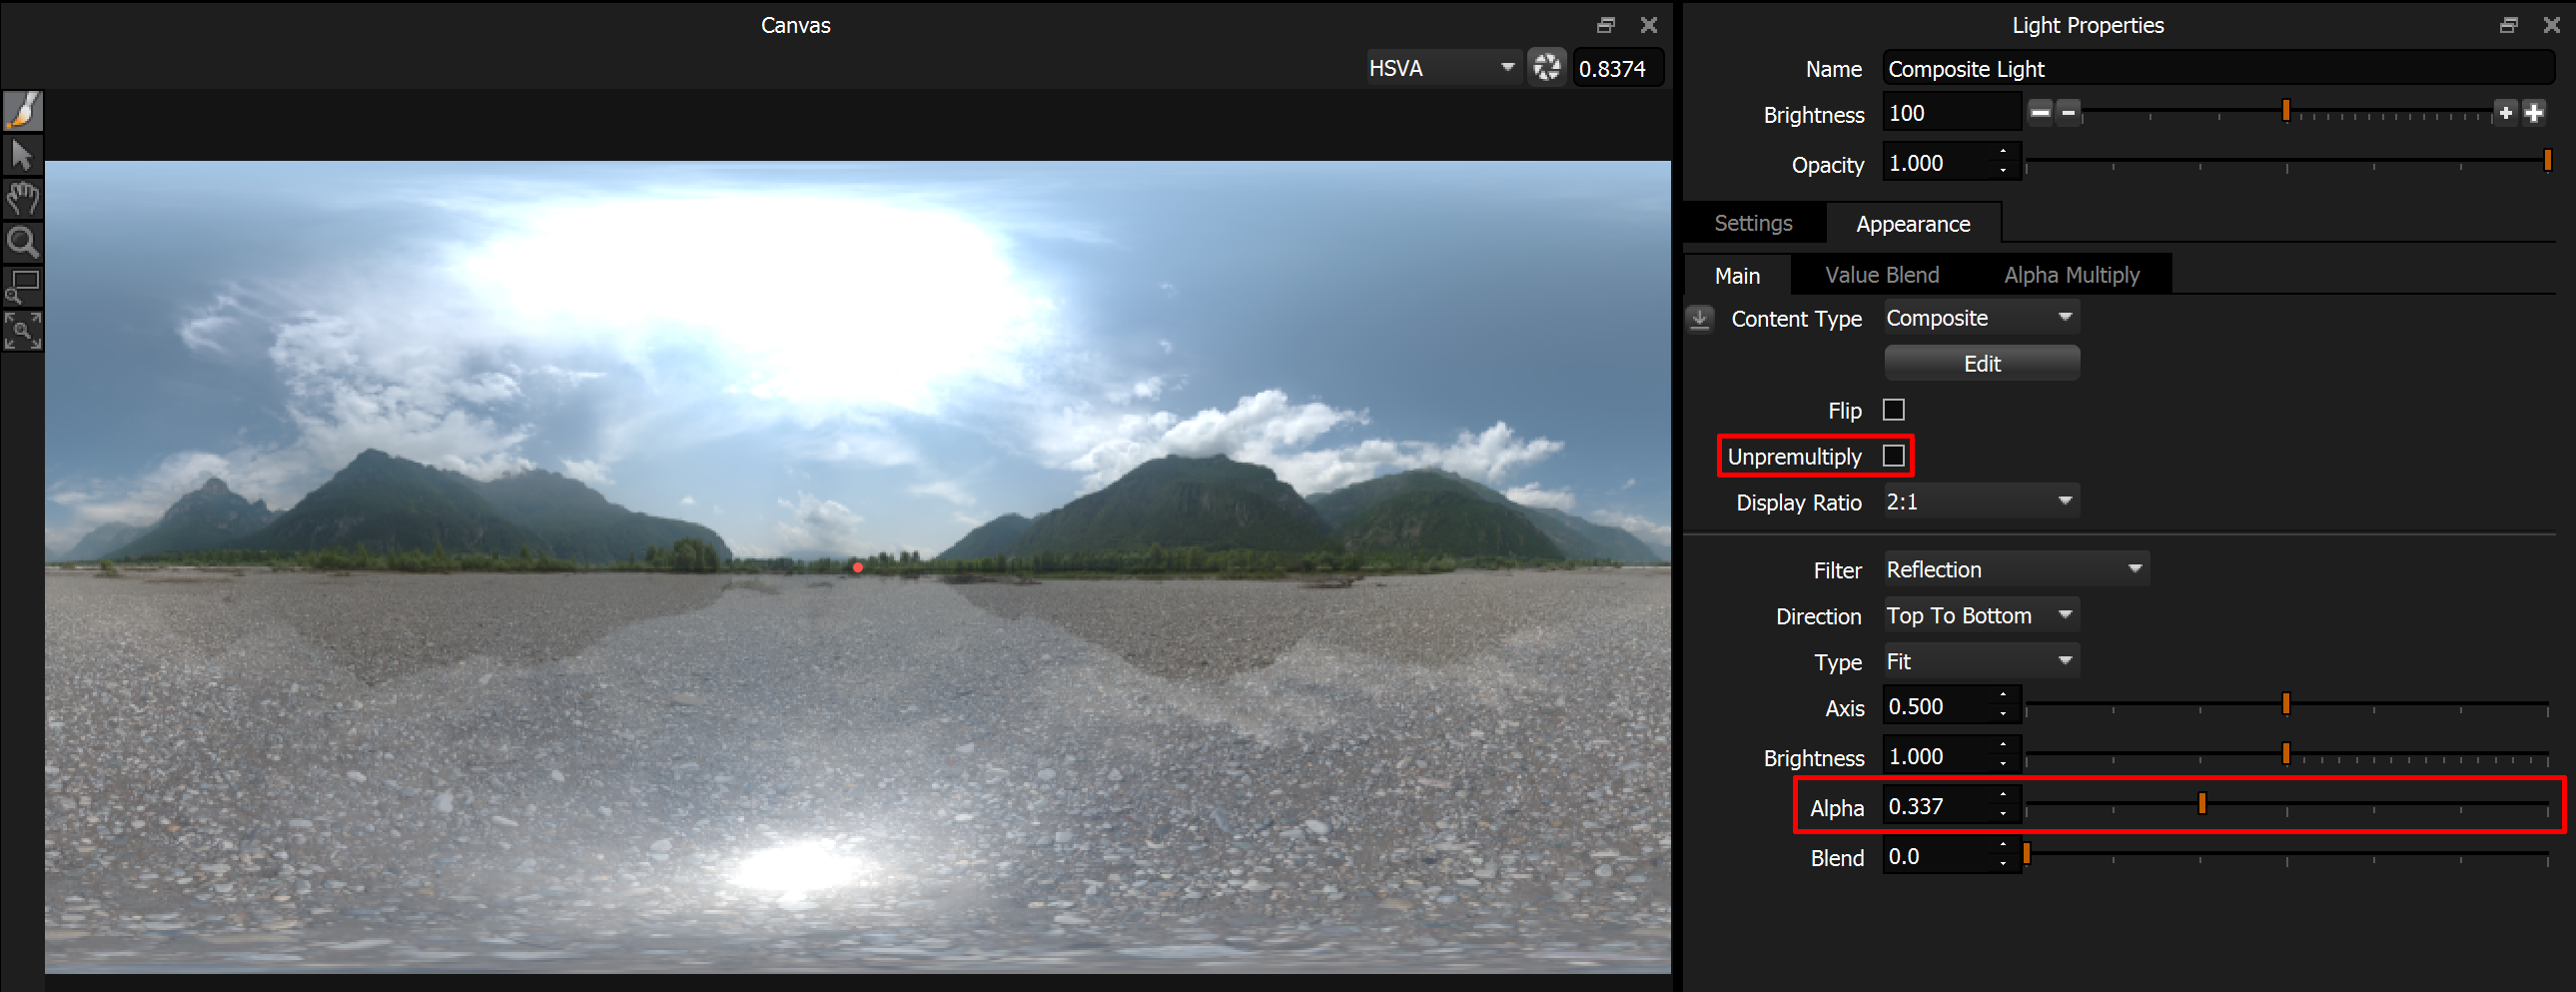
Reflected from top to bottom. Behind is the original HDRI map, the transparent reflection is over the top and looks like water.
Blend
The original and reflected image content can be blended over the axis with a soft edge. The width of this blend region is specified with this setting.
A setting of 0 provides a hard edged reflection and no blend.
Using the Blend setting is useful to soften the transition between both sides of a HDRI map. If the brightness has been adjusted for the reflected region, this normally leaves a hard edge unless a Blend value is used to soften this edge and create a transition.
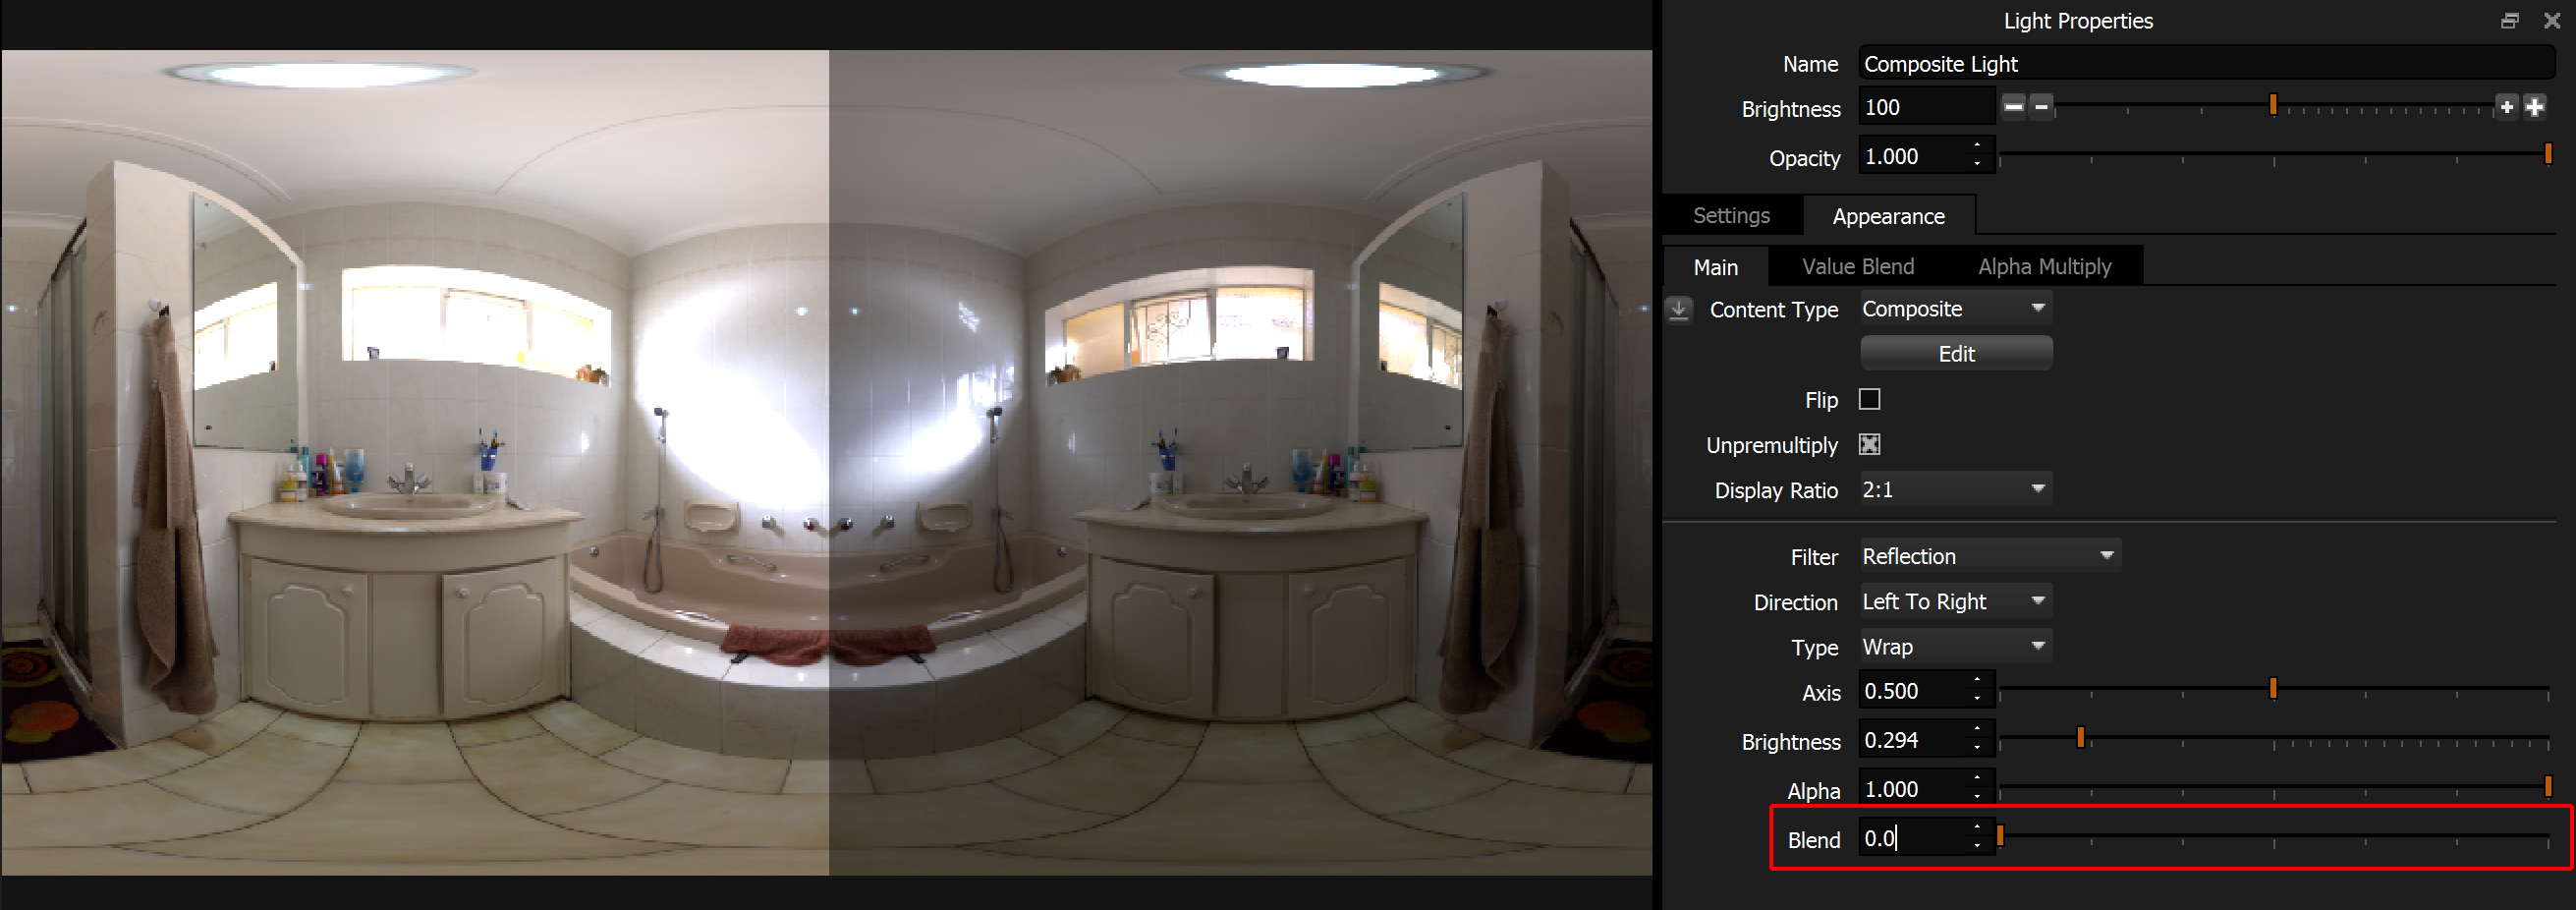
Blend = 0 - Hard Edge

Blend = 5 - Soft blend
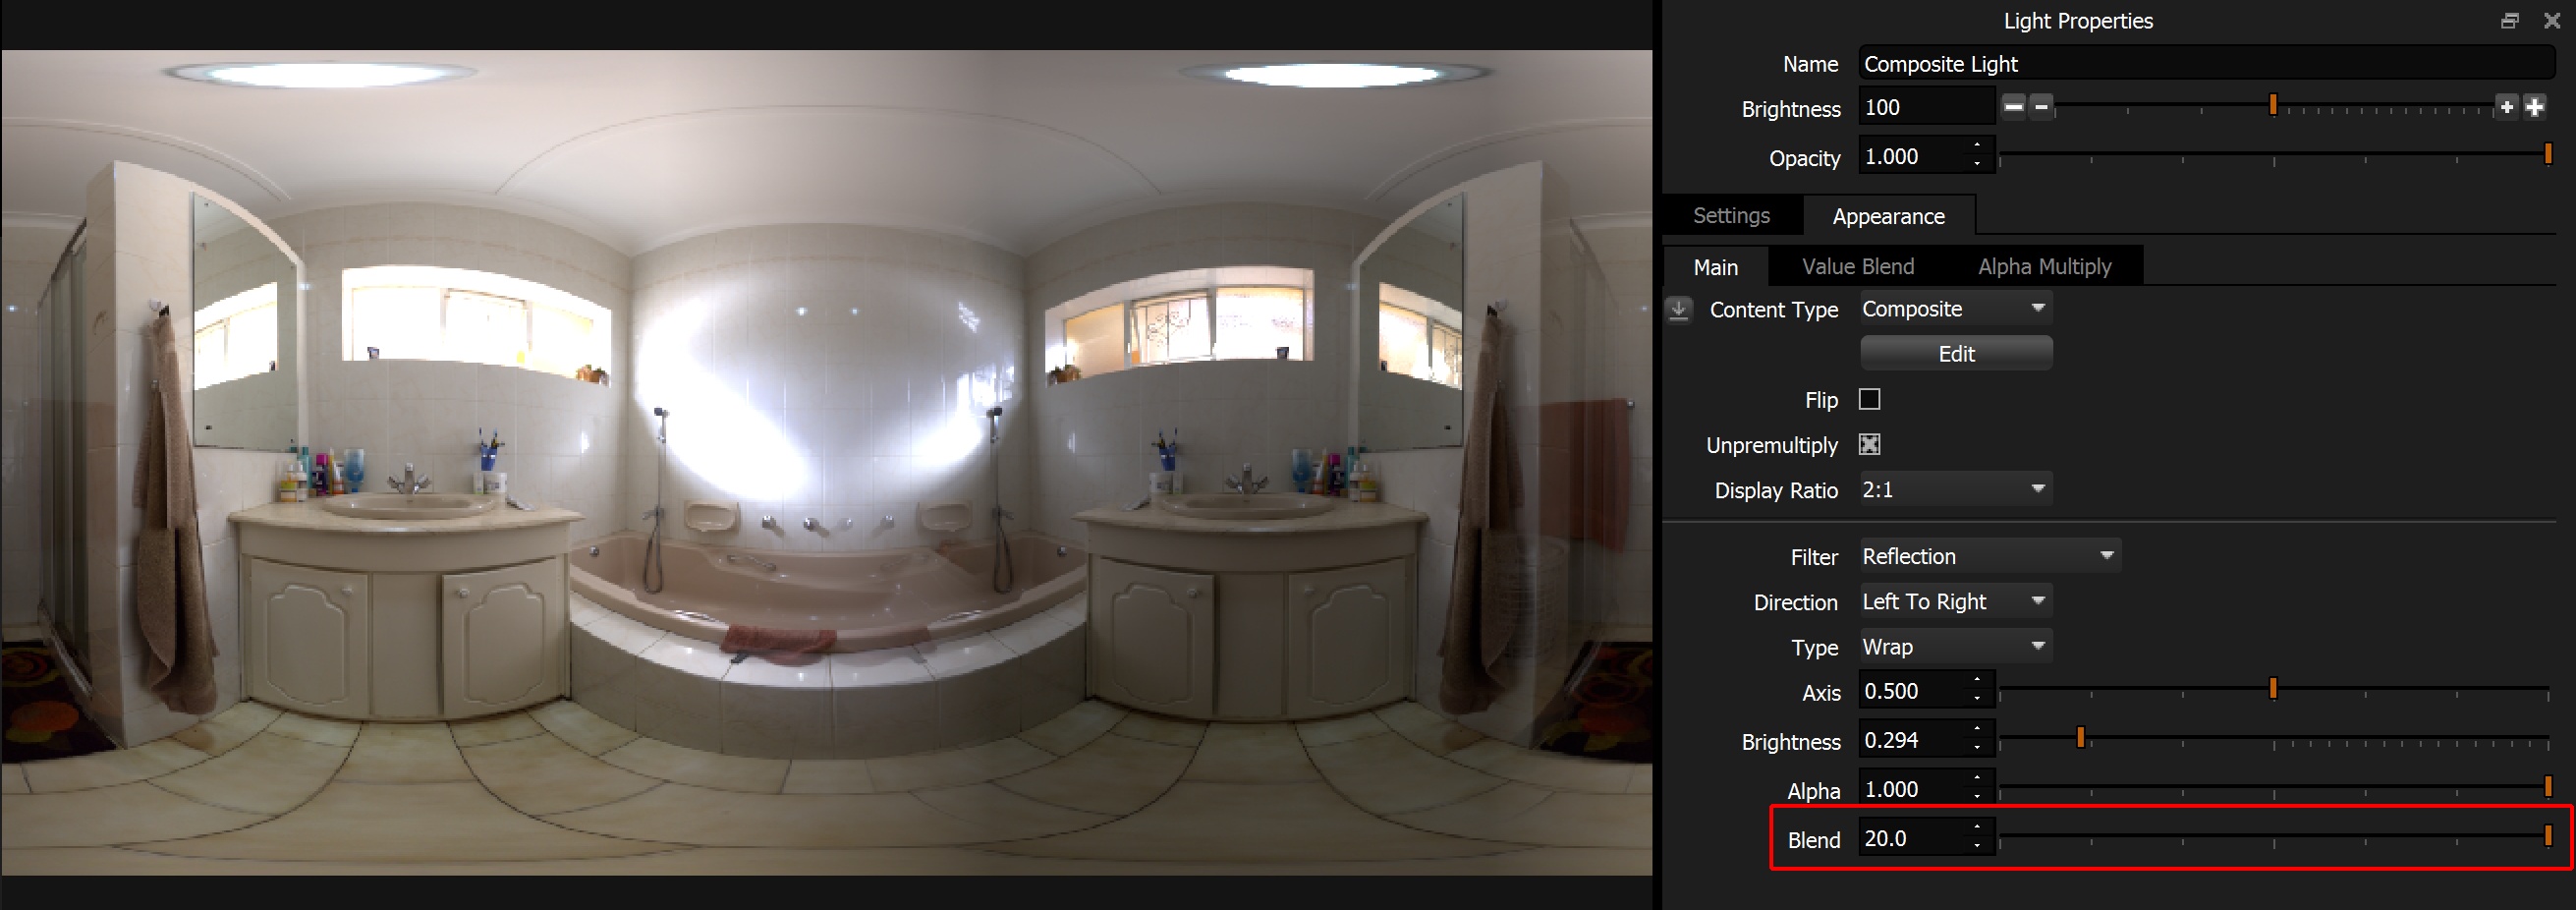
Blend = 20 - Very soft blend
