HDR Light Studio includes a large library of preset lights you can use in your lighting projects, and you can save your own Light Presets also.
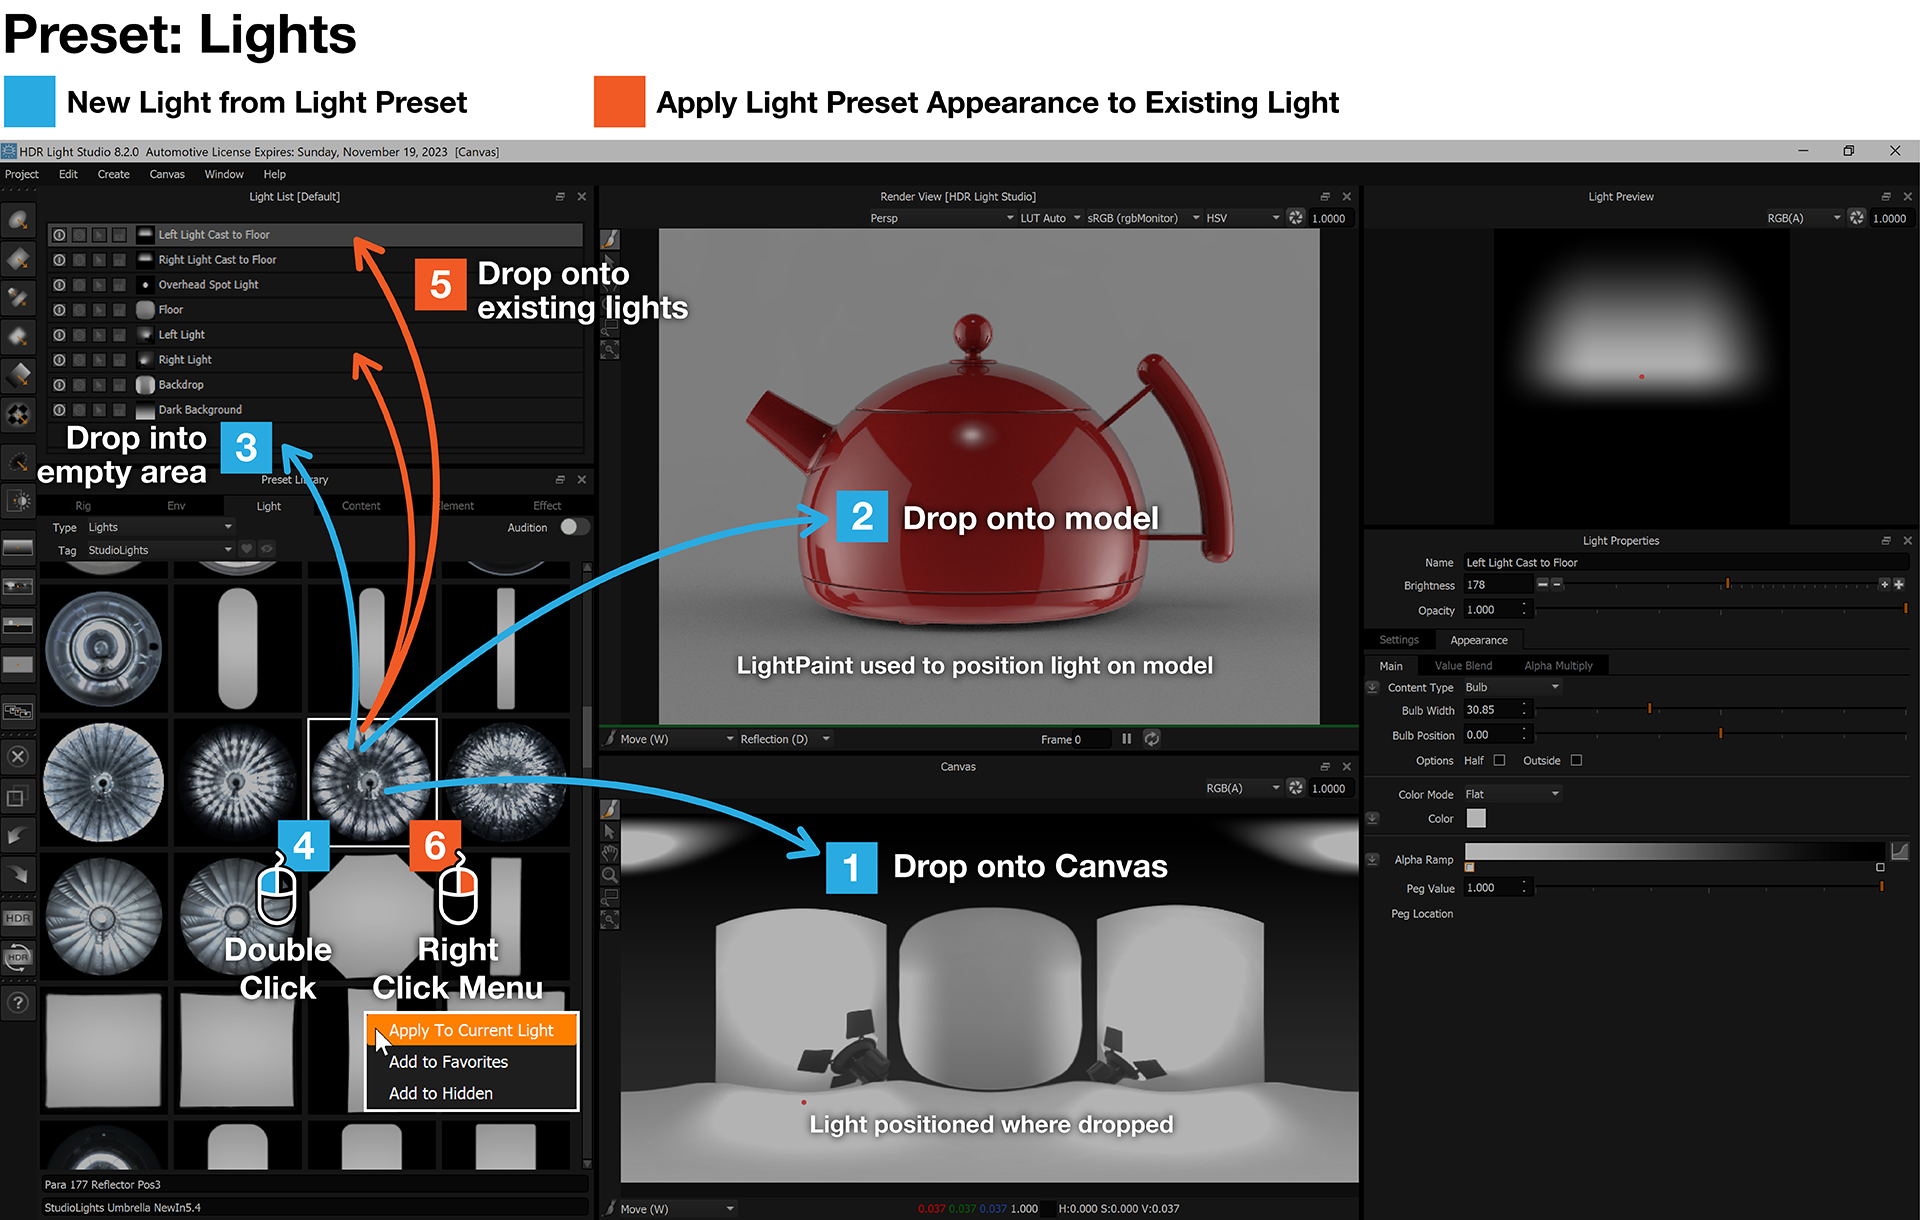
1. Drag and Drop onto the Canvas
The new light will be added to your current lighting project, at the top of the Light List.
The light will be positioned where it was dropped (mouse button released) on the canvas.
2. Drag and Drop onto a Render View
The new light will be added to your current lighting project, at the top of the Light List.
The light will be positioned where it was dropped (mouse button released) on the 3D model using the active LightPaint mode (Reflection, Illumination, Rim etc).
3. Drag and Drop into an empty area on the Light List
The new light will be added to your current lighting project, at the top of the Light List.
The light will be positioned using the location stored in the preset.
4. Double Click on the Preset
The new light will be added to your current lighting project, at the top of the Light List.
The light will be positioned using the location stored in the preset.
5. Drag and Drop onto existing lights in the Light List (New in 8 Drop 2)
The appearance of the preset light is applied to the light where the preset is dropped (mouse button released). This includes all Main, Value Blend and Alpha Multiply settings.
6. Right Click Menu - Apply to Current Light (New in 8 Drop 2)
The appearance of the preset light is applied to the selected light in the Light List. This includes all Main, Value Blend and Alpha Multiply settings.
Next: Preset Content
