This workflow tutorial teaches how to use HDR Light Studio with Omniverse USD Composer via the Connection.
Watch the HDR Light Studio - Quick Start video first to learn the key concepts of using HDR Light Studio.
Ensure you have installed both the HDR Light Studio main application and the HDR Light Studio Connection for Omniverse.
Start Omniverse USD Composer and Load your 3D Scene
Before we start to use HDR Light Studio to light this scene.... let's make sure the scene is ready to light first.
Camera View
Make sure you have a camera setup with the final composition for the shot that you want to light. If you move the camera during the lighting process, the reflections of the lights will move and this will ruin your lighting.
Existing Lights
Your scene should not contain any lighting before using HDR Light Studio. You may have set up some environment/dome lighting during the look development for the scene, so now is a good time to hide or delete this lighting. If you have an LED light that's part of a product for example, then this is a part of your scene and should be kept. We simply want to avoid confusion by mixing lights created with HDR Light Studio and those not created with HDR Light Studio. A blank lighting canvas is the best place to start.
 Tip: If you have an HDRI map you want to edit that's already lighting the scene, hide or delete this light and load the HDRI map into HDR Light Studio once it's open.
Open the 'HDR Light Studio Connection' panel
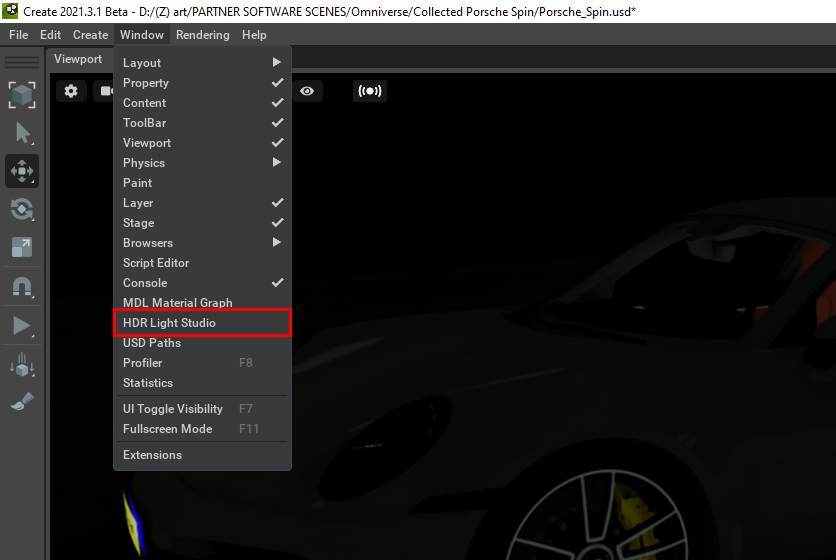
Go to the menu: Window > HDR Light Studio
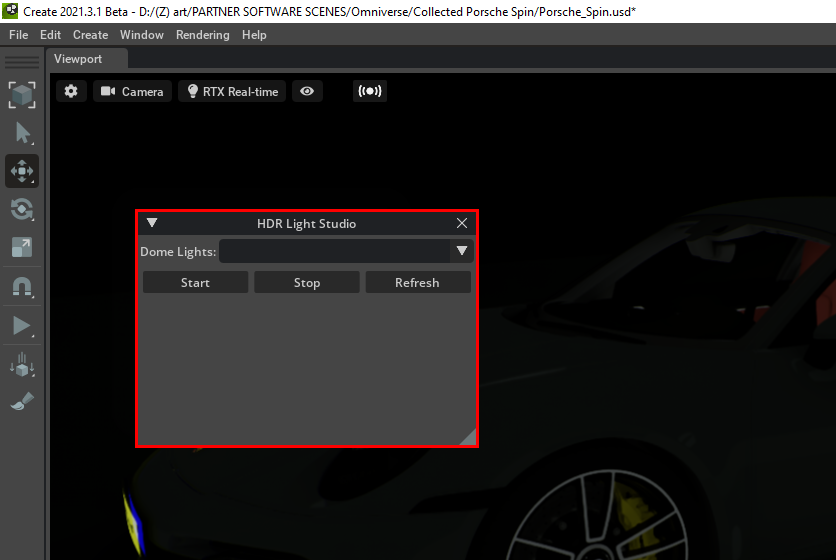
The HDR Light Studio Connection panel opens.
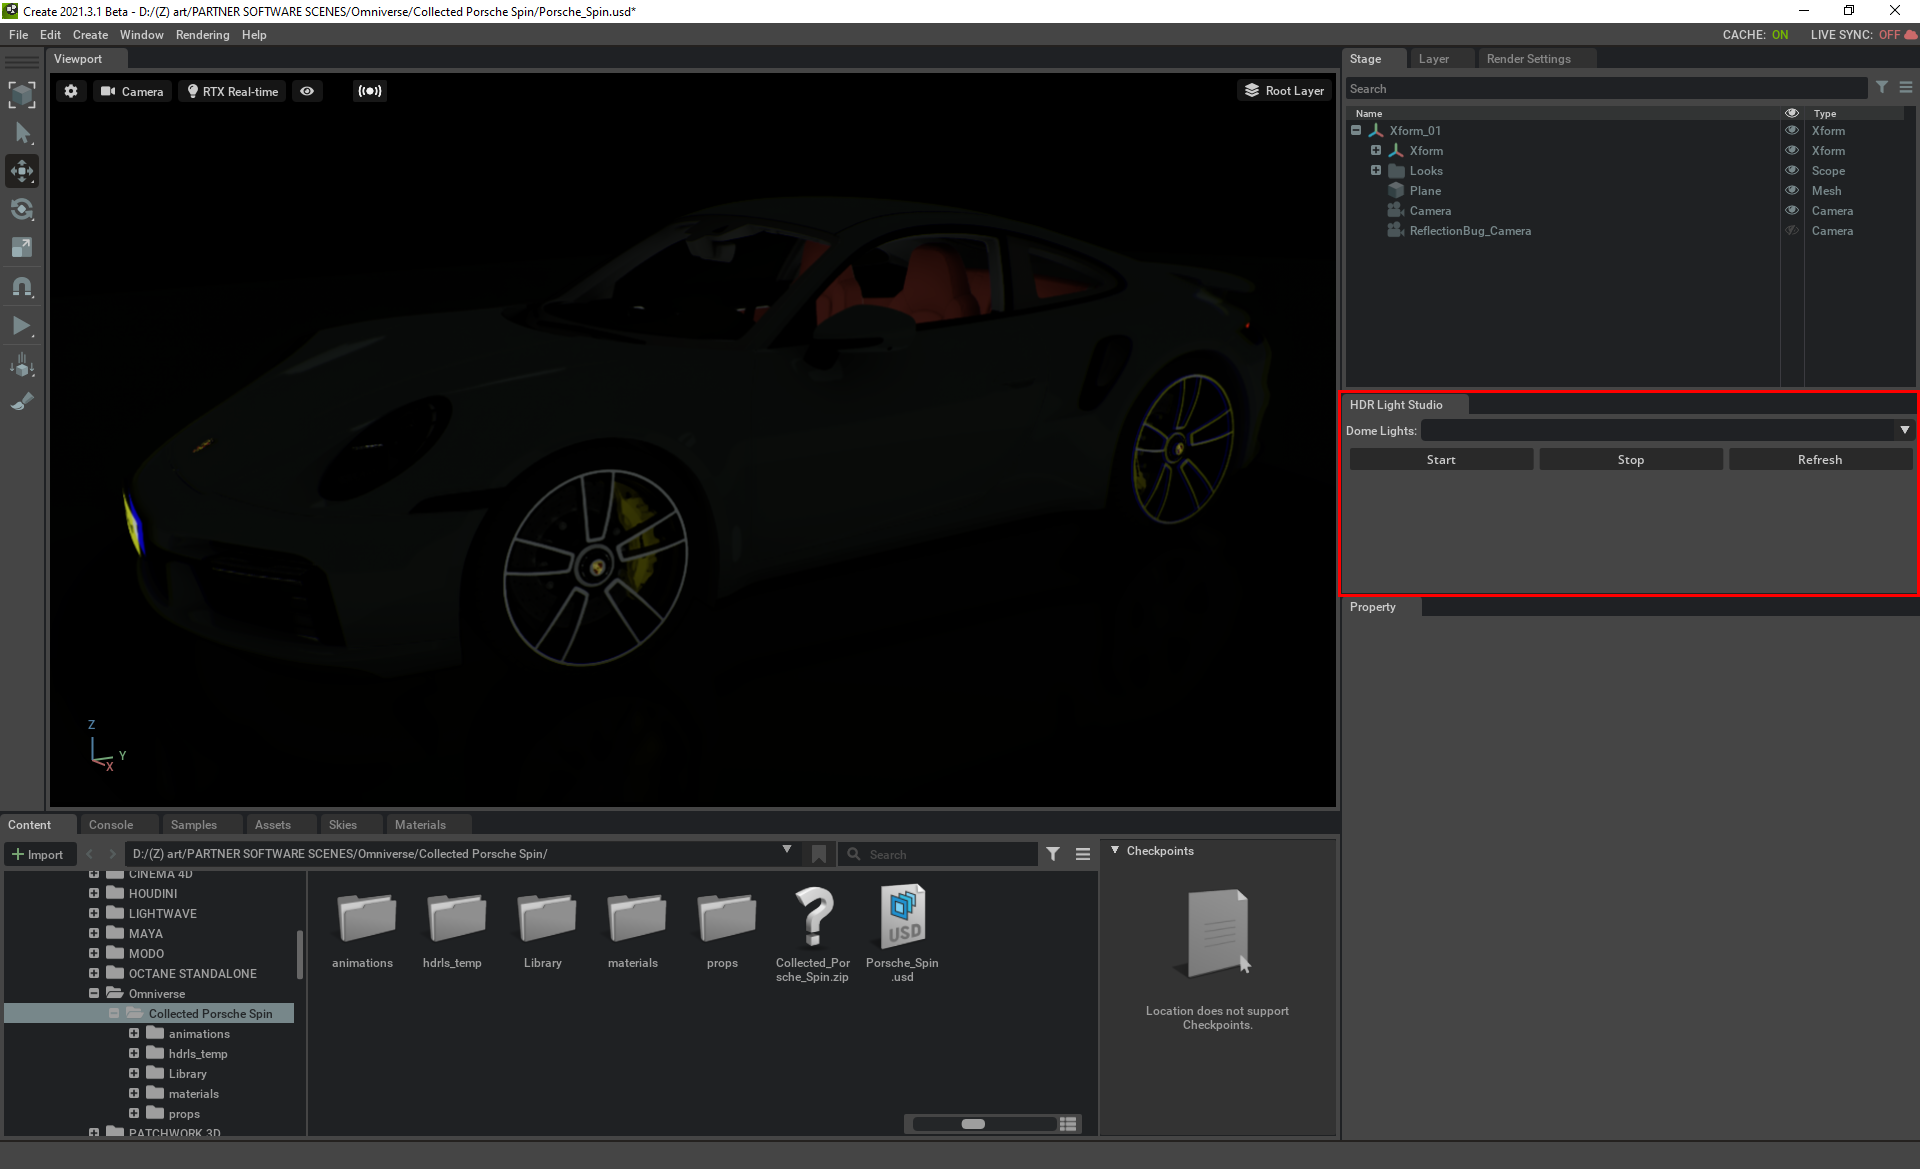
Ideally, you should now drag the panel and dock it into the Omniverse USD Composer interface.
Create A New Sublayer And Store Your Lighting On A Separate USD File
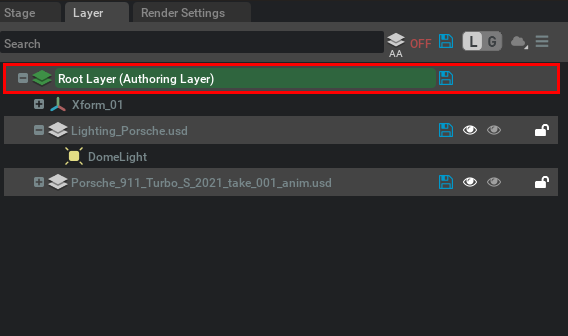
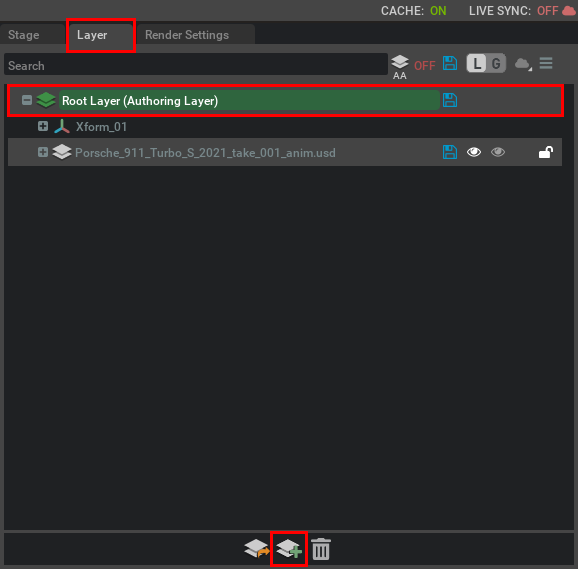
Go to Layer panel. Then, while the Root Layer is the authoring layer, click on Create Sublayer button.
 If the Root Layer isn't the authoring layer, simply double click on the Root Layer.
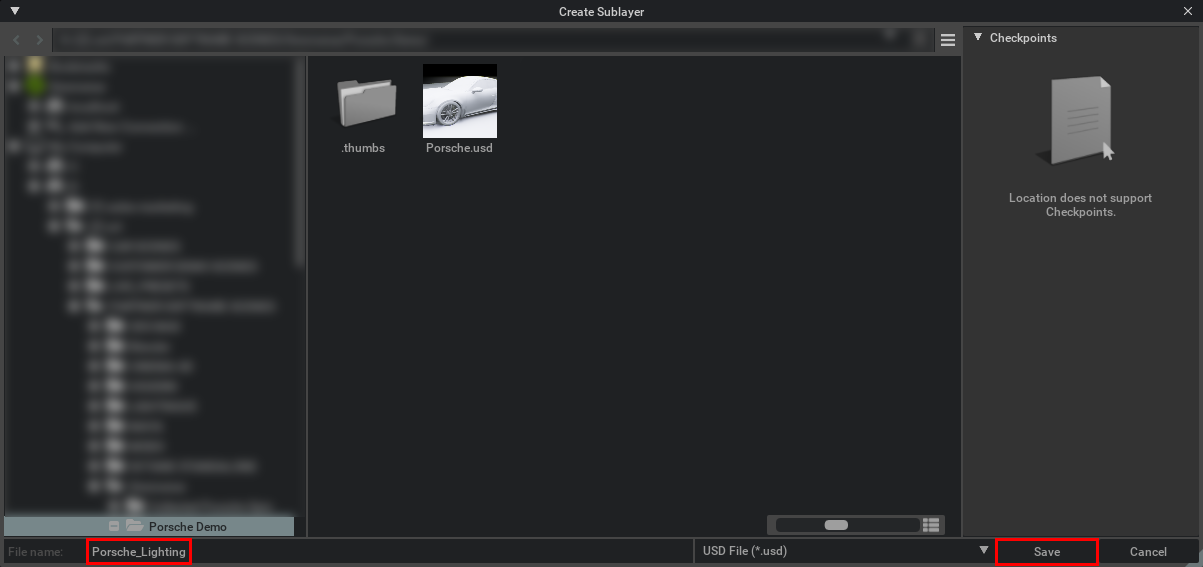
Give your sublayer a name and save. In this example we'll call it Porsche_Lighting.usd.
Double click on the sublayer you have just created to change it to the Authoring Layer. The sublayer will turn green,
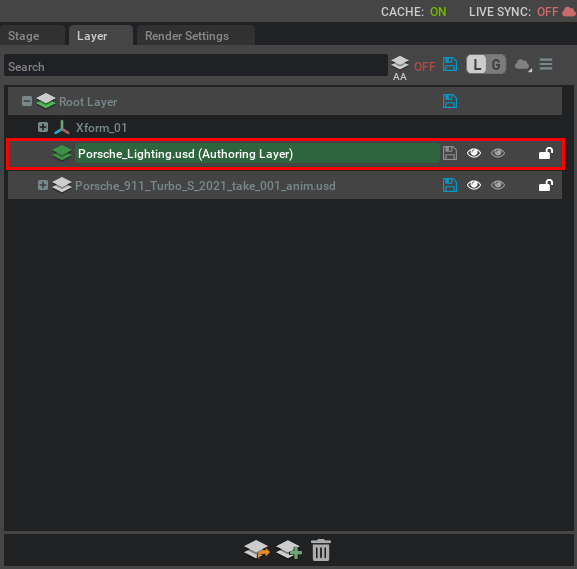
Now, any lighting we create in HDR Light Studio will be made and stored in this sublayer. This is a good way to keep your lighting separate to your geometry, animation etc.
Create A Dome Light
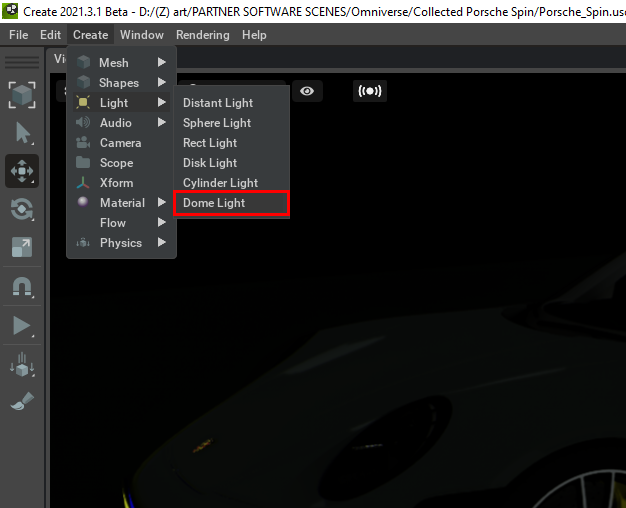
Go to menu: Create > Light > Dome Light
If we look in the Layer panel, we can see that this dome light has been created and is contained within the created lighting layer. This dome light is now detected by the HDR Light Studio connection and can be seen listed in HDR Light Studio panel.
When started, HDR Light Studio will connect to the chosen dome light and take control of its environment image.
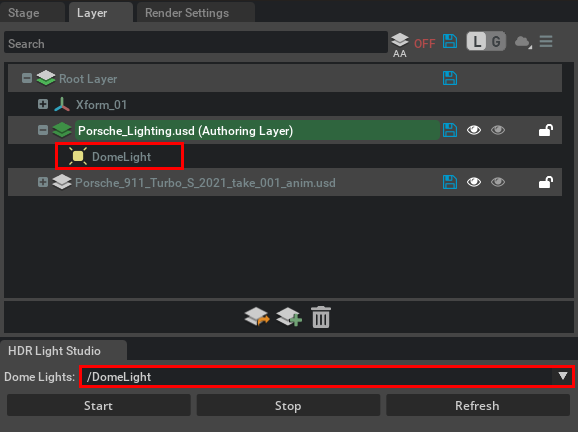
 If your dome light isn't being detected by the HDR Light Studio connection and it isn't listed in the Dome Lights list, then click on Refresh (in the HDR Light Studio connection panel) to re-scan the Omniverse stage and re-populate the Dome Lights list.
Start RTX Path-Traced Rendering
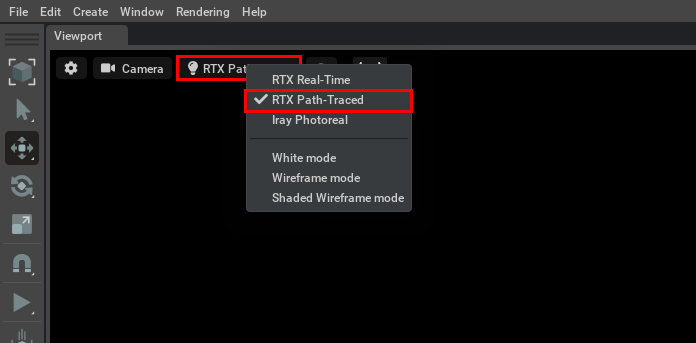
If you haven't already, switch from RTX Real-Time to RTX Path-Traced as it's the most accurate render mode for lighting.
Start HDR Light Studio
Press 'Start' to start HDR Light Studio in a connection with Omniverse USD Composer.
 Please Note: If HDR Light Studio is already open running standalone, connected with another 3D app, or connected to another session of Omniverse USD Composer - the connection will not function correctly. So please ensure HDR Light Studio is not already open before starting it from Omniverse USD Composer.

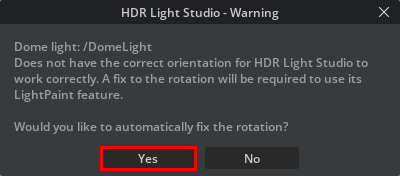
HDR Light Studio expects the dome light to have orientation set to 270, 0, 0. This is important for the LightPaint feature in HDR Light Studio to work as expected. So, if you see the HDR Light Studio - Warning dialogue below, it means the dome light you have created has its orientation set to a value that's different to what HDR Light Studio expects and is compatible with. Therefore, it is highly recommended to always press Yes to allow HDR Light Studio to automatically fix the orientation and set it to a value it expects, i.e. 270, 0, 0.
The HDR Light Studio application now opens connected with Omniverse USD Composer. Behind the scenes, the HDR Light Studio connection has taken control of the environment image on the chosen dome light.
The HDRI map from HDR Light Studio is now shared with Omniverse as a temporary low-res image (a proxy). This image is fast to calculate and fast for Omniverse USD Composer to load and use during the interactive lighting design process.
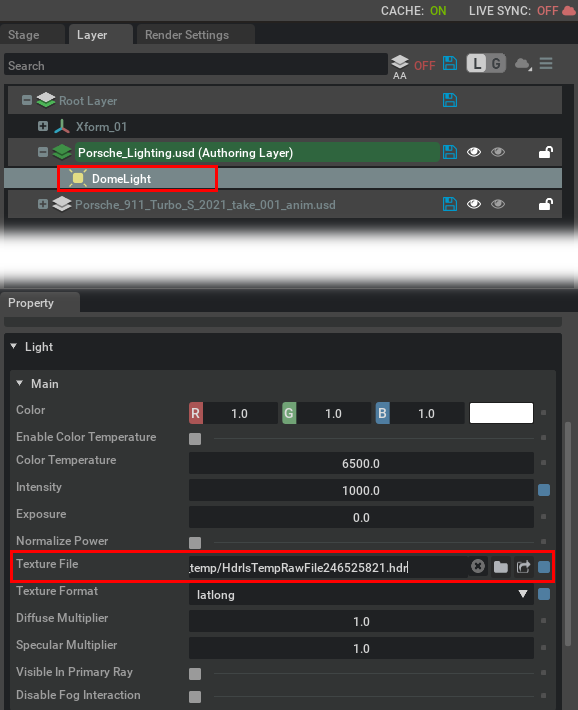
When the lighting design changes in HDR Light Studio, the environment in Omniverse USD Composer is updated to use a new temp file with a new file name with a random number on the end (see image above). This ensures the renderer uses the new image and not a cached old image.
Default HDR Light Studio Interface Layout with Omniverse
By default, the HDR Light Studio interface should look something like this. (below)
If not, you can reset the HDR Light Studio interface layout by going to the menu: Window > Layout > Load > Default > Omniverse
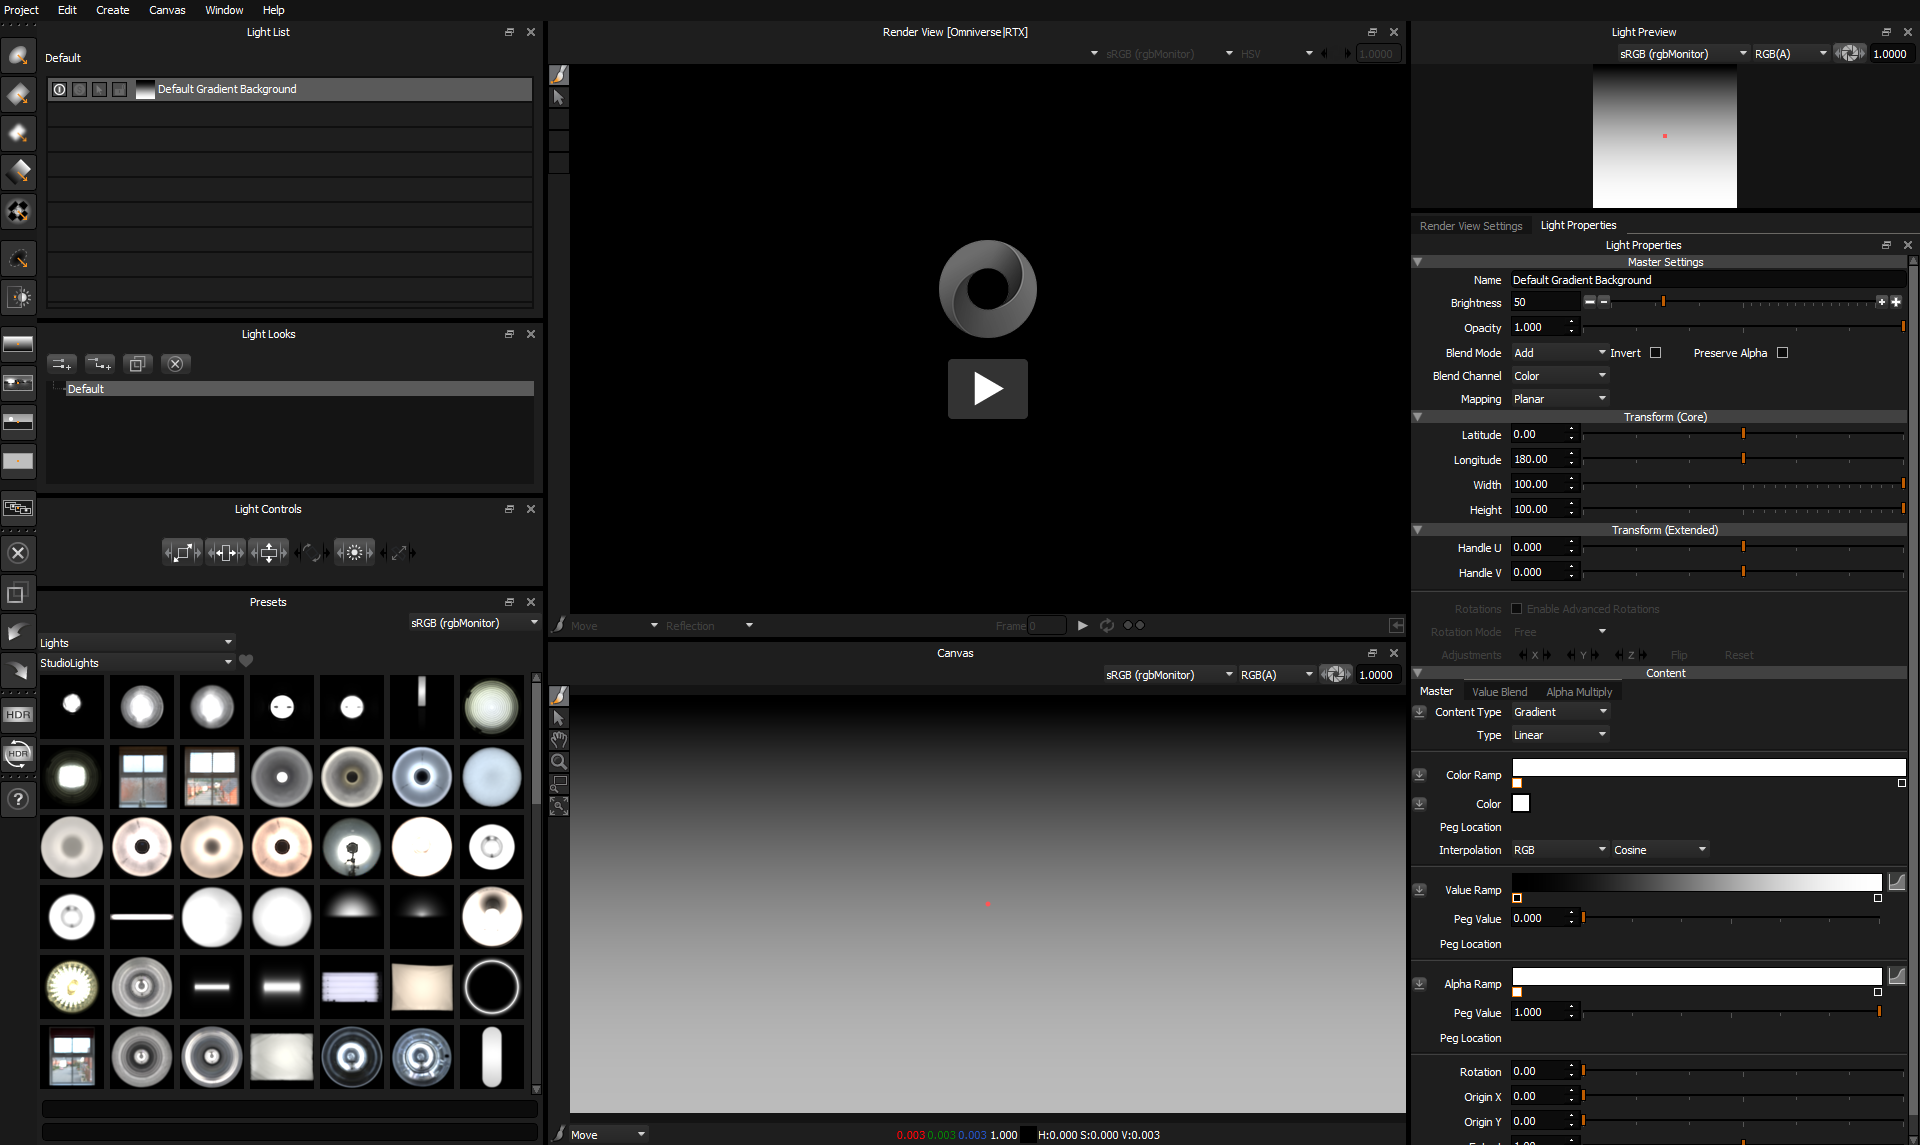
Show the interactive render inside the HDR Light Studio interface
In HDR Light Studio, press Play on Render View [Omniverse|RTX]
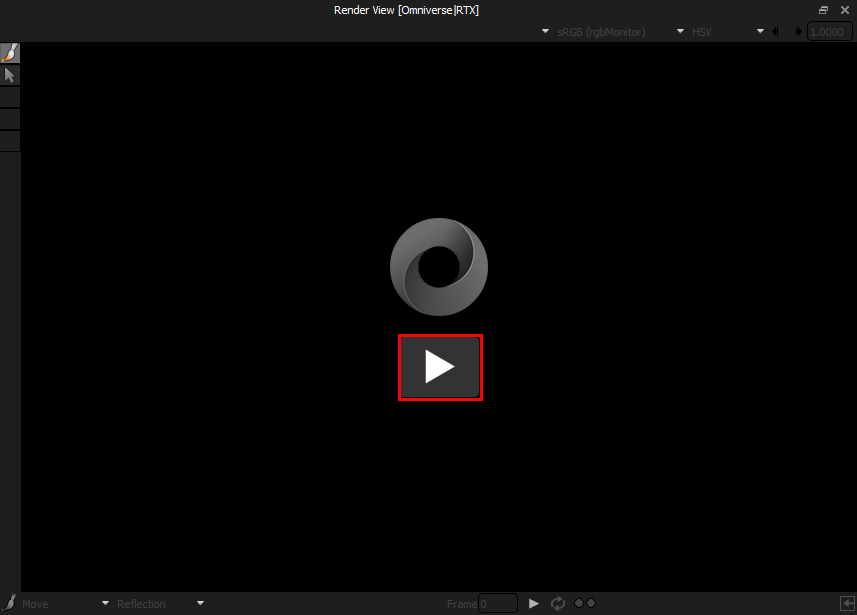
The Omniverse rendered image will now stream into HDR Light Studio's interface, so we can now paint it with lighting.
To understand all of the features/controls for this view, see here.
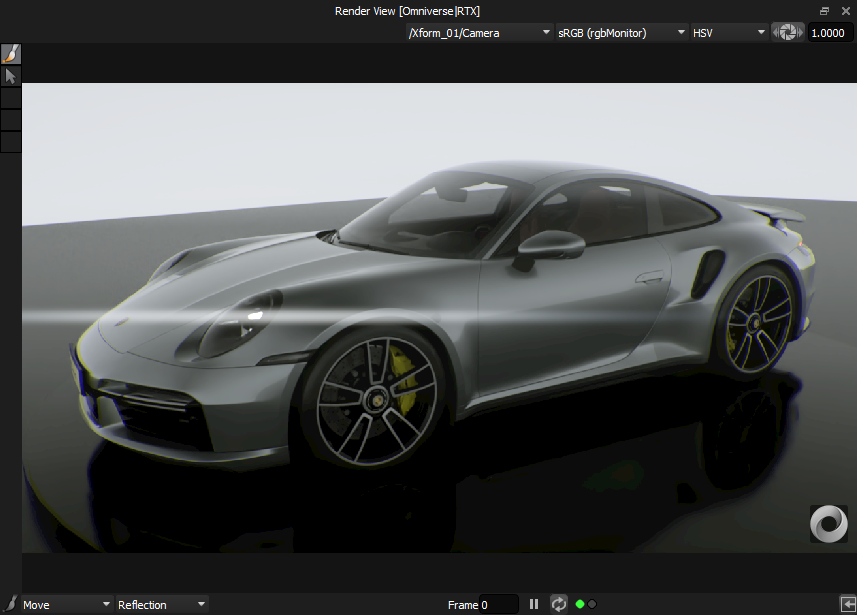
The rendered image will look too bright. This is because we need to change a setting in the Render View [Omniverse|RTX]. Use the drop-down to change the LUT from sRGB to None. This will ensure the image looks the same in HDR Light Studio as it does in Omniverse USD Composer.

Let's make our first Light
By default, LightPaint is set to Reflection in this view. So lights are moved to reflect in the clicked location on the 3D model.
Learn about LightPaint here.
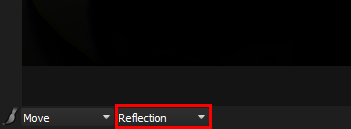
Drag and drop a Preset Light onto the 3D model in the Render View.
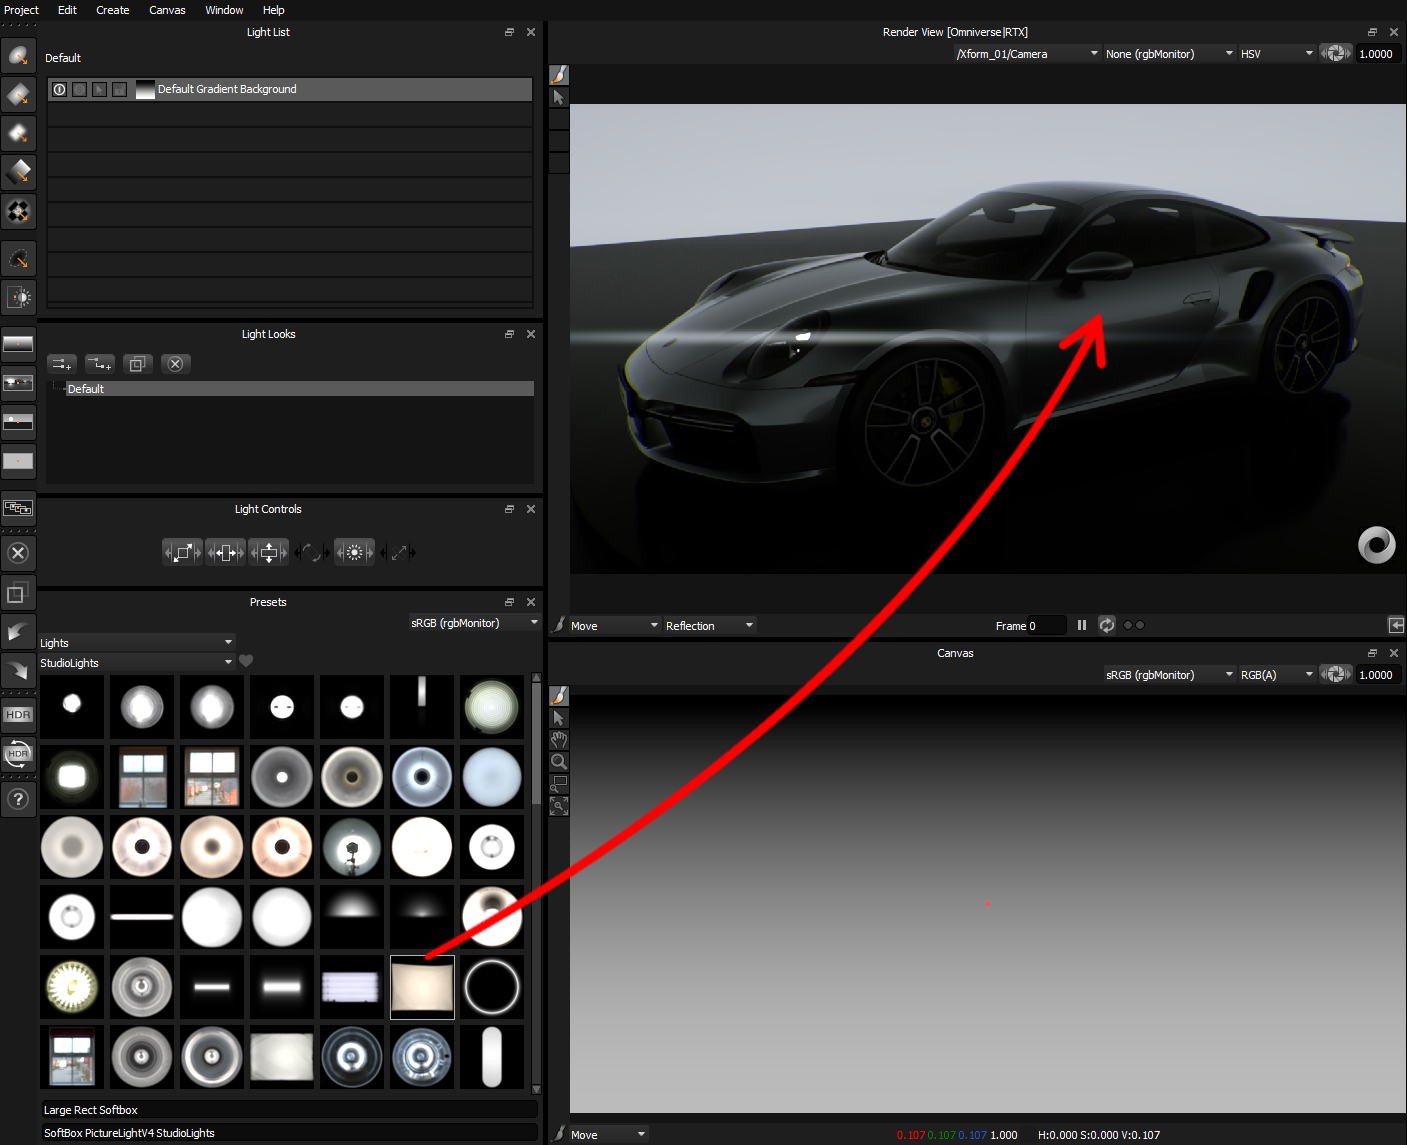
A new light is added to the lighting design - it's reflecting where the light was dropped on the 3D model.
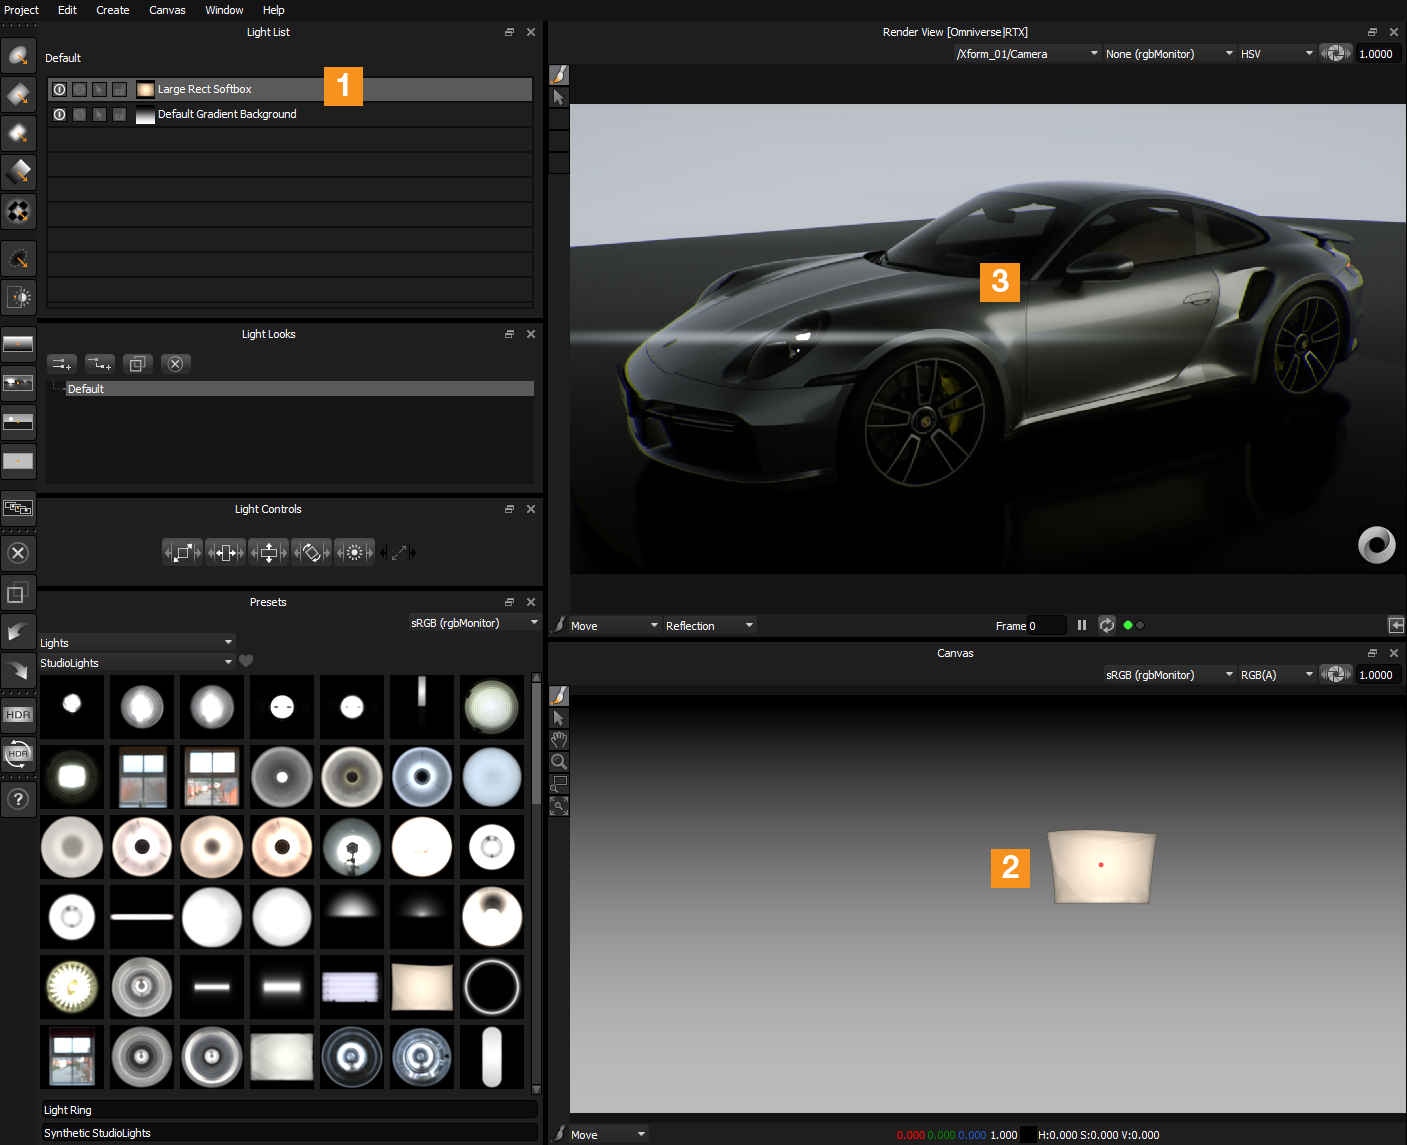
As a result, you can now see in HDR Light Studio:
•1. New light added in the Light List
•2. New light can be seen on the Canvas
•3. Render View has updated to show the new light on the model
Just the same as when we used HDR Light Studio standalone, but we have the scene from Omniverse USD Composer in our Render View.
Move the Light
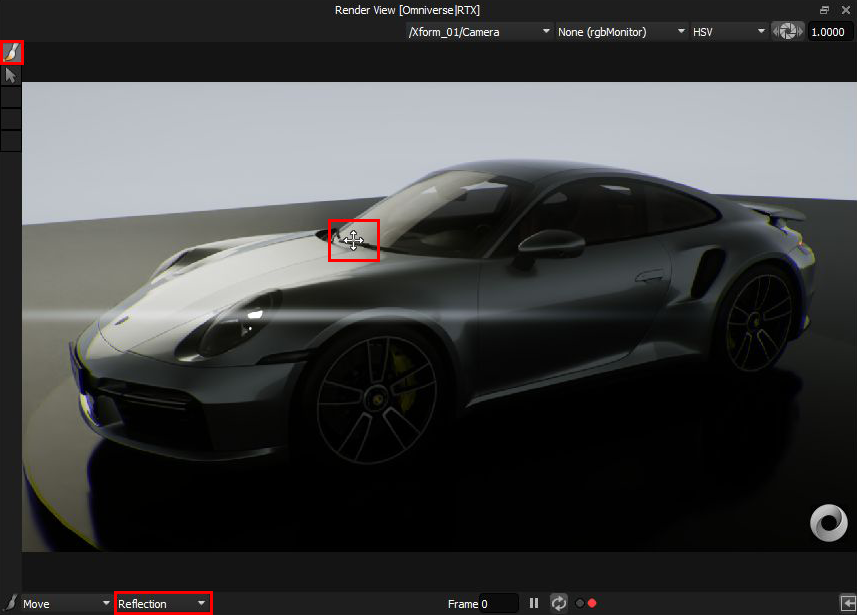
You can see that the LightPaint tool is active in the toolbar in the Render View [Omniverse|RTX].
Click on the 3D model to reposition the selected light, (highlighted on the Light List)
 Please Note: If you are lighting in RTX Real-Time render mode, you will need to disable DLSS for LightPaint to work properly. DLSS can be disabled in RTX Real-Time Render Settings > Anti-Aliasing.
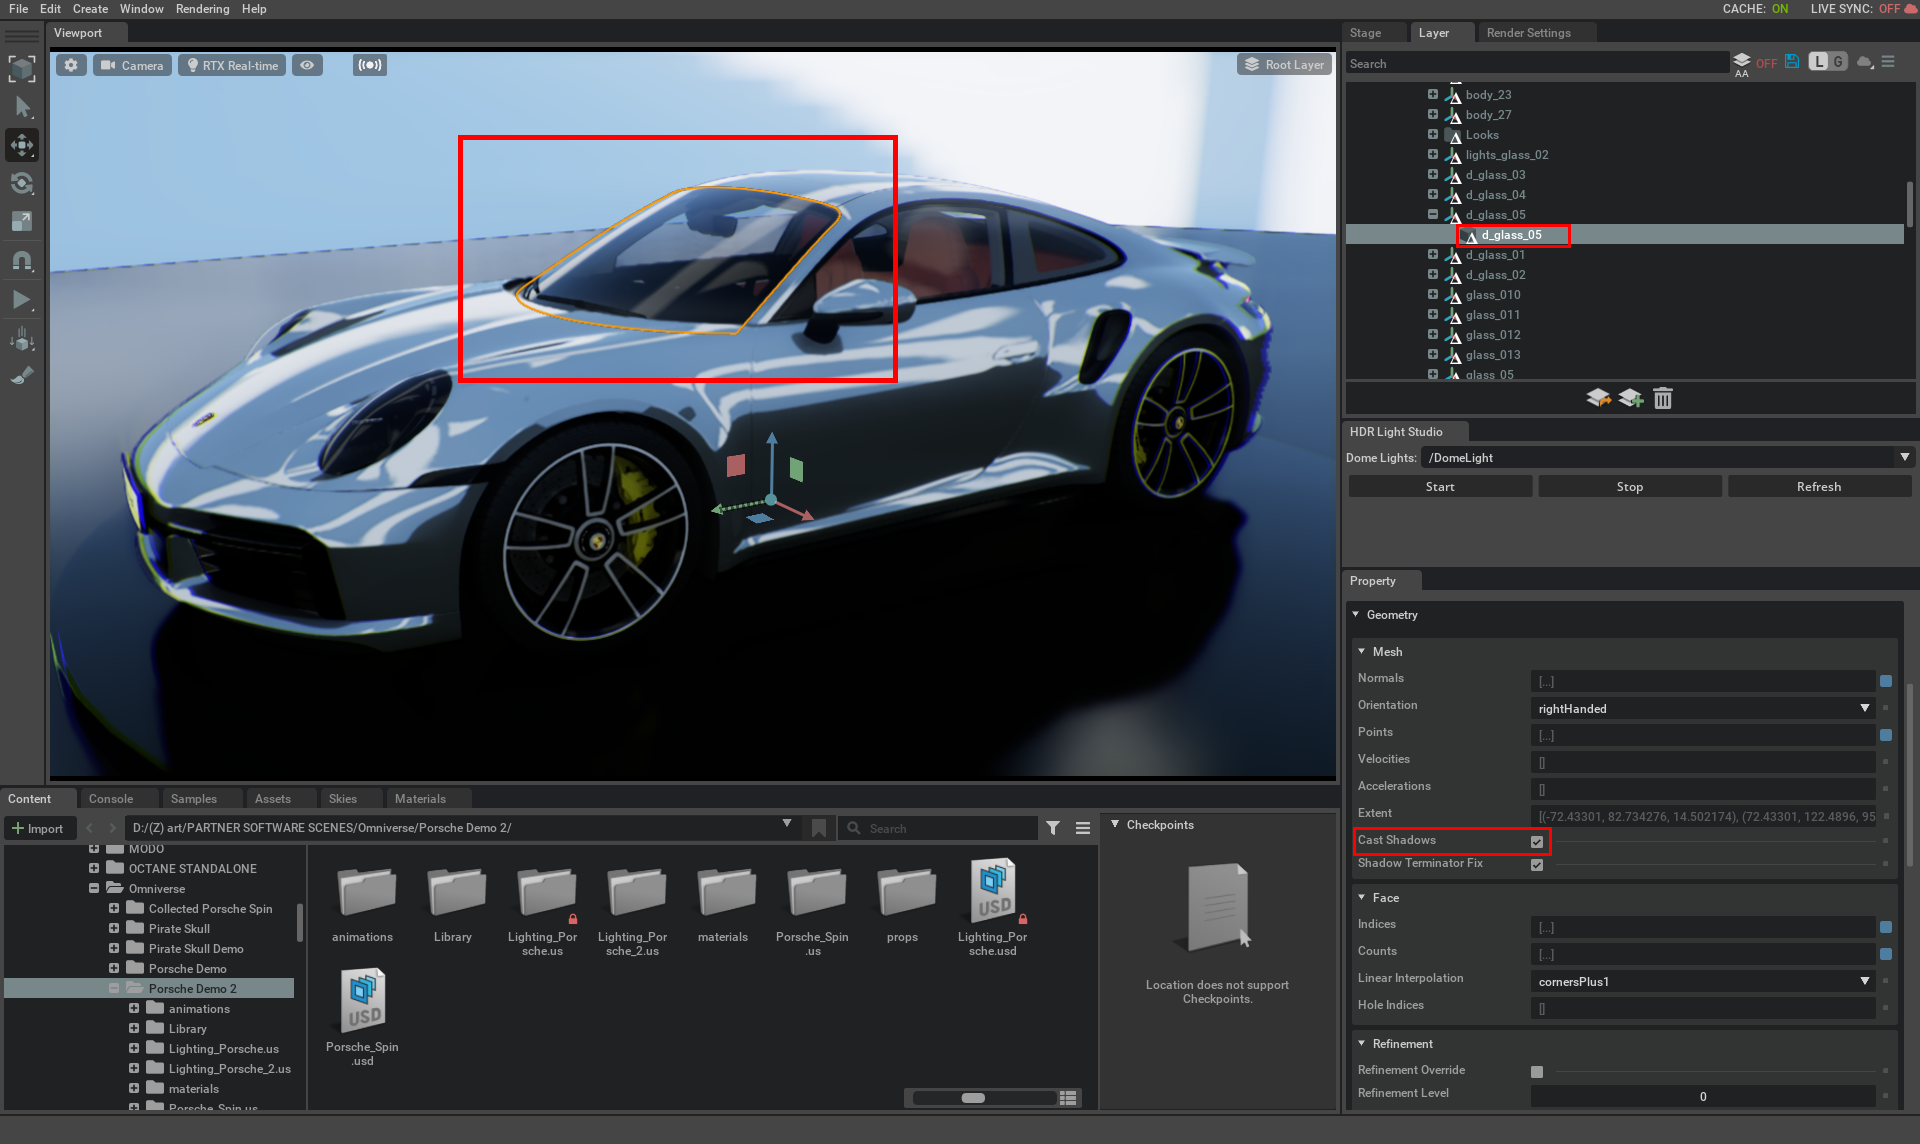
 LightPainting on Transparent/Translucent Materials - e.g. Glass
Making Area Lights - A 3D light mapped with an HDR texture
So far the lighting we created is on the HDRI map shared with Omniverse. This is about to change!
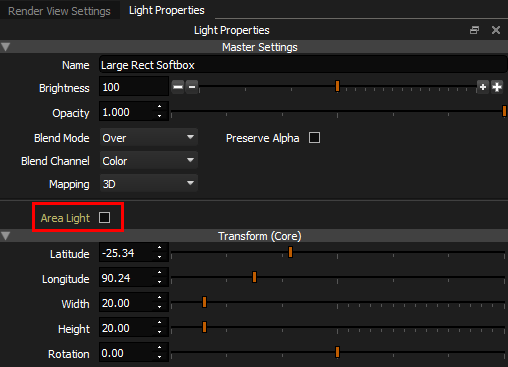
Enable the Area Light check box in the Light Properties panel for the selected light.
 Please Note: Only Lights with 3D mapping show the option to be converted into area lights, as these are the only lights that make sense to become area lights.
 Please Note: Alpha is not supported on area lights in Omniverse at the time of releasing this connection. HDR Light Studio shares RGB texture files to the area lights with RGB values multiplied by the alpha channel. So lights will have a black surround where the alpha should be.
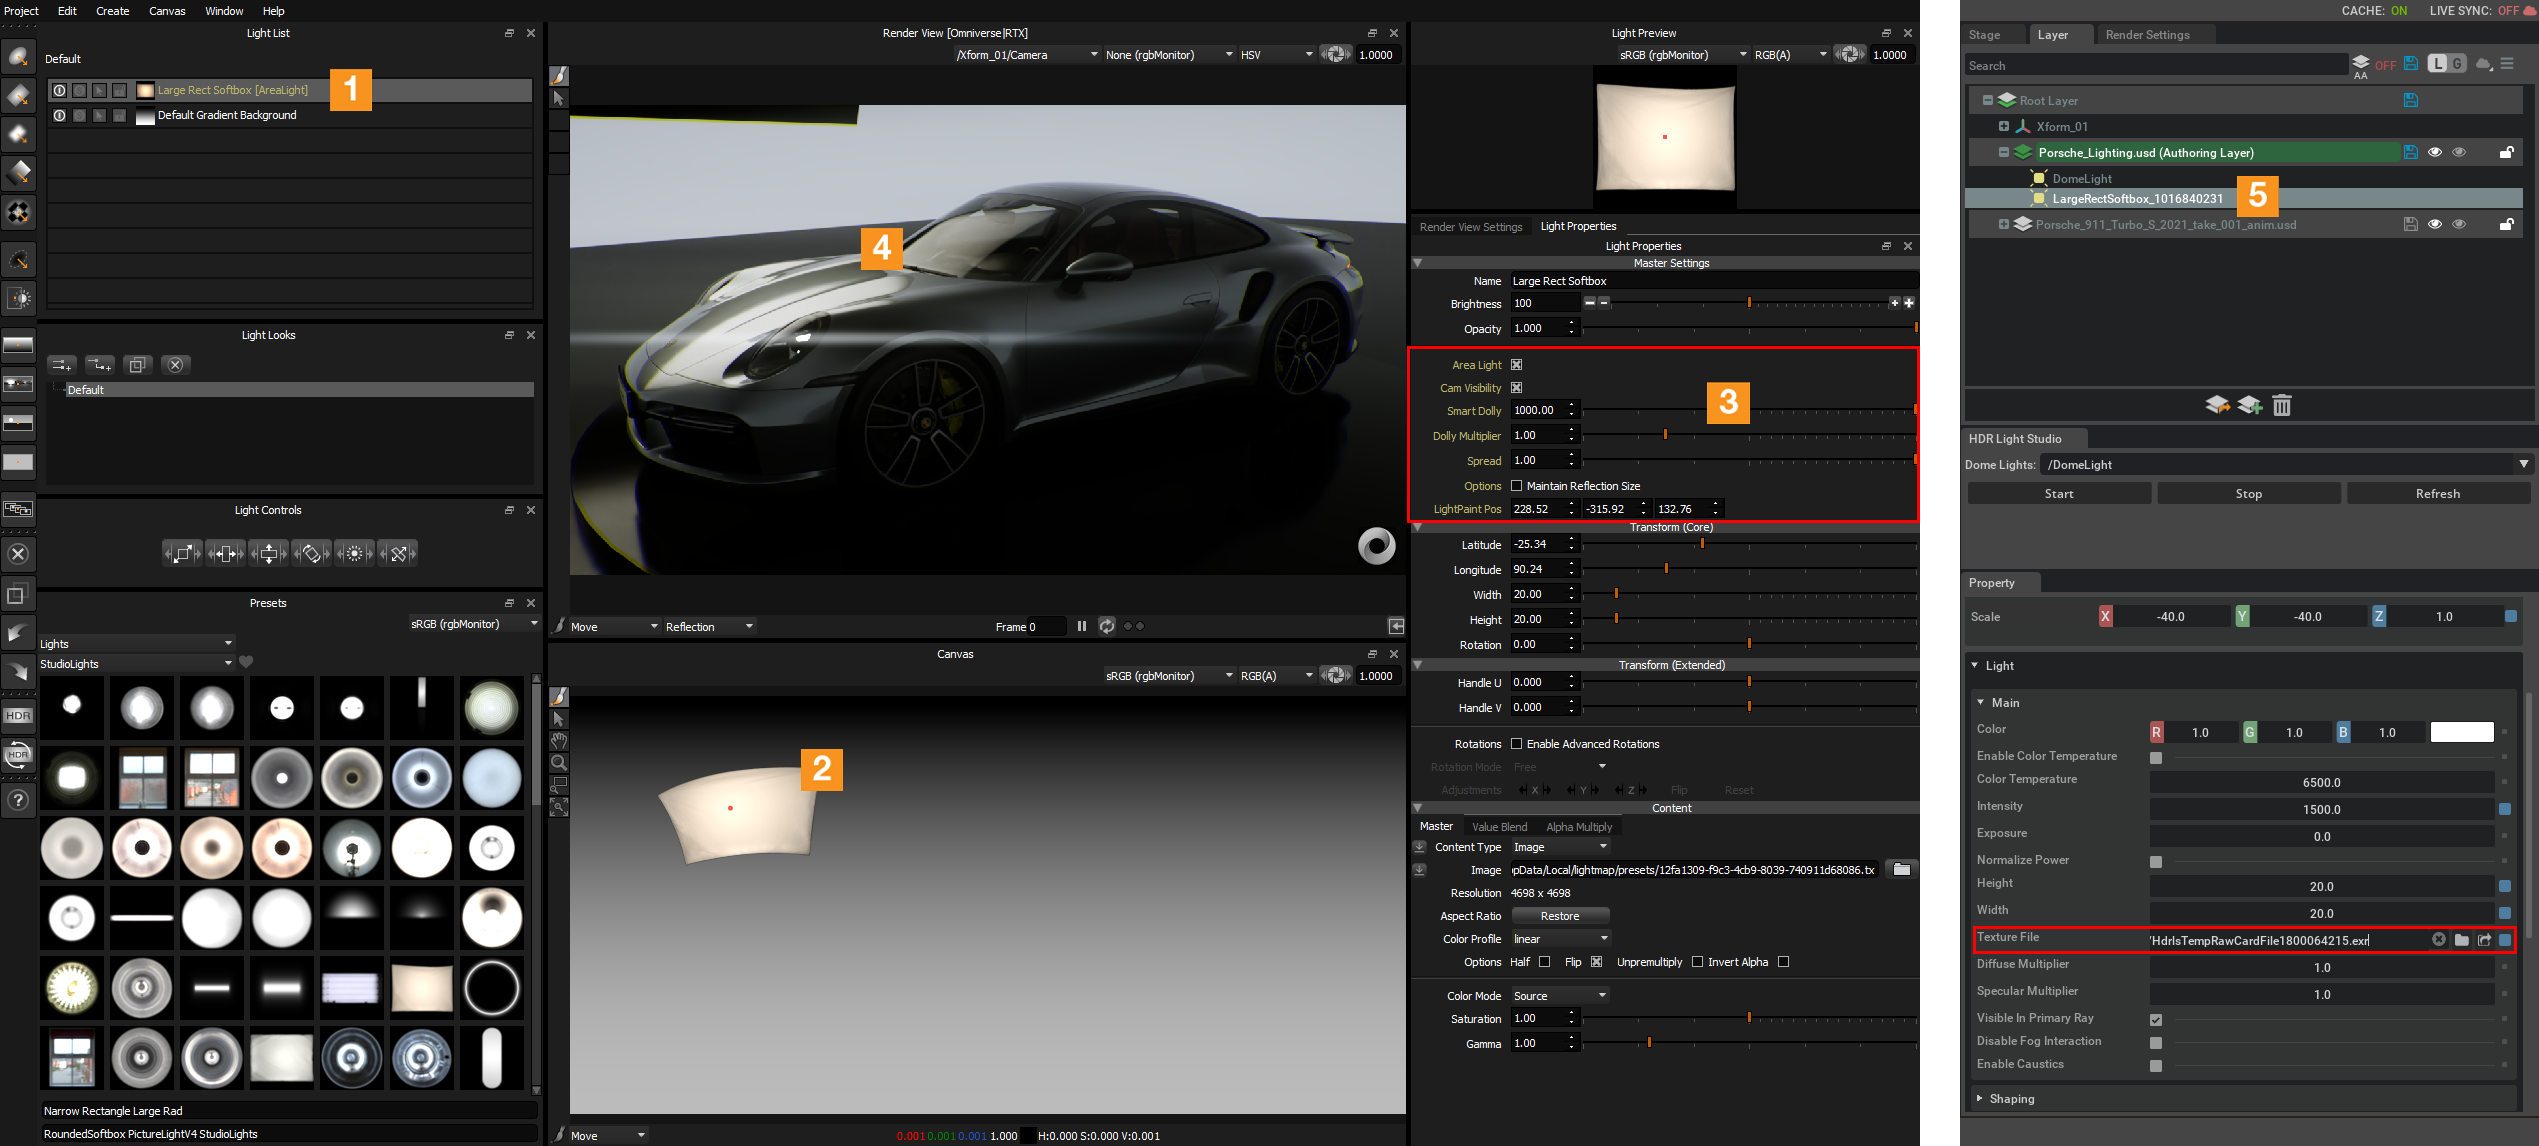
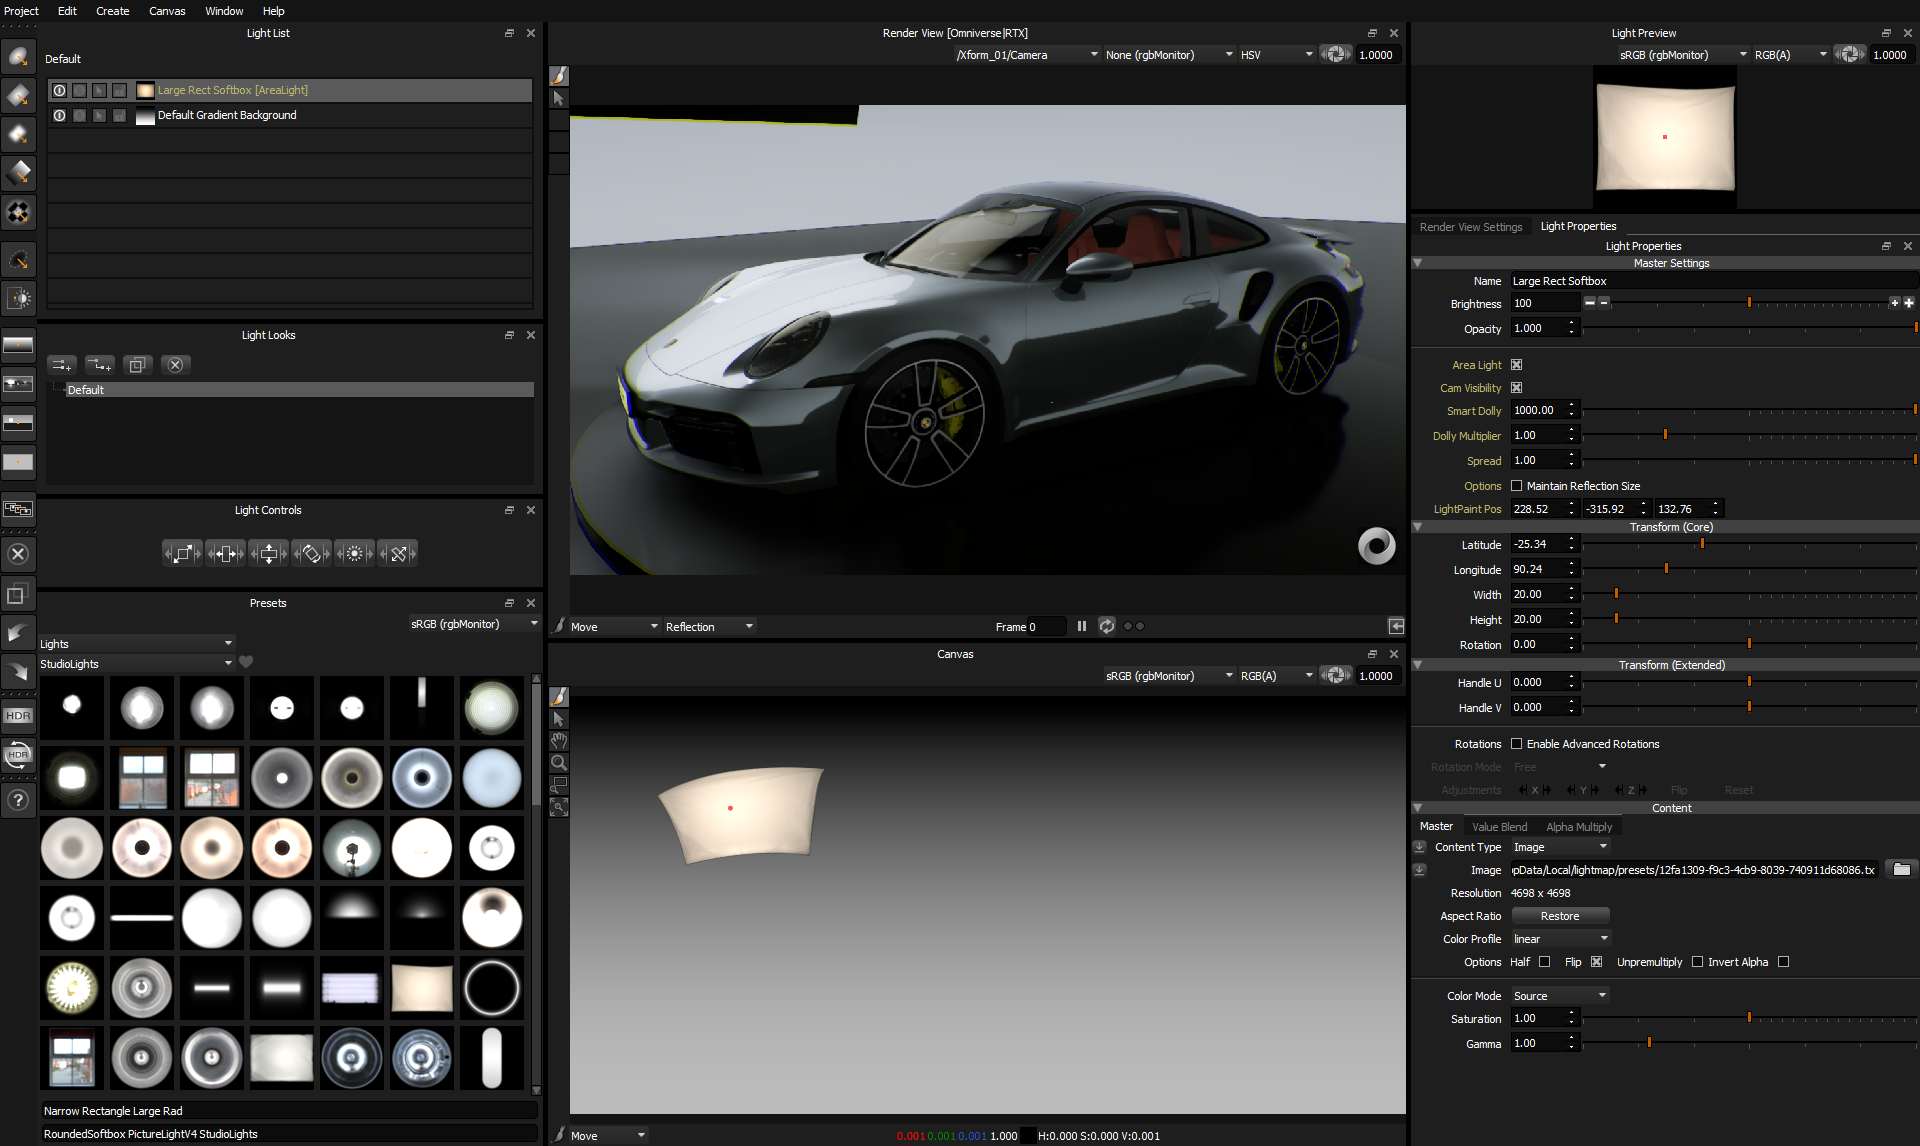
As a result of enabling this Area Light setting, the lighting looks very similar to before, but lots of things just happened with that single setting:
•1. The Light in the Light List gets the suffix [AreaLight] and its text is now yellow.
•2. The light has been removed from the HDRI map but is still represented on the Canvas as a view of the light as seen from the center of the world. Don't be confused, it's really no longer on the HDRI map lighting the shot!
•3. Additional Area Light properties have been added to the Light Properties for this light, with a default Smart Dolly distance of 1,000 units.
•4. An Area Light has been created in Omniverse for the selected renderer - mapped with the HDR texture from HDR Light Studio, and matching the size and position of the area light in HDR Light Studio.
•5. An area light has been created in Omniverse - mapped with the HDR texture from HDR Light Studio, and matching the size and position of the area light in HDR Light Studio.
 Please Note: USD Composer 2023.1+ now conforms to the latest naming conventions for paths. This includes not allowing asset names to begin with a numeric. As a result, the name of any area light created by HDR Light Studio will now begin with 'hdrls_'. Omniverse users can use the new Asset Validator to fix all of their assets and bring them up to the current standards.
In Omniverse. temporarily switch to Render Mode: RTX Real-Time to see what the area lights look like in this render mode. You will notice that the HDR textures are ignored in this render more. HDR textures will be visible on the area light's geometry but not visible in the scene's reflections. Before continue, ensure to switch back to Render Mode: RTX Path-traced.
Change the Area Light Distance
Initially, the Area Light will be far away from your model providing a similar lighting effect to when it was on the HDRI environment. We need to move it closer to the model so you can see it.
Reduce the Smart Dolly slider value to move the light closer to the 3D model.
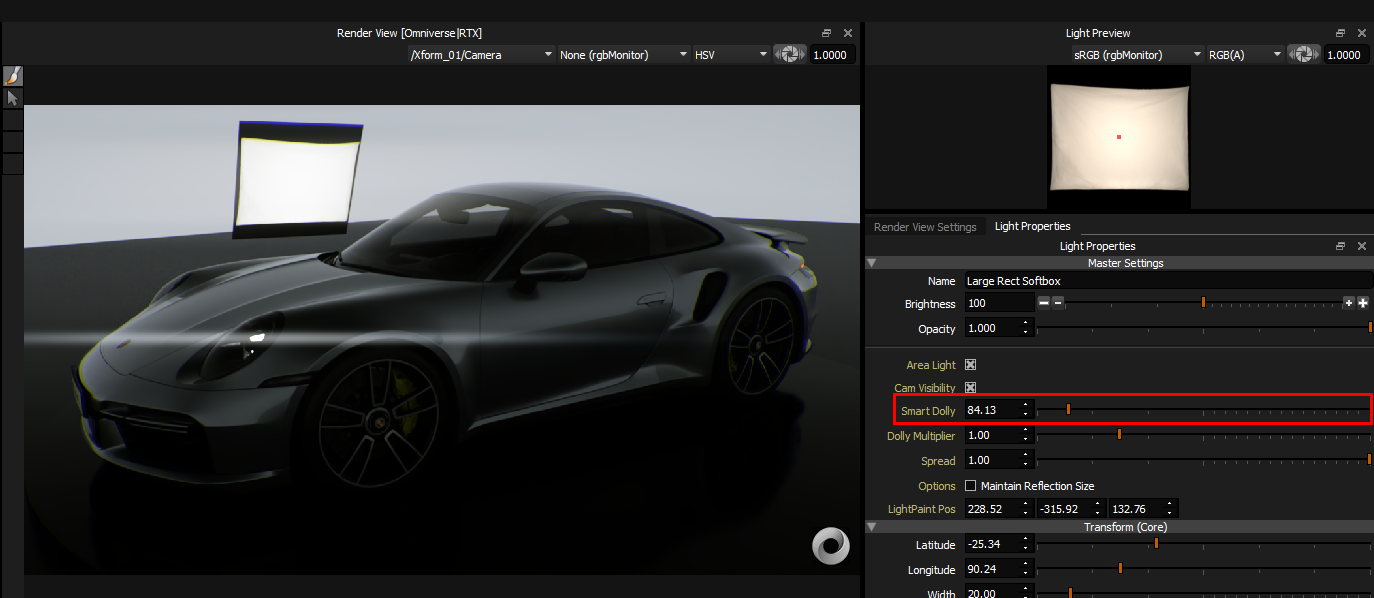
 HDR Light Studio has a scene scale setting that is useful when working with Area Lights. If the area lights are too close or too far away by default, adjust the Smart Dolly Scalar value in Preferences. This value scales all area light distances in HDR Light Studio.
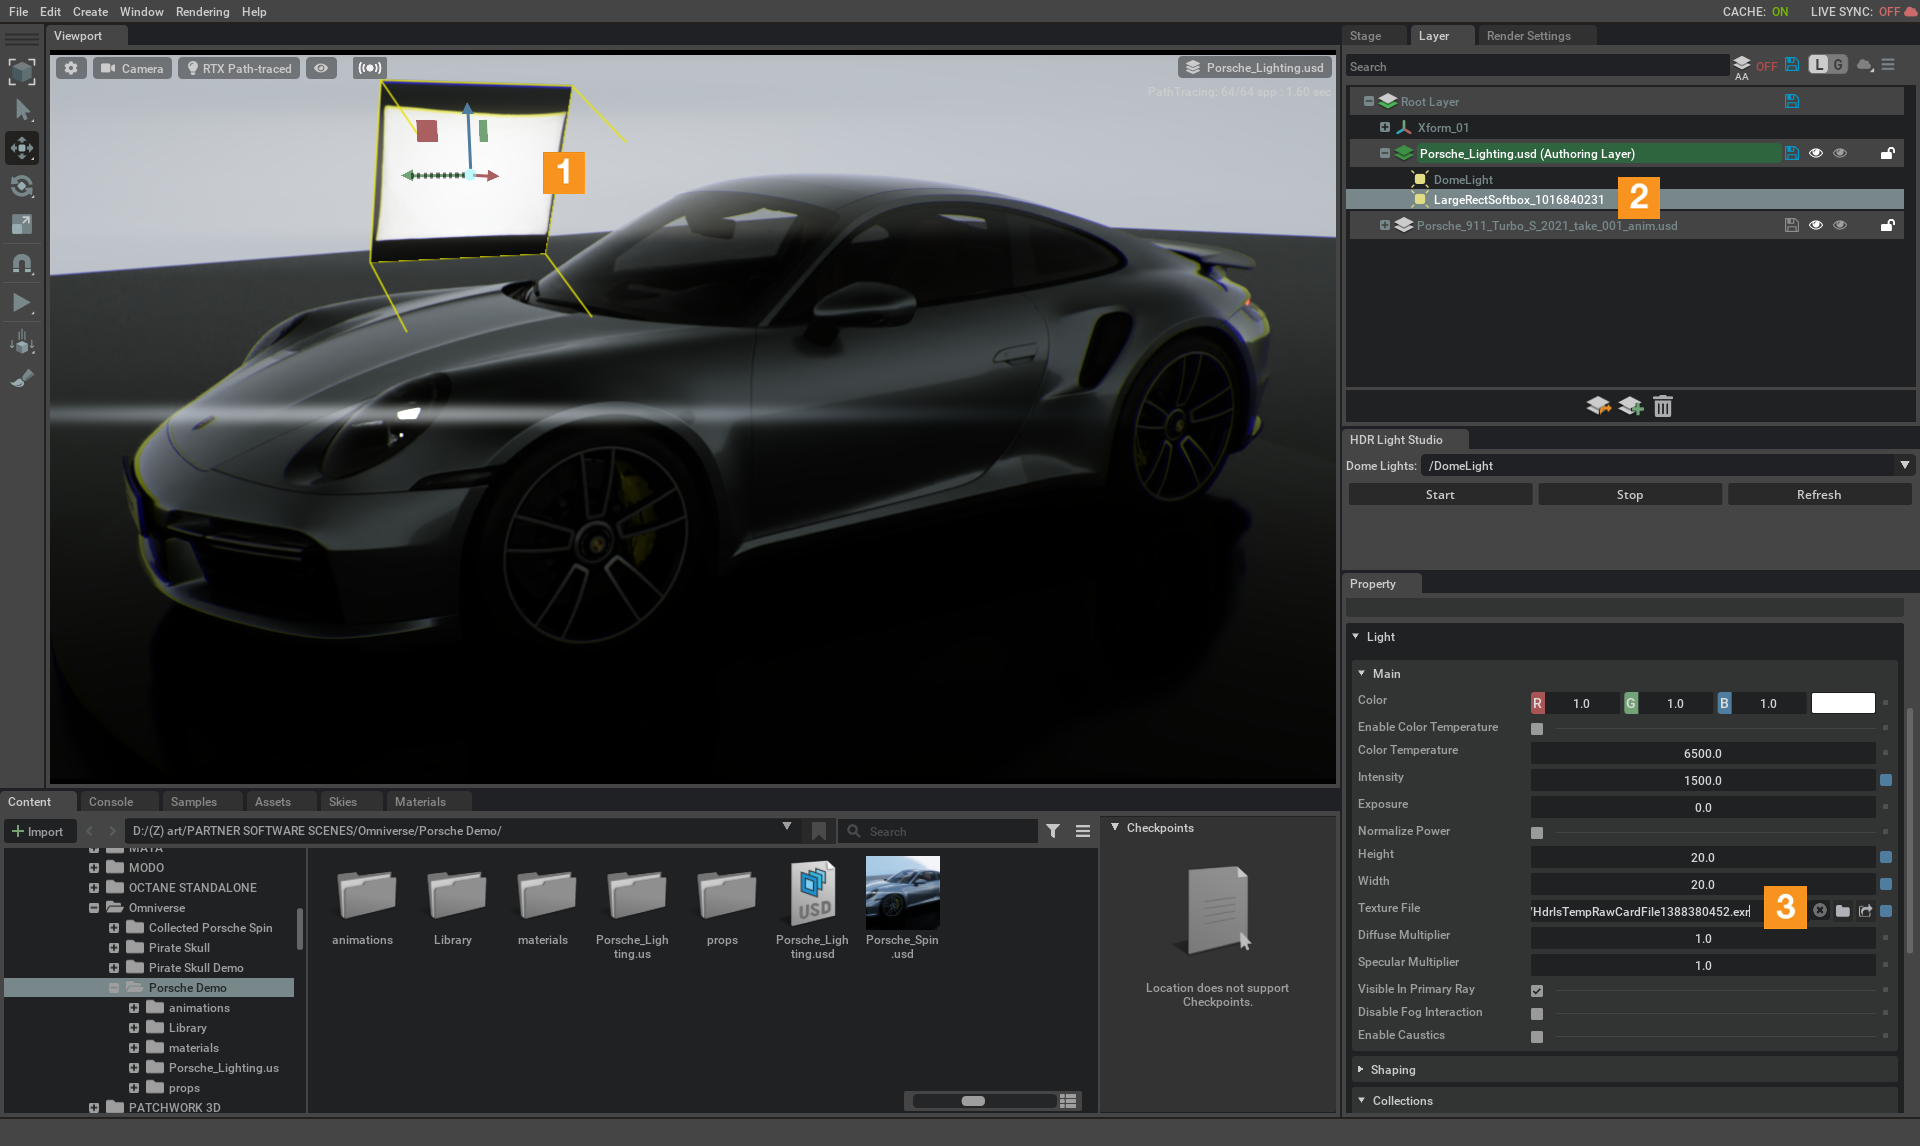
Let's take a look at the Omniverse interface now. You can see:
•1. The Area Light that HDR Light Studio created can be seen in the Omniverse viewport.
•2. Area Lights made with HDR Light Studio can be seen in the list of object in the Stage panel in Omniverse.
•3. The Area Light has been set up for your renderer. You can see the texture from HDR Light Studio mapped to the light properties. This texture is updated when the light's appearance is changed in HDR Light Studio.
 Please Note: Renaming/deleting/duplicating HDR Light Studio area lights in Omniverse can cause issues. Area Lights created by HDR Light Studio should be managed using HDR Light Studio's interface.
Moving Area Lights
Let's go back to the HDR Light Studio interface.
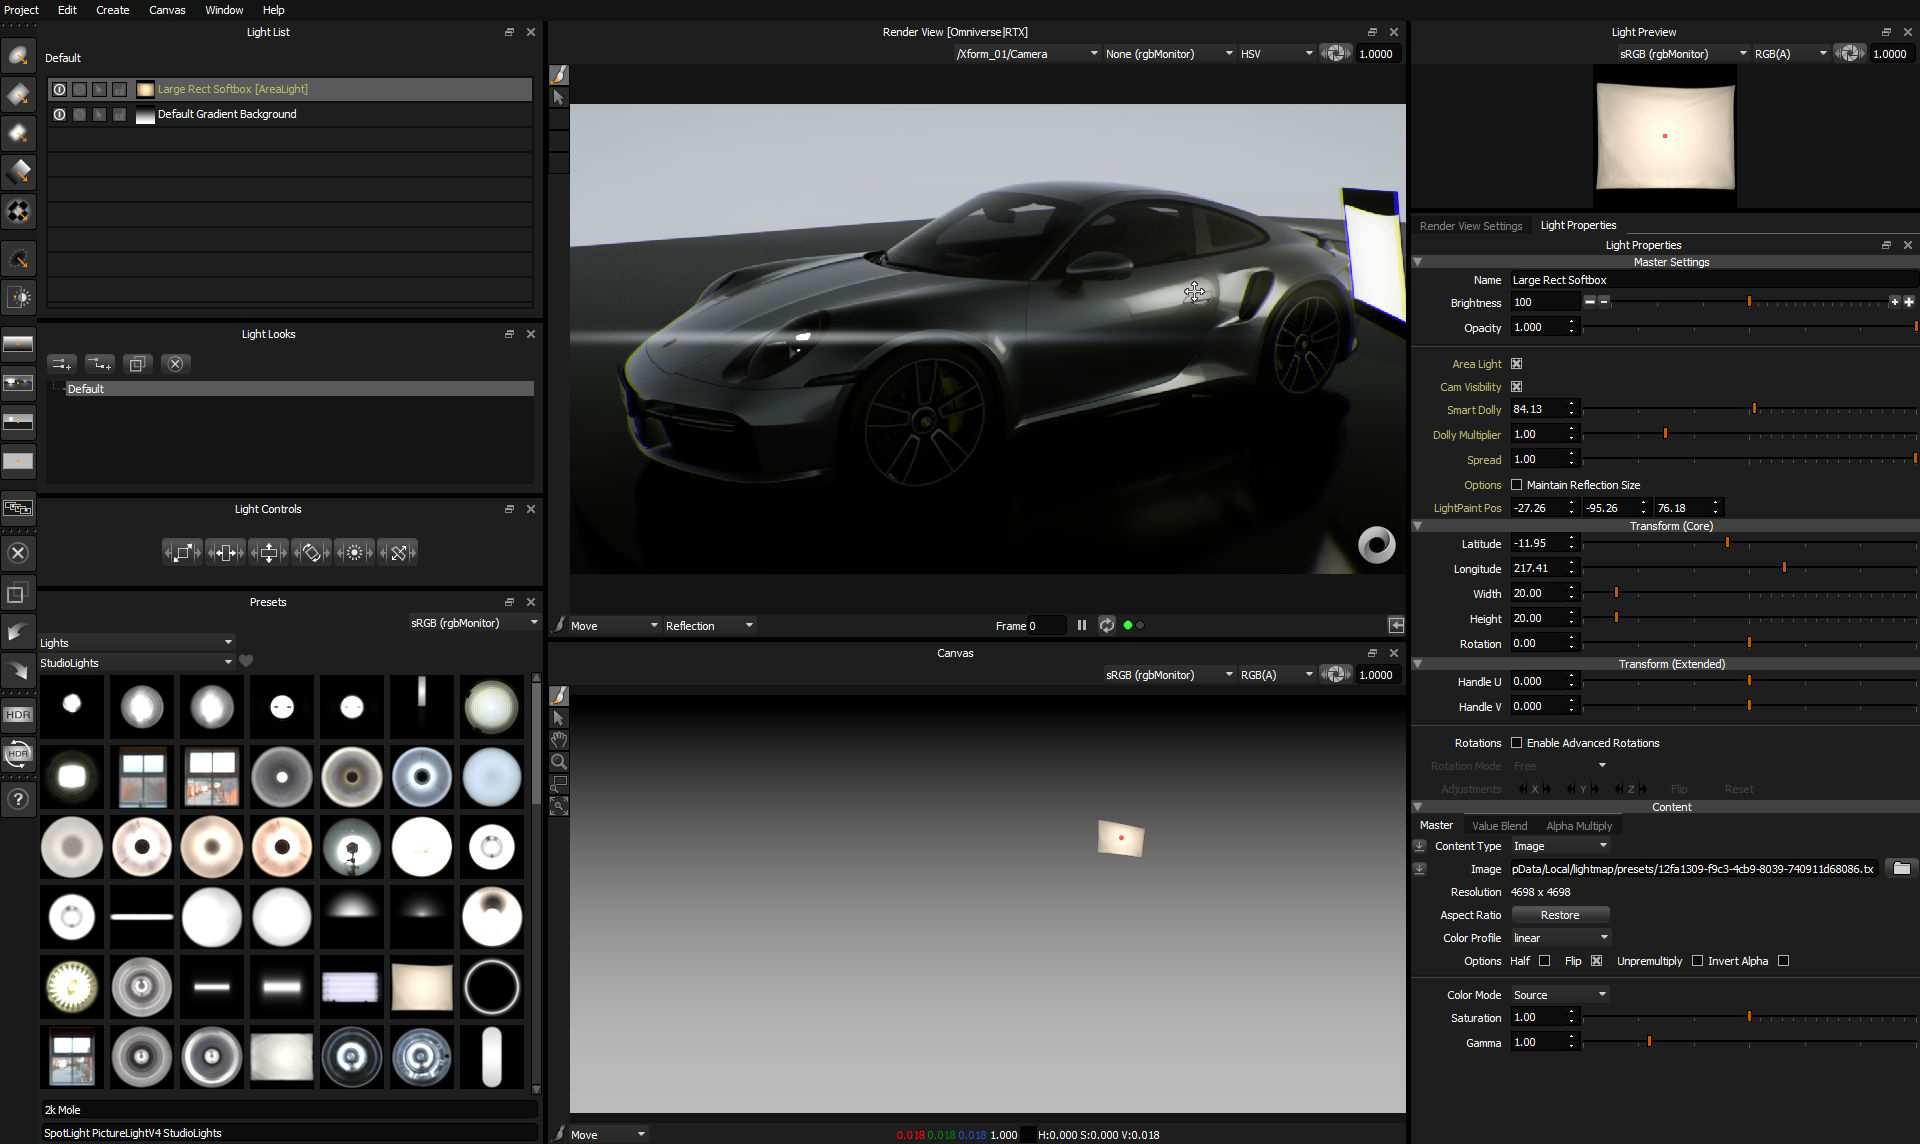
In HDR Light Studio, use LightPaint in the Render View [Omniverse|RTX] to move the Area Light.
Area lights are controlled just like any other light in HDR Light Studio with the addition of the distance controls.
Click on the 3D model to move the selected light.
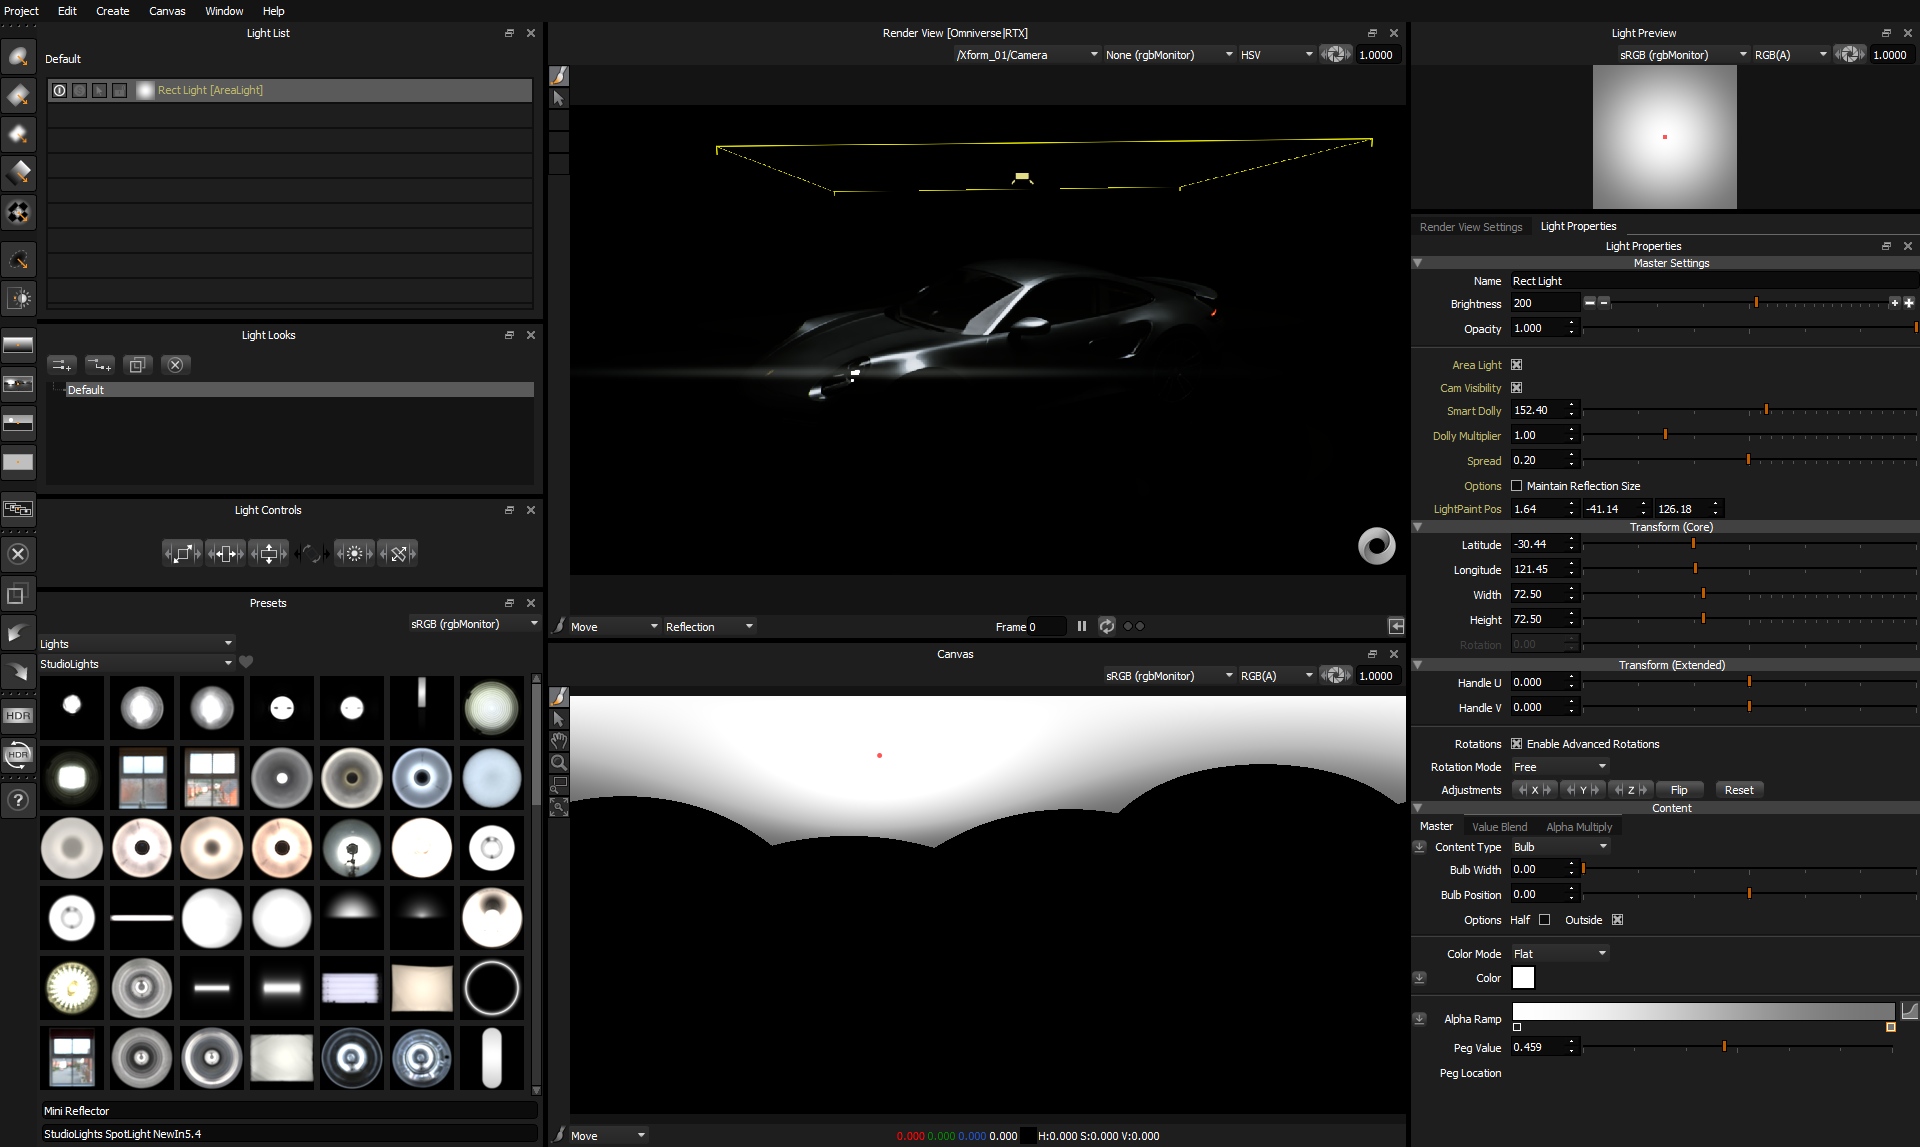
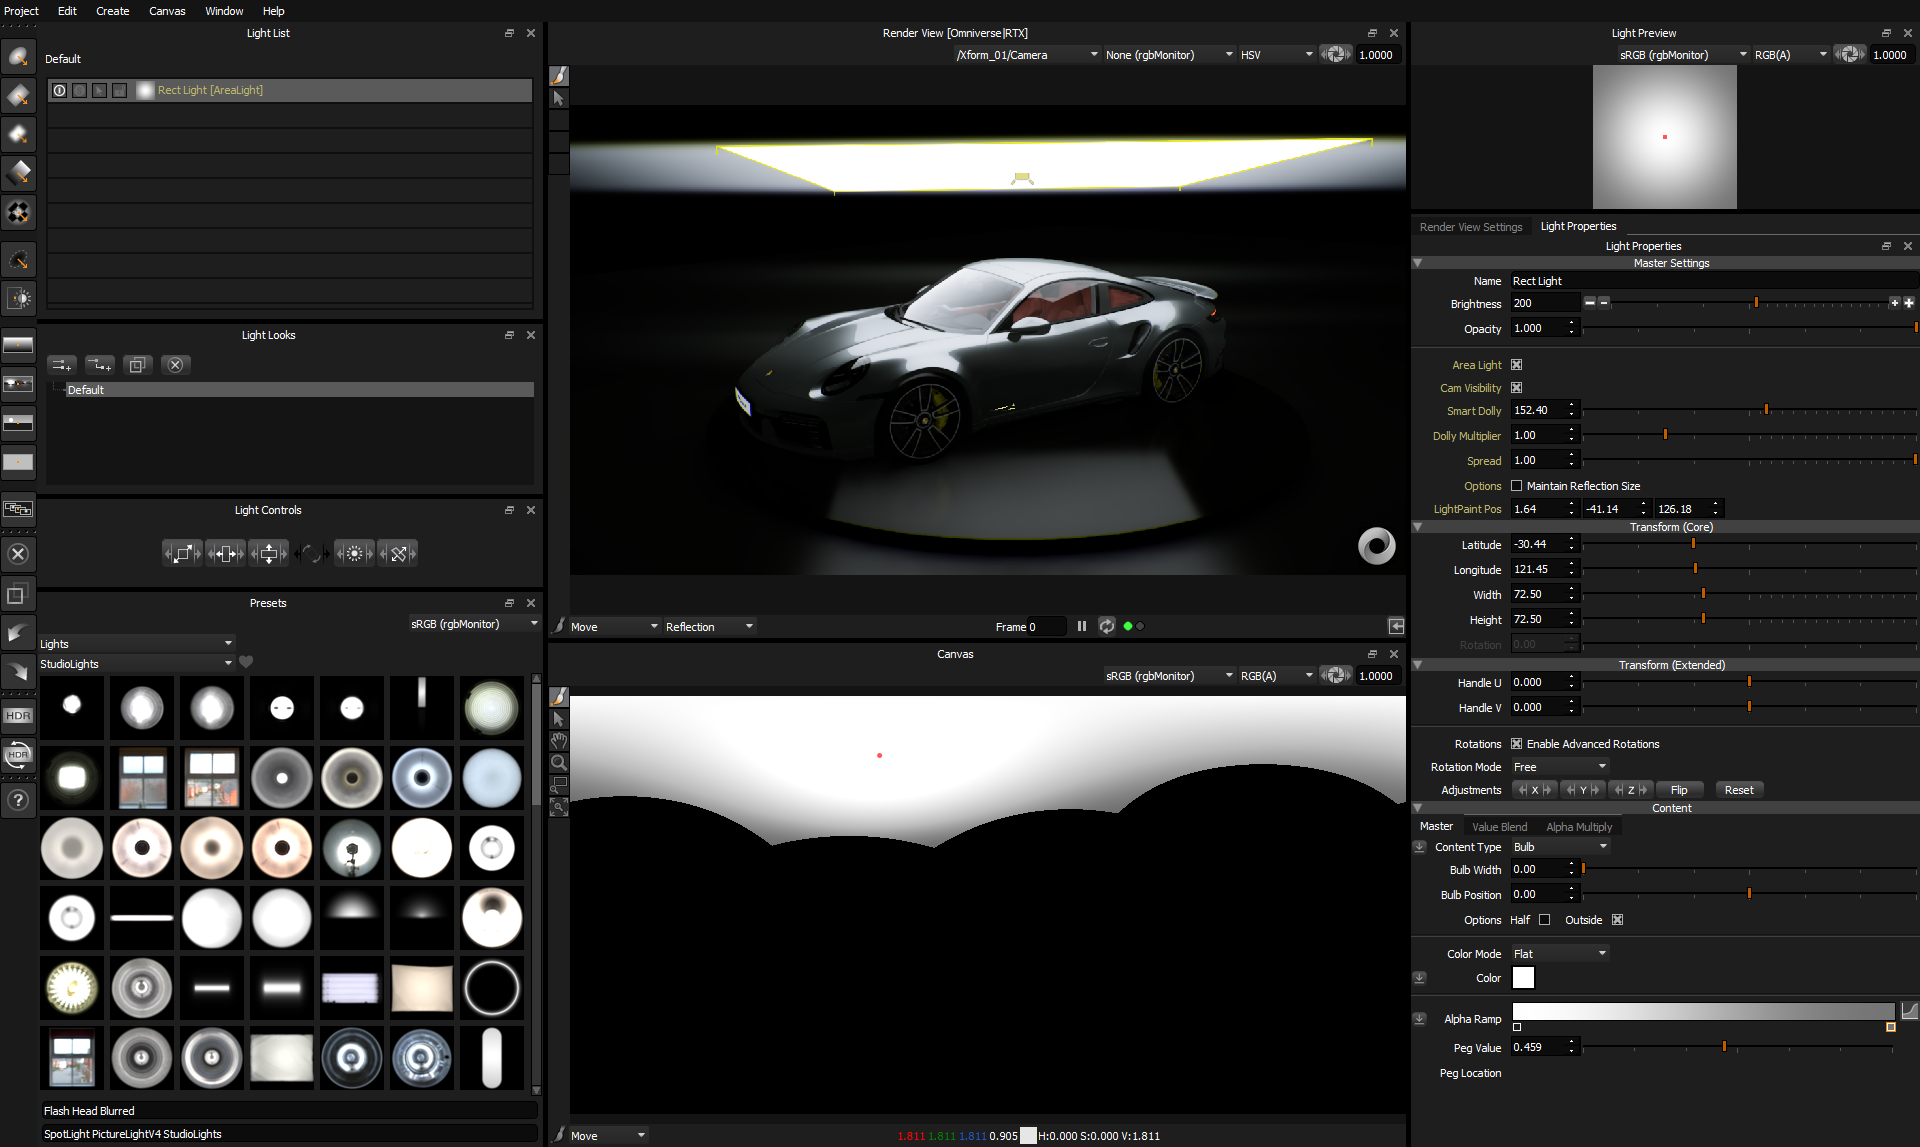
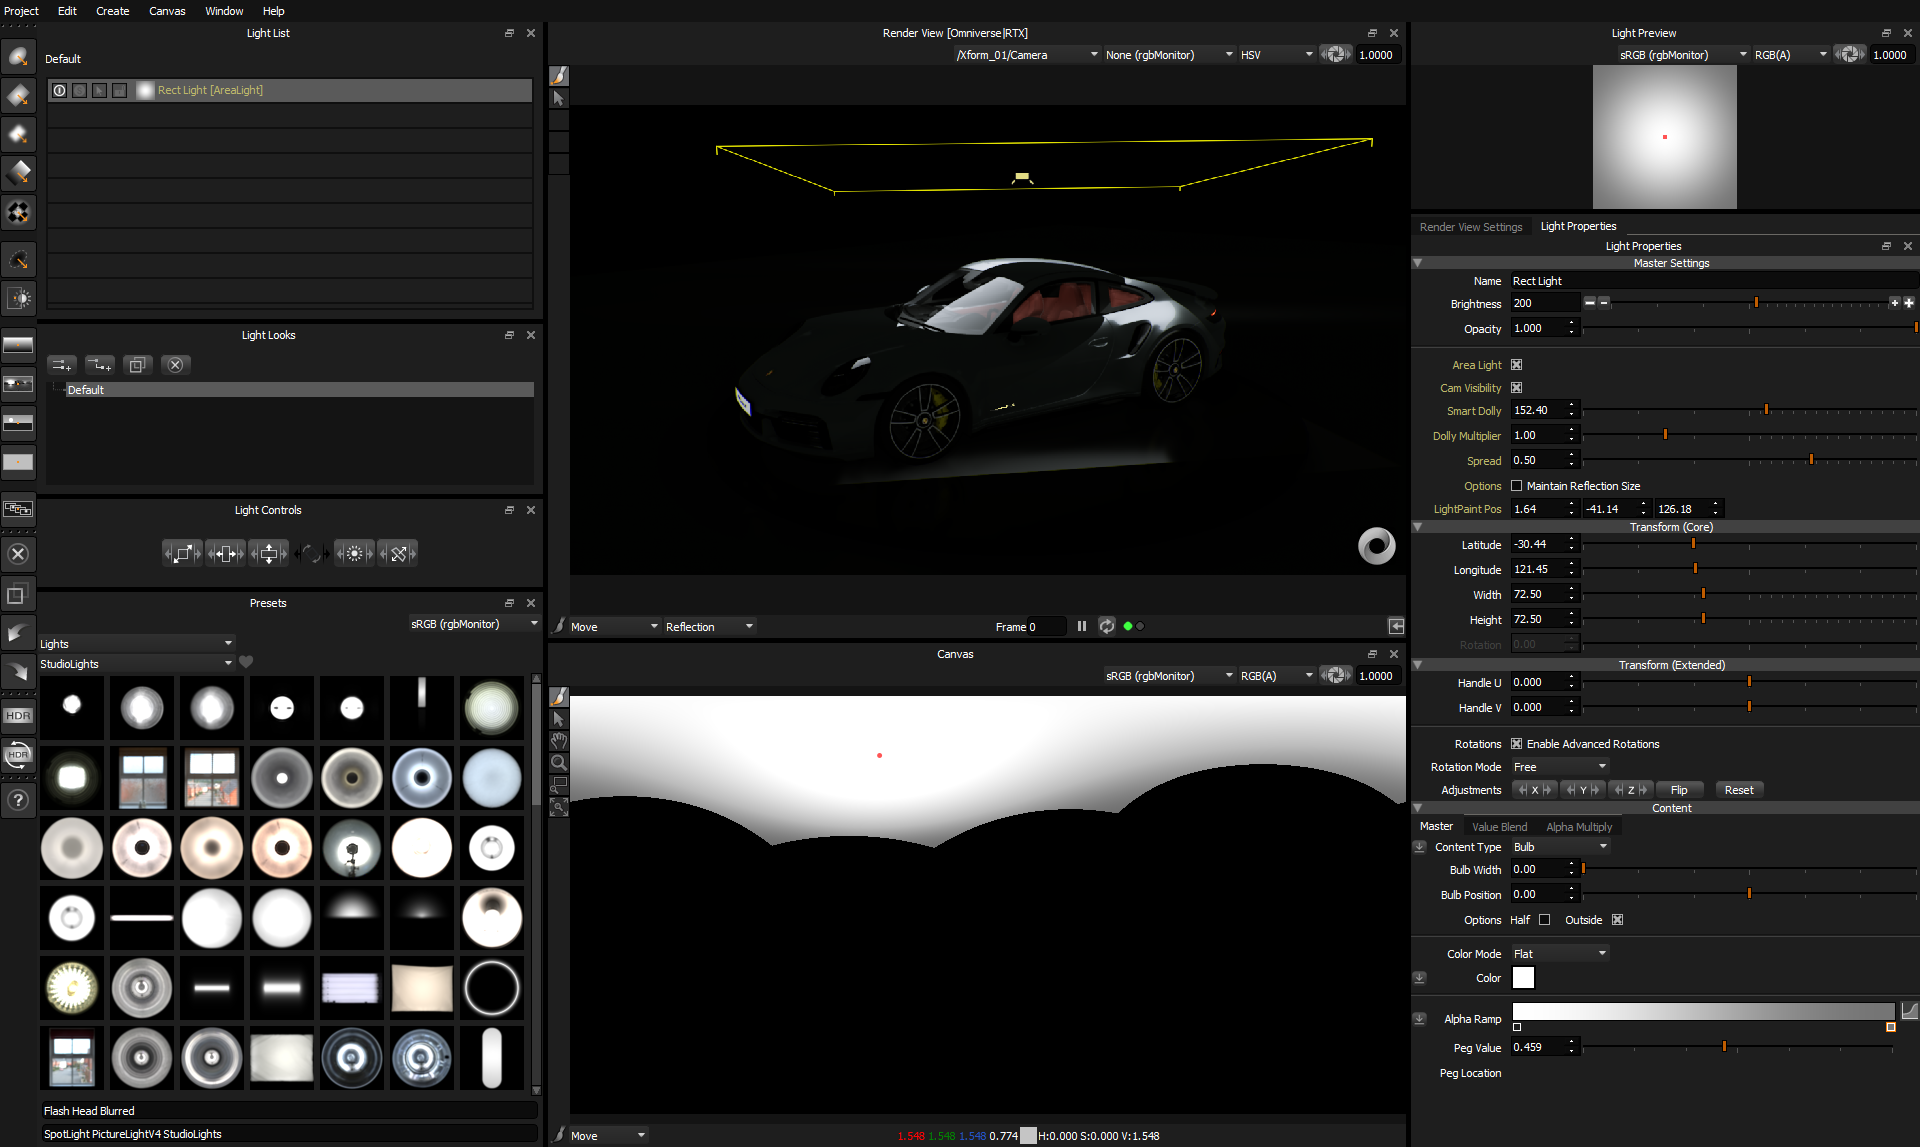
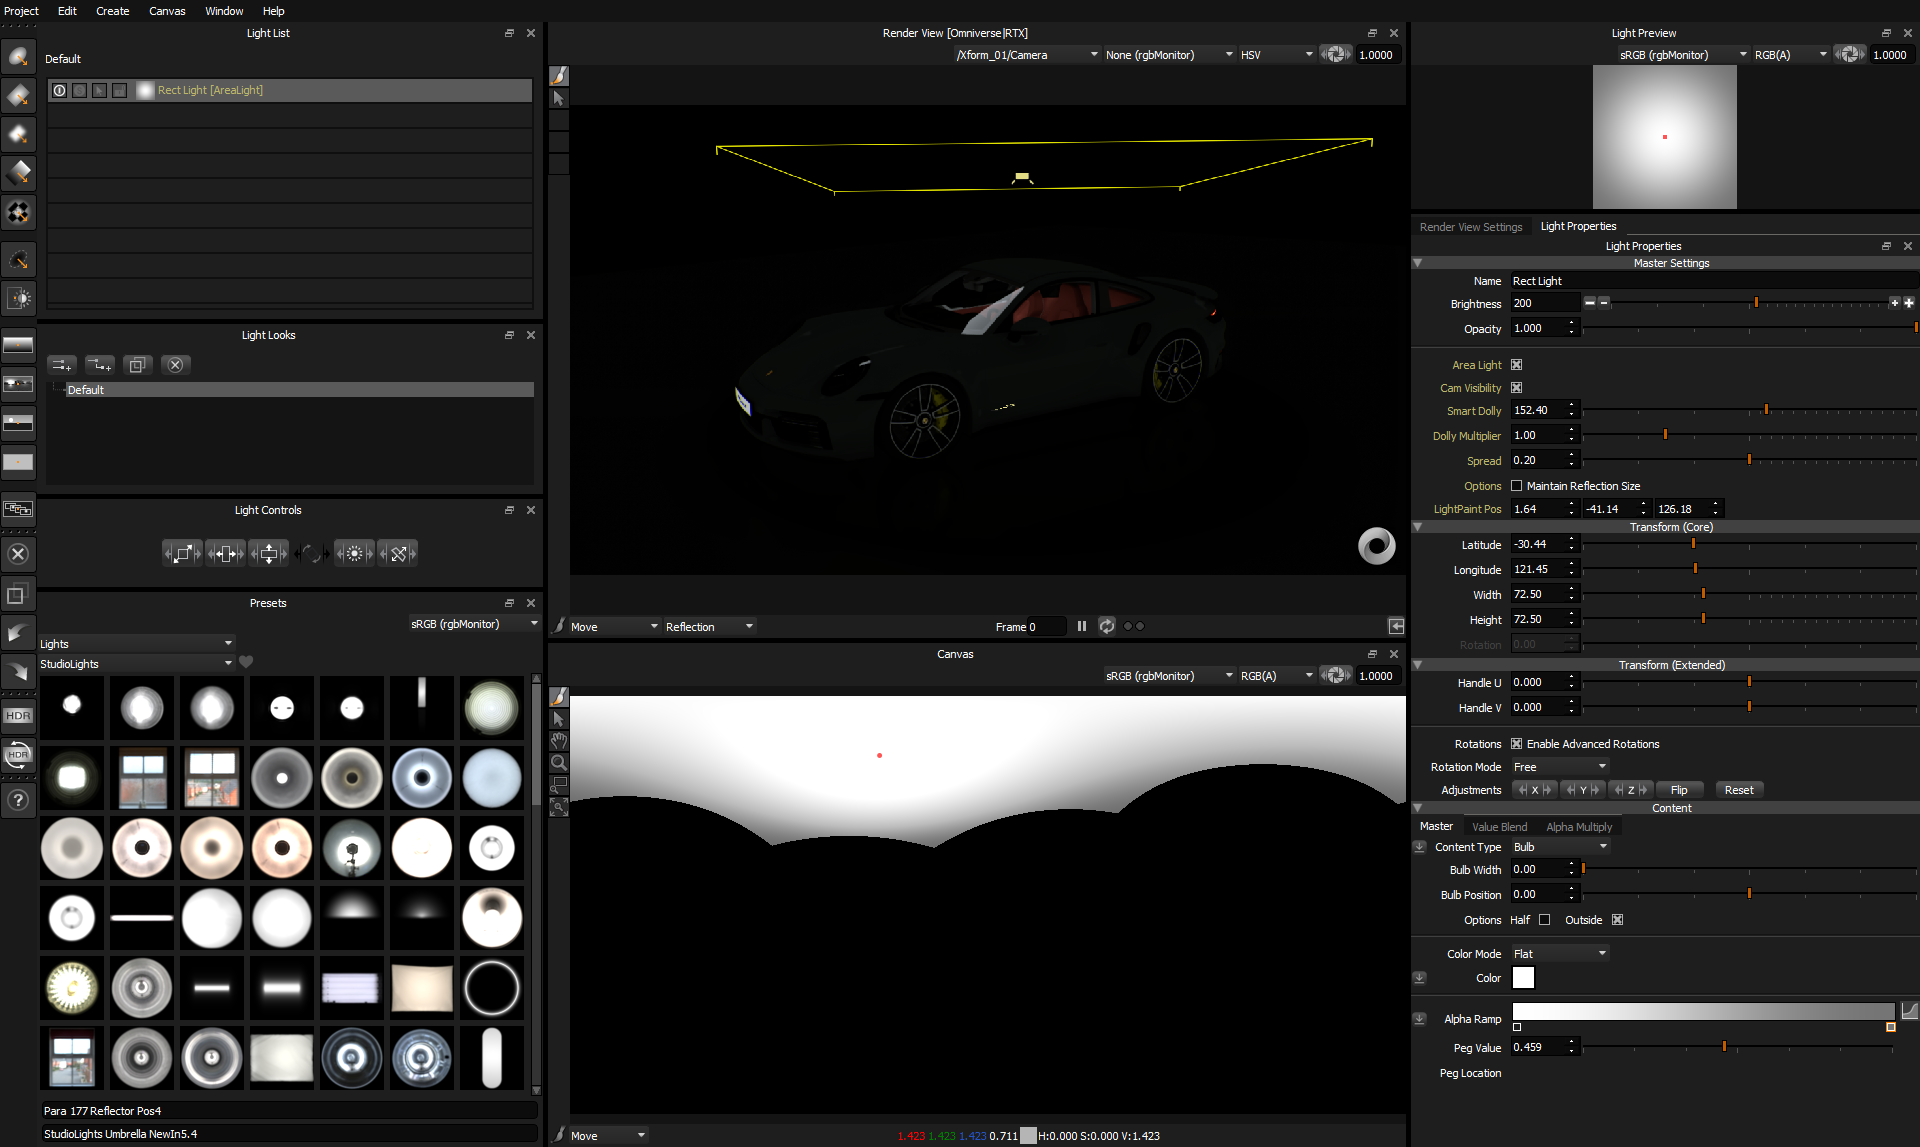
Area Light Spread
We can use the spread setting in HDR Light Studio to change how the light emits from the area light.
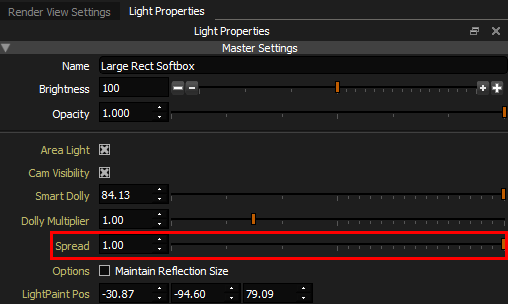
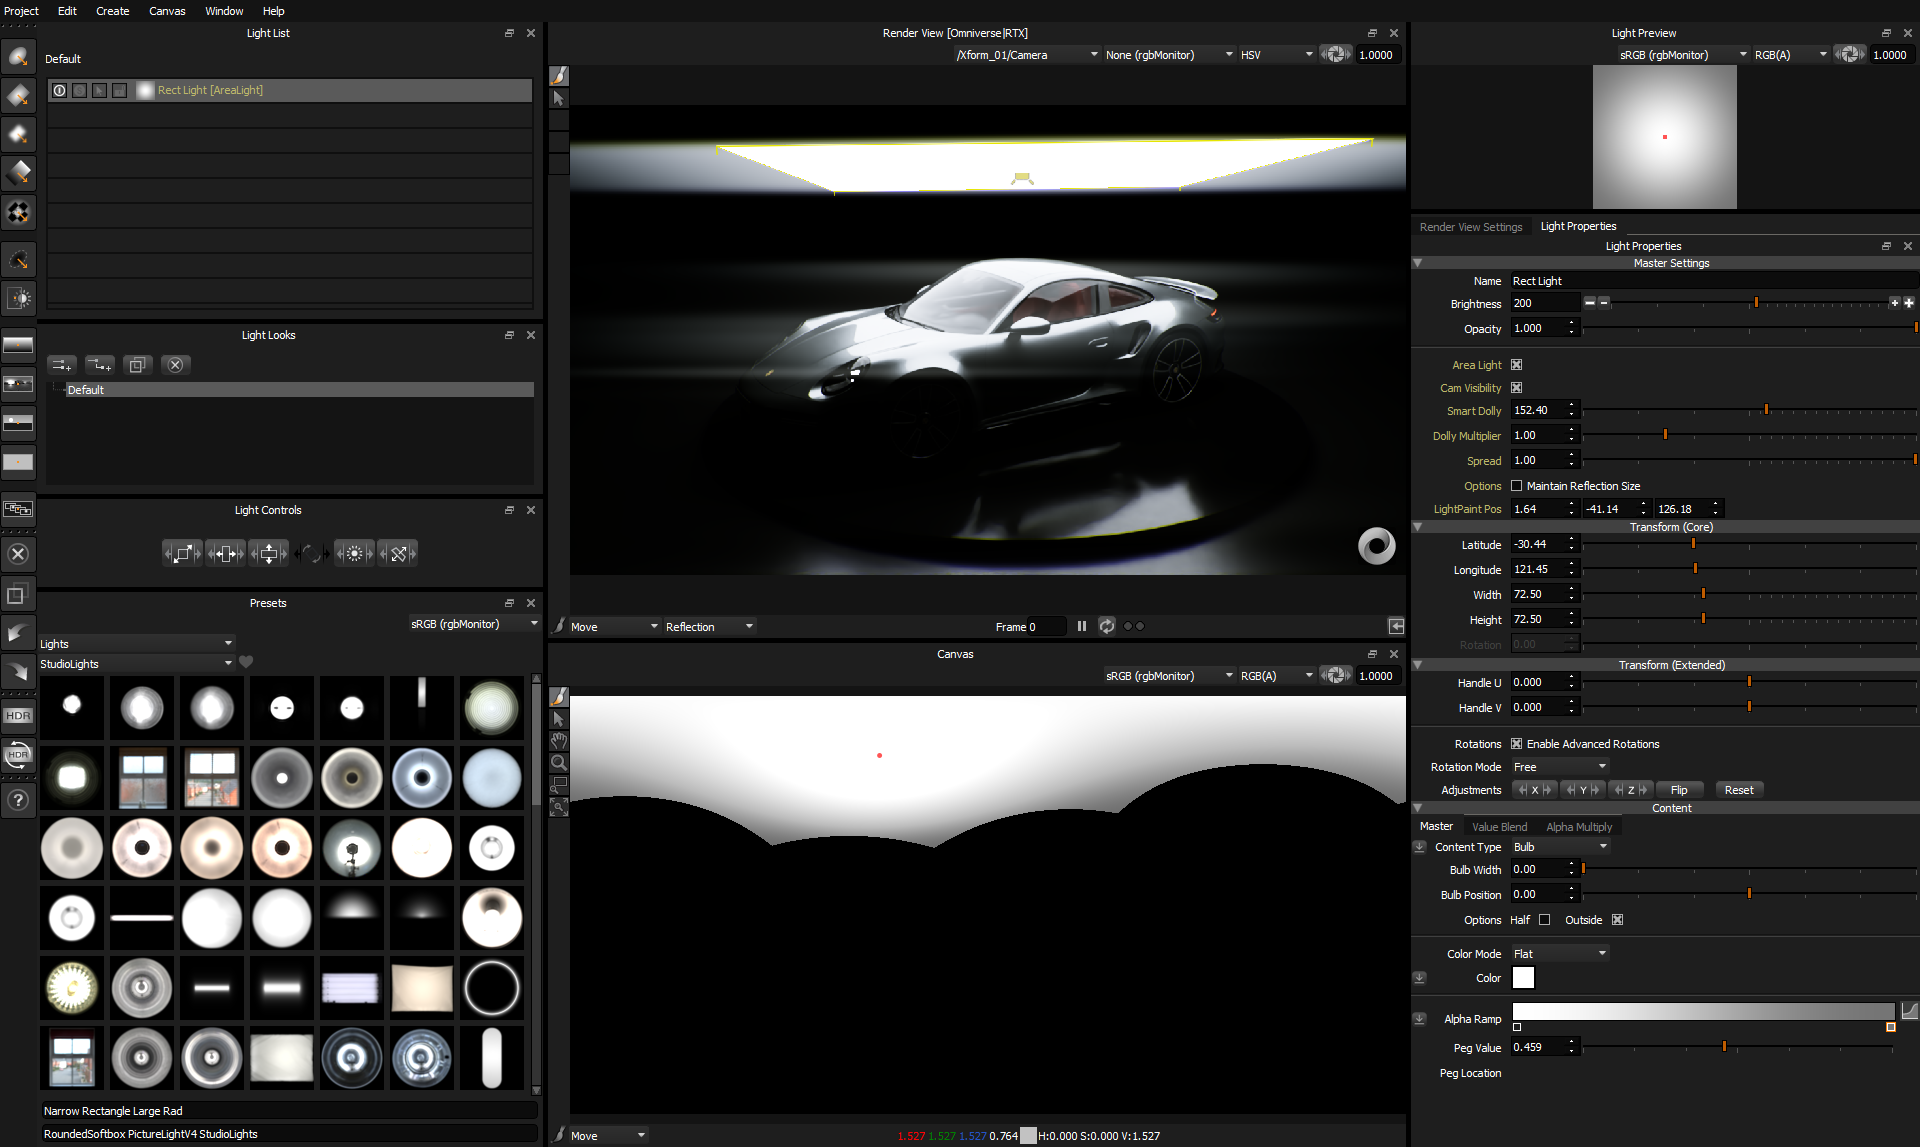
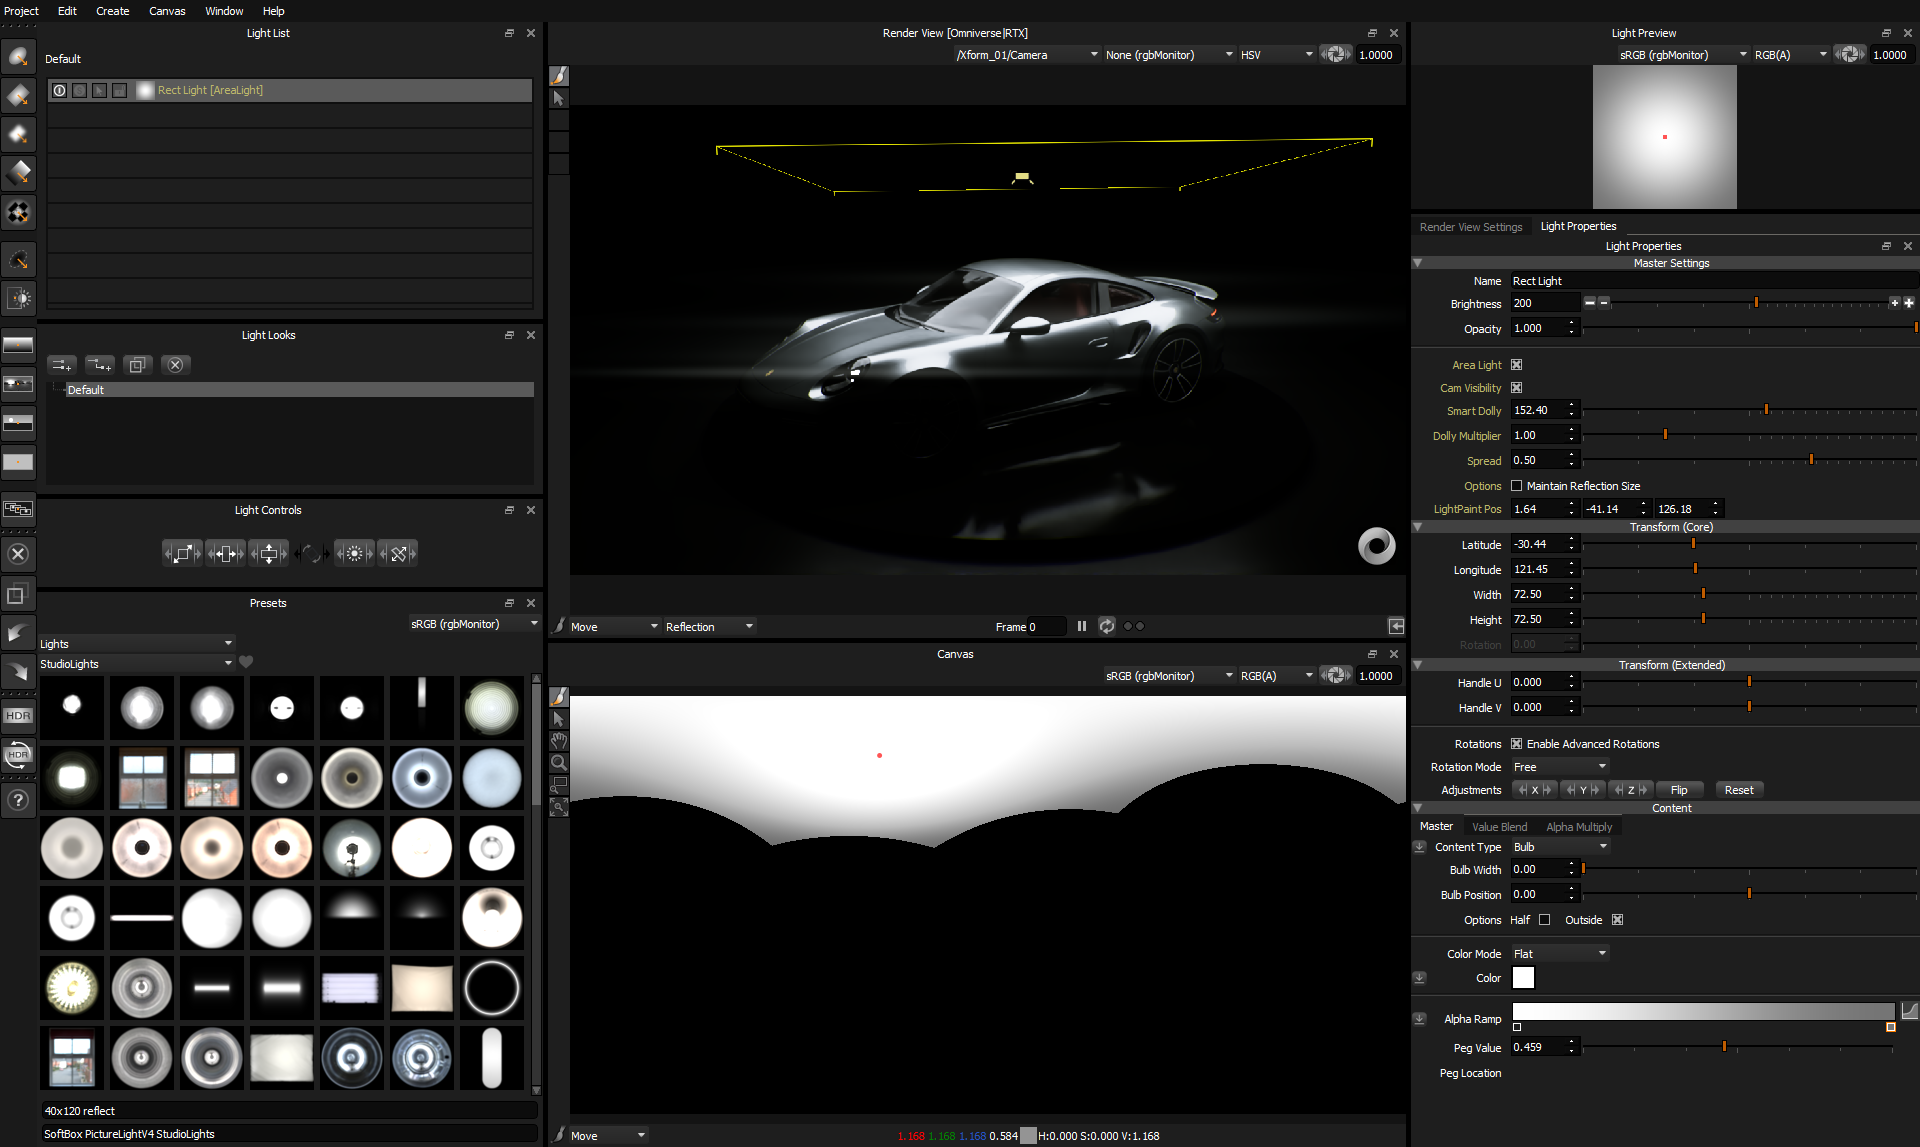
This is how the spread setting changes the light emitting from the area light.

The effect of changing this setting varies between render mode RTX Real-Time and RTX Path-Traced. Below can see the effect of changing this setting in two different render modes and how the light becomes more focused on the scene with lower settings.
Finalizing the Lighting Design
Rendering the Final HDRI Lighting Textures
So far we have been sharing lo-res temporary textures with Omniverse for your lighting - to keep things fast during the lighting design process.
Now let's complete the lighting process by producing higher resolution and higher quality sub-sampled HDR textures on disk.
Press the 'Production Render' button in HDR Light Studio.
The top HDR button on the toolbar
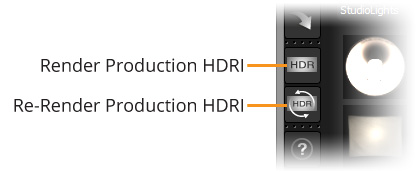
Set your Production Render settings
Notice how the 'Orientation' is already set for Omniverse and your set renderer. This ensures that the rendered HDRI map is orientated correctly when rendered.
For more information on these settings see: Production Render Dialog
Press the Browse button to choose a file location and give the lighting file a name.
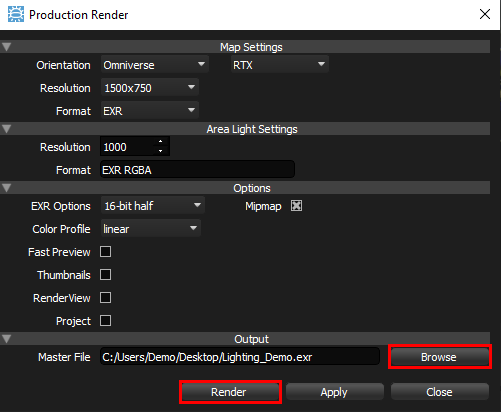
Press the Render button in this panel.
The production quality HDR textures will now be calculated and saved as permanent files on disk.
Once complete, the connection automatically updates Omniverse to use these new textures.
Stopping HDR Light Studio
If any further changes are now made to the lighting in HDR Light Studio, all lighting textures will be updated to use new proxy images, and the link to the rendered files is broken.
Please ensure you 'Stop' the HDR Light Studio connection after you have rendered your final lighting files.
Press the Stop button.

HDR Light Studio now closes and leaves your Omniverse scene with an awesome lighting setup for your renderer. This scene uses standard lights and can be rendered anywhere, even on computers without HDR Light Studio licenses.
 Please Note: If you want to edit the lighting design, press the Start button and HDR Light Studio will open and load the lighting design project data which is embedded in the Omniverse project. You can now edit the lighting, but make sure to render the final HDR textures at the end of the process.
Save the Omniverse project
The current state of the HDR Light Studio project is embedded in the Omniverse project. You should save your Omniverse scene now.
 Saving and loading HDR Light Studio projects
HDR Light Studio projects can be saved from the HDR Light Studio interface at any time during the lighting process as an HDi file (native HDR Light Studio project file), even when using HDR Light Studio via a connection. If you were to open HDR Light Studio in a connection with Omniverse, this project can be loaded into HDR Light Studio using Project > Open Project. The lighting design would load into HDR Light Studio replacing its current design, and would then be synced back into Omniverse. This is how you can move lighting between Omniverse projects or between other supported 3D software.

