1. Opening HDR Light Studio Connection Panel
Start DeltaGen.
Load a scene or create some geometry.
Before we start to use HDR Light Studio to light the scene.... we need to make sure the scene is ready to light first. We need to make sure there is a camera setup with the final composition for the shot that we want to light. If we move the camera during the lighting process, the reflections of the lights will move and this will ruin the lighting.
When your scene is ready to be lit, Load the HDR Light Studio panel from Windows > HDR Light Studio Connection. By default the panel will appear in the bottom left hand corner of the screen.

HDR Light Studio Connection Panel
2. Adding a Spherical Environment Map
In the Scene tree, select the local surrounding or the ambience. A new local surrounding or ambience can also be created by right clicking on the .csb file and selecting Create New > Local surrounding or Ambience.
Please note: For lighting with Ambiences, DeltaGen 2022x and HDR Light Studio DeltaGen Connection build: 2021.1110 or newer is required.
In this example, we'll work with a local surrounding.

Creating a new local surrounding or ambience
3. Starting HDR Light Studio in Connection with DeltaGen
With the local surrounding or ambience selected, press the Edit button in the HDR Light Studio Connection panel to start HDR Light Studio in connection with your DeltaGen session.

Edit button in HDR Light Studio Connection panel
You will notice that the studio environment lighting has been replaced by the output from HDR Light Studio. This is a default gradient background.

Default grey background
4. Lighting DeltaGen scene in HDR Light Studio
Create a white round light in HDR Light Studio. In DeltaGen select LightPaint, Ref, and click on the model in DeltaGen. The light moves so that it is reflected in the model where you clicked.

Clicking on the model to position the lights
Add more lights.

Lighting design after adding more lights
5. Finalizing the Lighting Design
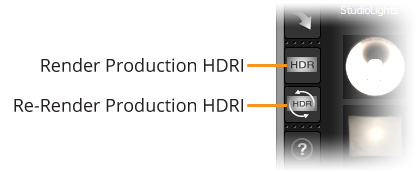
Once you are happy with your lighting, press the Render Production HDRI button in HDR Light Studio.
It says HDR on it.
Set your Production Render settings and Press Render in this panel. Notice how the 'Orientation' is already set to 'DeltaGen/DeltaGen', this ensures that the rendered HDRI map is mapped correctly in the host, i.e. DeltaGen. For more information see: Production Render Dialog

Production Render Panel
DeltaGen then automatically points at the file saved to disk rather than HDR Light Studio output. You can see this in DeltaGen's Object Editor panel in the Local Surrounding or ambience tab. HDR Light Studio's interface will become disabled.

HDR Light Studio in disabled state.
6. Save the DeltaGen scene to store the HDR Light Studio lighting project
If you would like the HDR Light Studio project to be saved in your DeltaGen scene for next time you load this DeltaGen scene, you should save your DeltaGen scene now. This way the scene state matches the HDRI map that is currently in the HDR Light Studio project.
Quit DeltaGen.
