You can use HDR Light Studio to create HDR Textured Area Lights in VRED.
Example: Environment lighting
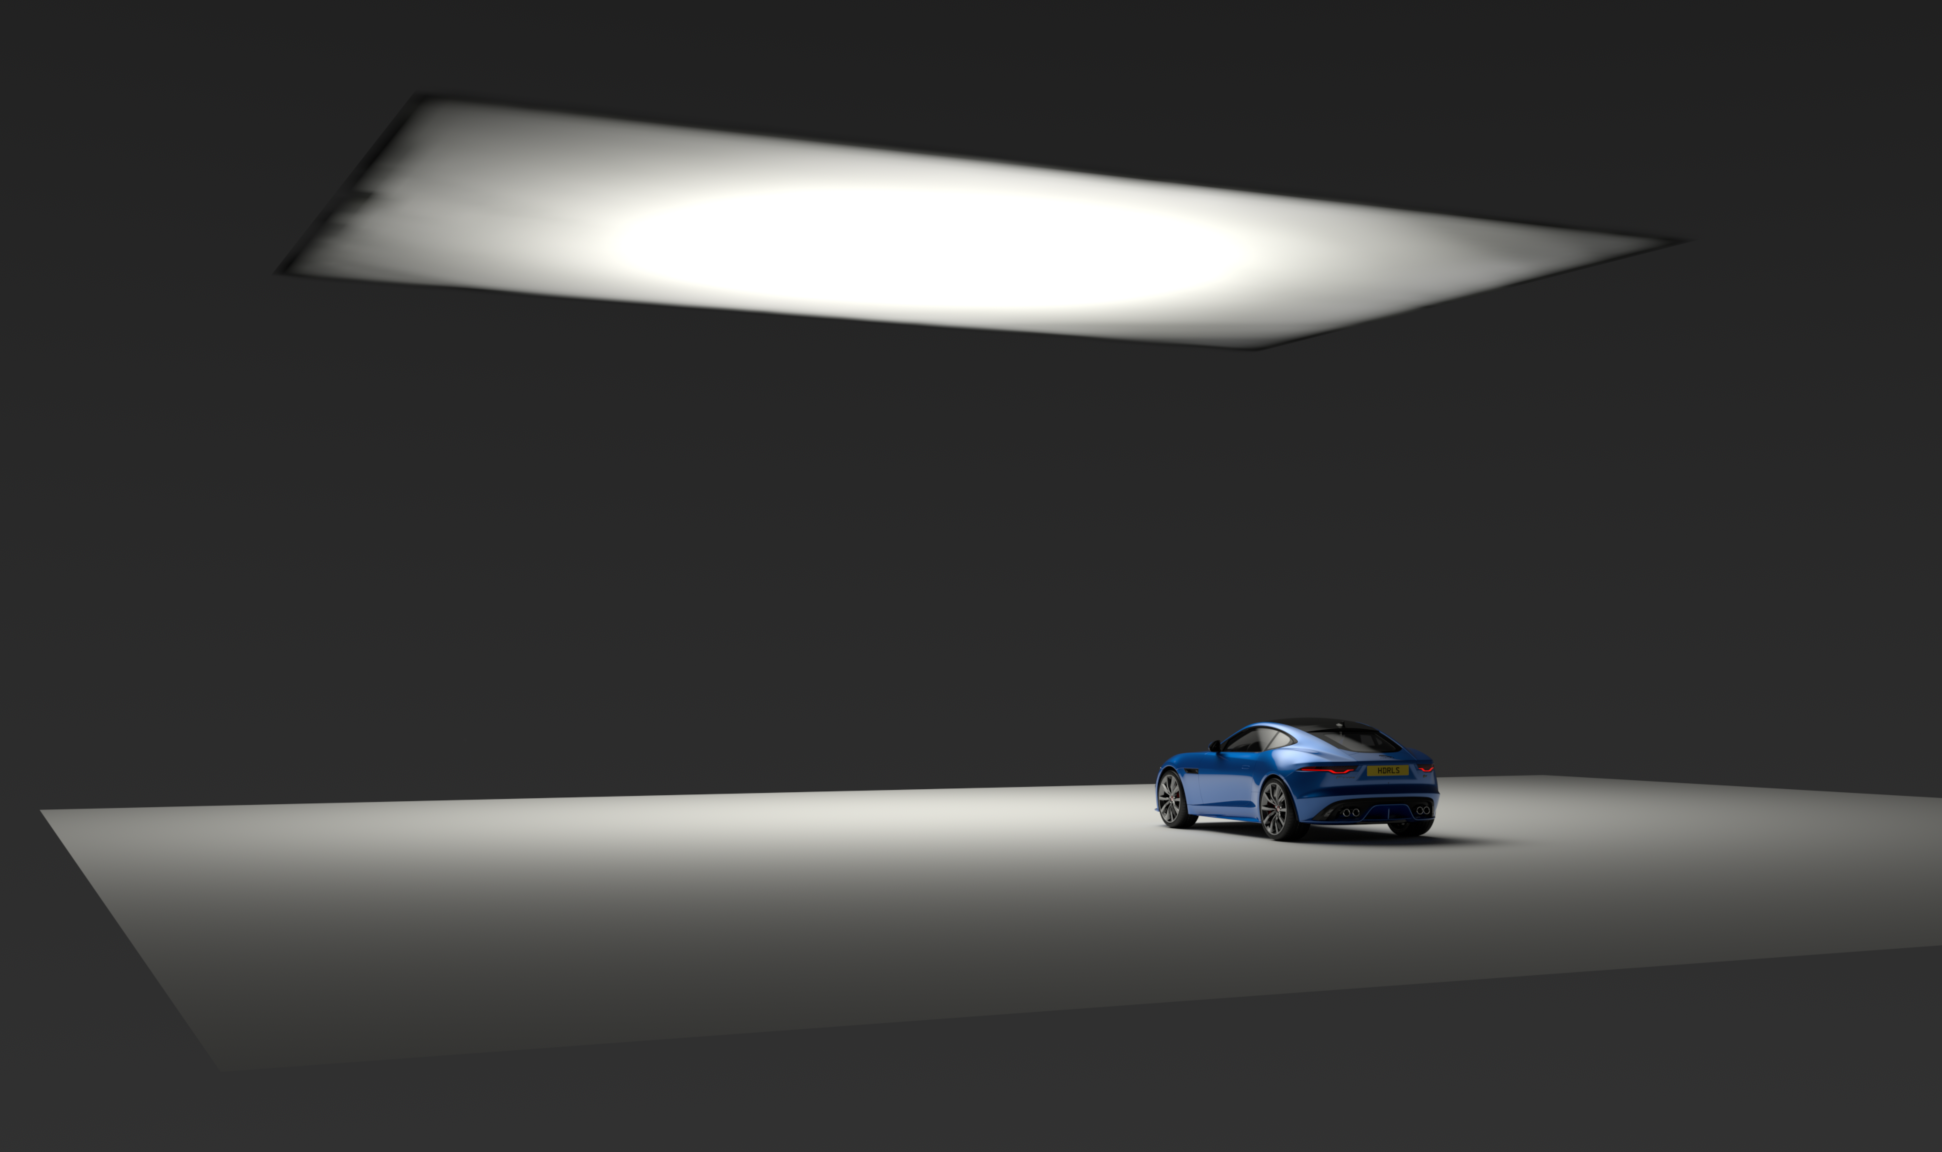
In the image below, one soft box on the HDRI map (right side) lights the car and floor. This light illuminates and reflects across the entire scene because the environment sphere is far from the car.

VRED Viewport

HDRI Map lighting view
When to use environment lighting vs. area lights
•Environment lighting - Good for most studio car lighting
•Area lights - Use when you need light in a specific area only
How it works
HDR Light Studio can convert a 3D mapped light into a VRED Area Light:
1.Change one setting in HDR Light Studio
2.The light is removed from the HDRI map
3.An Area Light appears in VRED with the same light appearance
HDR Light Studio controls:
•The Area Light's position and rotation
•The Area Light's appearance (texture)
When you change the light appearance in HDR Light Studio, the Area Light texture updates automatically in VRED. This works the same way as the HDRI map updates.
Understanding the scene scale
In the zoomed-out view below, you can see the Environment Sphere is about 100,000 units wide. Compare the sphere size to the floor grid to see the scale.

Looking at Sphere size in VRED
Change your view to see the light on the HDRI map better.
Light settings for our example light:
Advanced Rotations: Enabled
Rotation mode: Fixed
With these settings, the light stays horizontal and aligned with the X axis, no matter where you move it.
Note: Without Fixed rotation mode, the light would always face the LightPaint position.

Soft box on HDRI Map lighting the scene
Select the light in HDR Light Studio.
Enable the Area Light setting.

Area Light setting
There are in fact three ways to enable the Area Light checkbox
Method 1: Light Properties (as above)
Go to Light Properties > Settings tab
Enable the Area Light checkbox
Method 2: Light List
Right-click the light in the Light List
Select "Toggle Area Light"
Method 3: Keyboard shortcut
Select the light
Press CTRL + Space Bar
What happened
When you enable Area Light:
1.The light is removed from the shared HDRI map
2.A new Area Light appears in VRED
3.The Area Light uses an HDR texture with RGBA
Finding the Area Light in VRED
You can see the new Area Light in:
•The Scenegraph
•The Light Editor
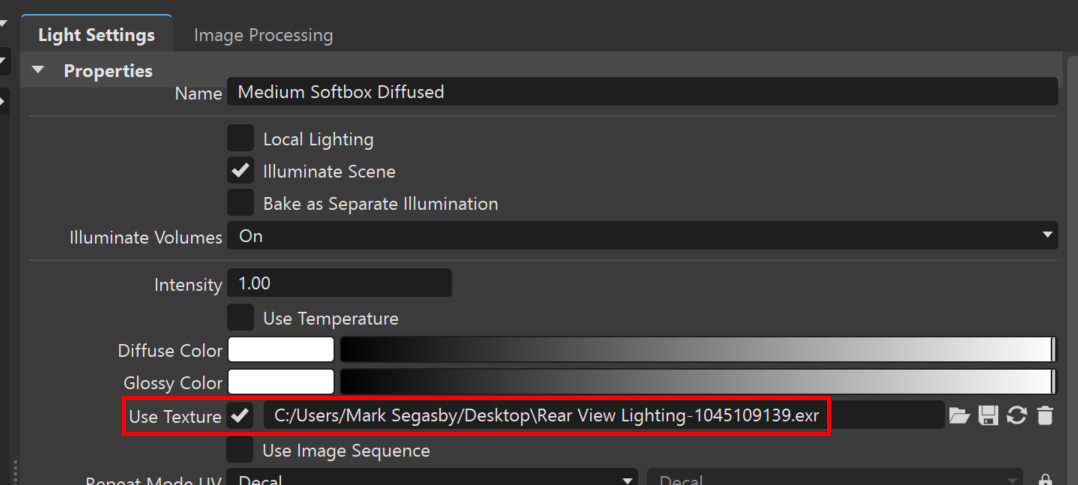
The light uses a "HDRLightStudioLive" texture.
You can edit Area Light properties that HDR Light Studio does not control.

HDR Light Studio created area light seen in Scenegraph and Light Editor
In our example, the new Area Light appears close to the car. By default, the Smart Dolly value is set to 1000.
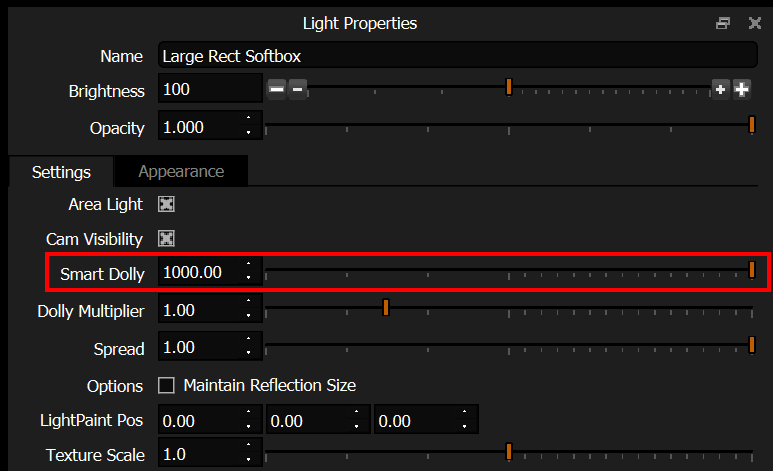
In this scene, 1000 = 1000mm (or 1 meter) from the car. This is why the light appeared so close.

Area Light appears in Scene
Adjusting the Smart Dolly range
The Smart Dolly value of 1,000 at the end of the slider is placing the light too close to the car. You need to change the scale setting.
Steps:
1.Go to Edit > Preferences in HDR Light Studio
2.Find the Smart Dolly Scale drop-down
3.Change the value from 1 to 10
4.Click OK
Why change to 10?
This allows the light to move from 0 to 10 meters away from the car (10 times the current range), when using the slider from 0 to 1,000.
Note: This setting is saved with the project. When you reopen this lighting project, it will remember the Smart Dolly Scale value.

Changing Smart Dolly Scalar setting
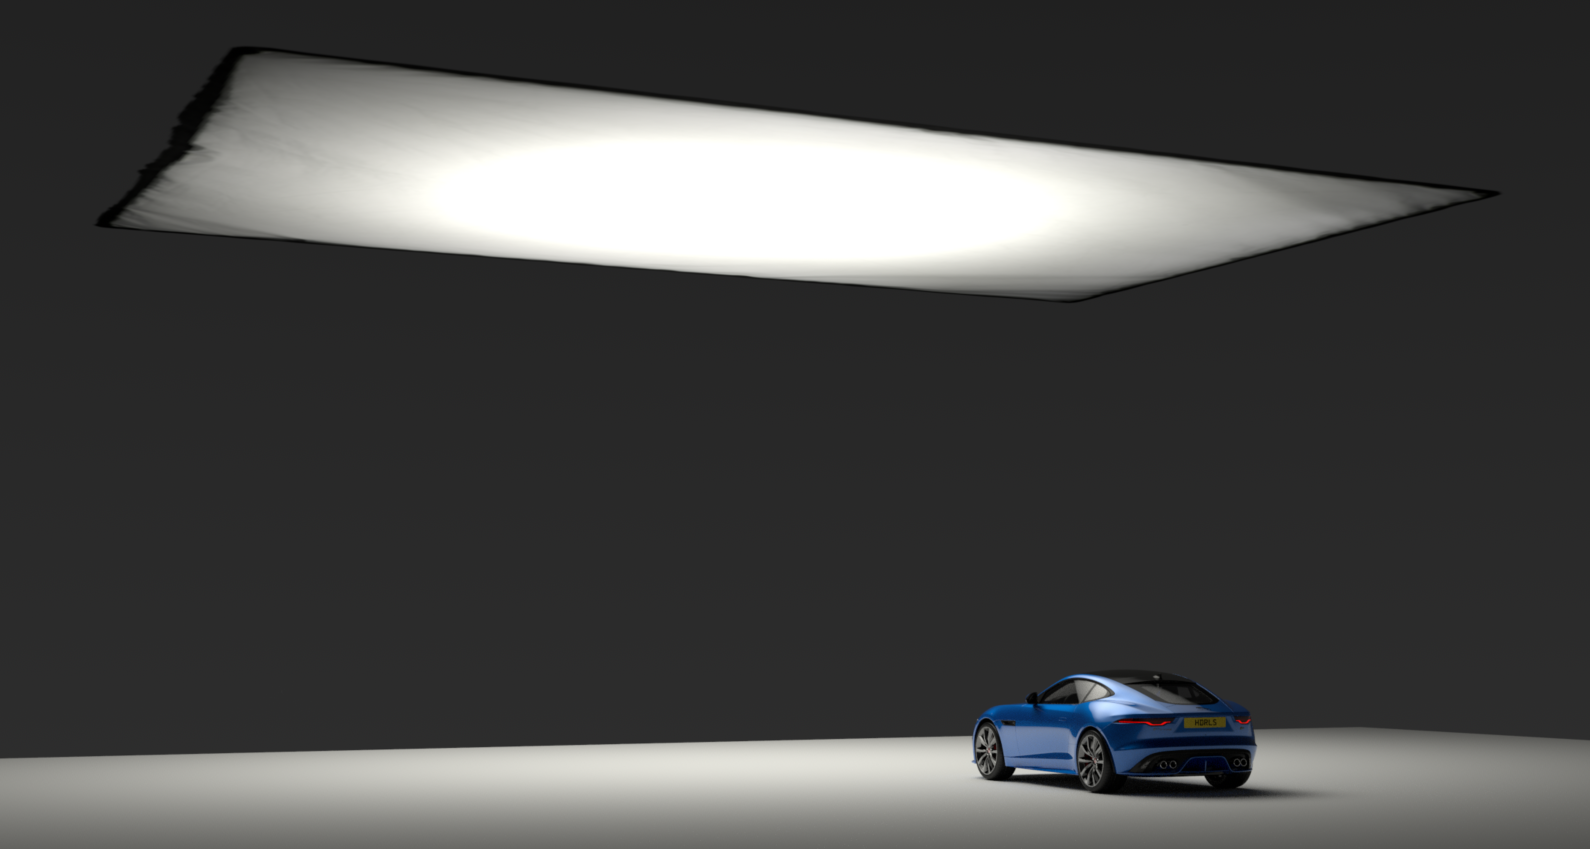
The scale change applies immediately in VRED. The Area Light now appears 10 meters from the car with a Smart Dolly setting of 1,000. This gives the slider a useful distance range.
Improving Area Light quality
The light appearance looks low resolution. You can increase the texture quality.
Steps:
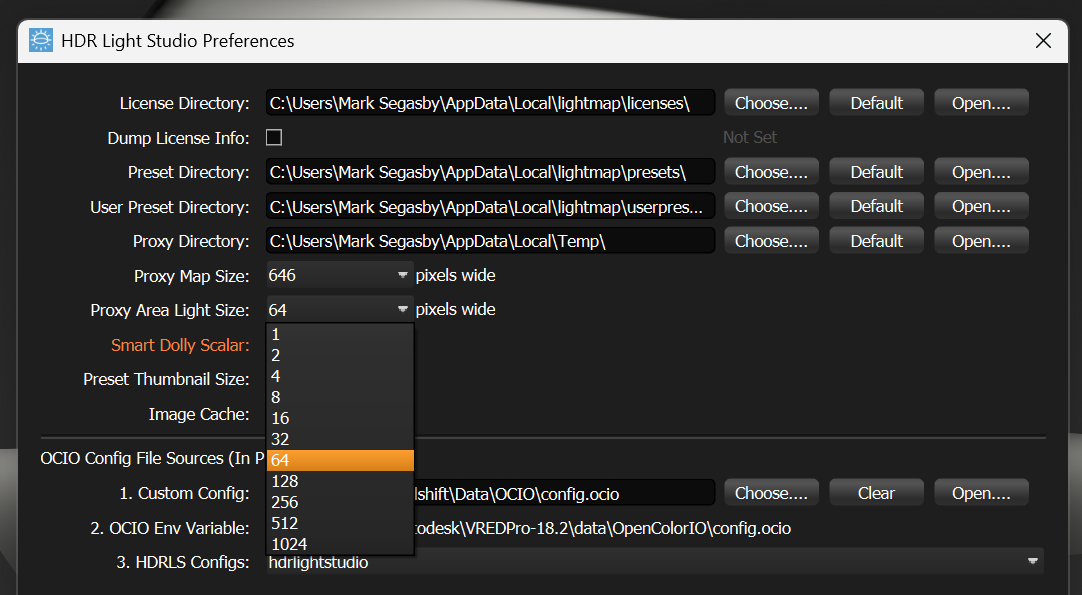
•Go to Edit > Preferences in HDR Light Studio
•Find Proxy Area Light Size
•Change the value from 64 to 512
•Click OK
This creates higher quality live textures for Area Lights. This is an application, not a project setting.
The texture now looks much better at 512 pixels. You can see more detail in the soft box creases.
Understanding Smart Dolly
The light appears much larger now because it's further from the car.
How Smart Dolly works
Smart Dolly controls both distance AND size at the same time:
•Move closer → Light gets smaller
•Move farther → Light gets larger
This keeps the light intensity on the 3D model consistent. You don't need to adjust size and distance separately, which saves time.
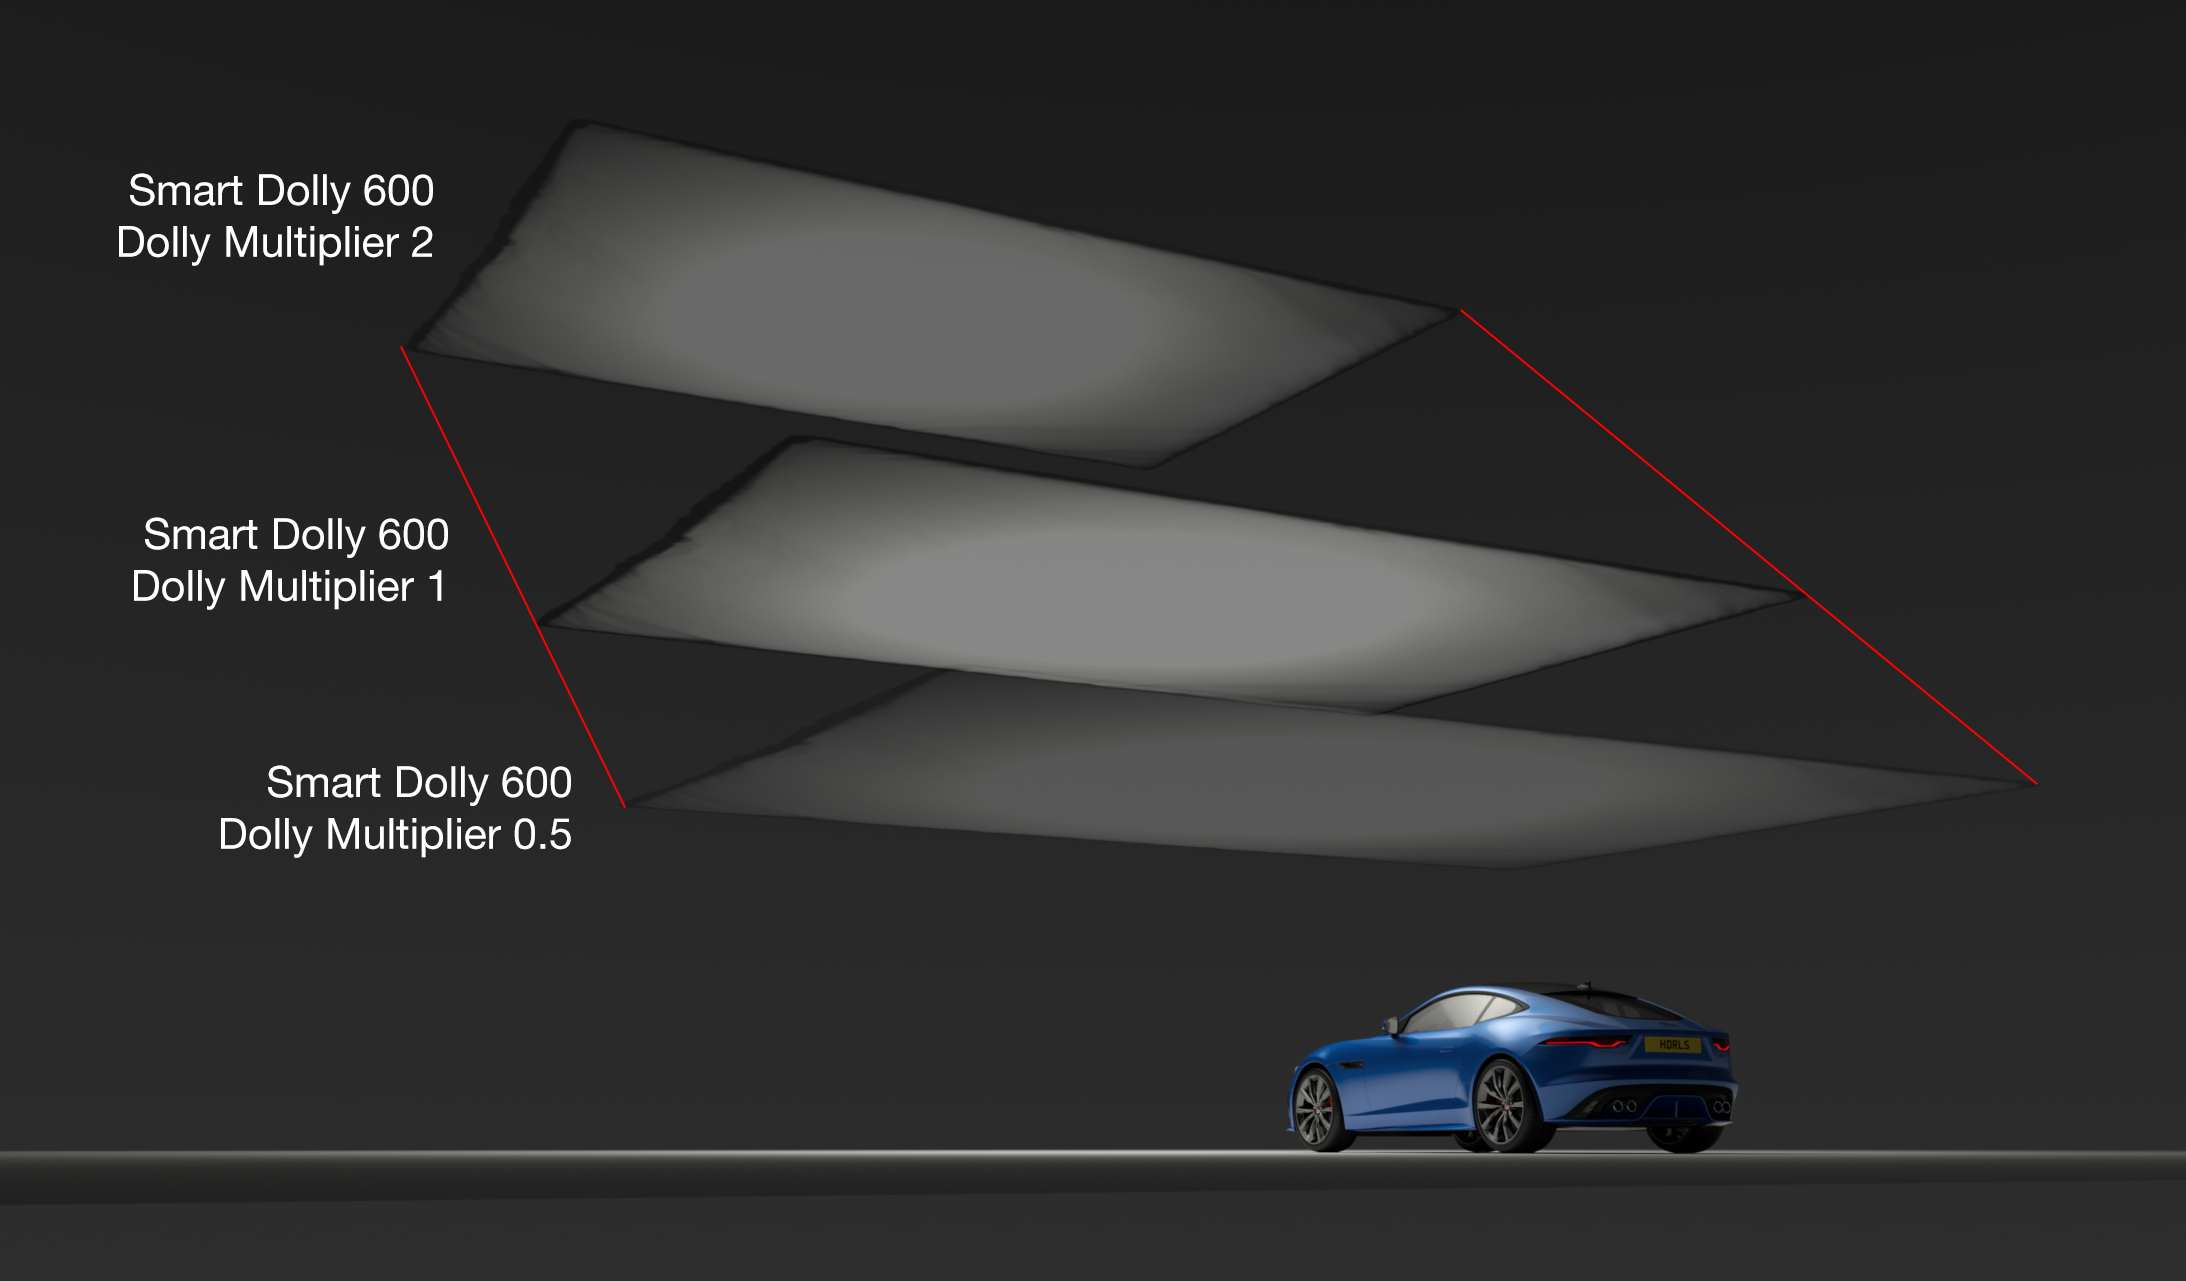
Example
The image below shows different Smart Dolly values:
•As the light moves closer, it gets smaller
•The light reflection stays in the same position on the 3D model
•When the light almost touches the model, it becomes very small

The settings above show these distances: 10m, 6m, 3m, 1m (based on the scale you set).
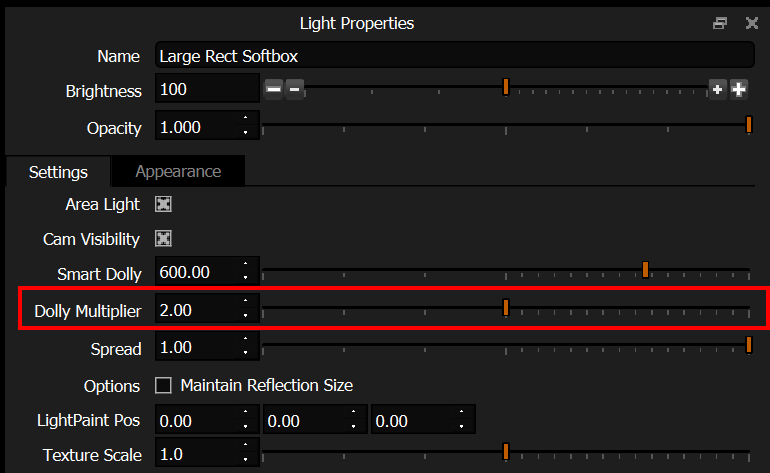
Moving the light without changing size
Use the Dolly Multiplier slider to change only the distance. This works together with the Smart Dolly slider but does not change the light size.
Example settings below:
Using Dolly Multiplier
When you move the light closer with Dolly Multiplier:
•The surface becomes brighter
•The reflection may get larger
Use Dolly Multiplier for small distance adjustments.
Why this approach to moving area lights?
Most 3D software lets you drag lights around in 3D views using gizmos. HDR Light Studio works differently.
HDR Light Studio uses LightPaint - you click on the Render View to position lights on the HDRI map. Area Lights work the same way, plus you get these distance controls.
Switching back to HDRI map lighting
To convert an Area Light back to HDRI map lighting:
•Turn off the Area Light setting
You can toggle this on and off to compare both lighting effects.
Final step: Rendering high resolution textures
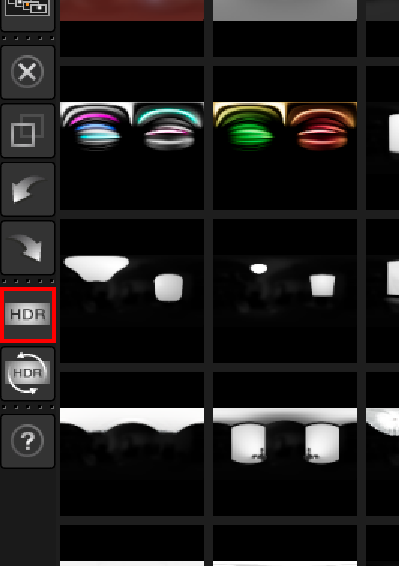
Before closing HDR Light Studio, generate the final high resolution textures:
•Click the HDR button on the toolbar
•The Production Render panel opens
Enter the Resolution for Area Light textures in the numeric input box.

The pixel resolution will be the same for the width and height, irrespective of the proportion of the content of the light or the proportions of the area light itself.
Generating final textures
Click the Render button to generate the final HDR textures. This creates:
•One HDRI map
•Textures for each Area Light (named with the HDRI map name + a unique ID)
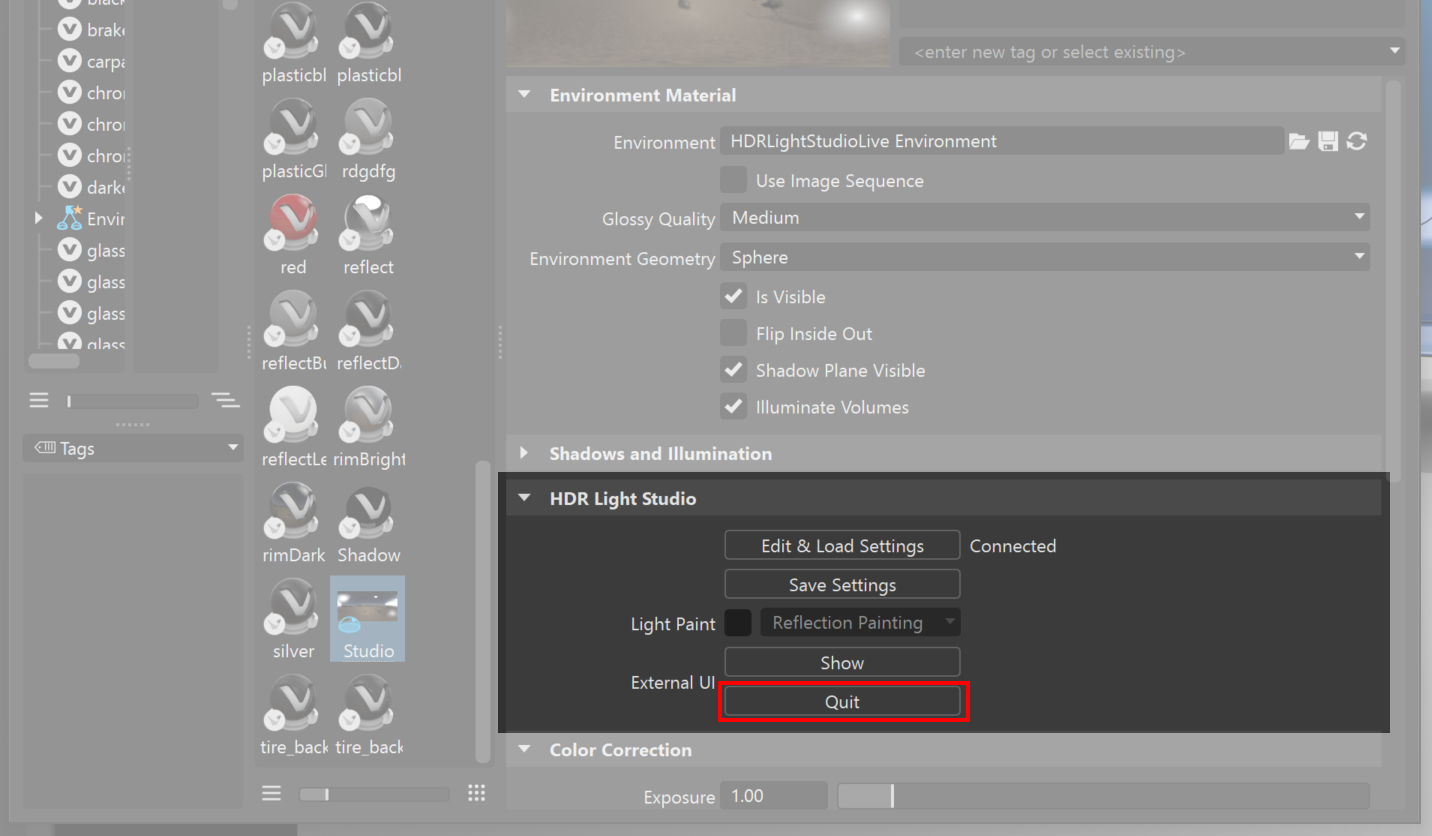
Closing HDR Light Studio
Click the Quit button in the HDR Light Studio section of the Environment Material.
Invisible Area Lights
Problem: If an Area Light is too far away, it may go outside the Environment Sphere. When this happens, the light will not appear in reflections during ray-tracing.
Why: The sphere hides the Area Light.
Solution: Zoom out to check your scene and make sure all Area Lights are inside the Environment Sphere.

Why Area Lights Create Odd Results with VRED's Shadow Material
VRED's Shadow material is designed to work with HDRI environment lighting. It's essentially invisible but captures and displays shadows over the background - which works great for floor shadows in most cases.
However, area lights behave differently. When you add an area light to a scene with the Shadow material, the shadows it creates don't respond properly to the light's intensity or the overall scene lighting. You'll see strong, dark shadows appearing even in areas where the area light isn't actually reaching—and these shadows remain overly dark regardless of how bright you make the light. This isn't a bug - it's simply how the Shadow material responds to area lights in VRED.
The Solution: Replace the Shadow material with a standard material like Plastic or Diffuse on your floor plane. The floor will then react correctly to all lighting in the scene, including area lights, creating realistic shadows that properly reflect light intensity and reach.

