When using the Render View [HDR Light Studio] in conjunction with your 3D software and Renderer, sometimes the renders look very different due to their brightness or the materials used in the scene.
There are simple adjustments you can make to the settings of the Render View [HDR Light Studio] to provide a closer and more useful match.
Matching View Brightness
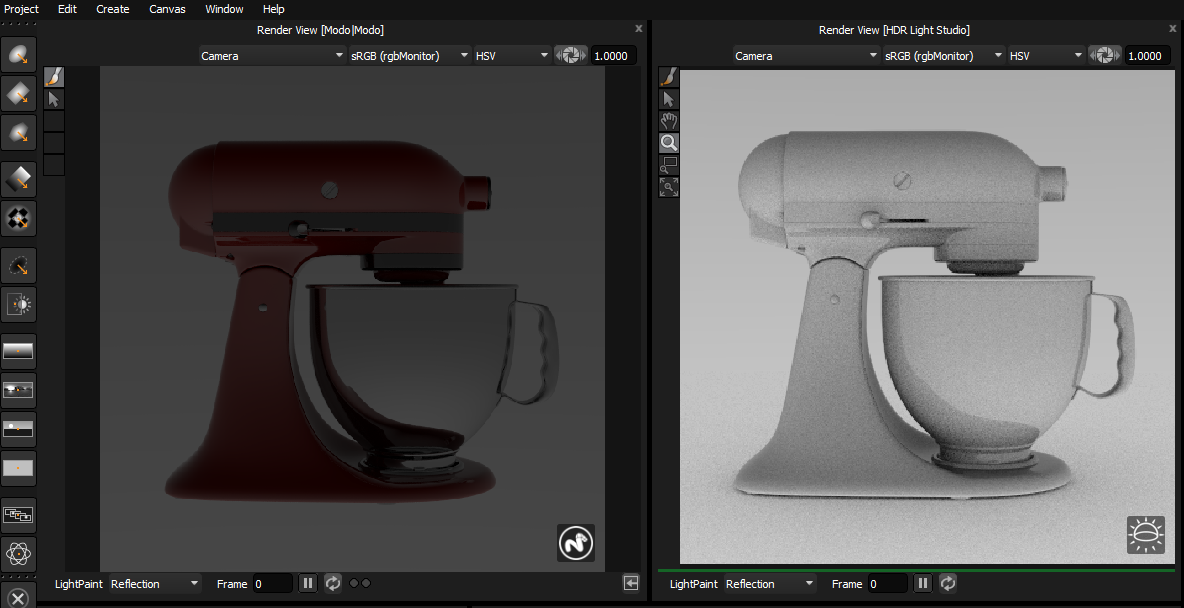
The simplest change to make is to the brightness of the view. See below, the Render View [HDR Light Studio] is very bright compared to the Render from the 3D software.

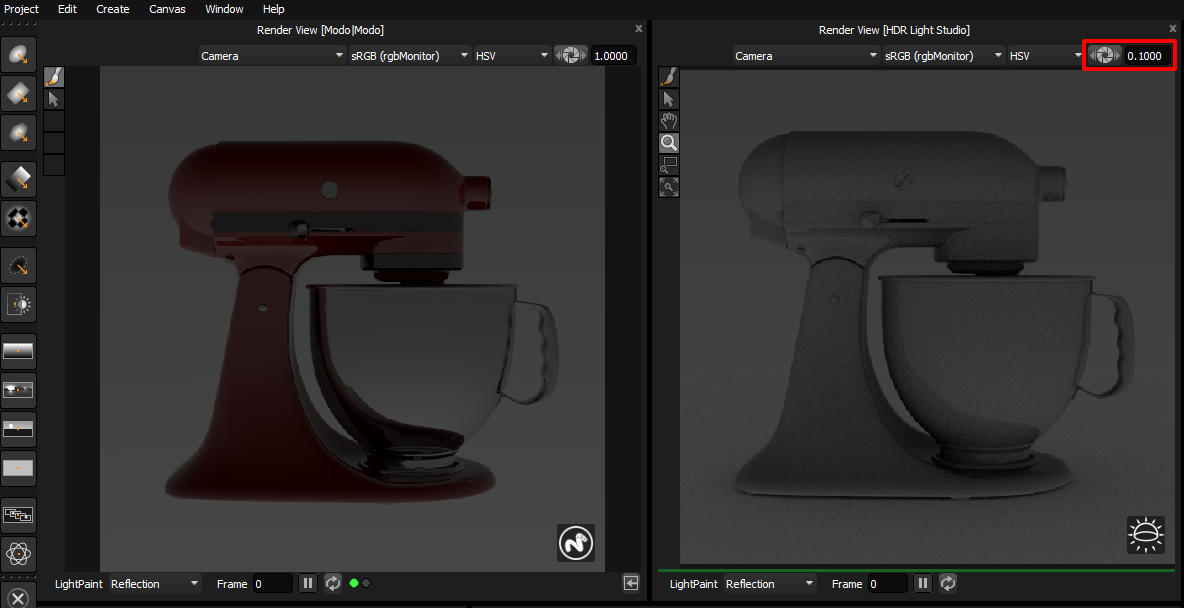
You should adjust the brightness of the Render View [HDR Light Studio] to provide a better match, so the views are responding to the lighting in a similar way. In the example below, we changed the Exposure in the view from 1 to 0.1. The view brightness now matches, and you can make better lighting decisions for the shot using the Render View [HDR Light Studio].

Adjusting Appearance Properties
You can change the appearance settings for the Render View [HDR Light Studio] if the model has a very specific color or level of reflectivity you want to match better. Of course there is only one shader on the whole model in Render View [HDR Light Studio], but adjusting this appearance can be useful.
In the image below, the appearance settings are their defaults in Render View [HDR Light Studio].
The Diffuse Color is: Mid Grey
The Reflectivity is: 50
The Fresnel is set to the default values for: Custom

In the image below we changed those settings to:
Diffuse Color: Dark red matching the bulk of the 3D model in the other view
Reflectivity: 100
Fresnel: IOR, value 2.5

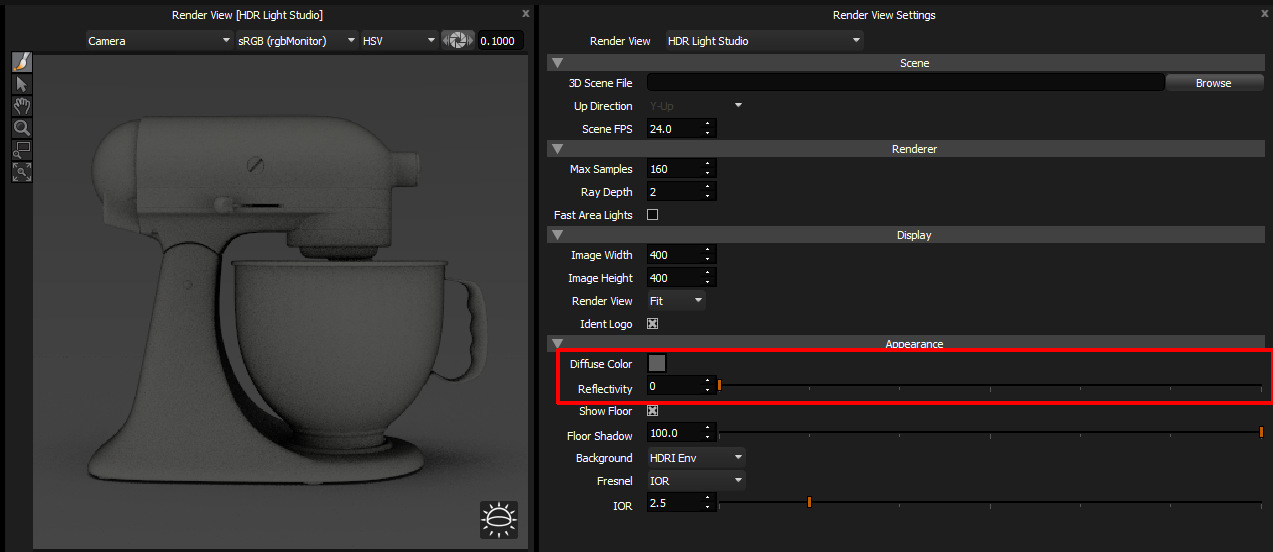
Using different settings for appearance, you can mimic other basic materials in HDR Light Studio. Like a matt material, with a Reflectivity setting of 0.

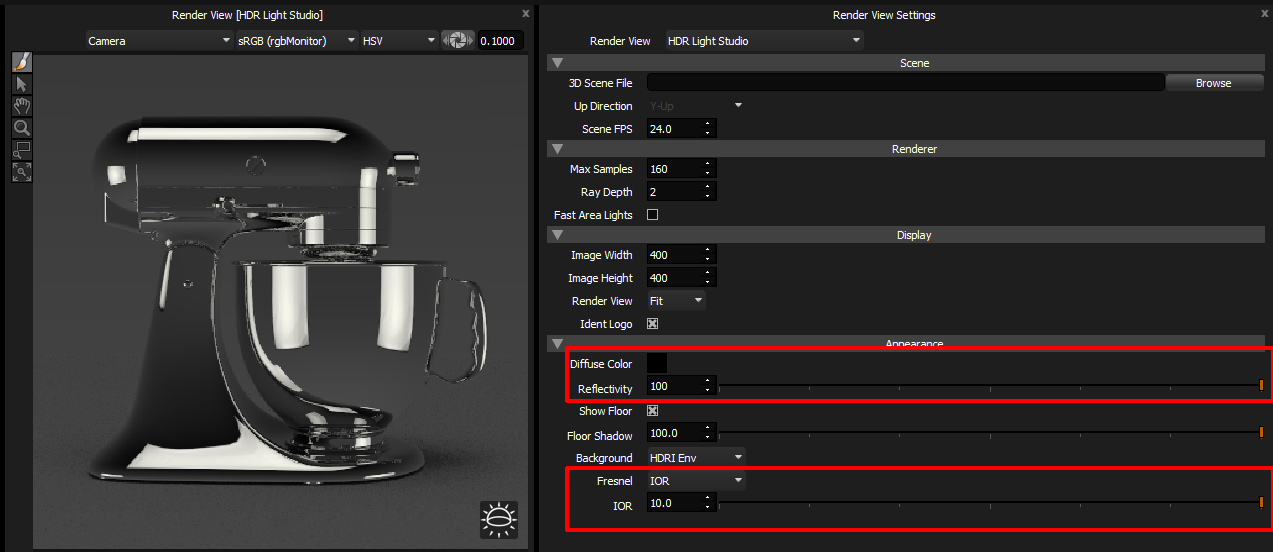
Or Chrome. With Diffuse Color set to Black, Reflectivity: 100, and Fresnel: IOR, value 10.

