Name
The label applied to the light and shown in the Light List. If you have several round lights, giving them unique names will help you find them. You can type in this field and press return to change the name of the light.
You can also double click on a light in the Light List to rename it.
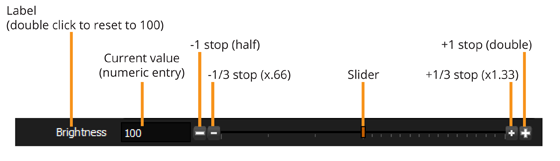
Brightness
The brightness value of the light. Higher values can be input into the numeric entry box than can be shown on the slider. You can also click and drag beyond the end of the slider for higher values, and a small triangle will appear to indicate this.
In order to adjust the brightness of the light in a more photographic way, buttons allow increasing and decreasing the light brightness relative to its current value.
The large plus and minus buttons increase and decrease by 1 stop (doubling and halving the brightness), the small plus and minus buttons increase and decrease by 1/3 of a stop (1.33 or 0.66)
Opacity
The transparency of the light when blended with the Canvas.
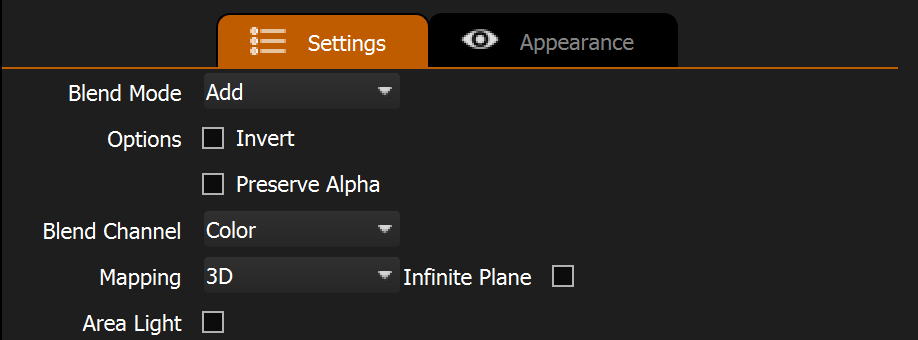
Blend Modes (Including Invert and Preserve Alpha)
Determines how the light content is composited with underlying Canvas content.
For more information see: Blend Modes
Mappings
You can choose between 3 mapping types. The mapping types determine how the Content is mapped with respect to the HDRI map. There are 3 types of mapping:
3D
Places a light source into the HDRI environment using equirectangular projection - it appears on the map as though it genuinely exists in the 3D scene, distorting naturally across poles, seams, and at any angle. You position and rotate the light in 3D space, and the map updates to reflect its correct appearance from the spherical viewpoint. A 3D-mapped light can also be converted into a 3D area light, removing it from the HDRI map entirely and placing it directly in the 3D scene as a real light source.
Planar
Places content flat onto the HDRI map without any spherical distortion. This is primarily used for compositing HDRI maps into your lighting design - moving a planar-mapped light left or right rotates the environment, making it easy to position an existing HDRI backdrop exactly where you need it.
Spherical
Wraps content across the entire HDRI map. You position it by its north pole (top-left corner), letting you rotate or offset the whole environment. Use this for tilting an existing HDRI, or for applying full-environment effects like gradients that encapsulate the entire sphere from any starting point.
For more information see: Mapping.
Area Light
This option is only available when the 3D mapping option is selected. It promotes the light from being on the HDRI map, to being a full 3D Area Light.
This setting can be toggled using Keyboard shortcut: CTRL + Space Bar (On macOS, using Fn + CMD + Space Bar)
For more information see: Area Lights
