• You should install HDR Light Studio Xenon Drop 1 or newer before installing the Blender plug-in add-on. See installation instructions for HDR Light Studio here.
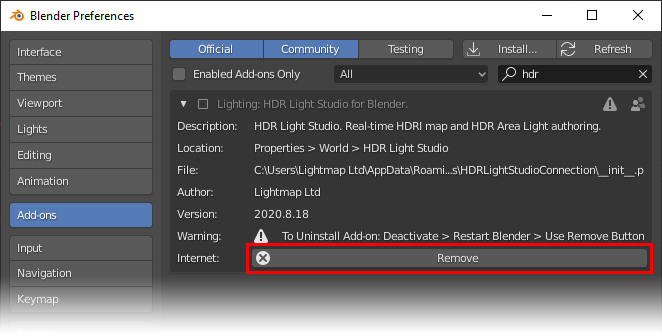
• If you have an older build of the Blender add-on installed, you should uninstall it first before installing a newer build - see Uninstalling.
Installing the Blender Add-on - Windows, Mac and Linux
STEP 1: Download the Blender add-on zip file from our website.
STEP 2: Save the zip file downloaded from our website at a location of your choice. Do not unzip this file as Blender actually requires this zip file for installation. (see Figure 1)
MacOS note: Zip files are unzipped automatically if you have "open 'safe' files after downloading" checked in the Safari preferences. If you have this set, then you will have to re-compress the HDRLightStudioConnection folder to make it a zip file that can be used for installation.
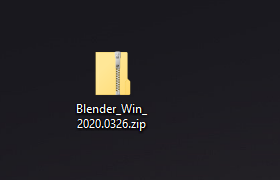
Figure 1: Blender add-on file stored on the desktop
STEP 3: Start up Blender and open Blender Preferences
Go to Edit > Preferences... (see Figure 2)
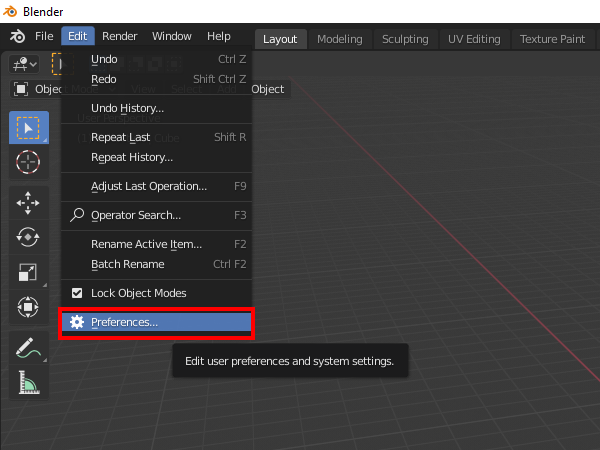
Figure 2: Opening Blender Preferences
STEP 4: Go to the Add-ons section and then click on Install... (see Figure 3)
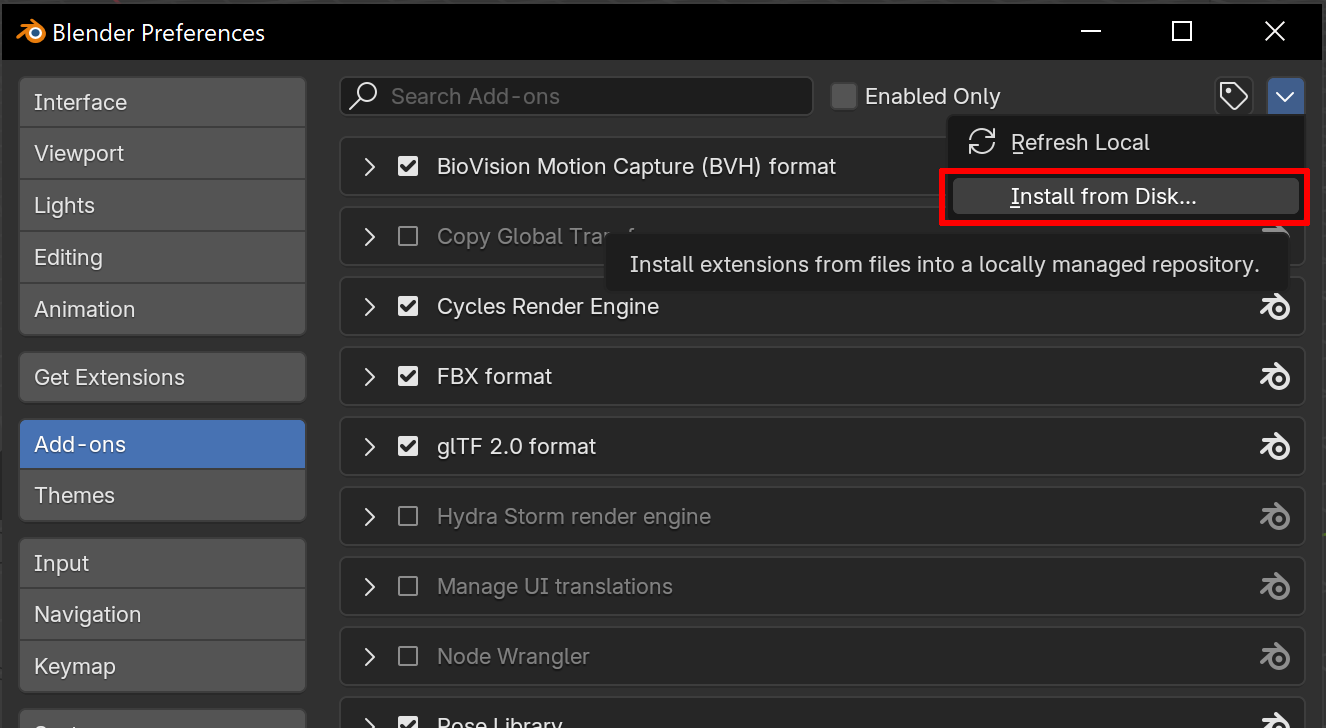
Figure 3: Clicking on the 'Install...' button to install a new add-on
STEP 5: Go to the directory where you have stored the Blender add-on zip file. Select it and click on Install Add-on (see Figure 4)
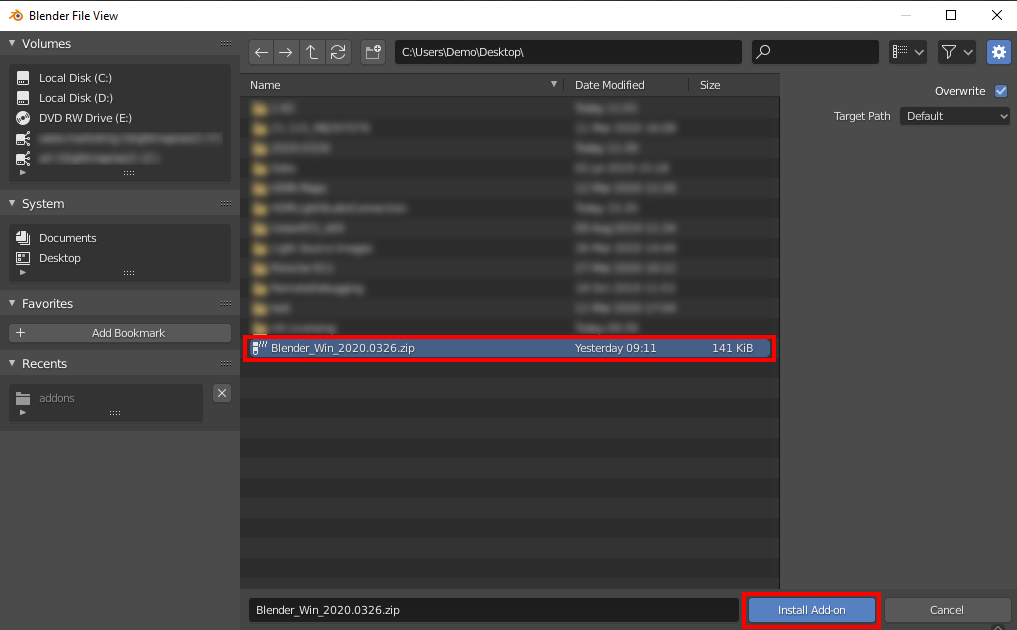
Figure 4: Installing HDR Light Studio add-on for Blender
The HDR Light Studio add-on for Blender is now installed.
You no longer need the .zip file used to install the add-on, it can now be deleted (in this example it was stored on the desktop).
STEP 6: Blender has automatically searched for the installed add-on called 'HDR Light Studio for Blender'. Now, enable the HDR Light Studio add-on for Blender in order to use it.
Check the checkbox for Lighting: HDR Light Studio for Blender to enable the add-on (see Figure 5)
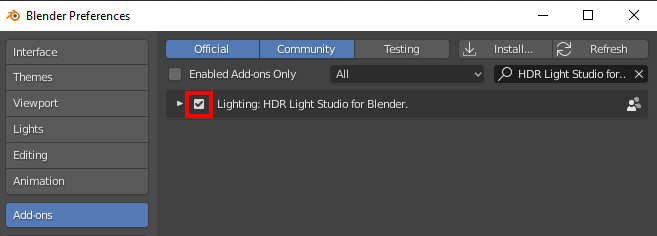
Figure 5: Enabling the HDR Light Studio add-on for Blender
You can see the HDR Light Studio add-on is installed because there is a new HDR Light Studio section in the World Properties in Blender (see Figure 6)
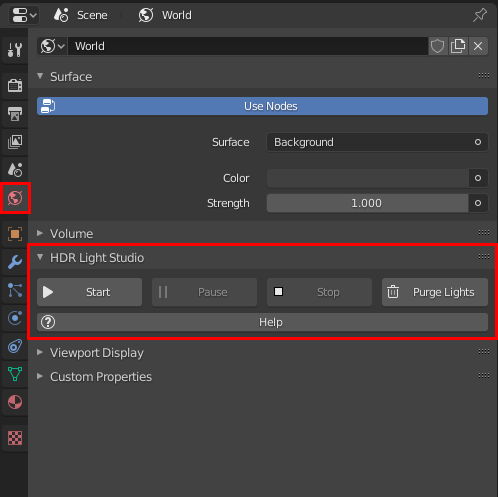
Figure 6: HDR Light Studio add-on for Blender
The installation process is complete and you are now ready to use HDR Light Studio using this Workflow.
Uninstalling
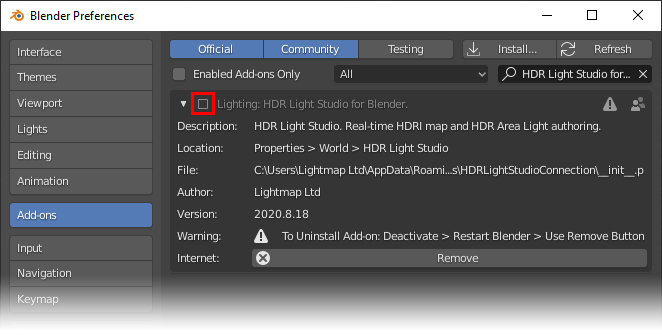
STEP 1: Disable the HDR Light Studio Add-on in Blender's Add-ons Preferences (Go to the Blender menu, Edit > Preferences)
STEP 2: Close and Restart Blender
STEP 3: Open Blender Preferences and go to the Add-ons
STEP 4: Find the HDR Light Studio Add-on using the search tool in Preferences, and use the Remove button to complete the uninstall process
