HDR Light Studio 5.4 introduces Advanced Rotations. This enables lights to be rotated in all 3 axis.
These rotations are available for 3D mapped lights when on the HDRI map and when enabled as Area Lights.
The Advanced Rotations controls are found in the Transform (Extended) section of Light Properties.
Use the check box to enable the advanced settings.
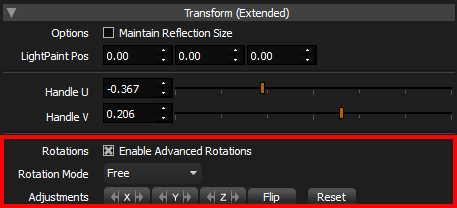
About Rotation Modes + Adjustments
Rotation Modes are used to set the default orientation desired for the light. Think of the rotation modes as setting the 'resting' orientation/behavior of the light. i.e. the orientation the light will face prior to any adjustments being made to it.
These modes have been created as helpers to create orientation behaviors that are genuinely useful for lighting.
Once the rotation mode has been chosen, the X,Y and Z adjustments can be made. These X,Y, and Z adjustments are made to the current orientation of the light.
The adjustments are applied as an offset to the 'resting' orientation for the selected rotation mode. So if the light is moved with LightPaint, and the light is now pointing at a new LightPaint location, the same offset rotations will be applied to the light. i.e. the rotation adjustments are always relative to the Rotation modes default orientation.
This may sound complex. It's easier to use than explain.
Rotation Modes
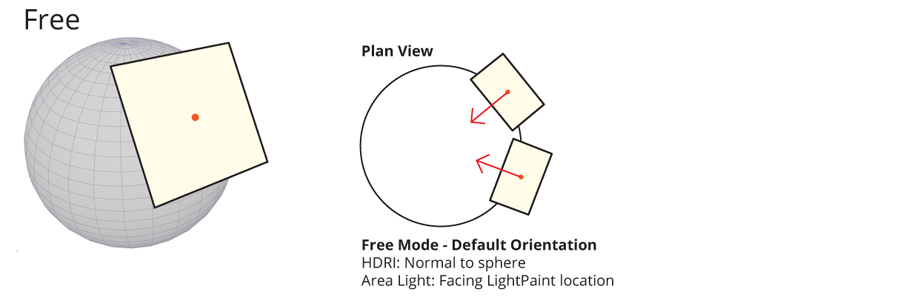
Free
In Free Mode the default orientation behaves exactly the same as when Advanced Rotations is off. So the light will be normal to the sphere when on the HDRI, and Area Lights will face the LightPaint location.
Use the X,Y,Z adjustments to offset the orientation of the light from this default. Whenever the light is moved it will maintain this offset.
Reset the orientation back to the default for this mode using the Reset button.
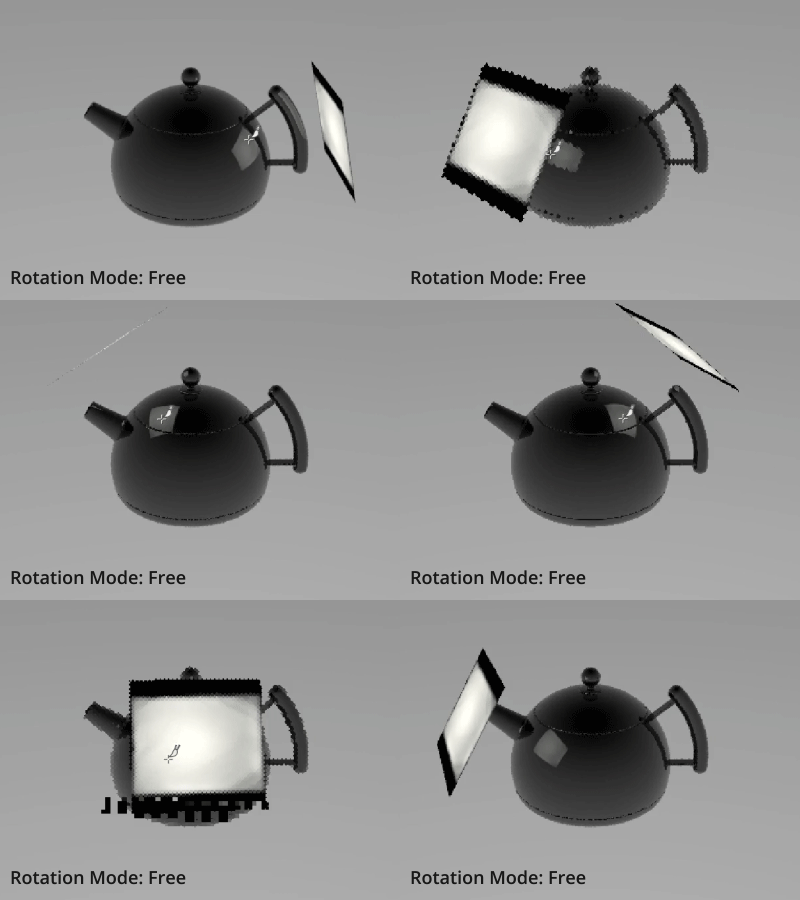
Here is Free mode in action:
V-Lock
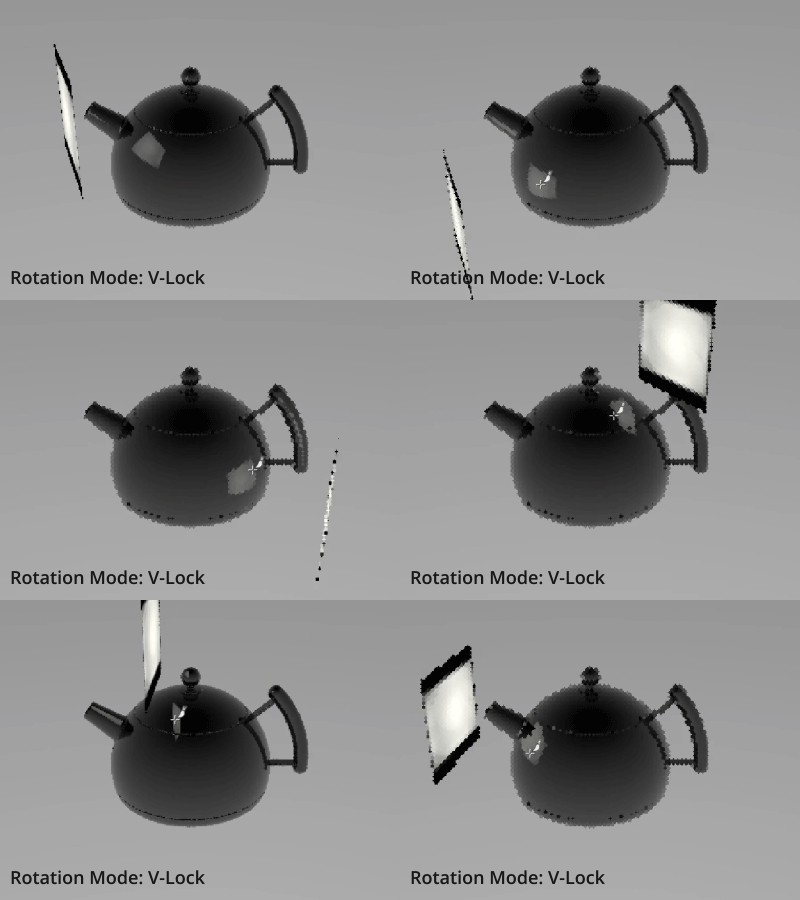
In V-Lock mode the light on the HDRI will be vertical and aligned normal to the sphere. Area Lights will be vertical and aligned to the LightPaint location.
Use the X,Y,Z adjustments to offset the orientation of the light from this default. Whenever the light is moved it will maintain this offset.
Reset the orientation back to the default for this mode using the Reset button.
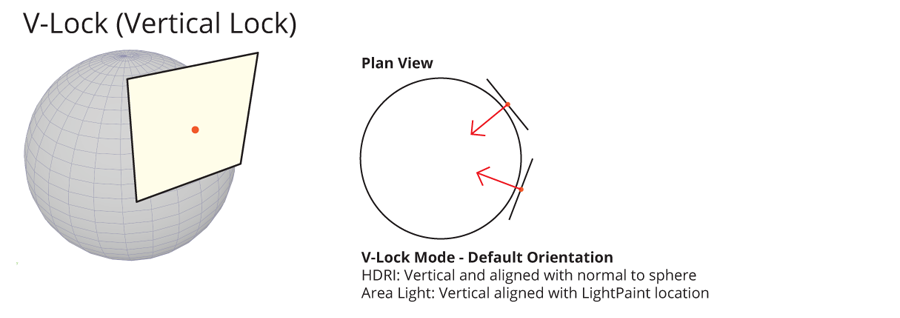
Here is V-Lock mode in action:
H-Lock
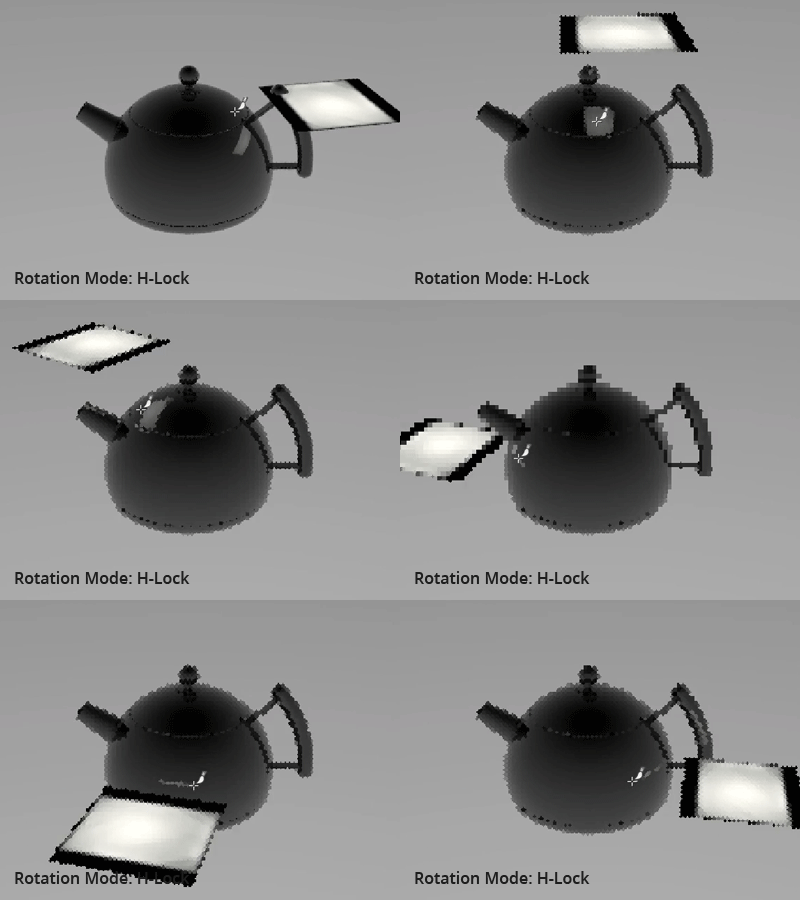
In H-Lock mode the light on the HDRI will be horizontal and aligned normal to the sphere. Area Lights will be horizontal and aligned to the LightPaint location.
Use the X,Y,Z adjustments to offset the orientation of the light from this default. Whenever the light is moved it will maintain this offset.
Reset the orientation back to the default for this mode using the Reset button.
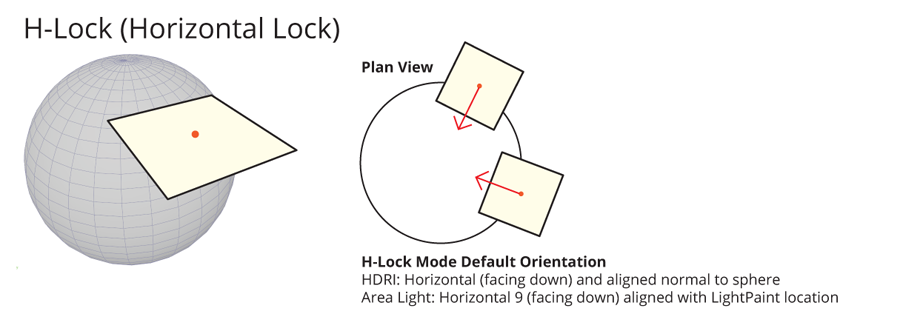
Here is H-Lock mode in action:
Fixed
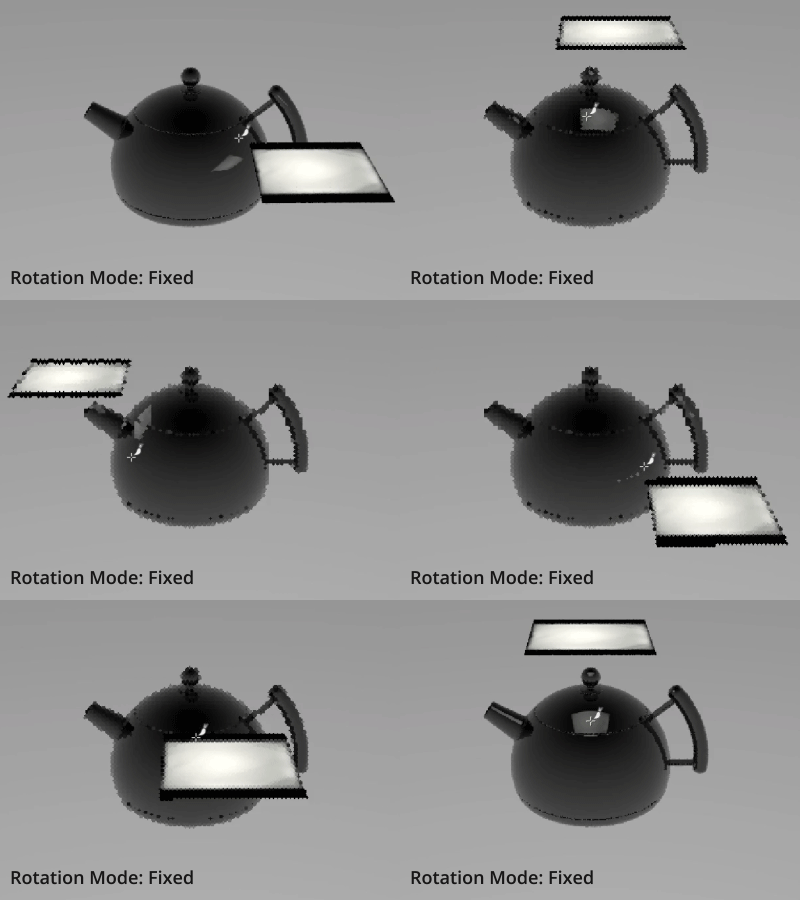
In Fixed mode, the light is orientated in world space. Disregarding the LightPaint location altogether. Wherever the light is moved it faces the same direction in this mode.
Use the X,Y,Z adjustments to offset the orientation of the light from this default. Whenever the light is moved it will maintain this offset.
Reset the orientation back to the default for this mode using the Reset button.
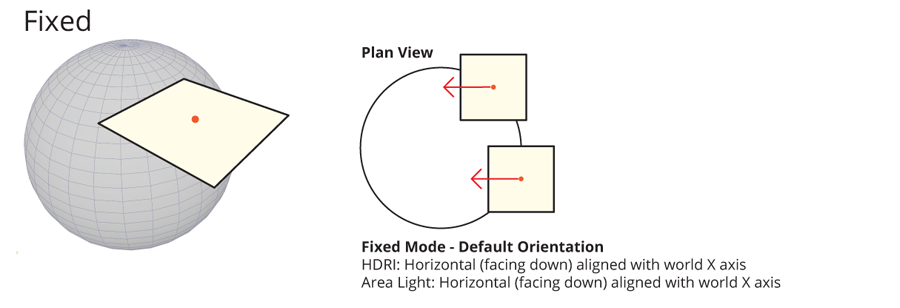
Here is Fixed mode in action:
Adjustments

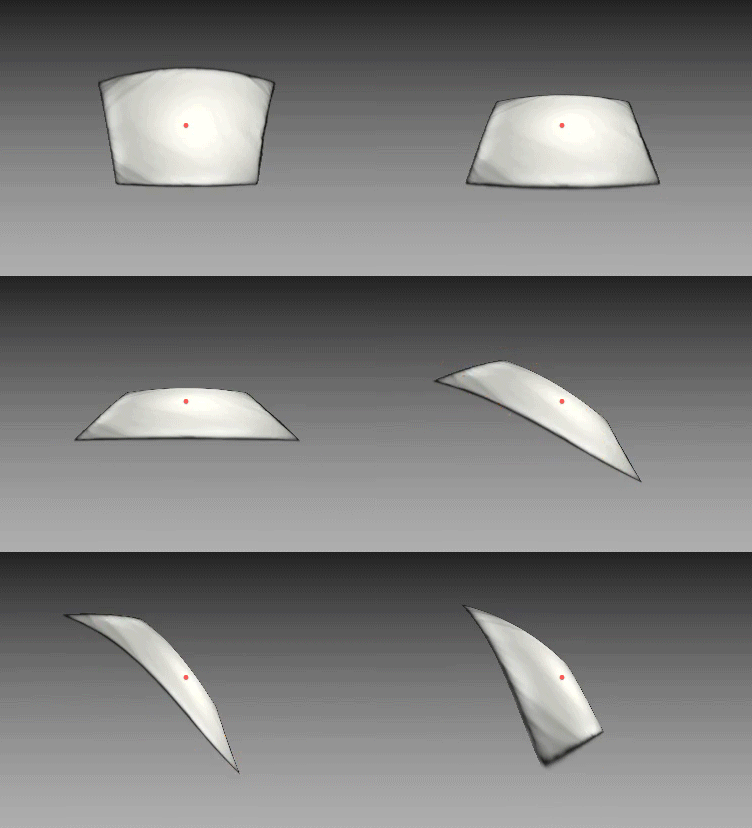
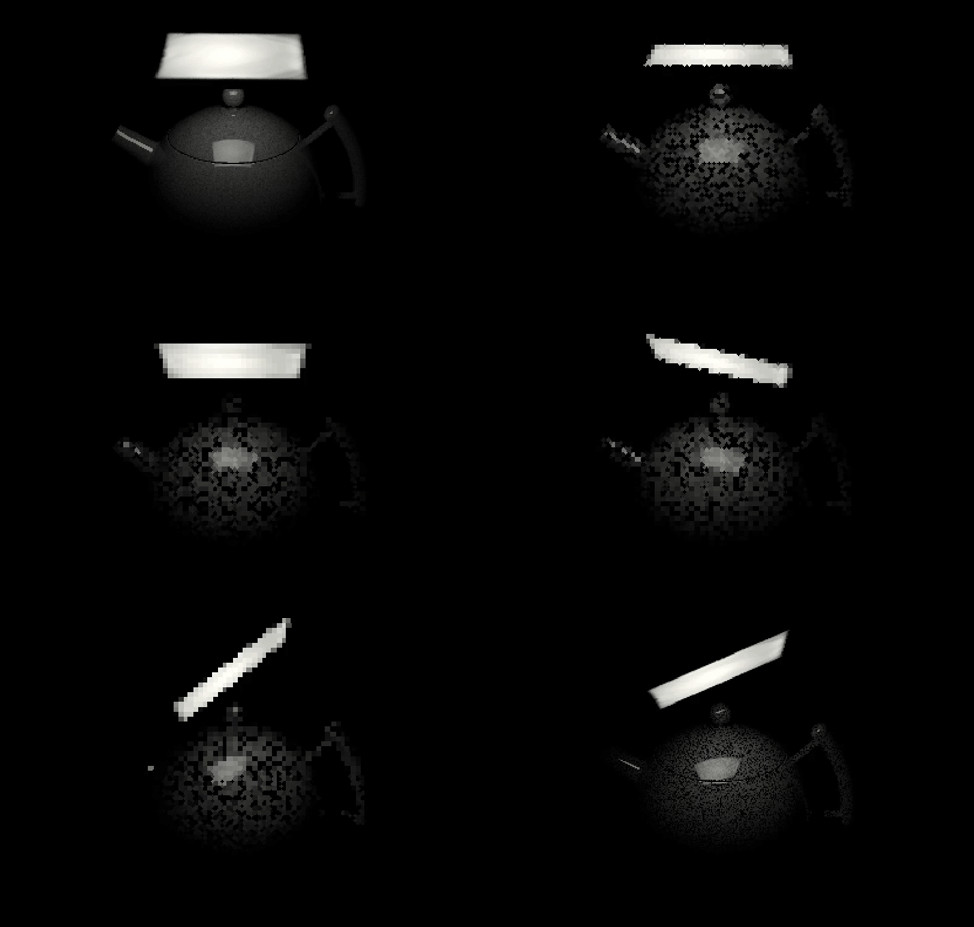
The adjustments allow the light to be rotated in the X,Y and Z axis relative to its current orientation.
Click, hold and drag on the X,Y or Z buttons to make the adjustments.
Here are examples of the effect of the rotations.


Here are the rotations in actions on the HDRI map:
Here are the rotations in actions with an Area Light:
Keyboard qualifiers can be used to change the sensitivity of the X,Y,Z buttons whilst dragging.
CTRL + Drag = slower increment (i.e. smaller adjustment for distance dragged).
SHIFT + Drag = faster increment (i.e. larger adjustment for distance dragged).
Press the Reset button to return the light to its default orientation for the chosen Rotation Mode.
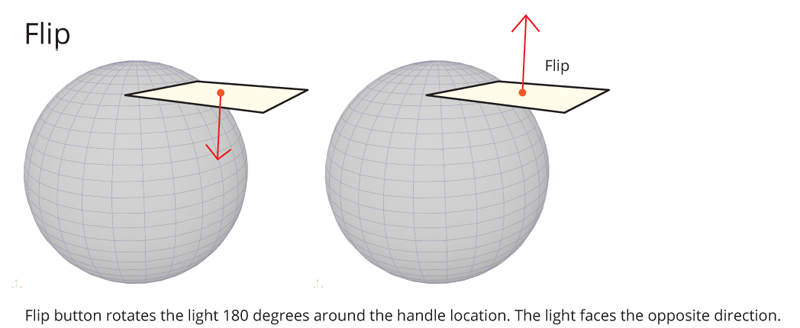
Press the Flip button to rotate the light 180 degrees around its Handle to face the opposite direction.
