V-Ray 2.0 for Rhino can create a direct connection with HDR Light Studio without the need to use Lightmap's HDR Light Studio environment texture.
HDR Light Studio enables the real-time creation and editing of a HDRI map for lighting your scene. This provides a much easier and faster approach to lighting your V-Ray shots, that will render fast too.
Workflow
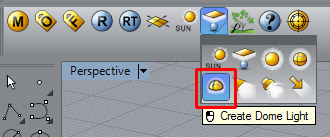
Create a V-Ray Dome light in your scene
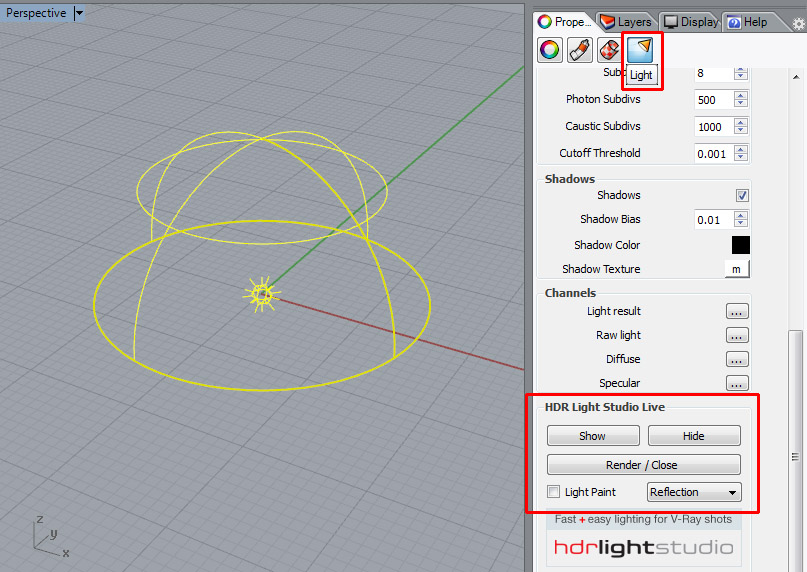
The HDR Light Studio Live controls are found on the Dome Light's 'Properties' tab, under the 'Light' section. Scroll to the bottom of the properties panel to see the HDR Light Studio Live section (that is displayed if HDR Light Studio is installed on your computer).
Let's turn on V-Ray RT in the view port for our scene - so we can see the dome lighting interacting with our scene and materials with real-time feedback.
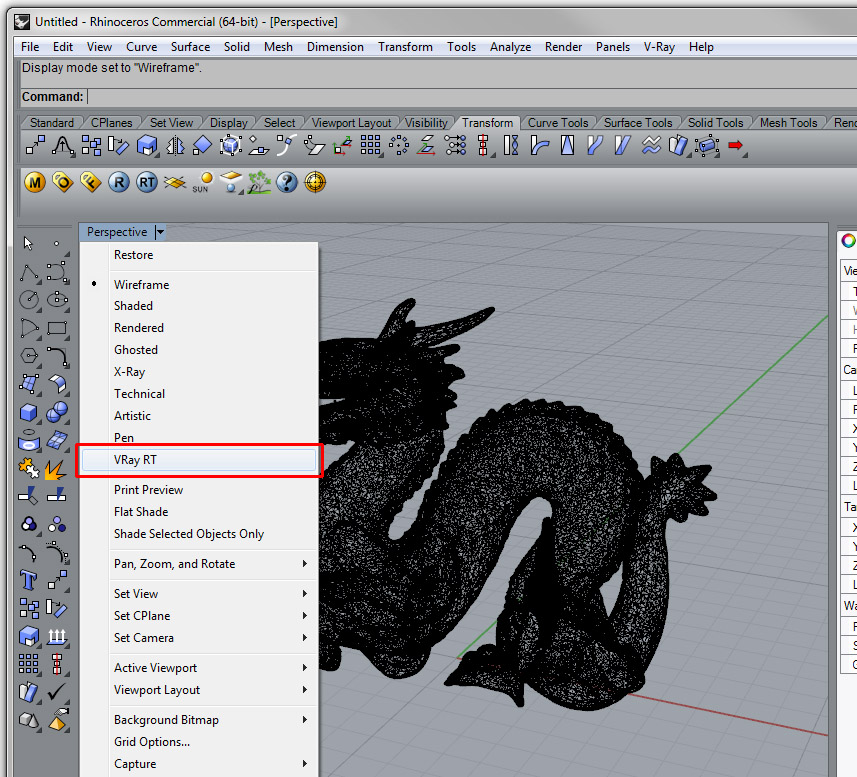
Now we can see the scene lit with the dome light.

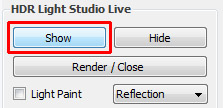
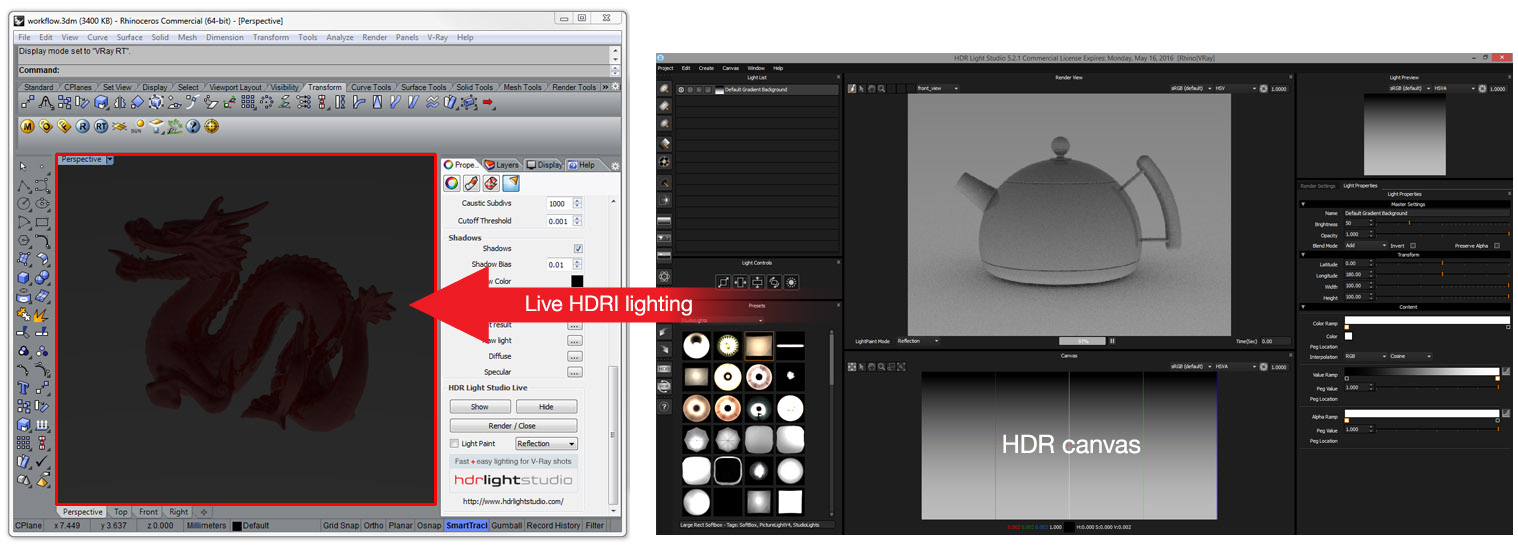
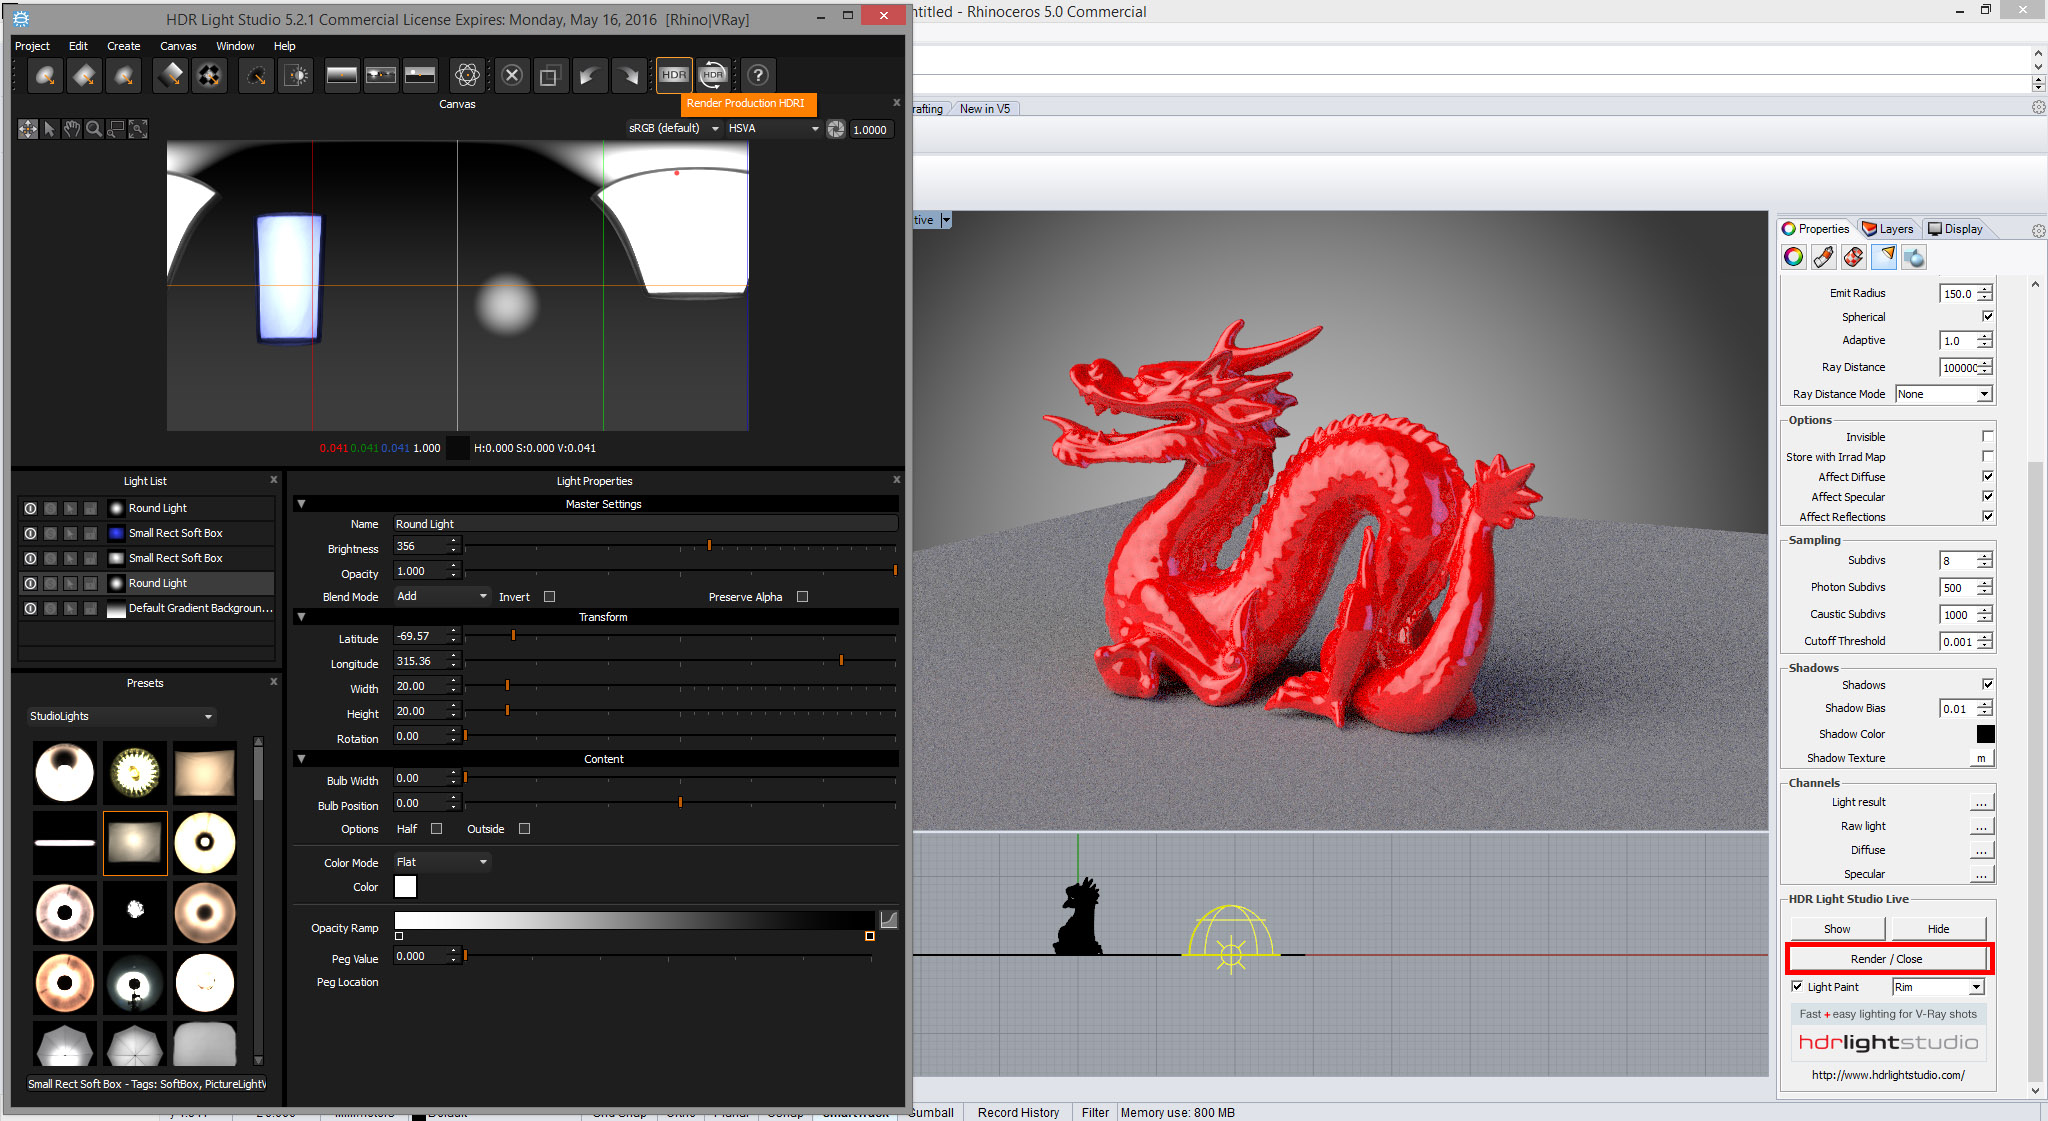
Now let's light this shot using HDR Light Studio. Find the HDR Light Studio Live controls and press the Show button to start HDR Light Studio in a live connection with this Dome Light.
The HDR Light Studio app is opened and the content of the HDR canvas in HDR Light Studio is now being used to light your V-Ray RT render. Every time a change to the lighting is made in HDR Light Studio - the V-Ray RT view will update using the new HDR lighting.
HDR Light Studio is providing V-Ray RT with small temporary HDR files that are used during the lighting design process. These are updated automatically though the live connection.
When HDR Light Studio opens, you will see that the interface includes its own Render View with a loaded default 'teapot' model. When using HDR Light Studio with V-Ray for Rhino, it is not necessary to see use this Render View at all, and it can be closed. Also, if you are not using HDR Light Studio on a second display, it is worth adjusting the layout of the HDR Light Studio interface so it fits more comfortably onto your display with Rhino. You can save your interface layout when you are happy with it to use next time.
Here is a nice example of a more compact interface layout to use with V-Ray for Rhino.

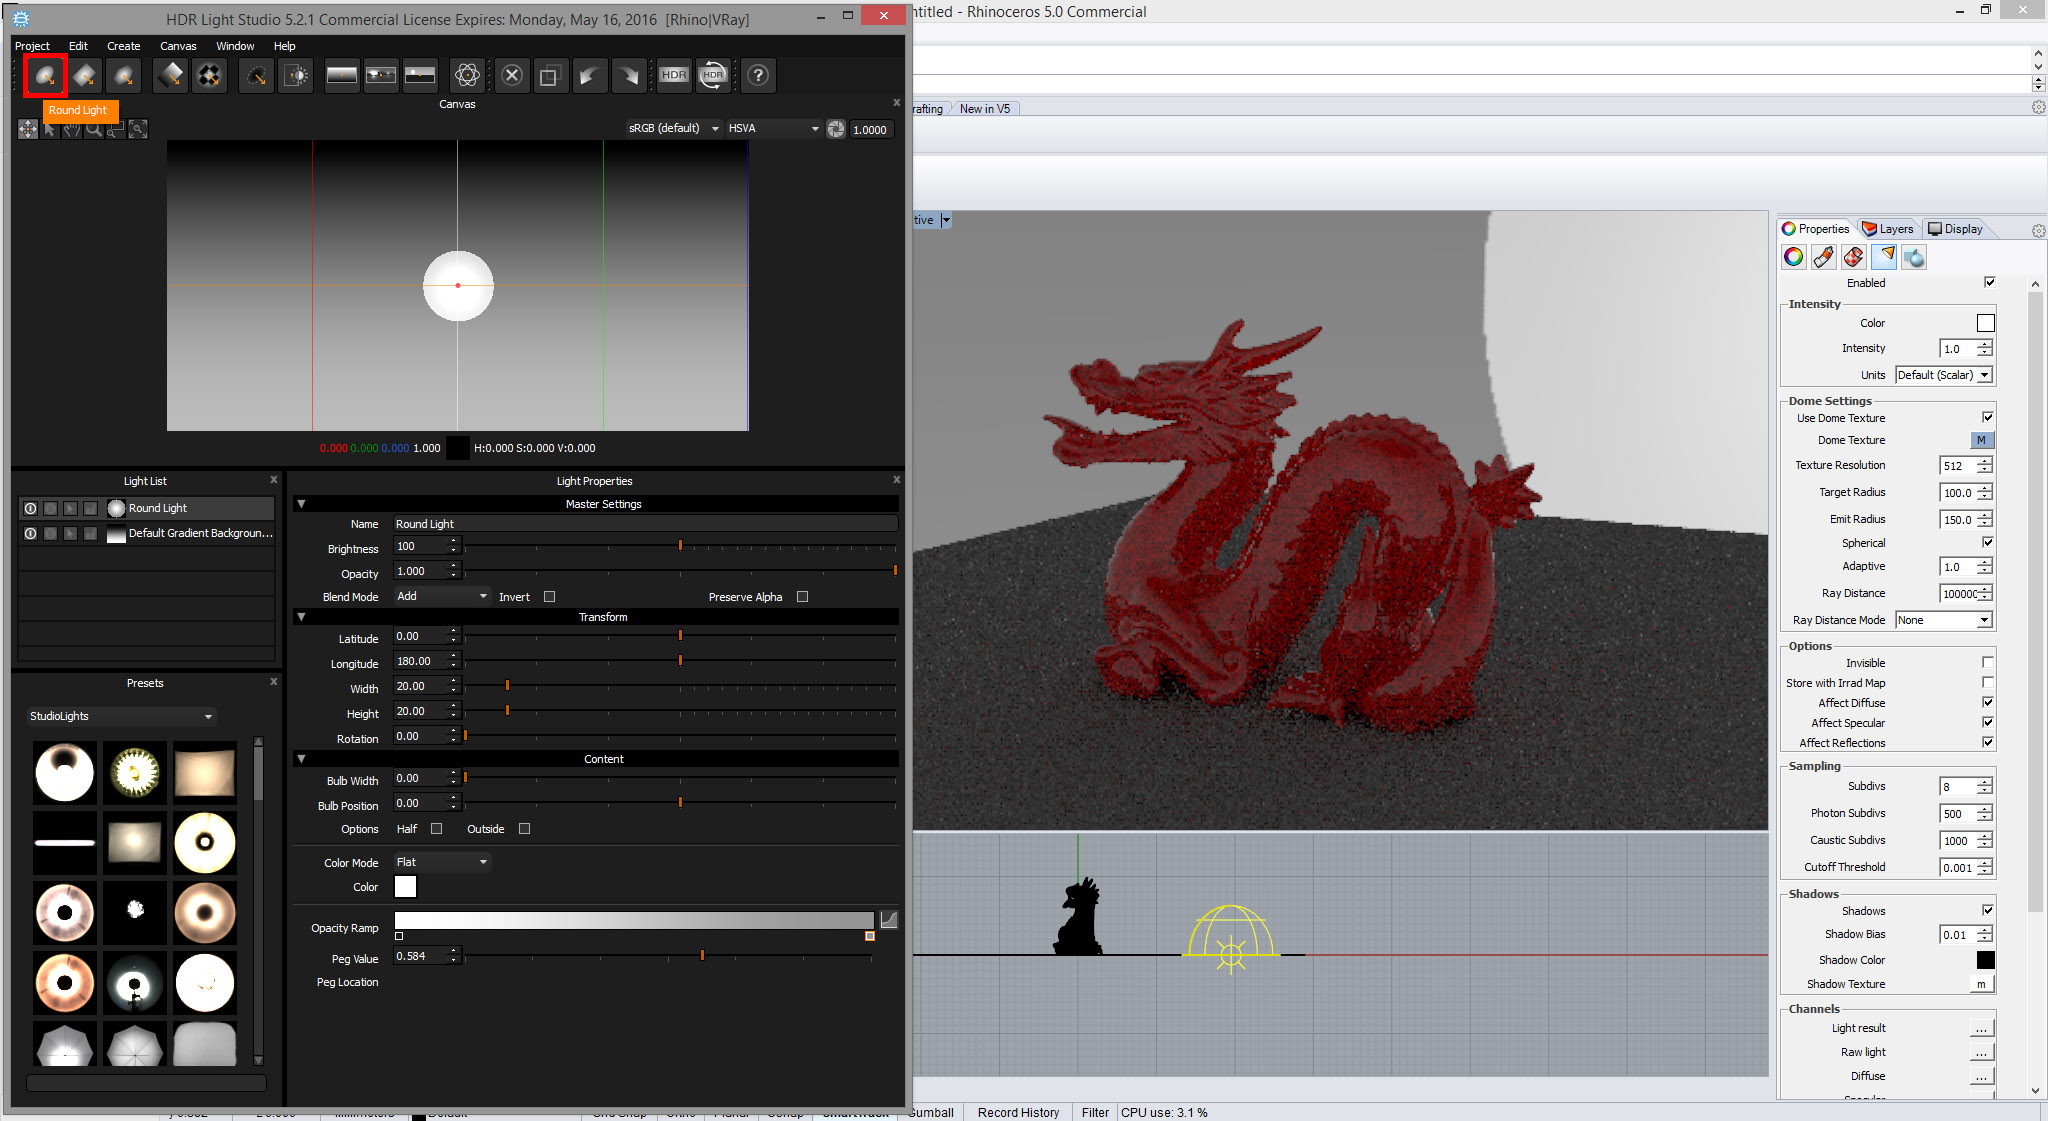
Lets add a new light source to the HDR canvas in HDR Light Studio, press the Round light button on the top bar. A light is created in the center of the canvas. You can see V-Ray RT update using the new lighting (the light in the background may look pixelated because this is using the lo-res temp file at the moment, at the end of the process we will render a hi-res, high quality HDR file on disk).
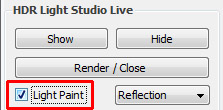
So we now have a light on the HDRI map... but how do we position it in the right place to get the desired lighting effect on our model? The answer is the LightPaint feature. Let's activate the Light Paint check box so we can click directly onto the V-Ray RT view to position the active light in HDR Light Studio. (You can also click on the Rhino views without using the V-Ray RT renderer, but it is far more effective to click on the render and see the lighting update before your eyes)
Now with the light active in HDR Light Studio, left click on your 3D model in the V-Ray RT view.
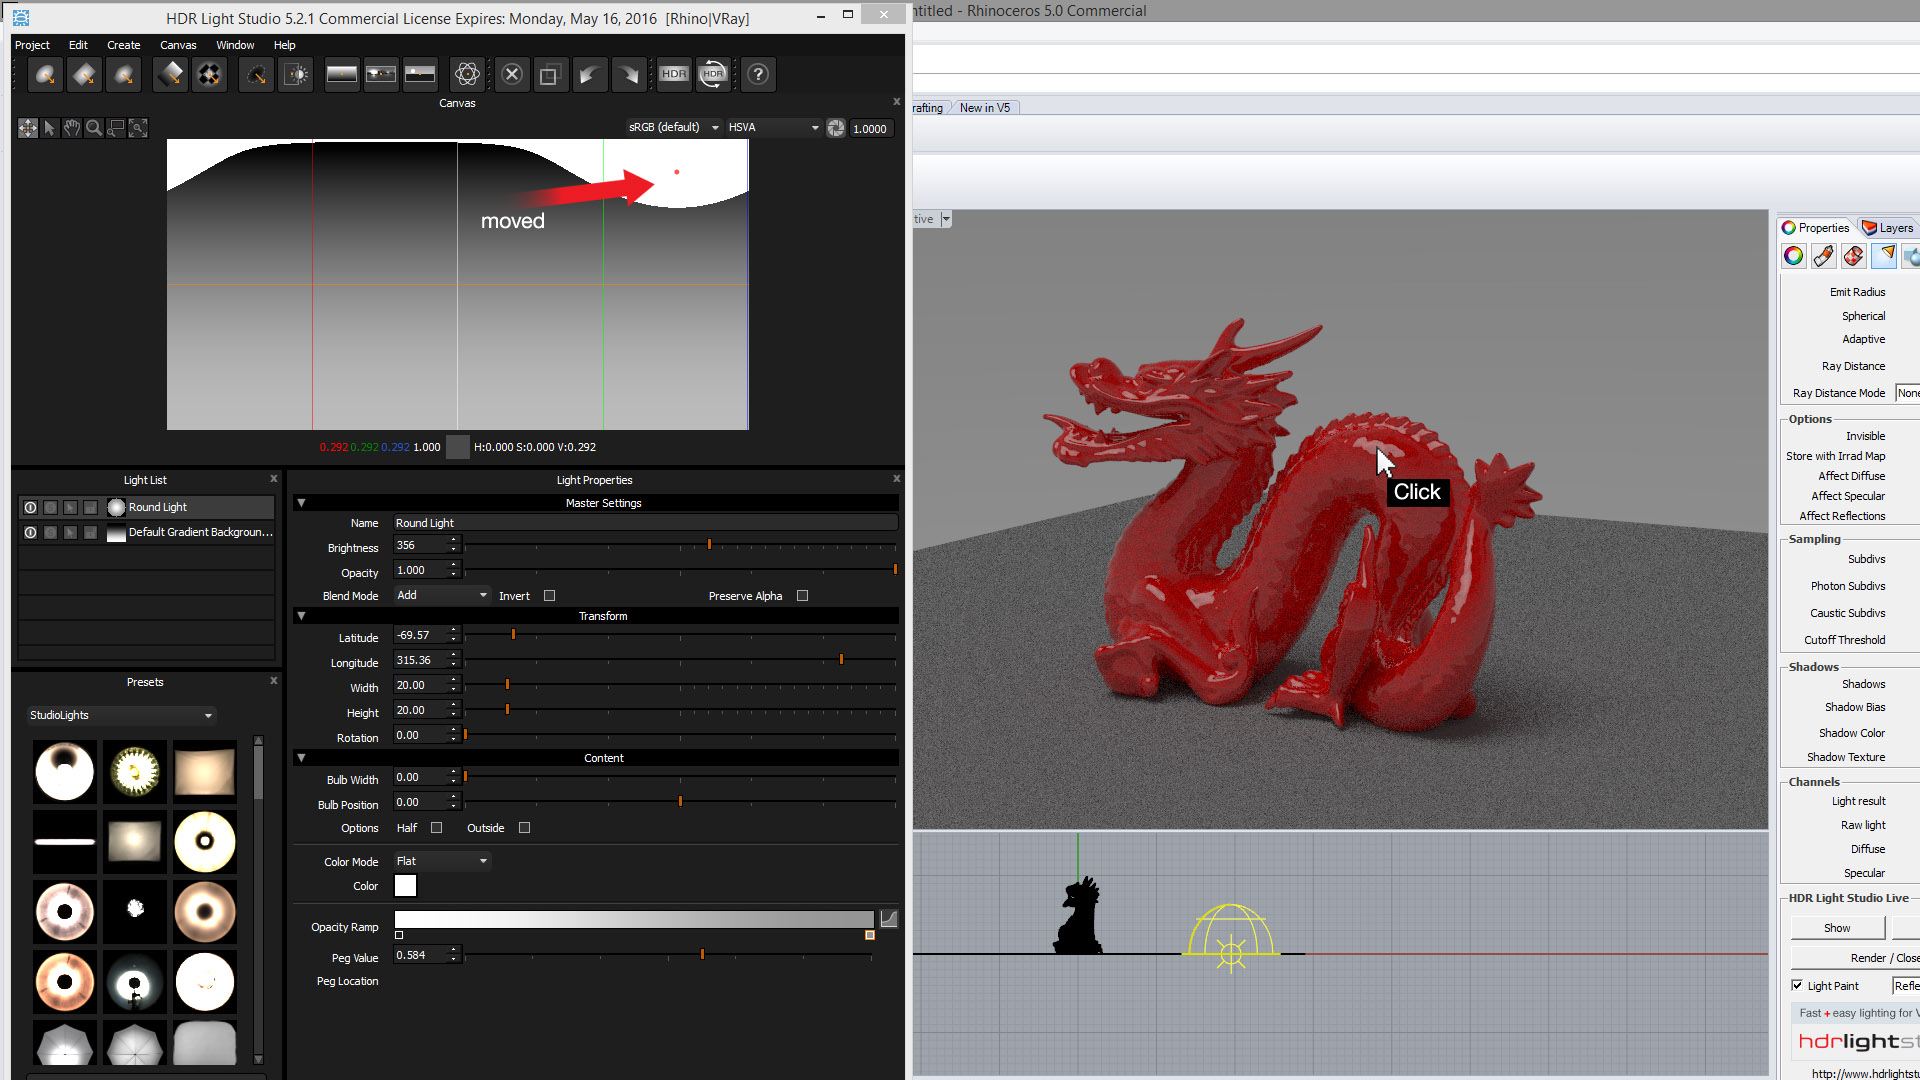
Because LightPaint is in Reflection mode, the active light has moved on the HDRI map so that it 'reflects' in the region of your 3D model that was 'Clicked' on. This point and click lighting technique is a very fast and precise way to light your shots.
Use the drop-down to select Rim mode, this places the light directly on the visible HDRI map in the background of your image and is useful for creating a background effect or rim lights to reflect in the glancing edges of your models.
Use the drop-down to select Illumination mode, to position a light to illuminate the region clicked, this works best for matt surfaces without reflections.
Lights can even be selected in HDR Light Studio using the LightPaint modes in Rhino using the Shift key when clicking on the model. For example, ‘Shift Click’ on a highlight using Reflection mode to select the light reflecting in that location. This is a great way to pick lights when editing your design without the need to remember the light names or locations on the HDRI map.
When another tool is selected in Rhino, then the Light Paint mode is deactivated until you turn it back on.
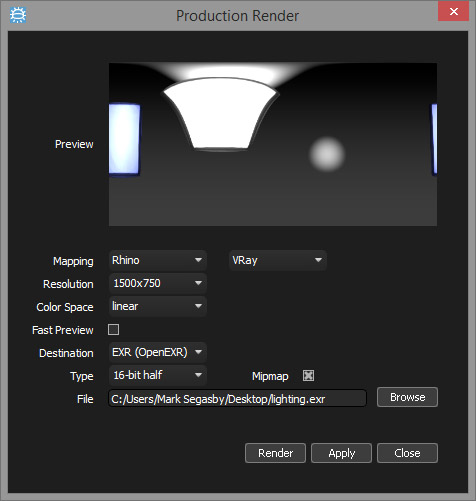
Create more lights and adjust their properties until you are happy with the lighting design. When you are happy with the lighting design, Press the Render / Close button to render a hi-res HDR file on disk and to close your HDR Light Studio session. This is what you do at the end of your lighting session.
The HDR Light Studio Production Render dialog will open where you can set a resolution for the HDRI map, and then browse to a location on disk and name your hdr or exr file. Once you press the Render button on this panel, the file on disk will be generated and V-Ray for Rhino will use that file for the dome light texture. HDR Light Studio will also close after the file has been completed.
So now you have a scene lit with a custom HDRI file on disk and you are ready to produce your final V-Ray production rendering. This Rhino scene can be opened by other users without HDR Light Studio, as it is lit by a standard HDRI file on disk and is therefore totally compatible.
The HDR Light Studio lighting project is actually embedded with your V-Ray Dome Light in Rhino. So save your Rhino scene to store the lighting design, then next time you open the scene launch HDR Light Studio from the dome light and the lighting will automatically be loaded in the state it was left when the Rhino file was saved.
Top Tips
Multiple V-Ray Dome Lights can be created in your Rhino scene and assigned to different layers. This way you can store many different lighting designs in the same Rhino scene. This is useful for creating different lighting for alternative camera views.
Use the Project menu in HDR Light Studio to save and load HDR Light Studio lighting projects independently of your Rhino scenes. You can move your favorite lighting setups between projects this way, or to create an archive of useful lighting rigs for future. projects. Once lighting is loading into HDR Light Studio this way, the current lighting shown in HDR Light Studio is what gets saved and embedded within your Rhino scene.
