HDR Light Studio let's you create a custom HDRI map to light your render in Rhino.
HDR Light Studio connects with Rhino, so as lights are added and moved in HDR Light Studio's HDRI map, you can see the lighting change in real-time in your rendering software in Rhino. Welcome to interactive lighting using HDRI maps!
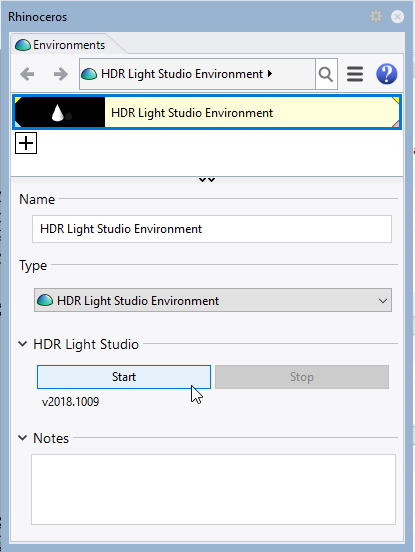
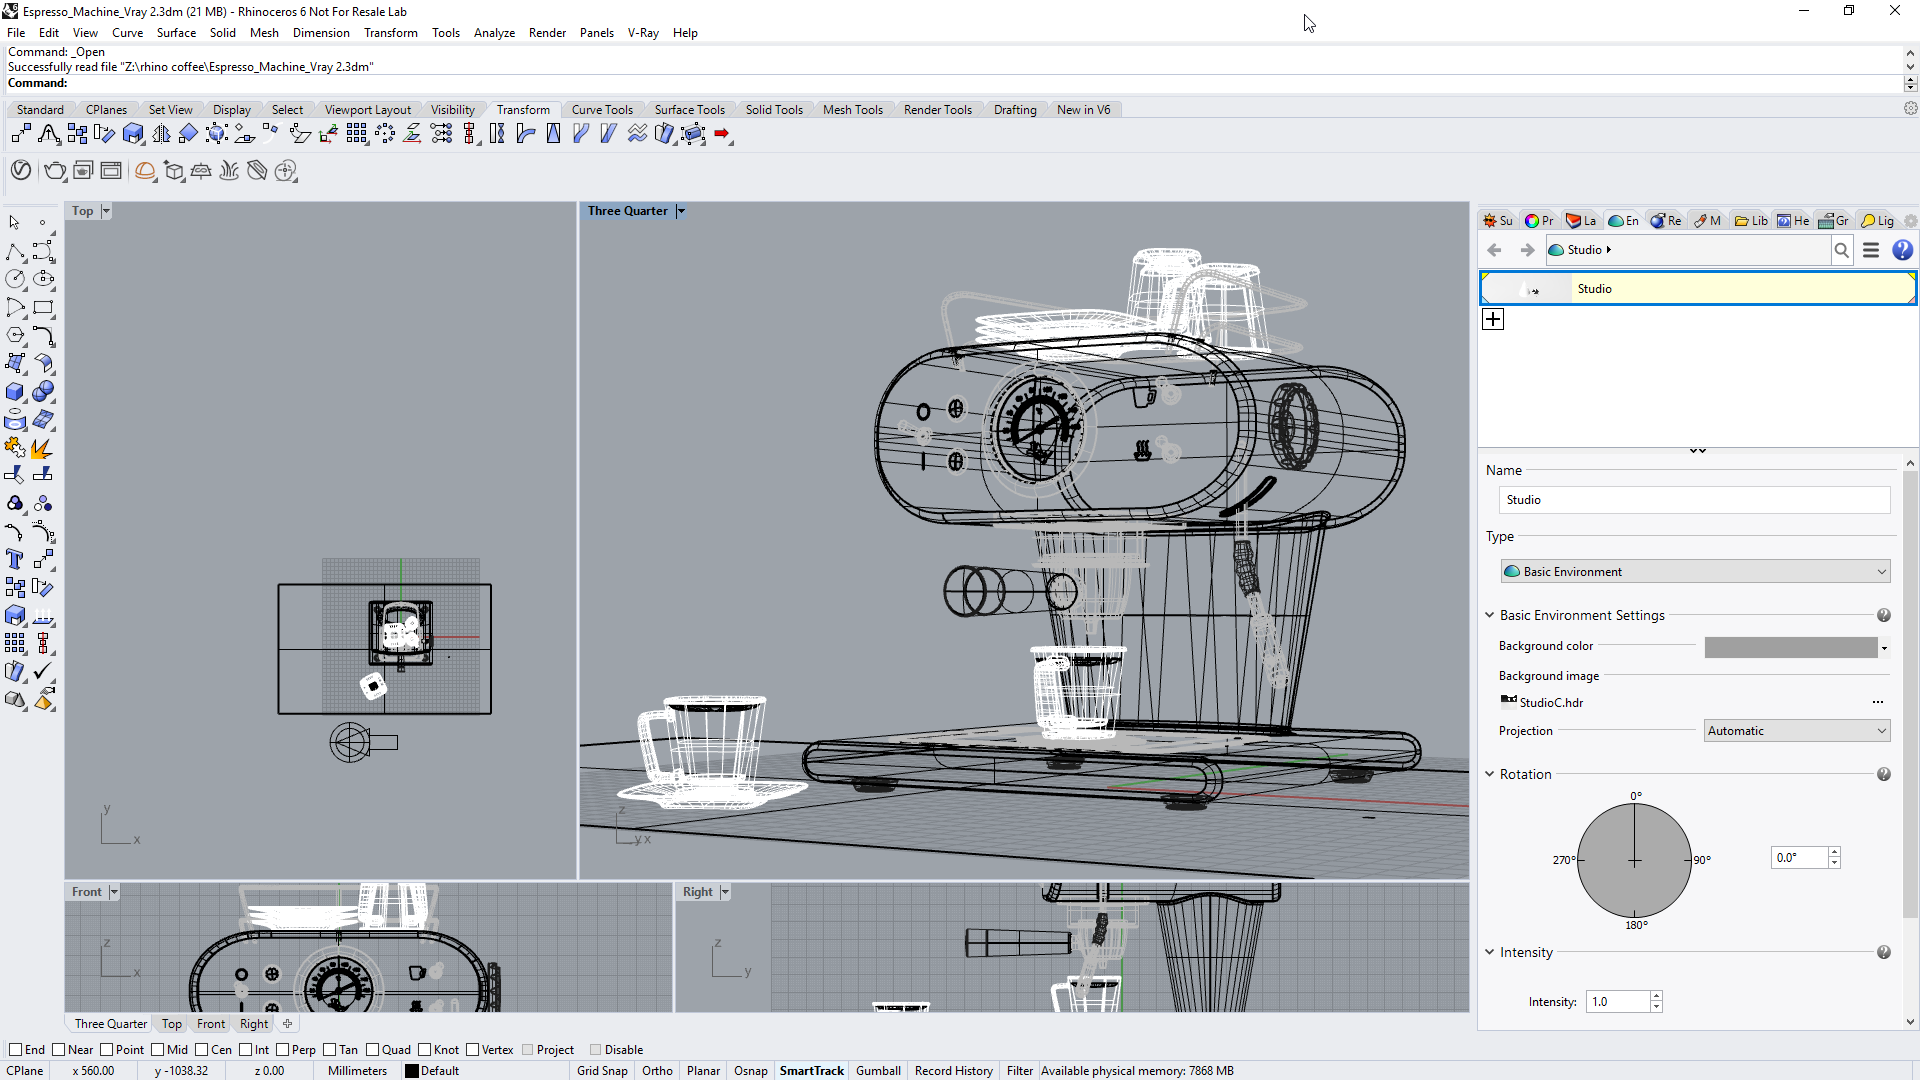
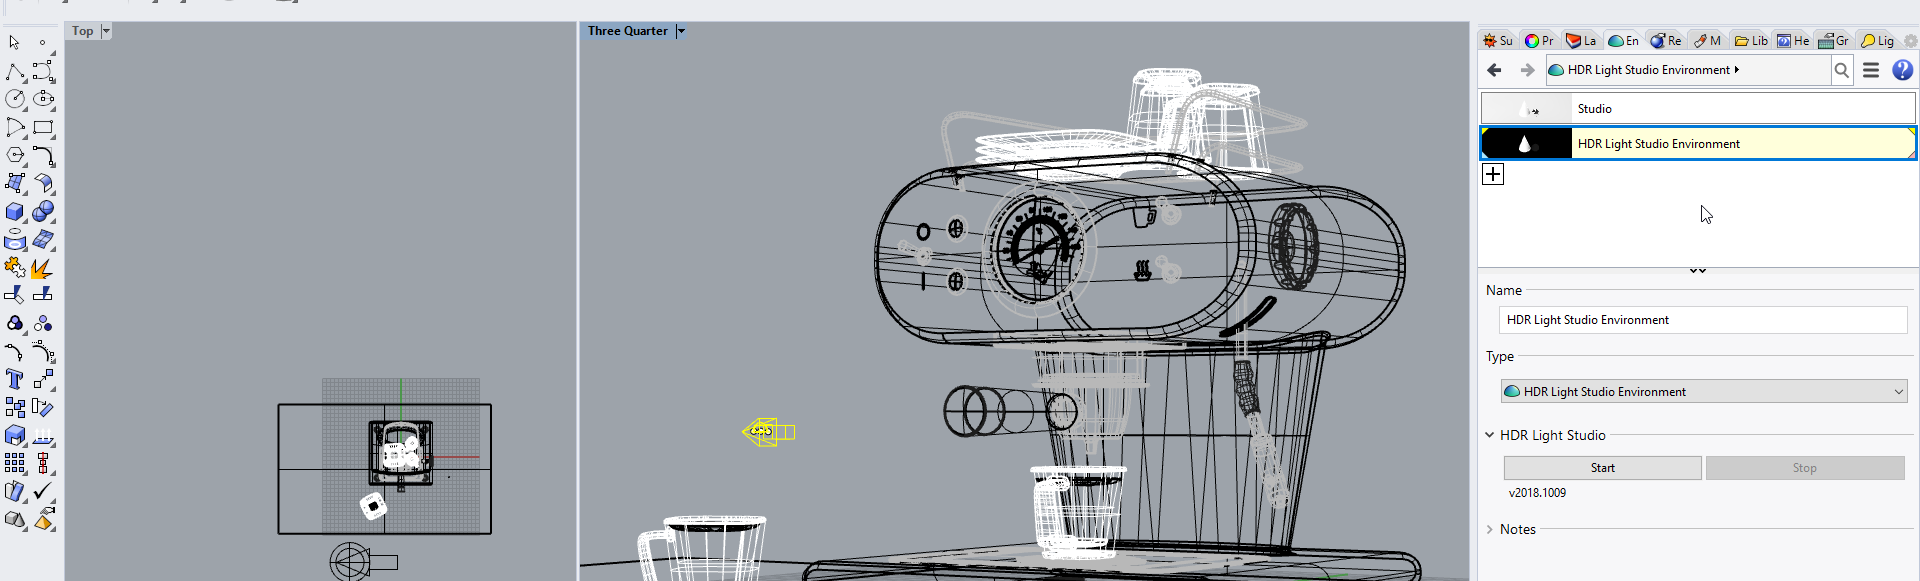
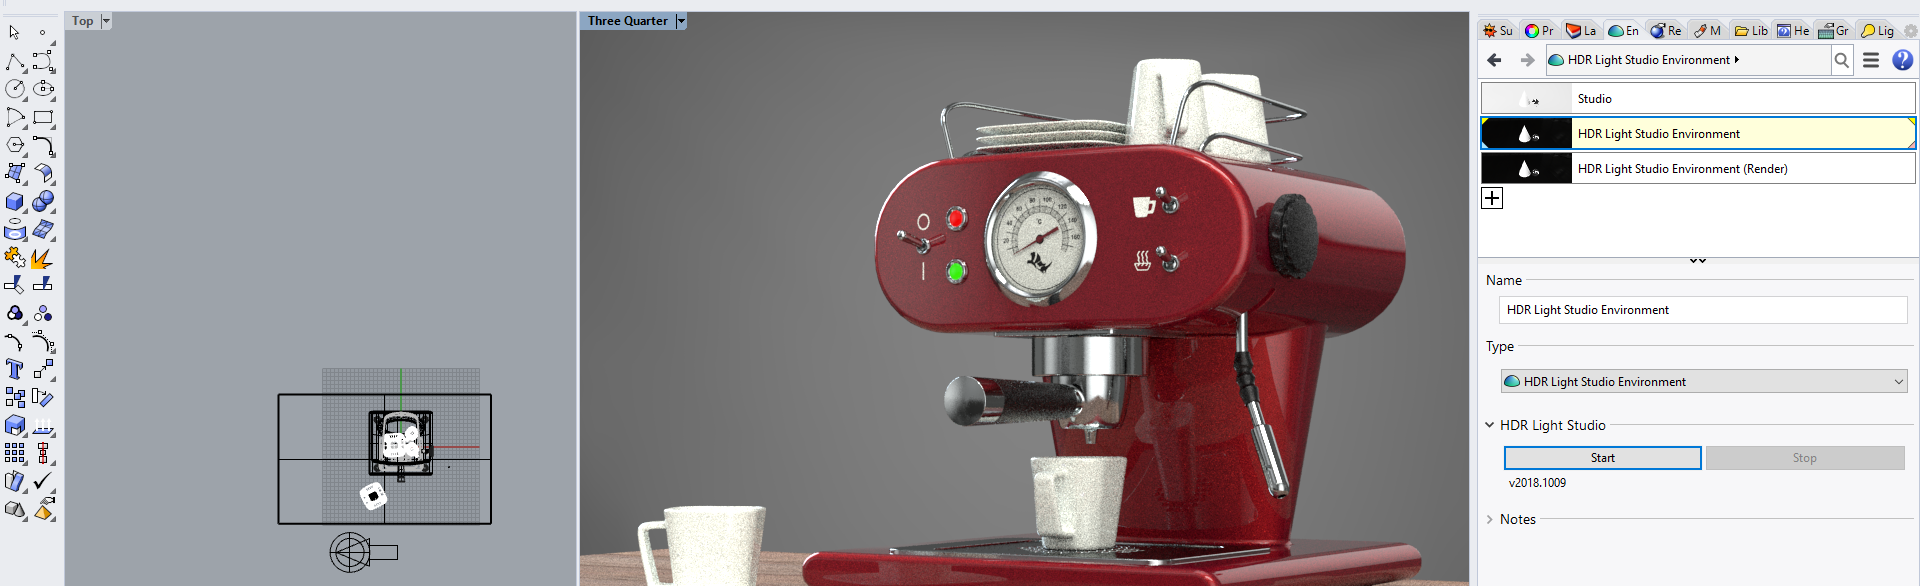
HDR Light Studio's connectivity with Rhino works via Rhino's Environments. Once the HDR Light Studio plug-in has been installed in Rhino, you can Add an additional Environment type called 'HDR Light Studio Environment', in the Environments panel. This environment type is used to store HDR Light Studio's lighting project, a temporary low res HDRI map, and contains buttons to start and stop HDR Light Studio.
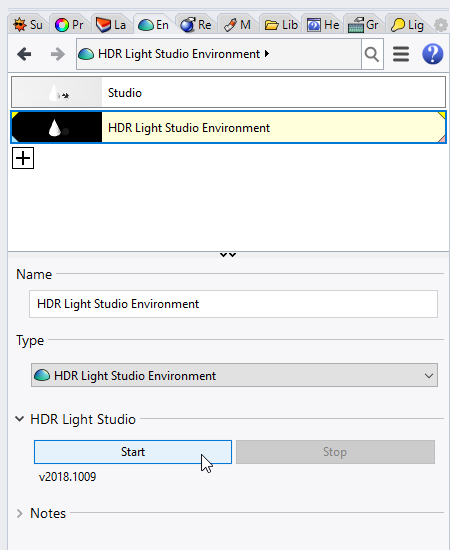
For Rhino 6 we have simplified the connection experience and added some exciting new features too. The updated HDR Light Studio Environment has just 2 buttons - Start and Stop. You can now do more from within HDR Light Studio, we will come to that soon.
OK, let's Light a Shot
Prior to starting your lighting, please turn off Autosave in Rhino.
Currently Rhino files take significantly longer to save when they contain a HDR Light Studio Environment. We are working to solve this issue in a future build.
In this example we are using V-Ray for Rhino 3.6, but the process is similar for any renderer that supports Rhino Environments.
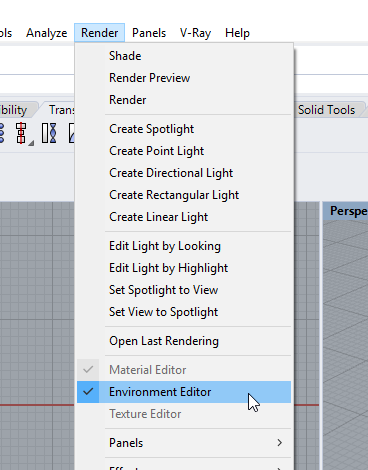
Open the Environments panel using the menu Render > Environment Editor
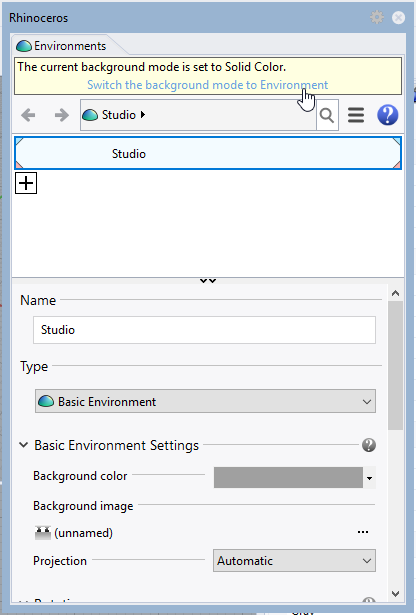
The Environments panel opens.
By default with a new scene in Rhino 6, you are given the option to set the background mode to Environment. Select this option if you would like to see the HDRI environment map in the background of your render.
You will also see a default studio lighting environment already listed and active.
So here is the scene we are going to light. It already has the V-Ray materials applied. But no lighting has been created yet. We have docked the Environment panel on the right side of the Rhino interface.
Please note, the following steps are V-Ray for Rhino specific, please skip to the next section if you are using another renderer.
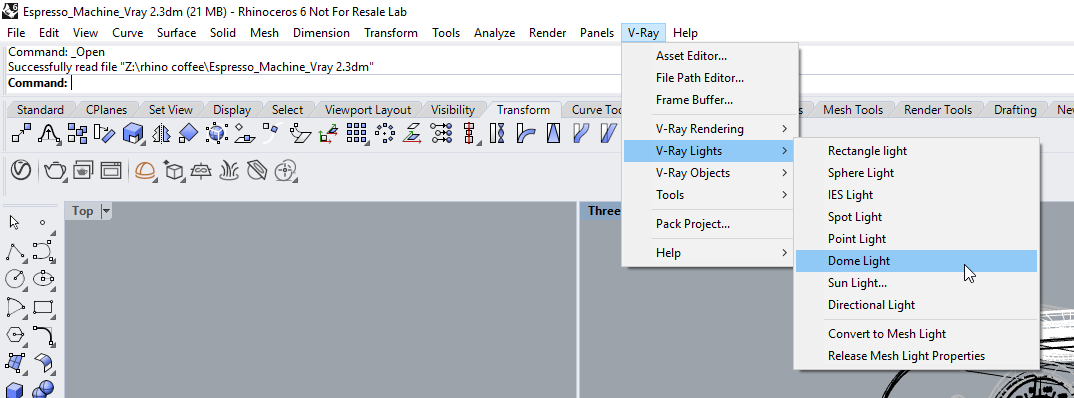
Create a Rhino Dome Light (using menu or tool bar)
You may need to click in a Rhino view to create the Dome Light. If you are then prompted to choose an image for the dome light, you can cancel this, you do not need an image on the dome light. This will come from the Rhino environment.
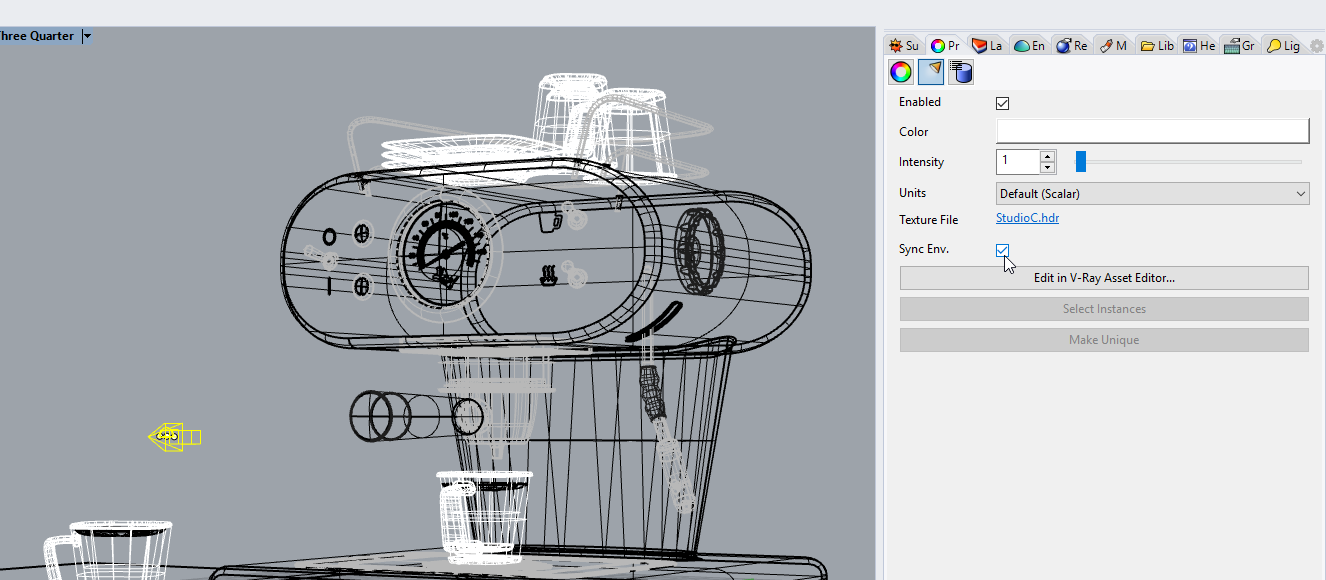
Now select the Dome light created and view its Properties, switching to the light properties section. Enable the Sync. Env check box. This setting tells the V-Ray dome light to use Rhino's environment.
Now return to the Environments panel.
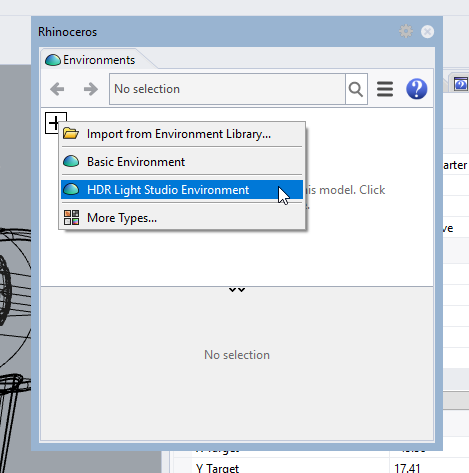
We are now going to add a HDR Light Studio Environment.
Click the + button and select HDR Light Studio Environment from the list
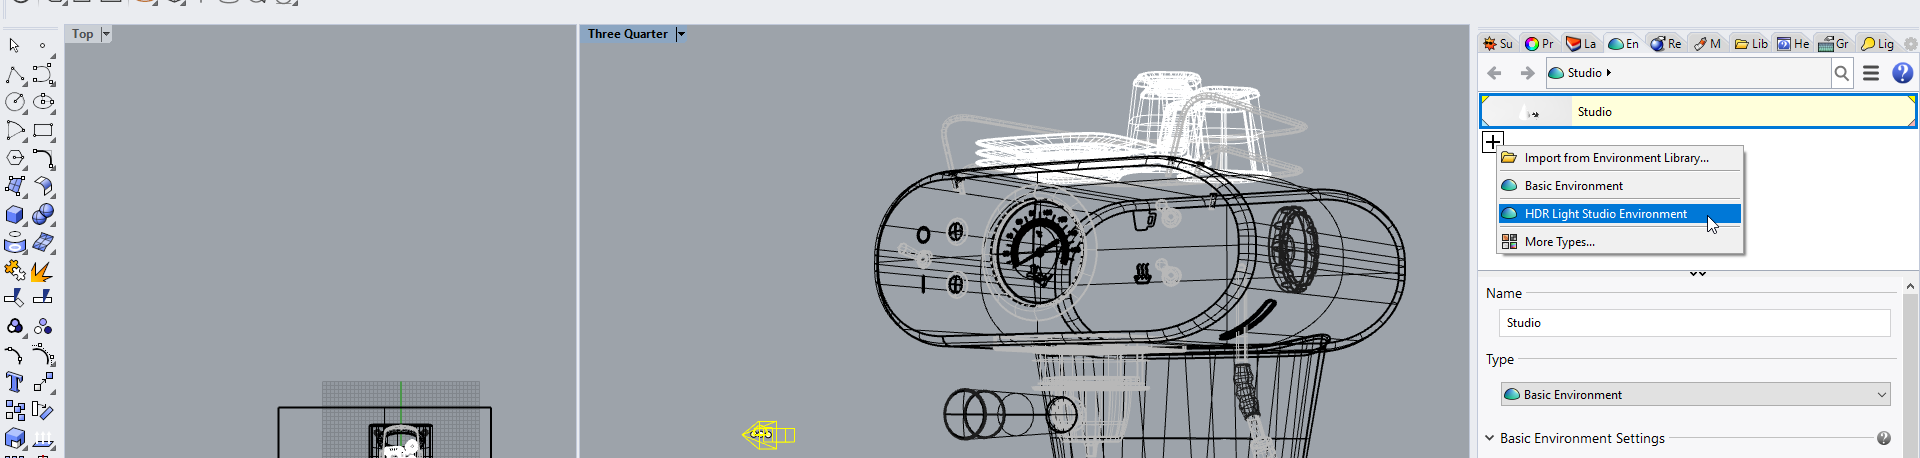
Double click on the new HDR Light Studio Environment in the environment list to make it 'active'. You can see it is active because its highlighted and has triangles in each corner.
Before we start HDR Light Studio, let's start interactive rendering in the viewport, in this example V-Ray Interactive.

At this point there we have not created any lighting, so the view will be black.

We are now ready to press the Start button on the HDR Light Studio Environment, this will open HDR Light Studio in a live connection with the HDR Light Studio Environment.
The HDR Light Studio interface opens. There is a big play button on the Render View with a Rhino logo above.
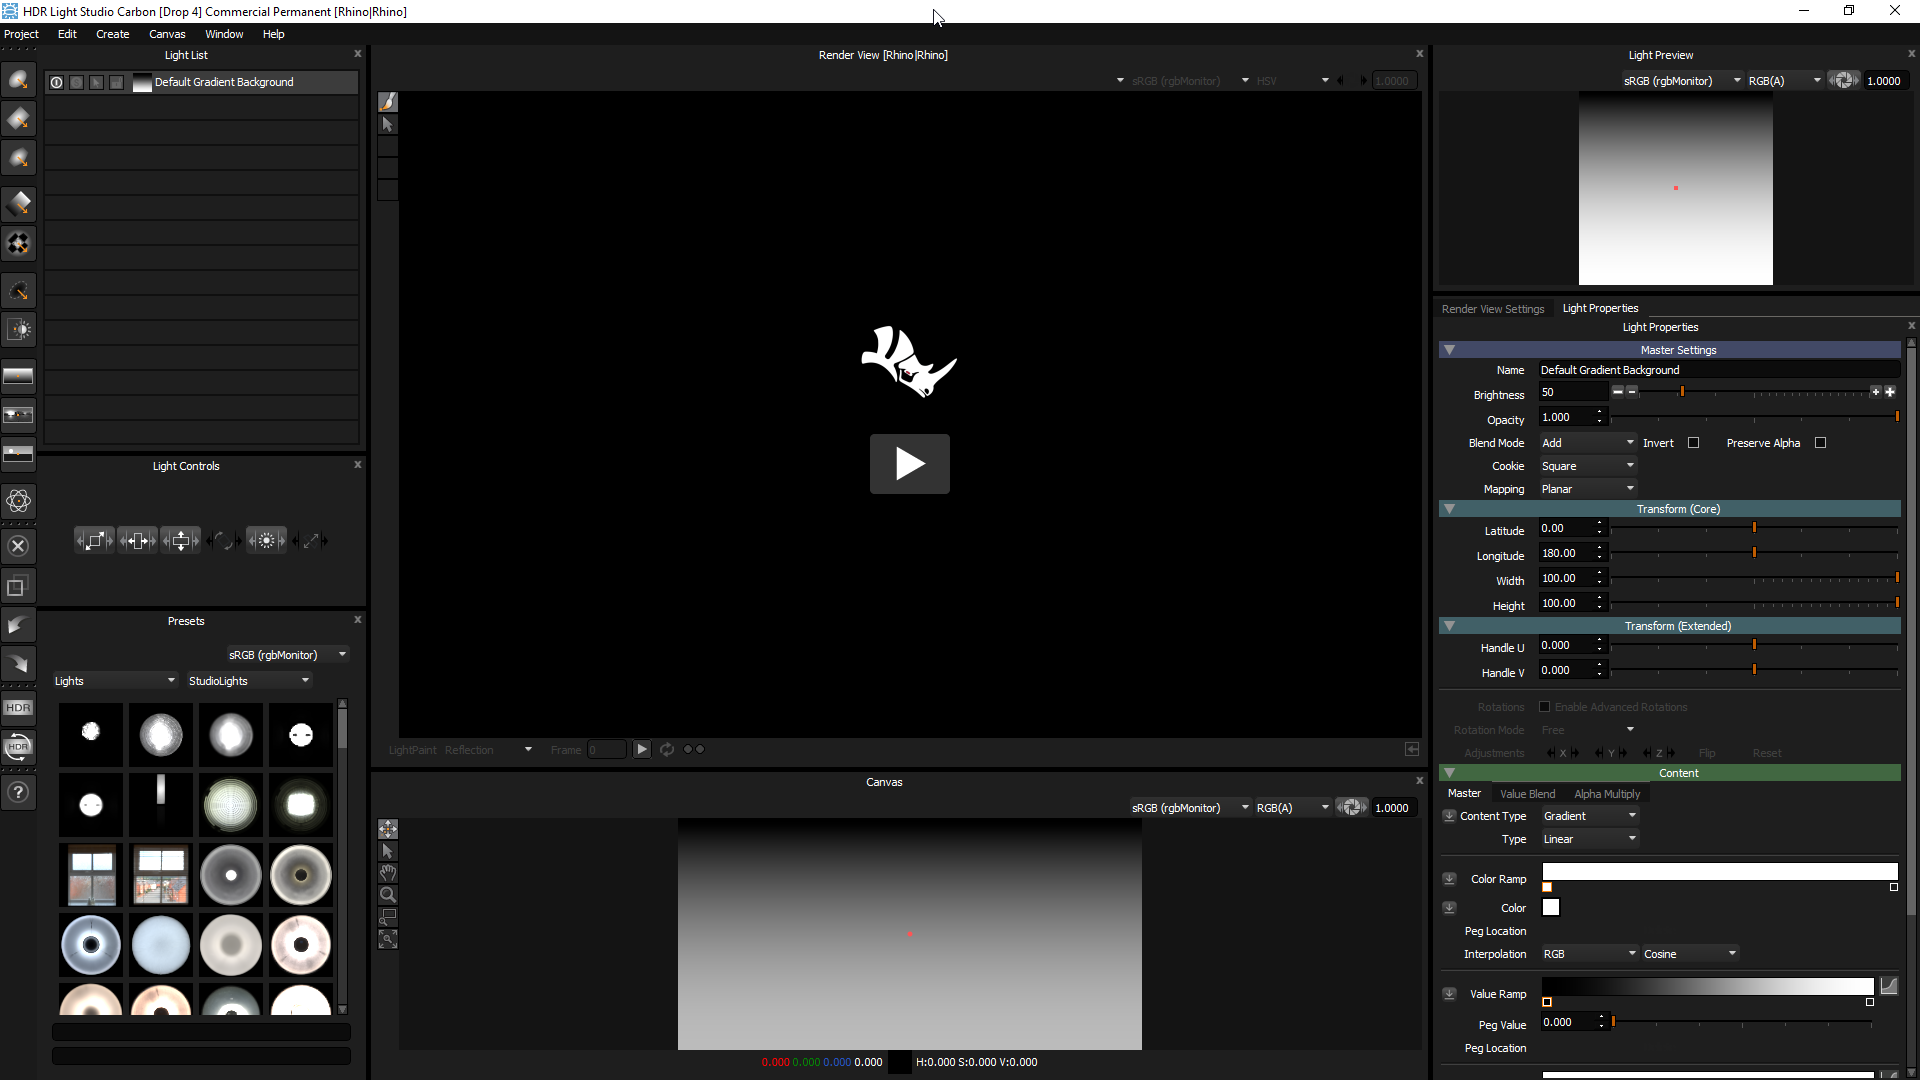
Press the Play button and you will then see the Rhino viewport inside the HDR Light Studio. You are now able to fully concentrate on lighting the shot within HDR Light Studio.
Please Note: When using Octane Render, you will need to ensure the Octane properties panel has been opened in order for the Render to stream into HDR Light Studio's UI.

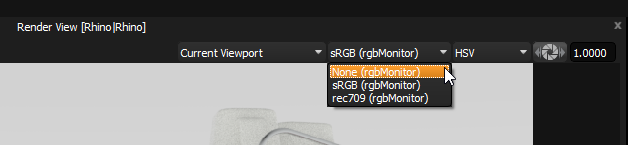
The rendered image will look washed out, too bright. This is because we need to change a setting in the Render View. Use the drop-down to change the view LUT from sRGB to None. This will ensure the image looks the same in HDR Light Studio as it does in Rhino.
You are now ready to light the shot.

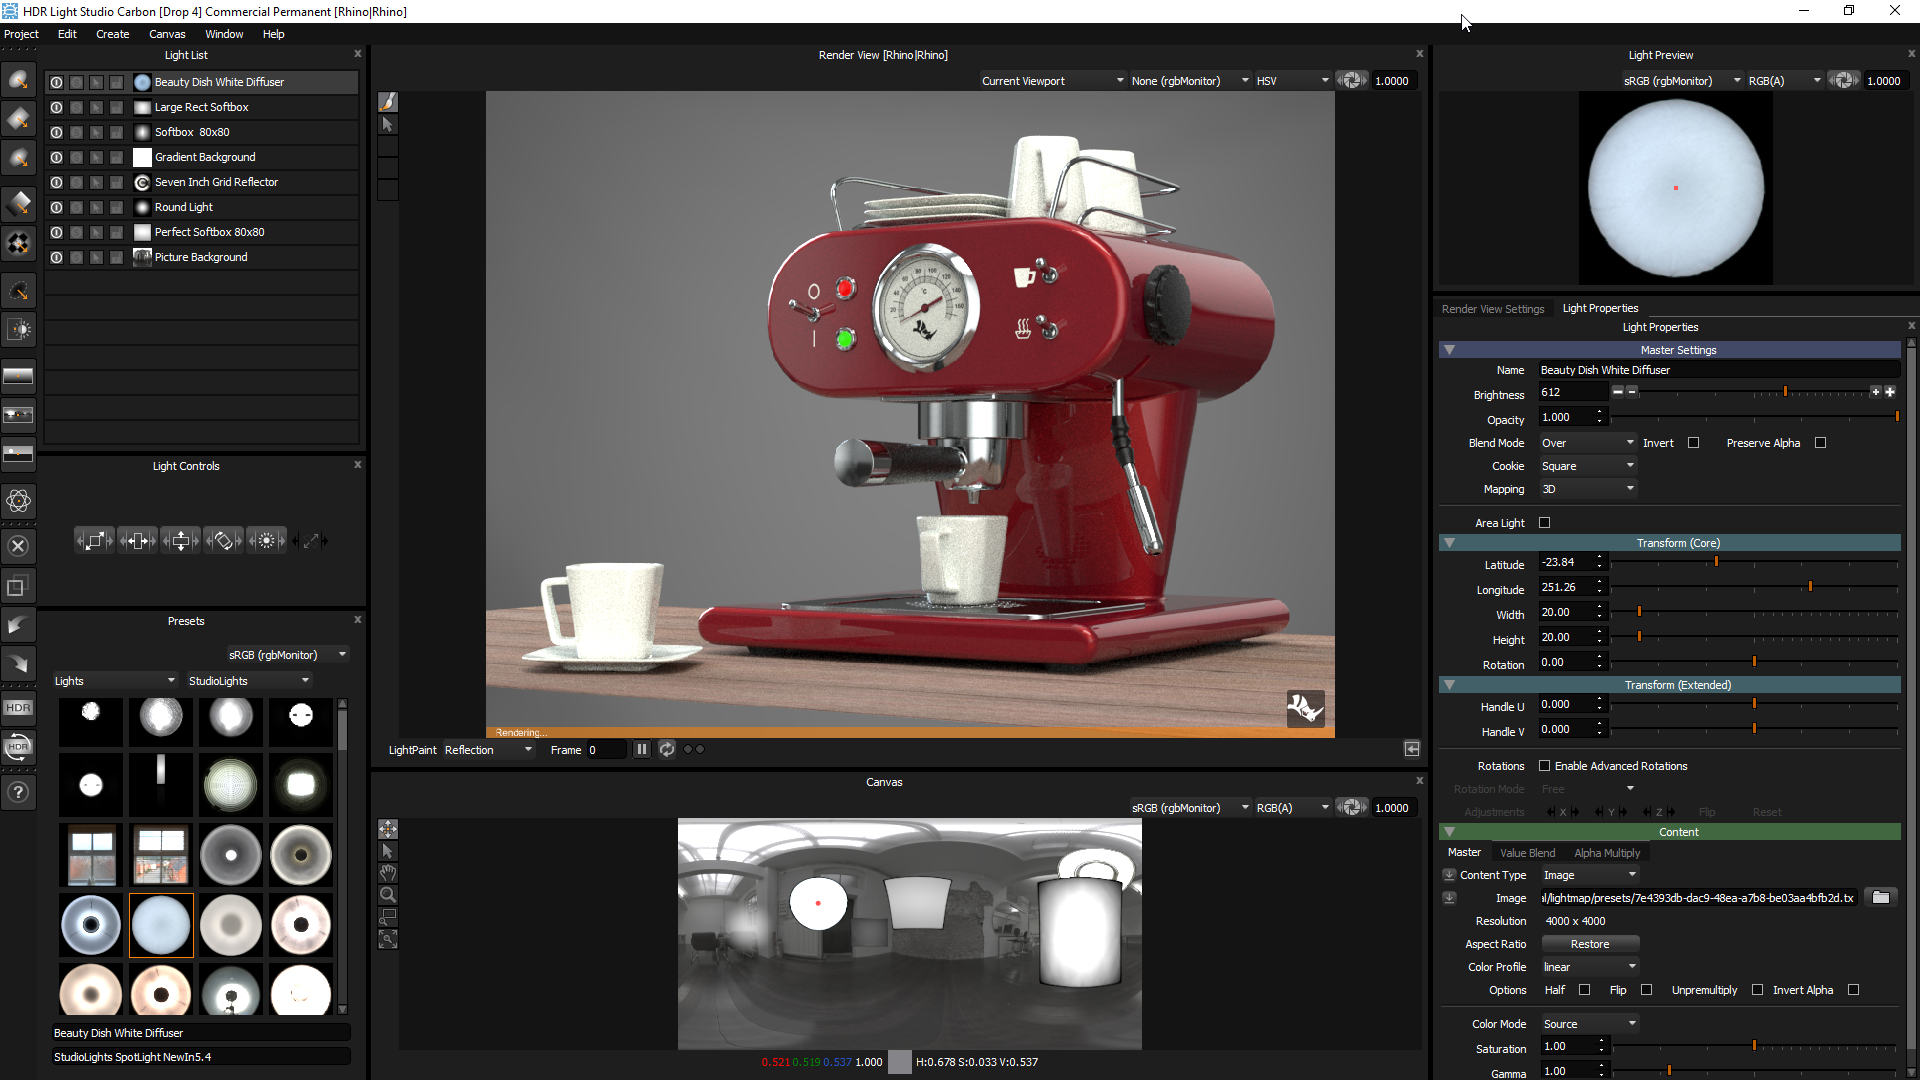
You can drag and drop lights from the presets panel onto the Render View, and they will be added to the HDRI map, they will be positioned to reflect where they are dropped on the 3D model.
You can reposition an active light by clicking on the model in the Render View, or moving it on the Canvas.
You can make new lights using the tool bar buttons, and move them by clicking on the Render View and Canvas too.
In this example below we are now happy with the lighting design. So we now need to complete the lighting process, close HDR Light Studio and return to Rhino.
Every time a lighting change was made in HDR Light Studio, 2 things happen in Rhino.
1. Updated lo res HDRI data was sent to Rhino and stored against the HDR Light Studio Environment - this is why the renderer kept updating to use the new lighting.
2. The HDR Light Studio project file was stored against the HDR Light Studio Environment - this means next time you open this Rhino file, you can open HDR Light Studio and edit the lighting.
To complete the lighting process we need to output the HDRI map at a higher quality and higher resolution. We use only a low resolution for the live HDRI maps to make them update as fast as possible when using interactive rendering.
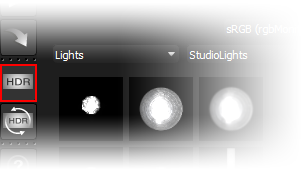
Press the HDR button on the tool bar
The Production Render panel will open. There are only a few settings that we need to concern our selves with.
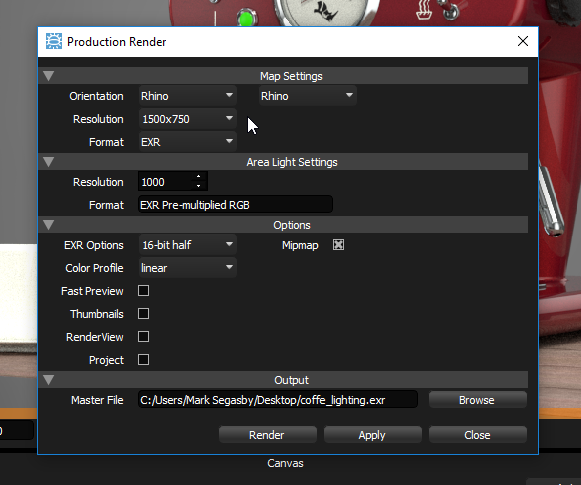
Map Settings
Resolution - Use the drop-down to choose the resolution you want for the final HDRI map file.
Format - Choose from EXR or HDR file formats
Output
Use the Browse button to chose a location and give the file a name.
Then press the Render button to generate the final HDRI map file on disc.
Once the HDRI map has been generated you can now close HDR Light Studio.
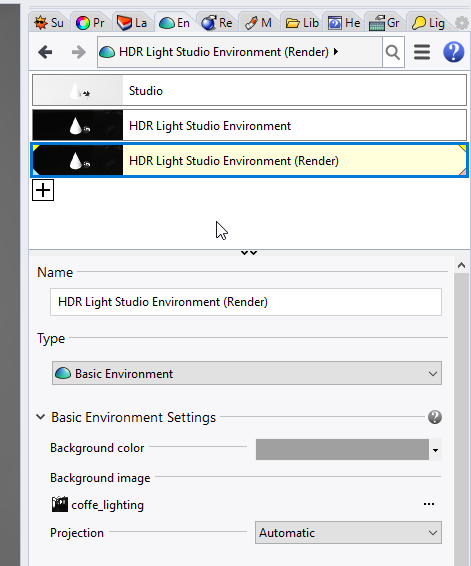
When returning to Rhino you will notice there is now an additional environment called HDR Light Studio Environment (Render)
The low resolution HDRI map and HDR Light Studio project is still stored on the original HDR Light Studio Environment which is still active.
The HDR Light Studio Environment (Render) environment is a Basic Environment created using the new high resolution HDRI map file. Switch to using this environment to take advantage of the higher quality HDRI map.
You are now ready to produce your final render in Rhino using the high quality lighting created in HDR Light Studio.
If you want to edit the lighting, simply choose the HDR Light Studio Environment and press the start button again. HDR Light Studio will start and the stored lighting project will be loaded.
