1. Press the HDR Light Studio button on the HDR Light Studio shelf in Maya

The HDR Light Studio Connection panel opens. You can dock this in your Maya interface.
At the top of the panel it will show Maya's current renderer (if it's supported by the HDR Light Studio connection)
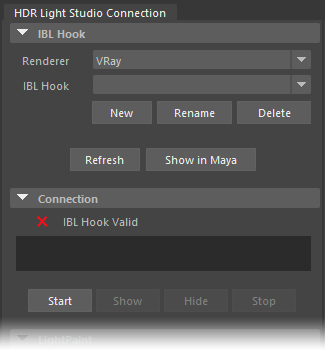
2. Press the Start button
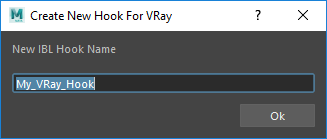
The HDR Light Studio Connection will now create an IBL Hook (Environment Light) for you.
Please give it a name and Press OK.
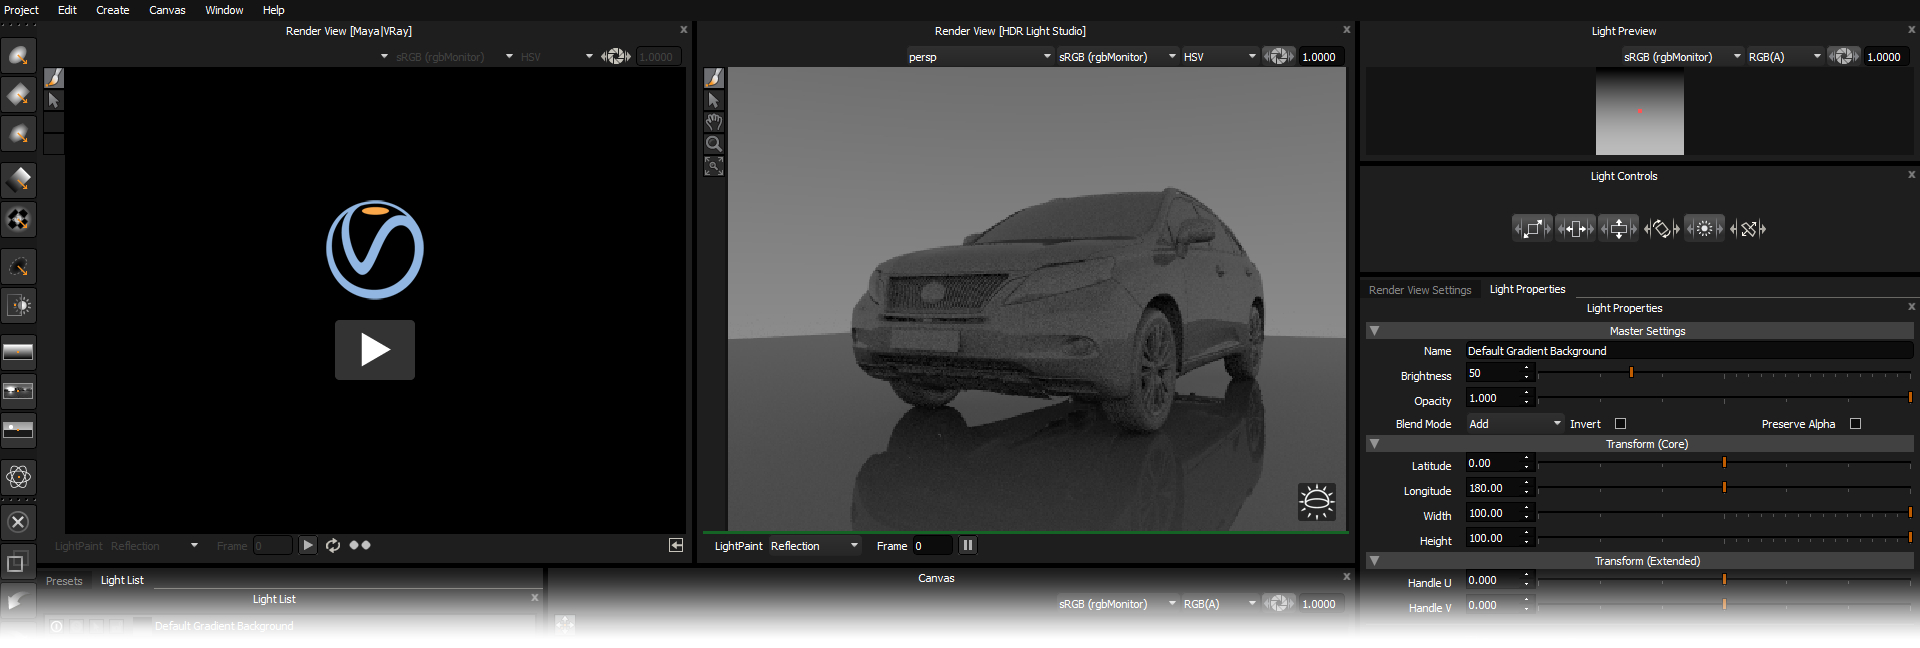
3. HDR Light Studio will now start connected with Maya
The HDR Light Studio interface will look like this when starting.
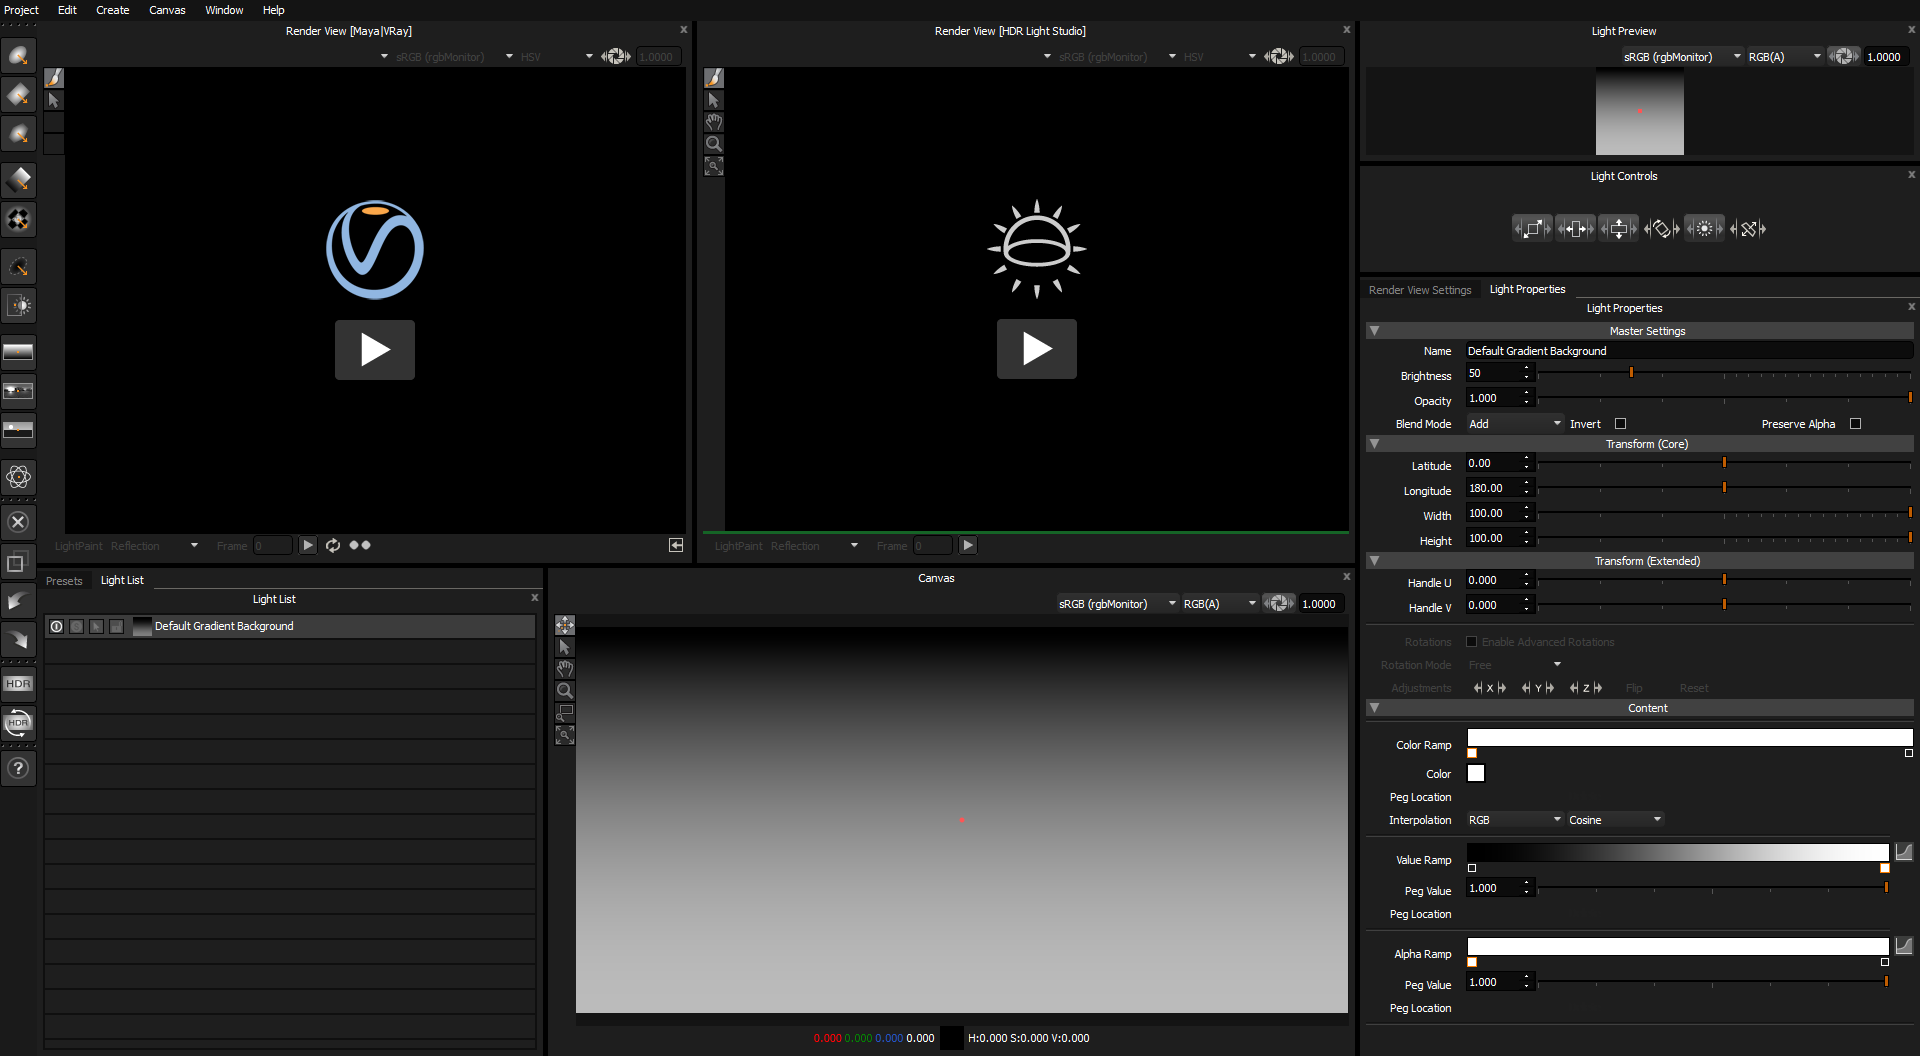
4. Press the play button on the Render View (HDR Light Studio) - the view with the HDR Light Studio logo
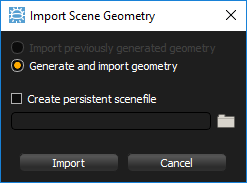
Now press the Import button to load your Maya scene into HDR Light Studio. This will export a temp Alembic file into HDR Light Studio.
Your Maya scene is now loaded into HDR Light Studio's own renderer - providing a very fast way to light your shot.
5. Make you first light
Press the Round Light button on the tool bar
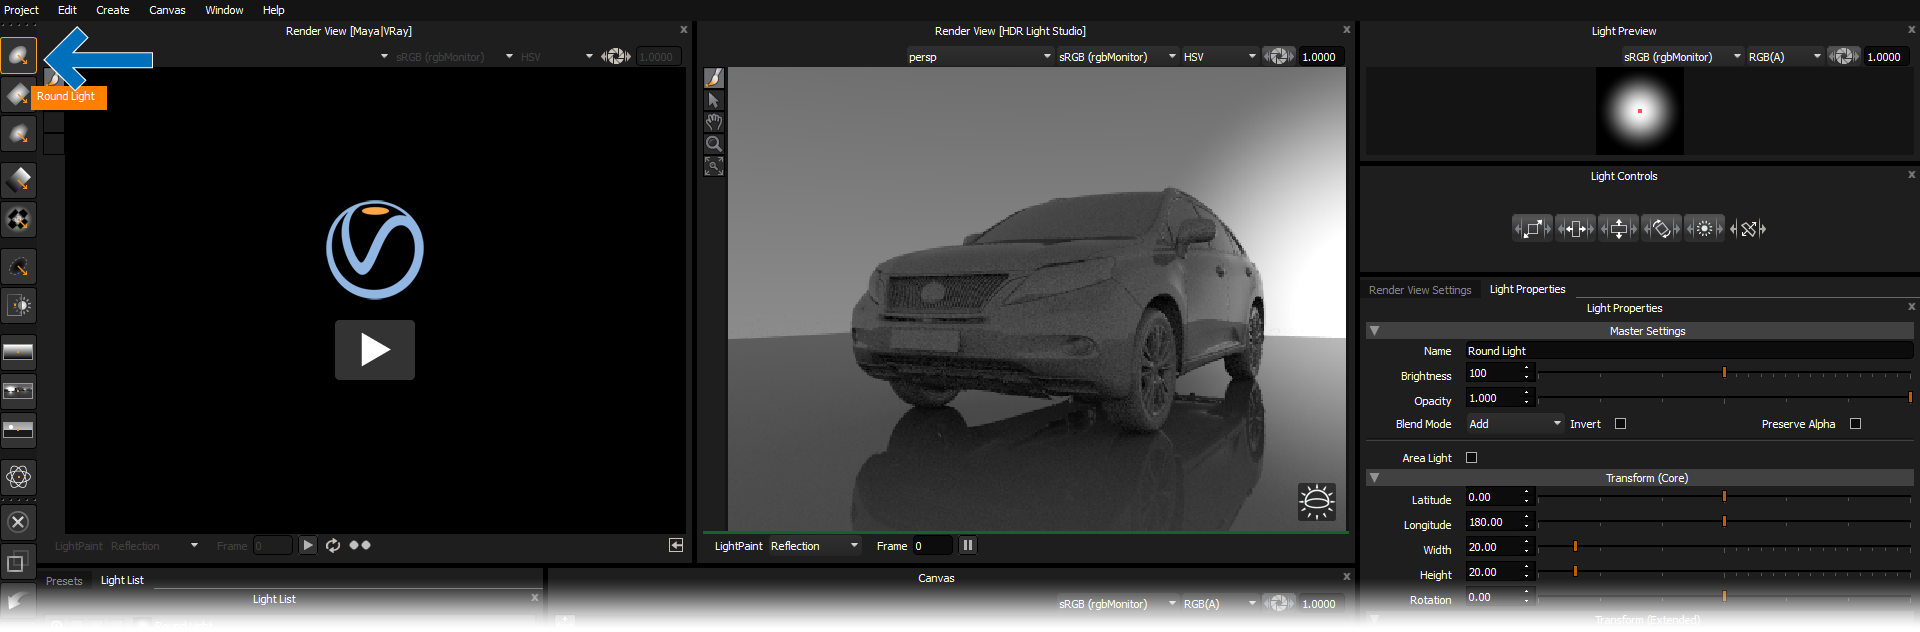
The light is added to the HDRI map and you can see the lighting updated in the HDR Light Studio render view.
Click and drag on the 3D model in the Render View to reposition the active light using the LightPaint tool (default)

The light will interactively move and the render view updates as the light is moved. Welcome to interactive HDRI lighting!
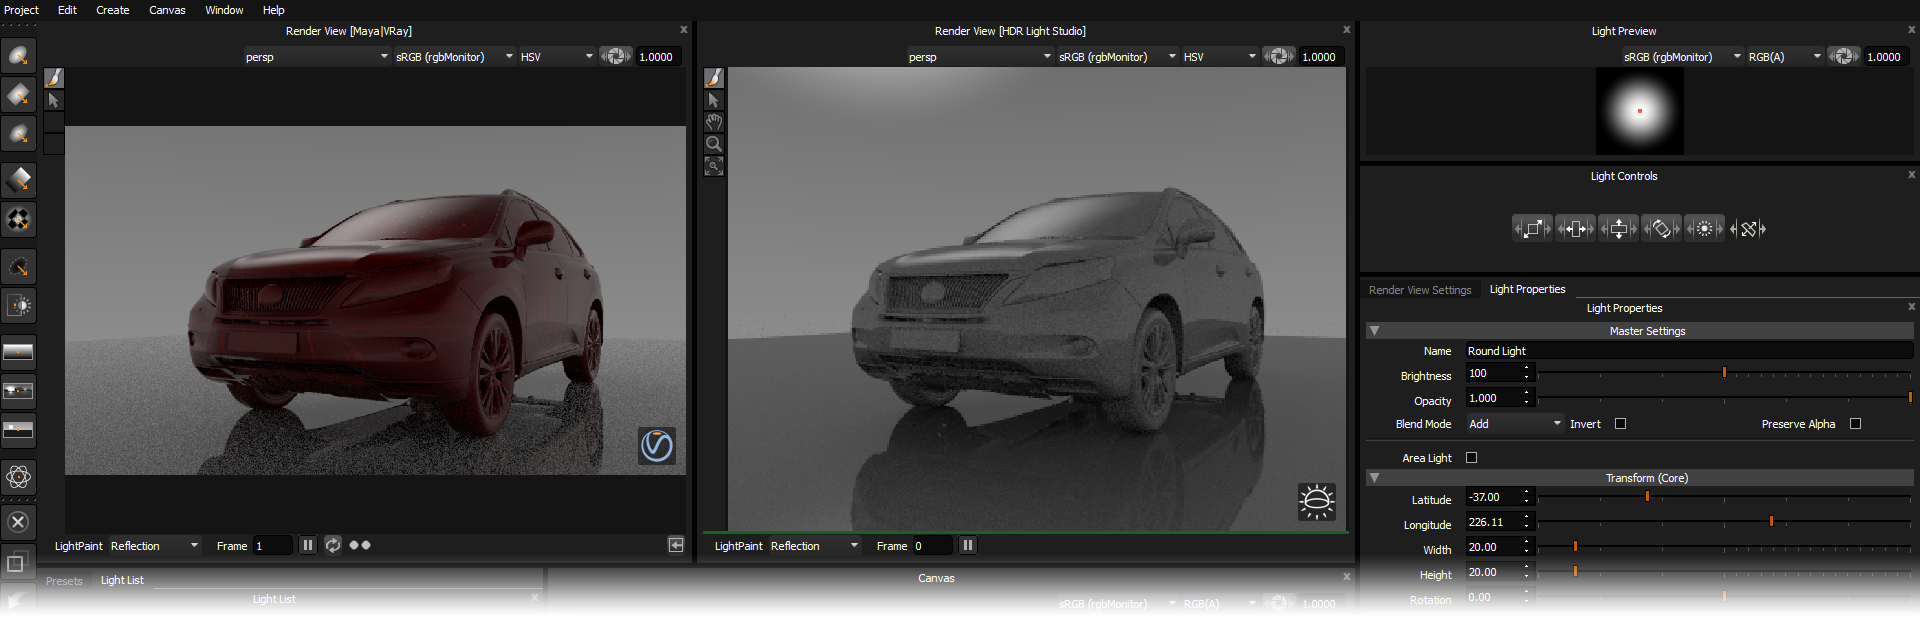
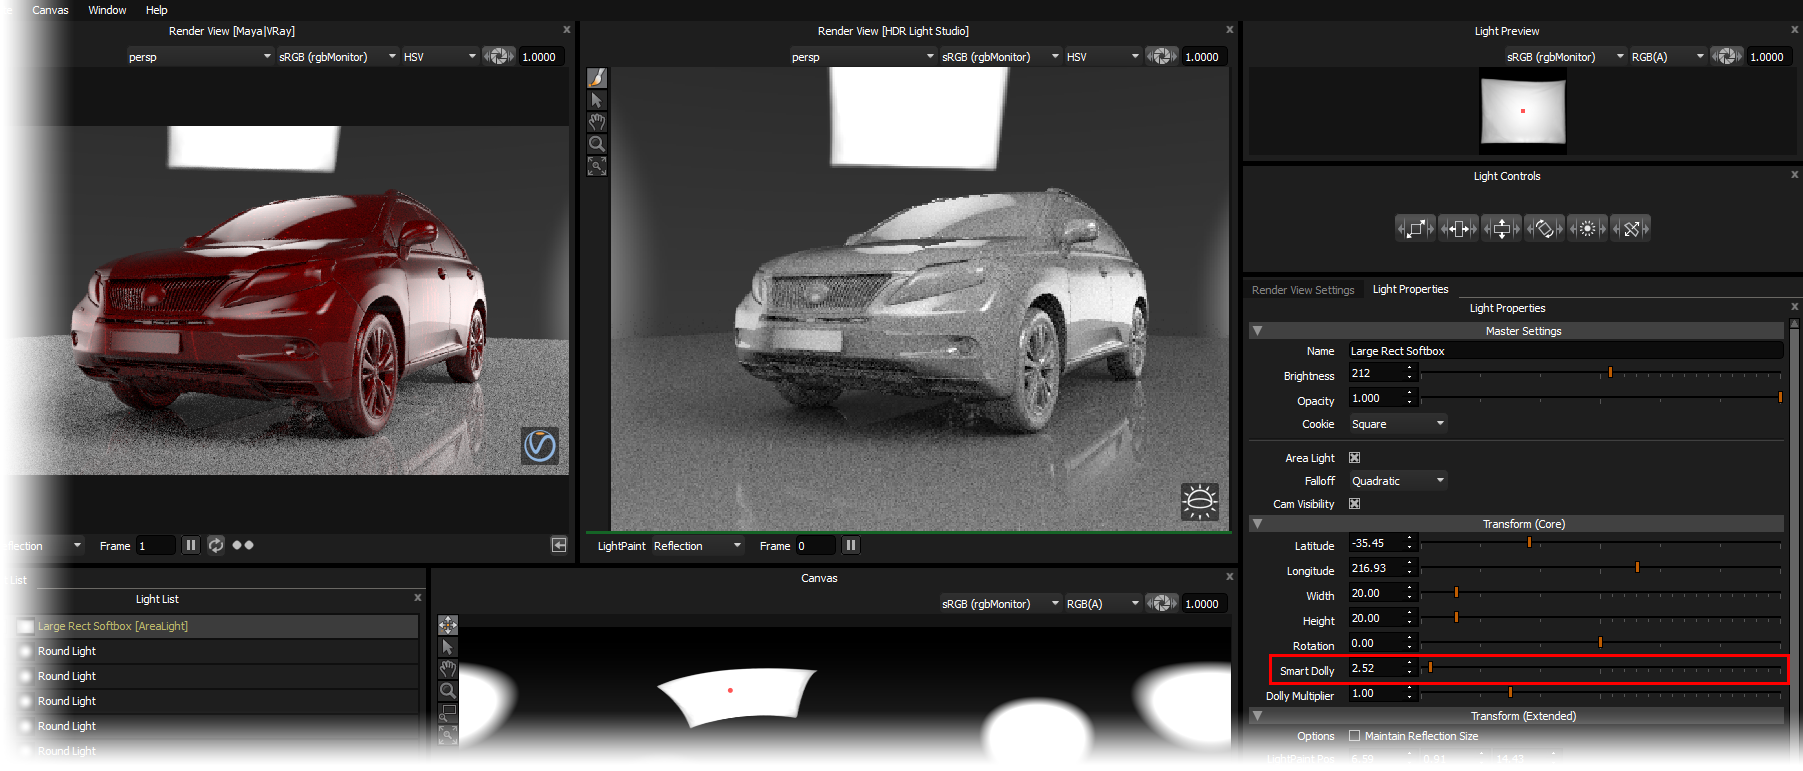
6. Press the Play button in the Render View (Maya/VRay)
New in HDR Light Studio (Carbon) - This feature is compatible with V-Ray, Arnold, Octane, Redshift and RenderMan
V-Ray IPR will now be started in Maya and the IPR image will be shown in the HDR Light Studio interface.
This is a simple example with a red shader over the whole car model.
Continue adding and adjusting lights until you are happy with the lighting design. The lighting updates in both views as you work.
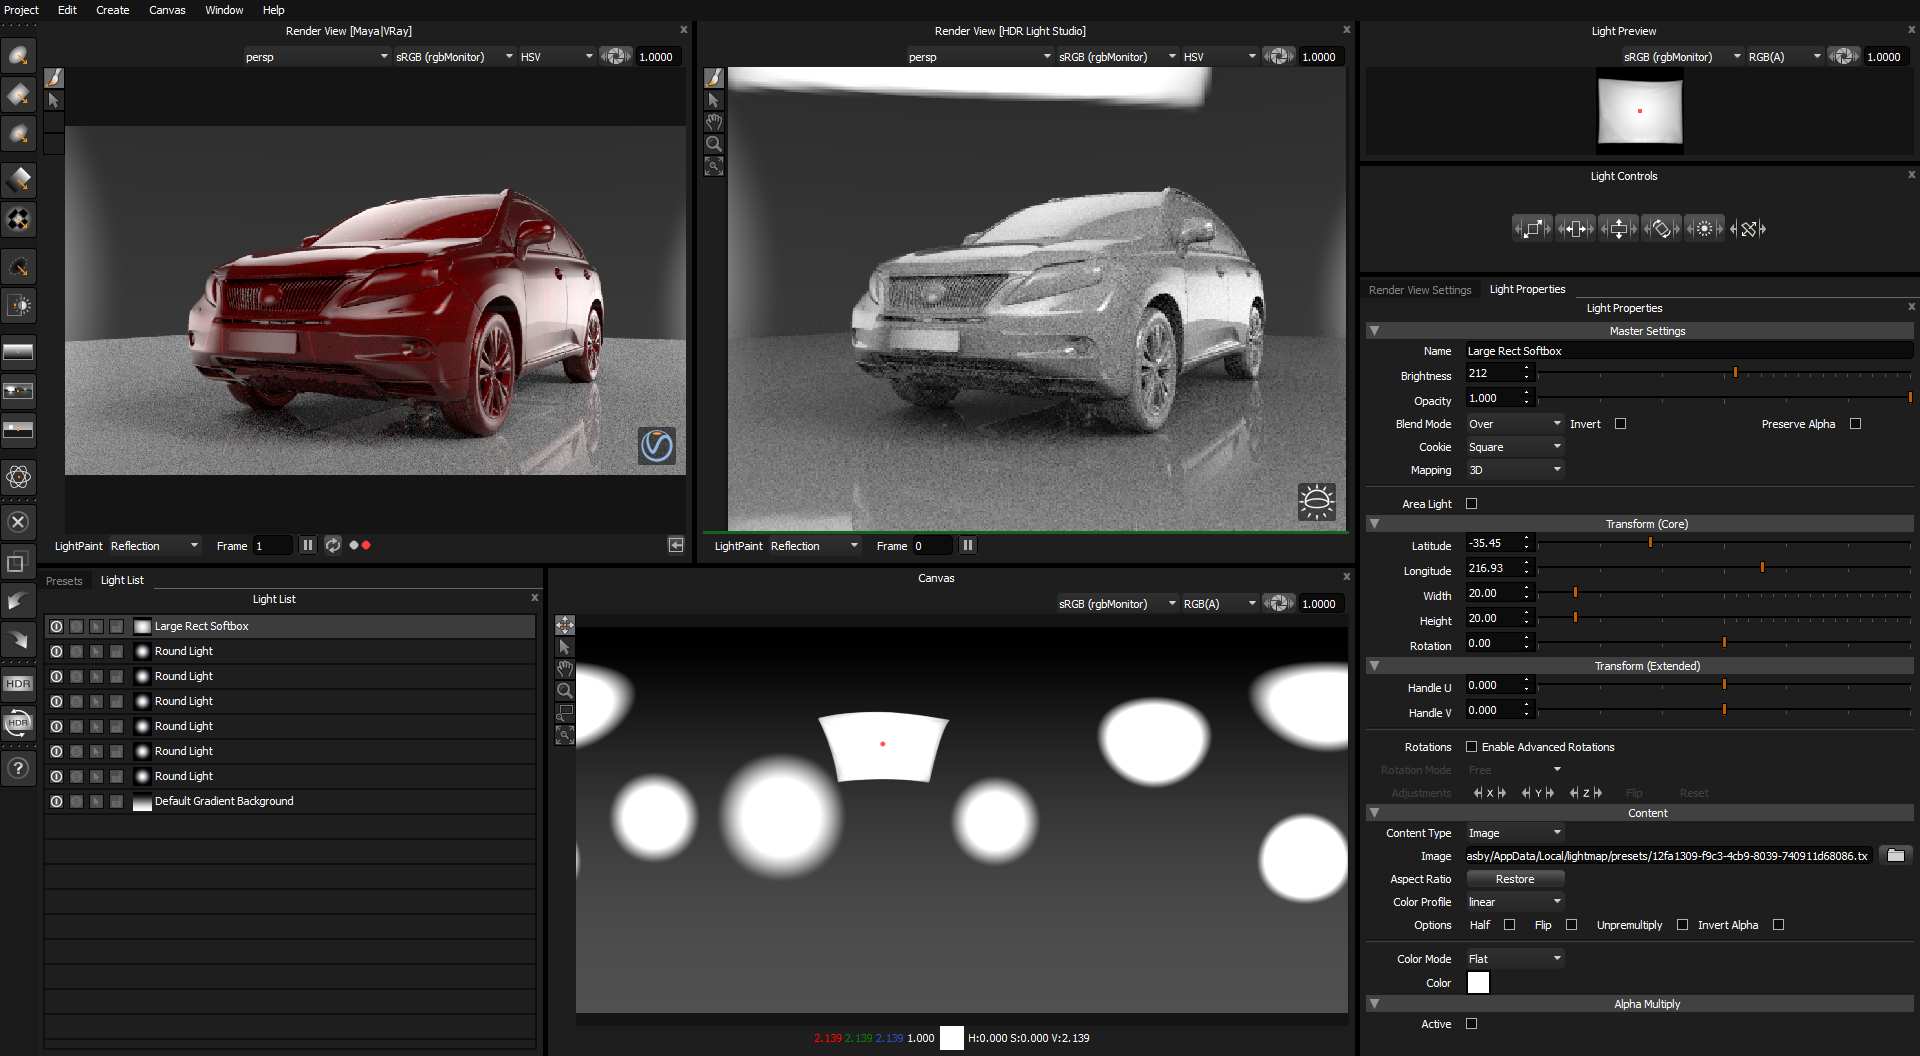
7. Let's make one of the lights a 3D Area Light
In this example the Large Rect Soft Box that is active in the Light List.
In the Render Properties panel enable the Area Light check box.
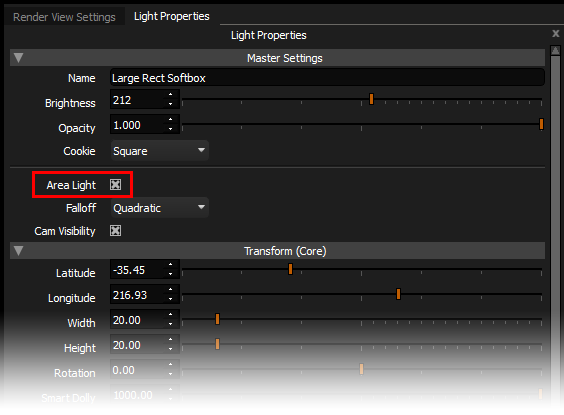
Use the Smart Dolly slider to bring the light closer to the object in the scene.
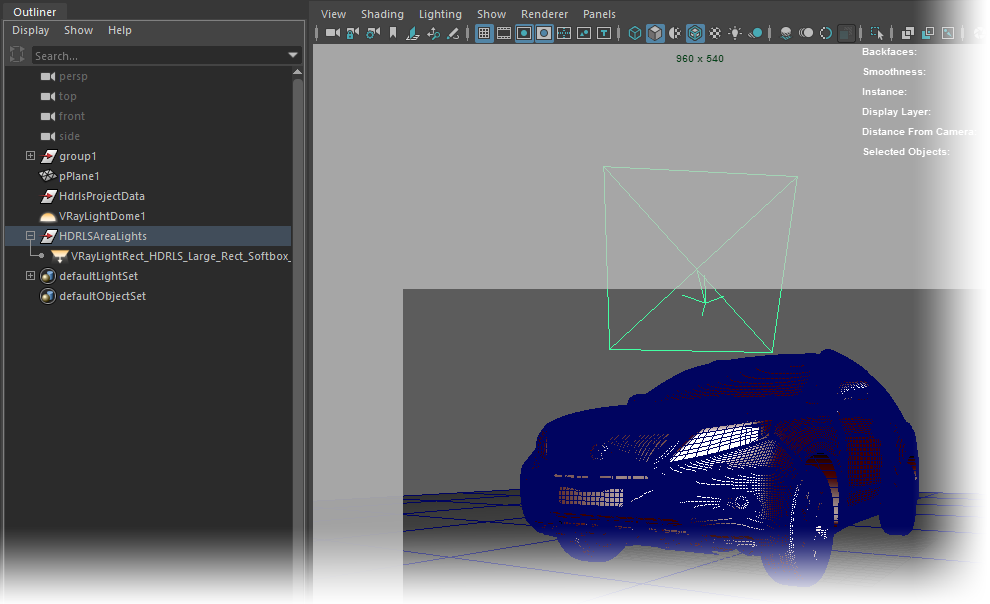
If we look at the Maya scene, we can see the 3D Area Light has also been built correctly for this renderer.
HDR Light Studio created area lights are seen in the HDRLSAreaLights group. Everytime the light is edited in HDR Light Studio, it is updated in Maya.
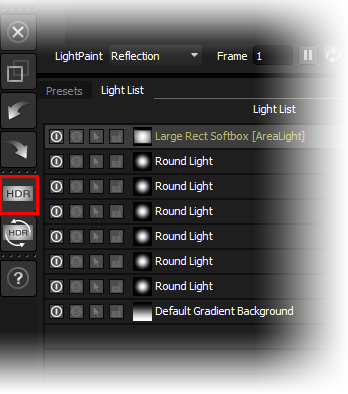
8. Now we will generate the HDR content as high quality files on disc.
Press the HDR button in HDR Light Studio.
The Production Render dialog opens
In this example we have set the HDRI map resolution to 3000 x 1500, and have left the Area Light resolution as 1000 pixels.
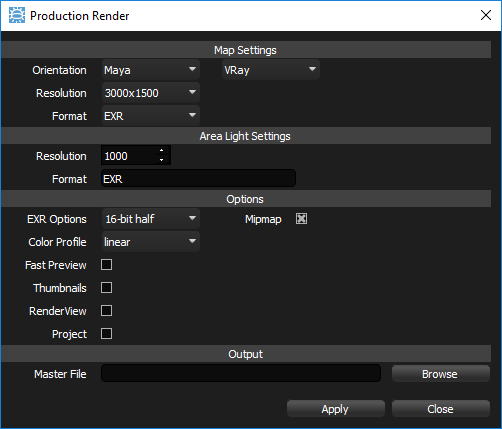
Press Browse and provide a file name and location.
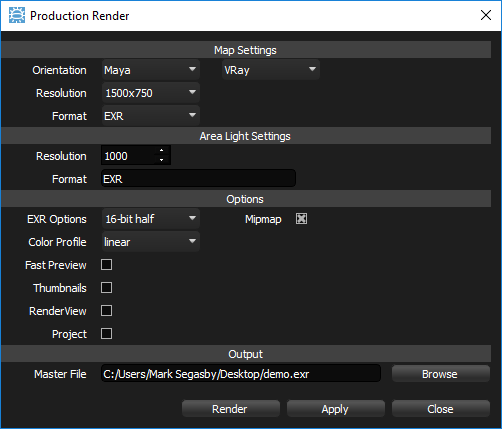
Now press the Render button and HDR Light Studio will generate the HDR content for Maya.
The environment light and area lights in Maya will now use these files on disc.
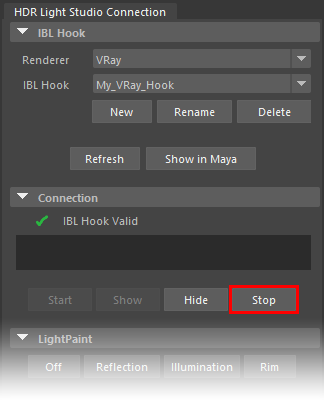
9. Press the Stop button in the HDR Light Studio Connection panel in Maya.
This will close HDR Light Studio and the connection to it.
That's it! You lit your first shot using HDR Light Studio with the Maya Connection.
