I have purchased maintenance for my HDR Light Studio Floating licenses and would like to update my license files to have the new maintenance date.
Step 1: Generate Floating License
Login at www.lightmap.co.uk/login then click on your username in the top right, and select ‘Activate Floating License’ from the drop-down menu.

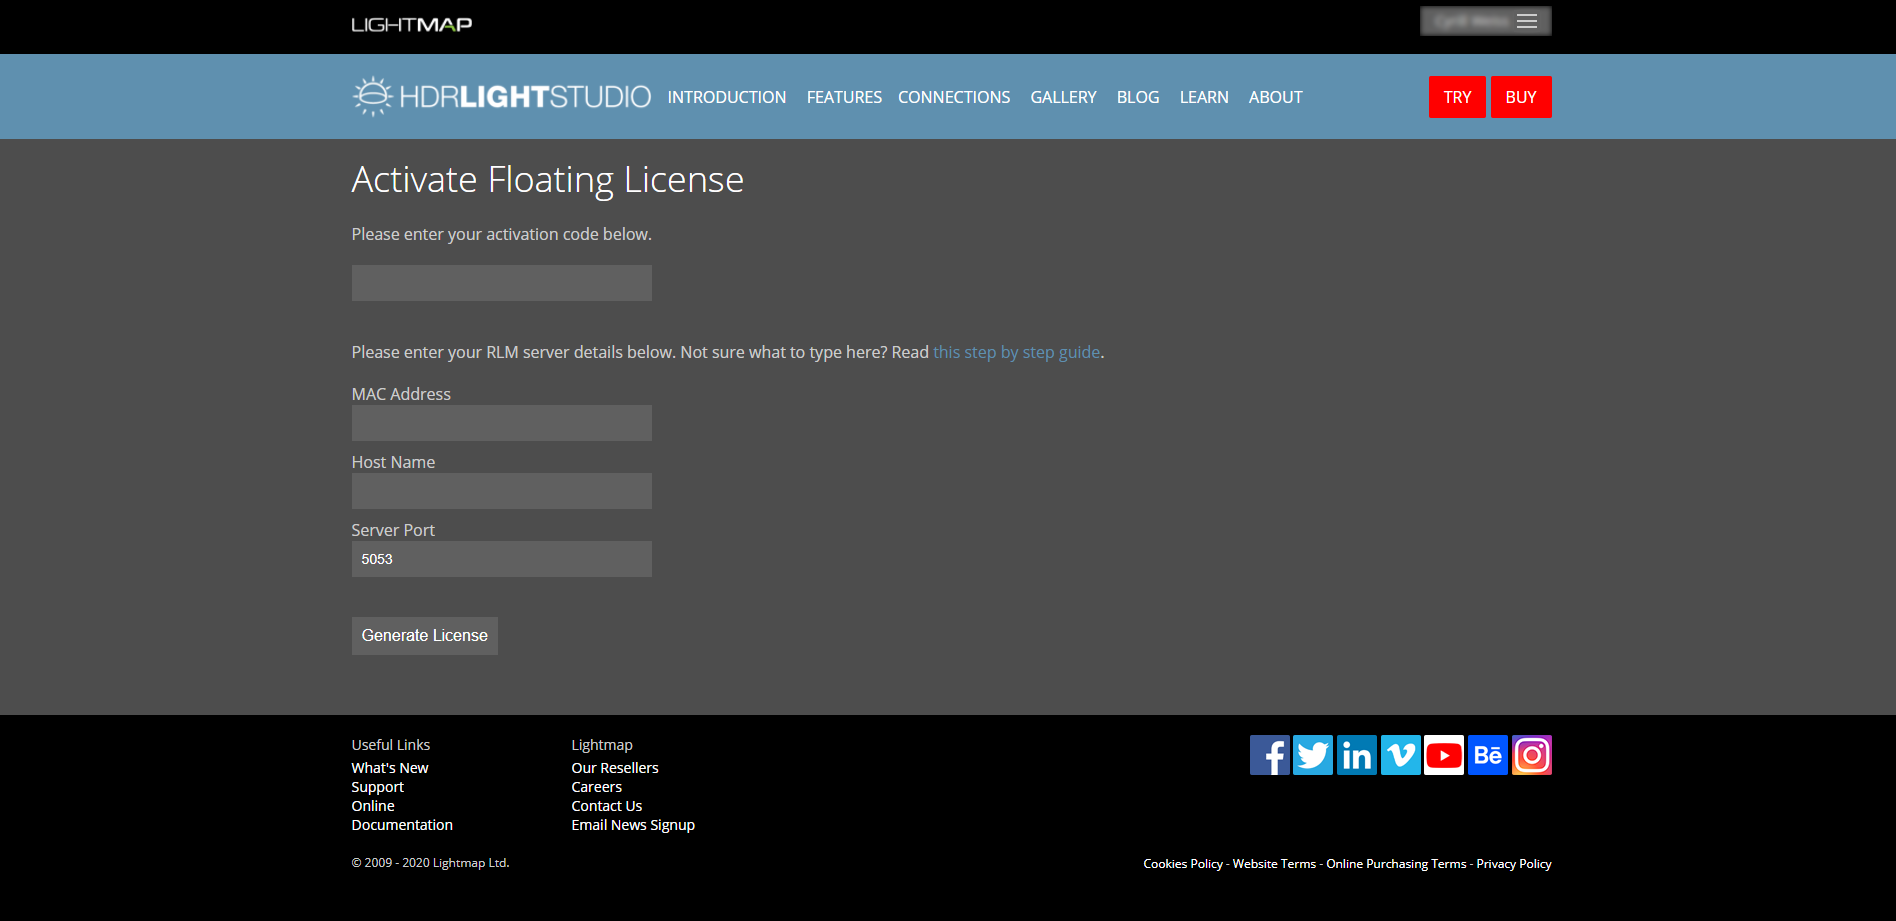
You will be taken to the ‘Activate Floating License’ web page – this is the page where you will generate your new Floating licenses with your updated maintenance date.
When you purchased maintenance for your permanent licenses, you were supplied with a new activation code. This new activation code will let you redeem your new license files with an updated maintenance date.
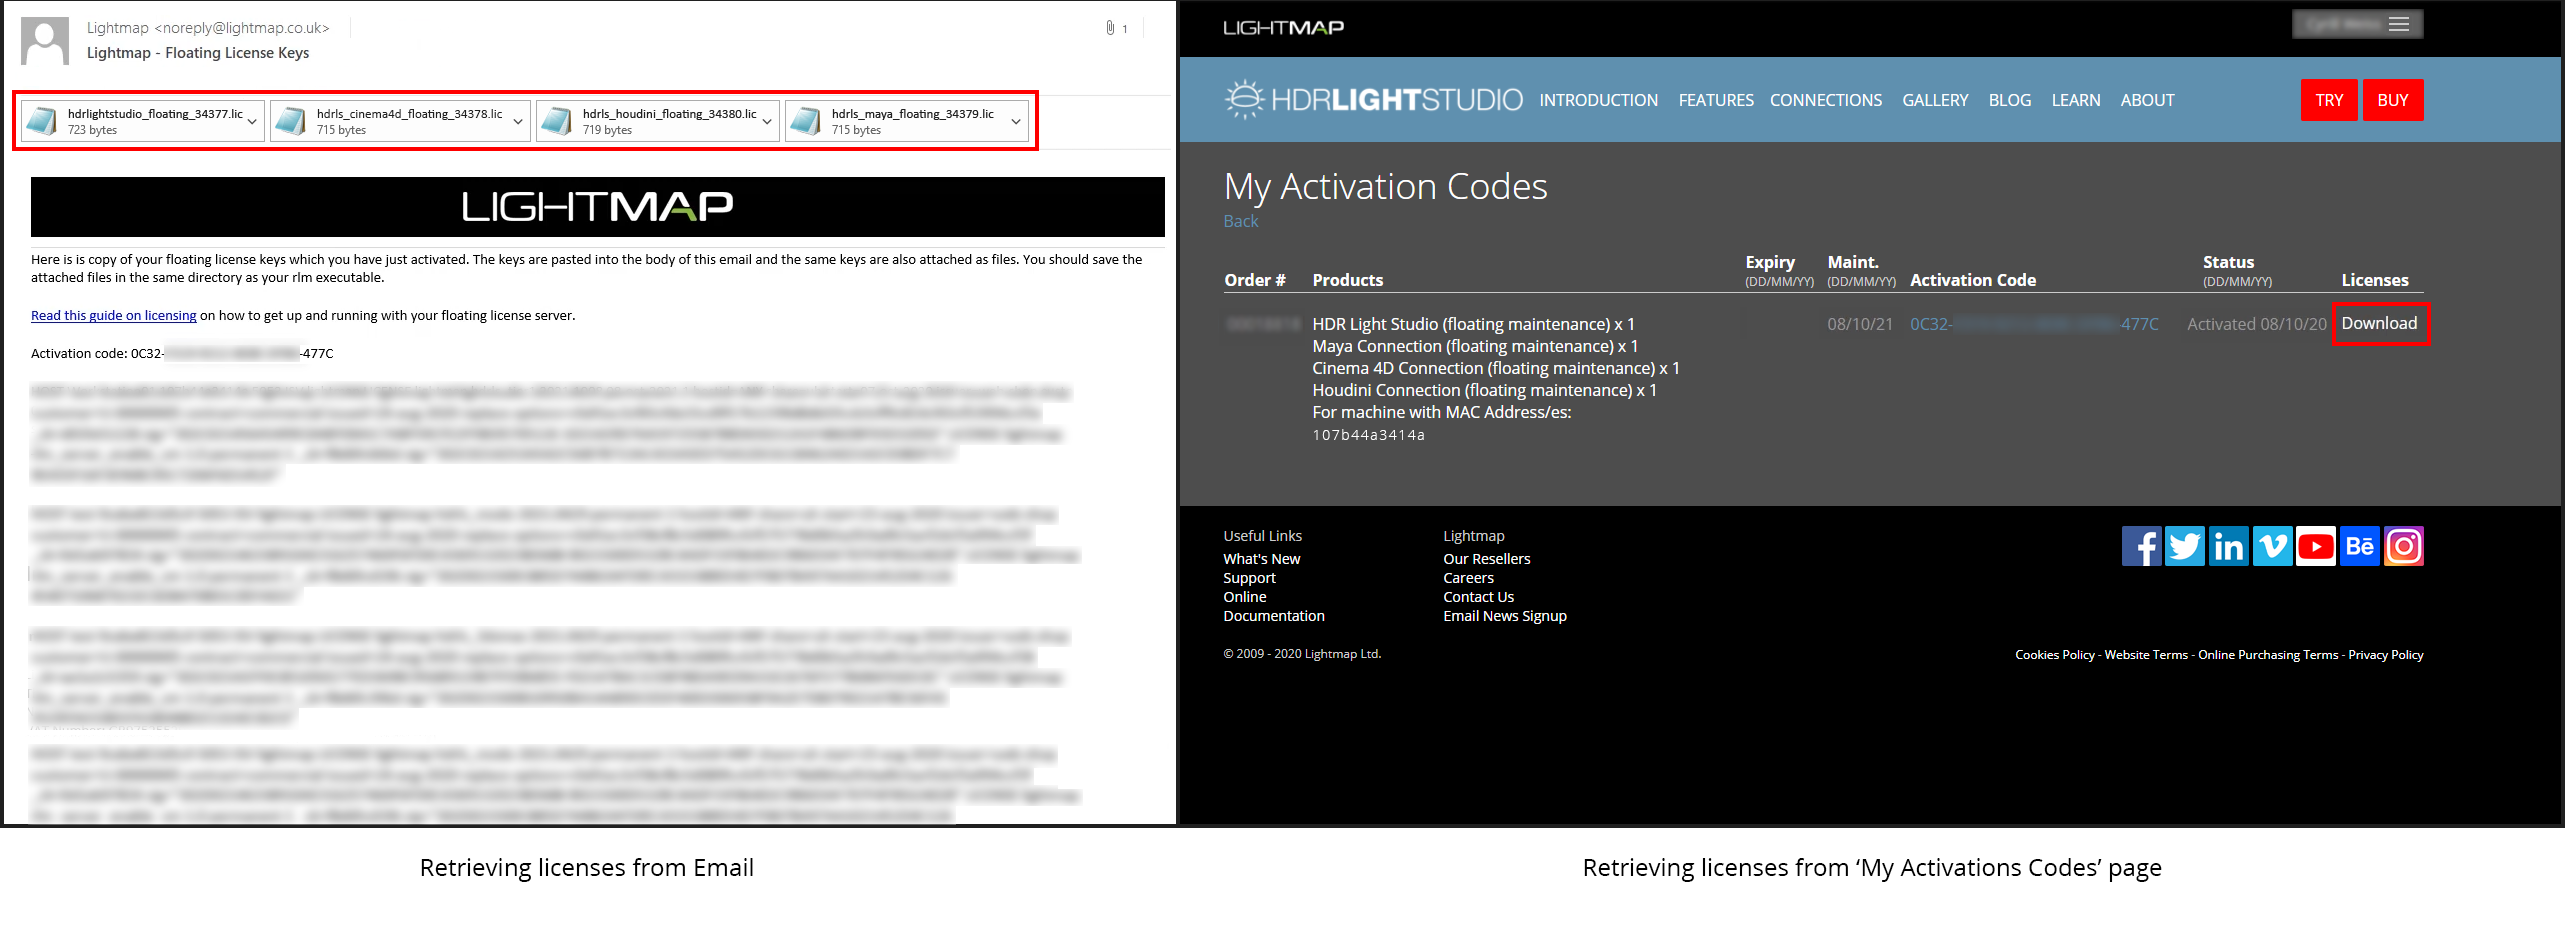
Copy your new activation code either from the email you have received or from the ‘My Activation Codes’ page.

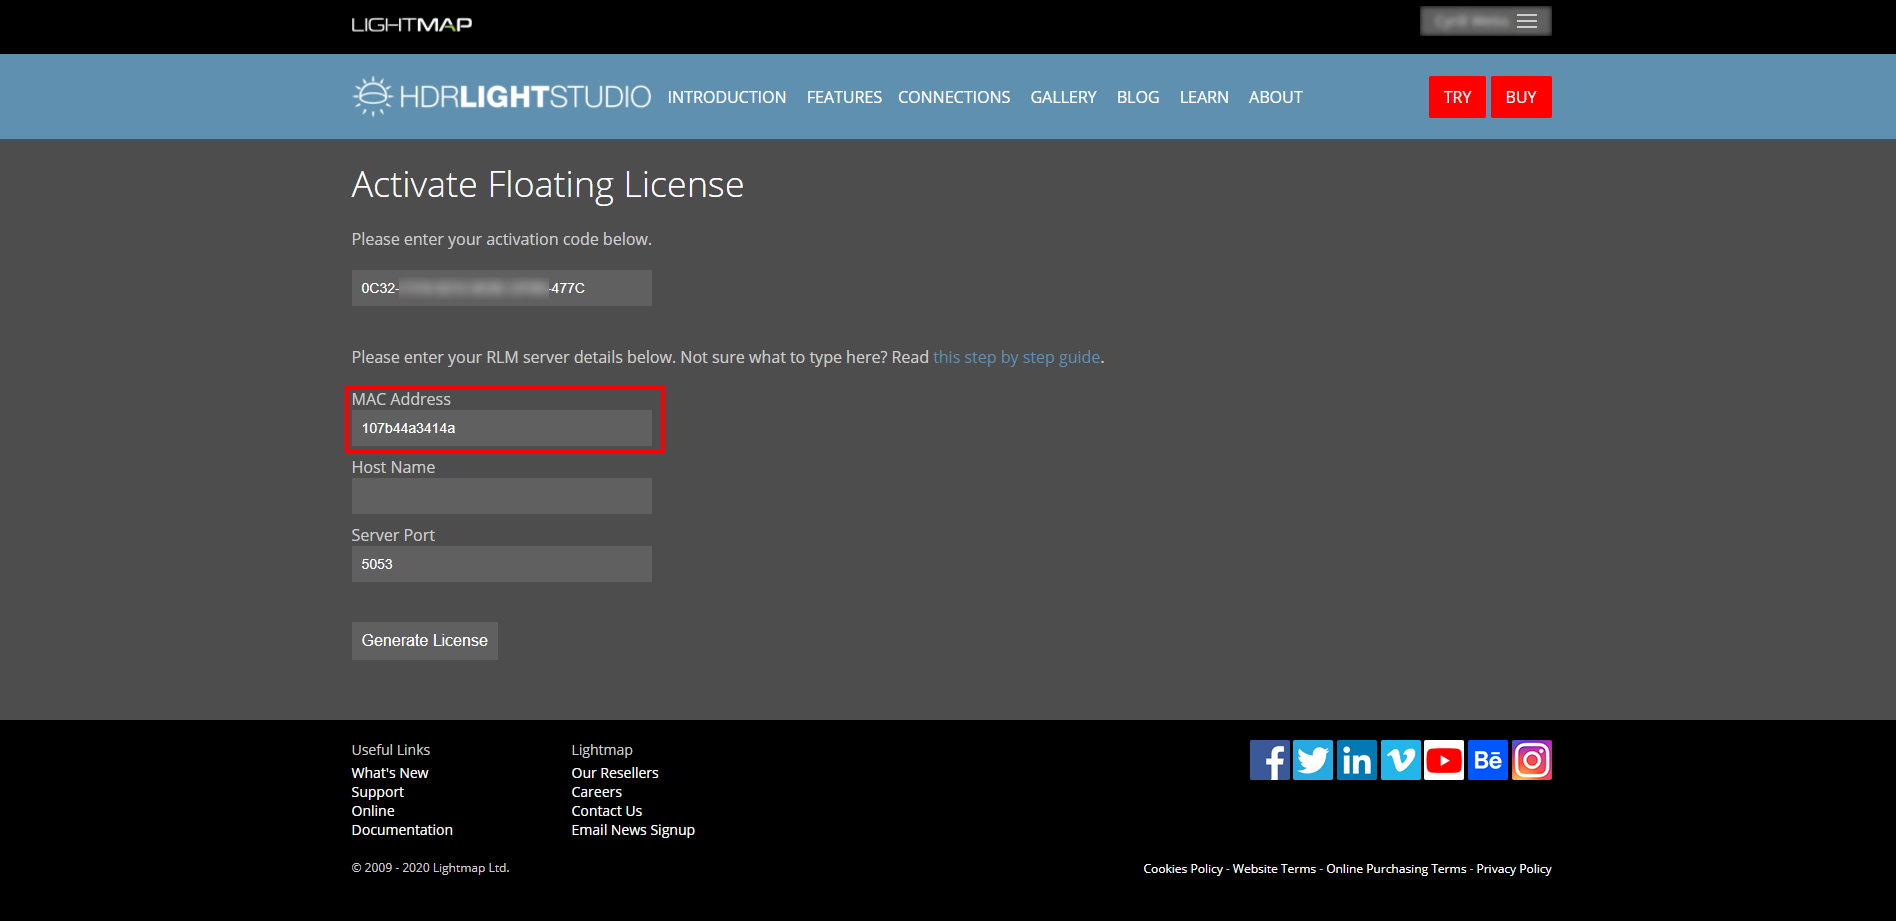
Next, paste the activation code on the ‘Activate Floating License’ web page, ensuring all characters have been pasted.

The activation code is locked to use the MAC address we already have on file for your current permanent license. In the case of Transferred licenses, this is the MAC address of the machine where the software was last transferred to. In other words, the activation code is locked to a MAC address of the license server computer that is currently hosting your HDR Light Studio licenses. Therefore, renewing maintenance does not give you an additional opportunity to relocate your software.
You can check what MAC address is locked to your new activation code on the ‘My Activation Codes’ page.
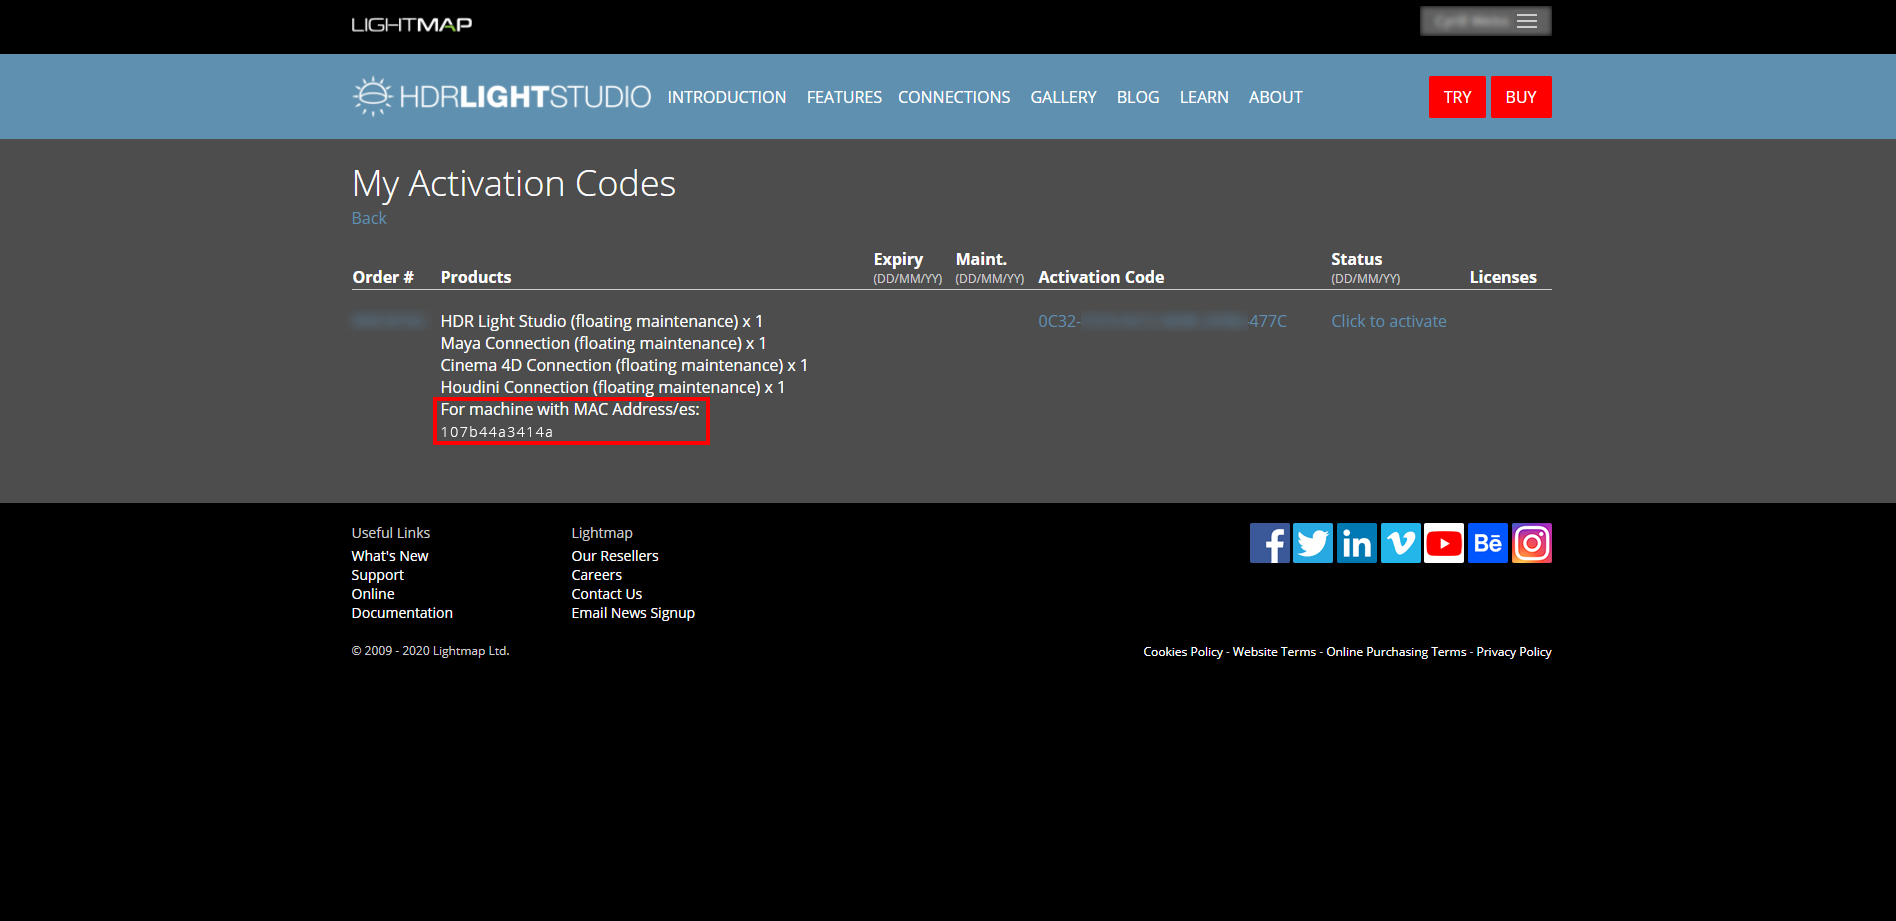
Please note: If the MAC address shown on the ‘My Activation Codes’ page is not what you expect and is for a different machine, get in touch with us at support@lightmap.co.uk.
Copy the MAC address locked to your activation code from the ‘My Activation Codes’ page and paste it in the ‘MAC Address’ field on the ‘Activate Floating License’ web page.
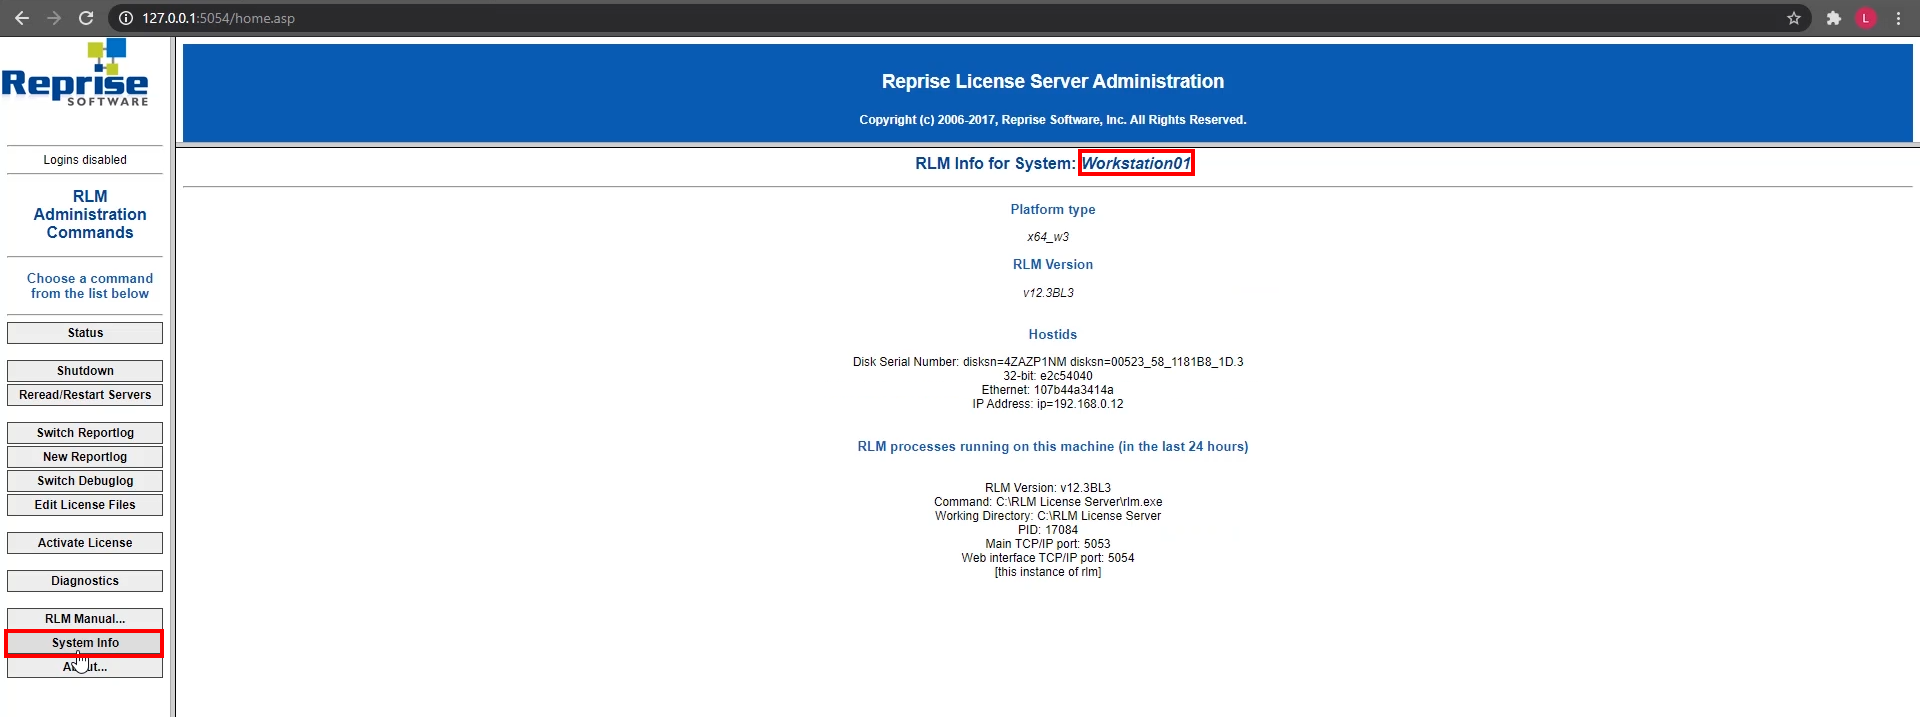
All that’s left is the Host Name. You can copy it from the ‘System Info’ area on the RLM web page, which you can access by typing the address 127.0.0.1:5054 into your web browser on the RLM License Server machine where your current licenses are installed.
Paste the host name of your license server computer in the ‘Host Name’ field on the ‘Activate Floating License’ page. Leave the server port as the default, i.e. 5053, unless your requirement is to use a different port, then click on ‘Generate License’.

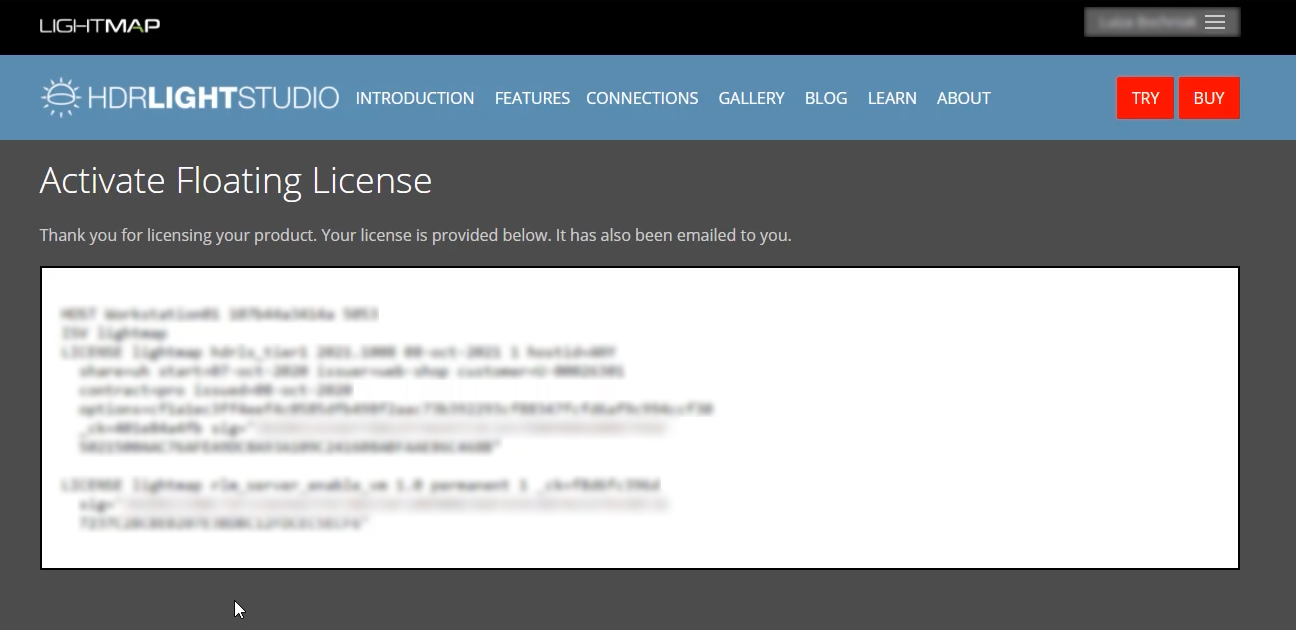
Figure 8: Generating new floating licenses with updated maintenance date
The host name and port can be changed in the future by editing the license file generated. This doesn’t invalidate the license file. However, the MAC address cannot be edited.
You have now generated your new floating licenses with the updated maintenance date. You can see the details for the licenses on the resulting web page.
You will now be sent an email with your new license files attached. Or another way to access your new floating licenses is to go to the ‘My Activation Codes’ page and click on ‘Download’. If you do not see ‘Download’, instead you still see ‘Click to activate’, it’s likely that you haven’t refreshed the ‘My Activation Codes’ page after generating your licenses, so refresh it now.
Step 2: Install Floating Licenses
Once you have your new floating license files (if your licenses are in a zip file, unzip them before proceeding), you need to install them by simply placing the new .lic files in the same directory as your RLM application – in this example it’s in C:\RLM License Server.
Your new floating licenses have a replace flag set and will override your old floating licenses with older maintenance dates.
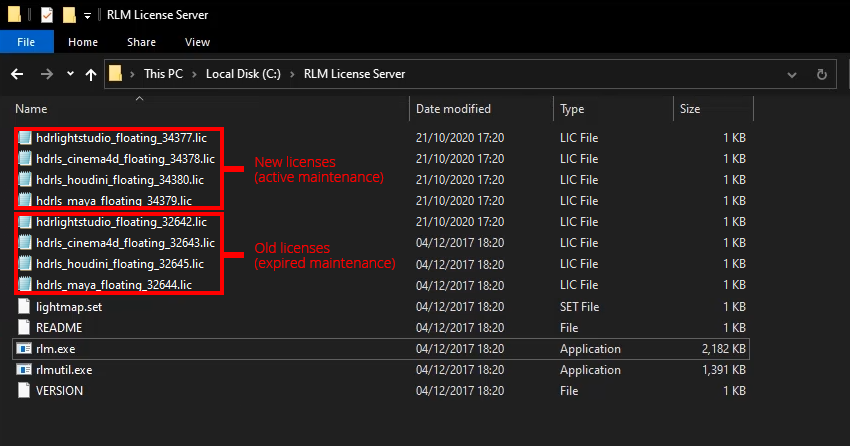
If you want to you can delete your old set of licenses with an expired maintenance date, but you don’t have to as HDR Light Studio will use your new licenses either way.
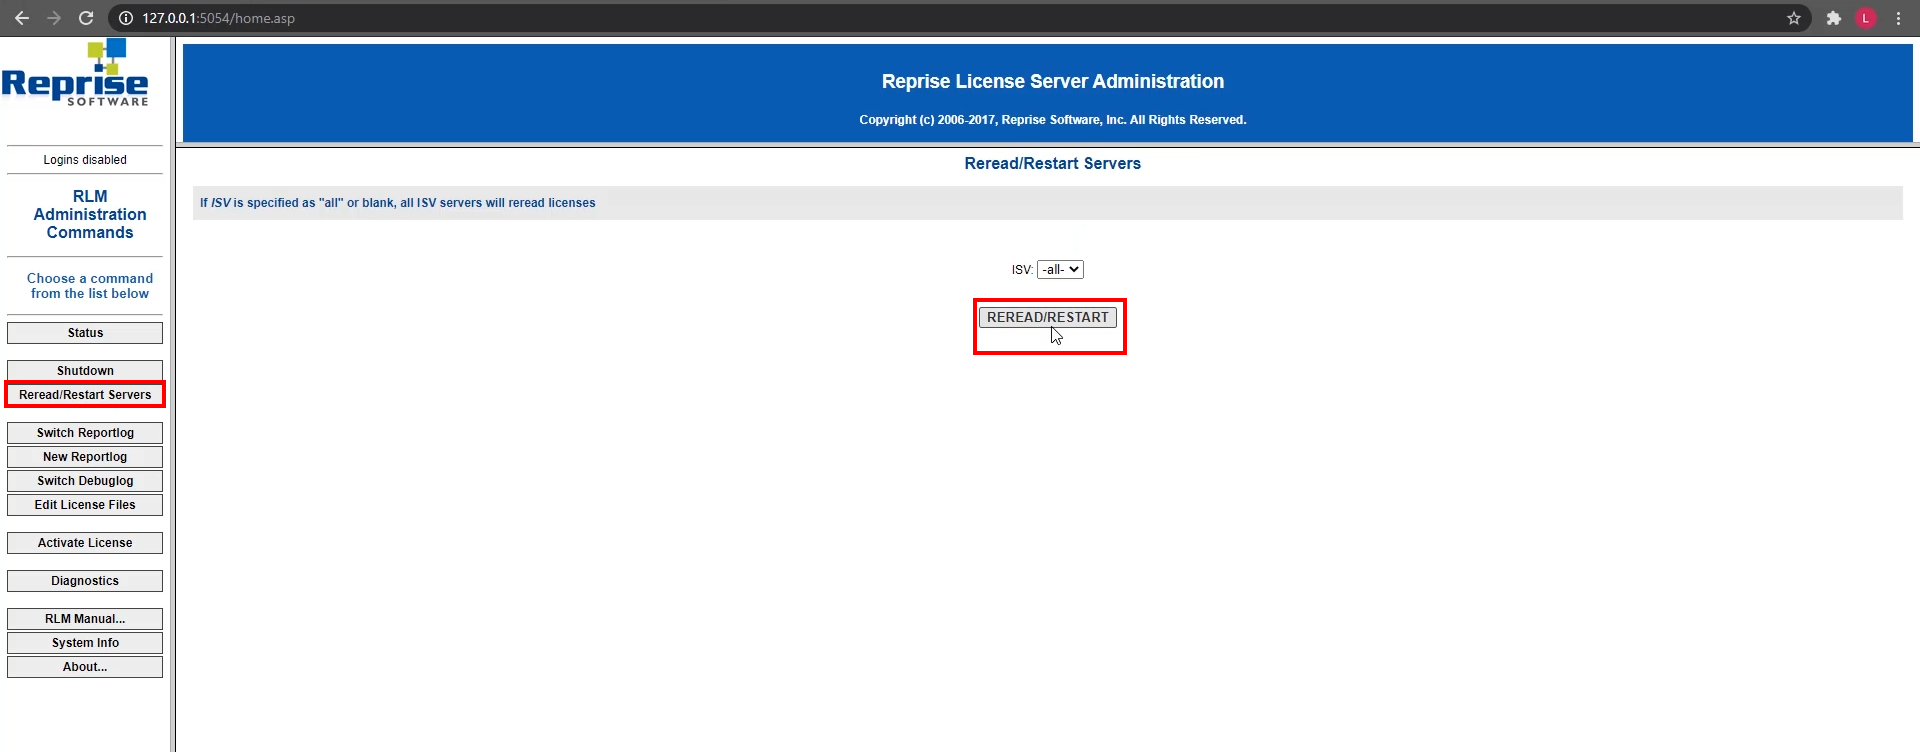
You now need to tell the RLM server software to restart and reread the installed floating licenses. Open a web browser and go to: 127.0.0.1:5054, then click on ‘Reread/Restart Servers’. Next, press the ‘REREAD/RESTART’ button. This will restart the RLM software and it will read the new floating licenses you have just installed.
Step 3: Setup the Client Computers to use the Floating Licenses
Client computers do not need to be updated. Next time HDR Light Studio is run, it will pick up the new license from the RLM server.
