This workflow tutorial teaches how to use HDR Light Studio with Cinema 4D via the Connection.
Watch the HDR Light Studio - Quick Start video first to learn the key concepts of using HDR Light Studio.
Ensure you have installed both the HDR Light Studio main application and the HDR Light Studio Connection for Cinema 4D.
For compatibility ensure you are running 'at least' these renderer versions:
V-Ray Version: 5, Octane Version: 2018.1.3 (Octane 5) or 4.04-R2 (Octane 4), Arnold Version: 2.5.0, Redshift Version: 2.6.40
Big thanks to Szymon Kubicki for the demo scene used in this tutorial.
Start Cinema 4D and Load your Cinema 4D Project
Before we start to use HDR Light Studio to light this scene.... let's make sure the scene is ready to light first.
Camera View
Make sure you have a camera setup with the final composition for the shot that you want to light. If you move the camera during the lighting process, the reflections of the lights will move and this will ruin your lighting.
Existing Lights
Ideally, your scene should not contain any lighting before using HDR Light Studio. You may have set up some environment lighting during the look development for the scene, so now is a good time to delete or hide this lighting. If you have an LED light that's part of a product for example, then this is a part of your scene and should be kept. We simply want to avoid confusion by mixing lights created with HDR Light Studio and those not created with HDR Light Studio. A blank lighting canvas is the best place to start.
 Tip: If you have an HDRI map you want to edit that's already lighting the scene, hide or delete this light and load the HDRI map into HDR Light Studio once it's open.
Open the 'HDR Light Studio Connection' panel
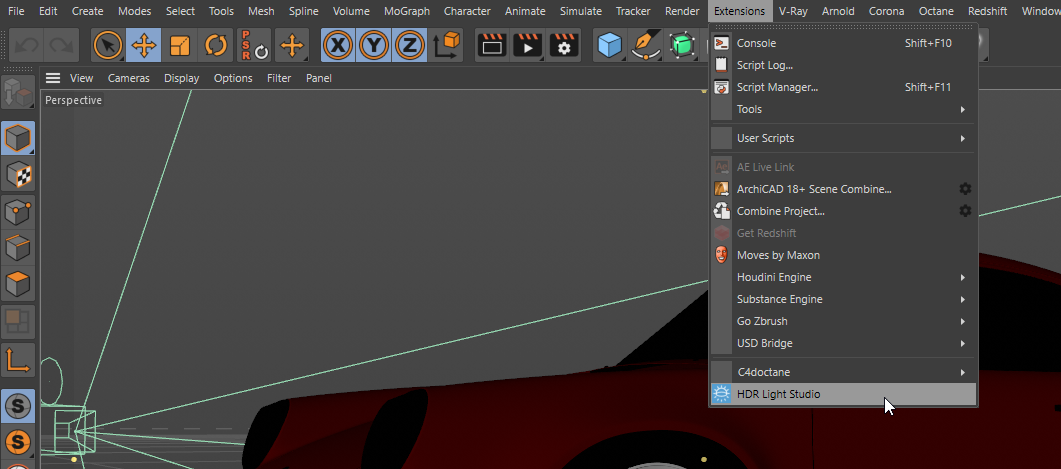
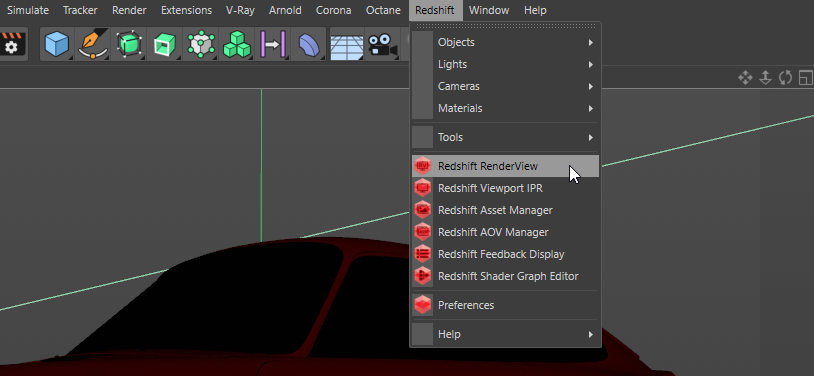
Go to the menu: Extensions > HDR Light Studio
(Cinema 4D 20 users, go to the menu: Plugins > HDR Light Studio)
The HDR Light Studio Connection panel opens.
Ideally, you should now drag the panel and dock it into the Cinema 4D interface.
The connection will still function even when the tabbed panel is hidden by another tabbed panel.
Tip: You can save your Cinema 4D interface layout to include the HDR Light Studio connection panel. So you don't need to do this every time.
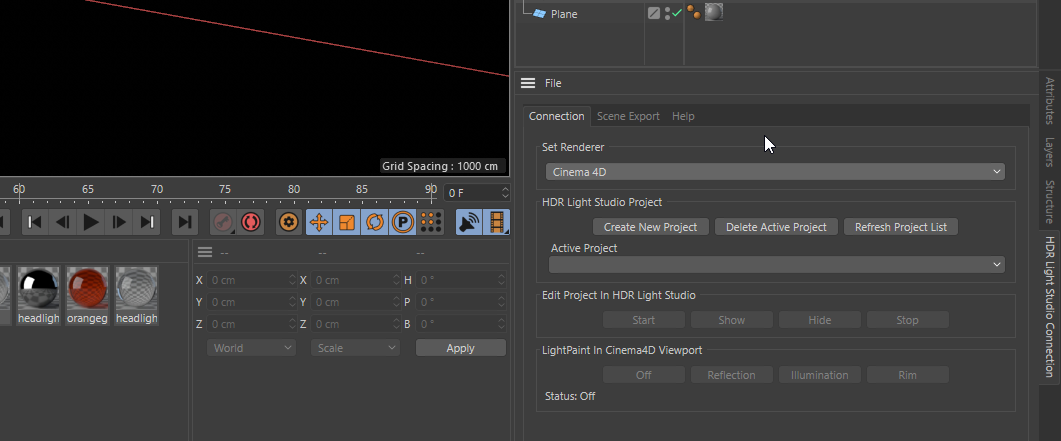
Now we are ready to start working in the HDR Light Studio Connection panel.
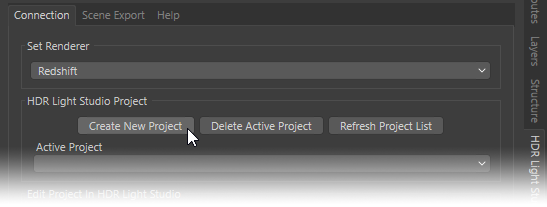
Set Renderer
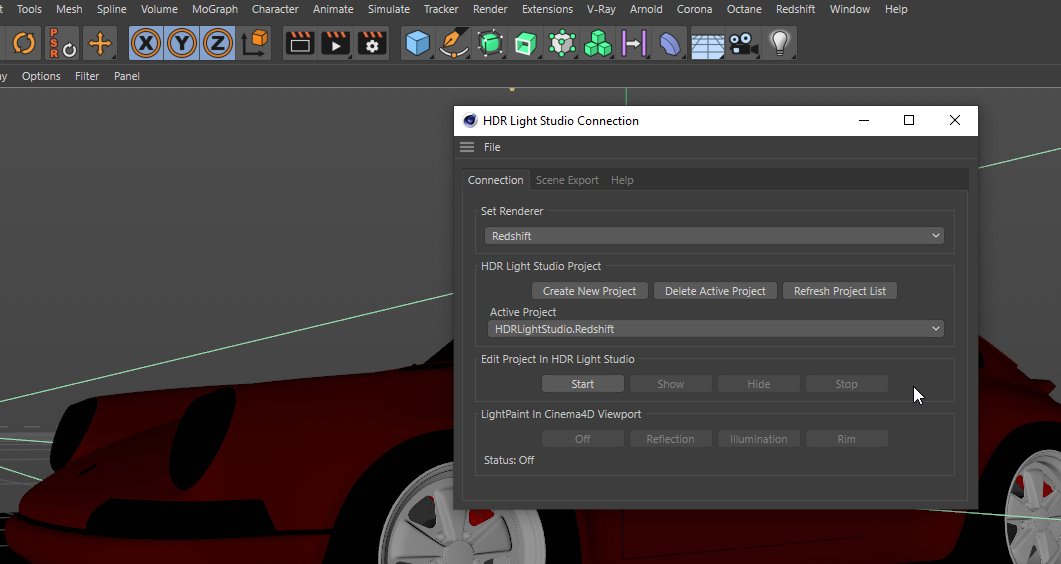
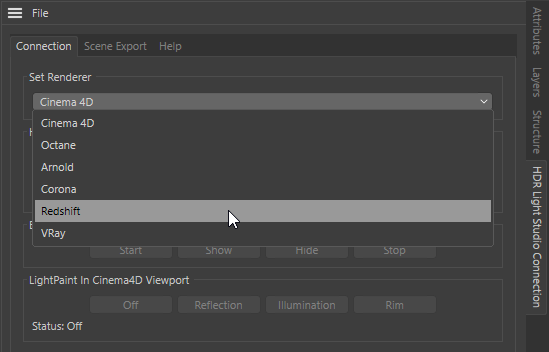
Use the 'Set Renderer' drop-down in the Connection panel to set the Renderer for this Cinema 4D project.
This tells HDR Light Studio which renderer it will create lighting for. In this example, we are choosing Redshift in the drop-down.
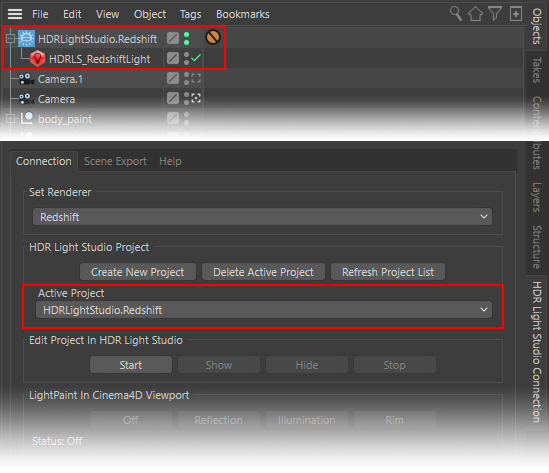
Create New Lighting Project
Press the 'Create New Project' button.
This will create a new HDR Light Studio lighting project for the chosen renderer.
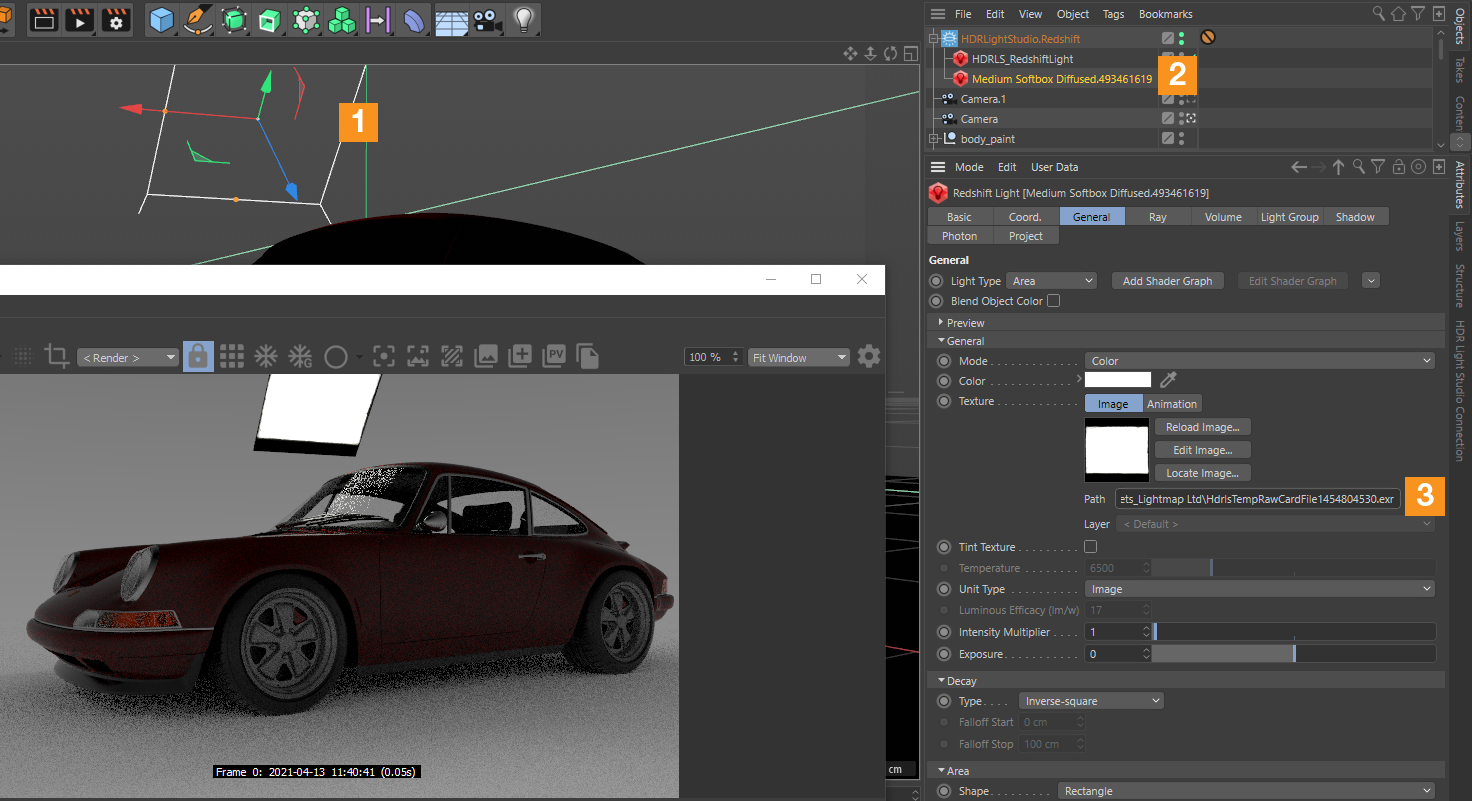
In the image below, you can see the HDRLightStudio.Redshift project has been created in the Cinema 4D Objects panel - containing an environment light for Redshift.
This new HDR Light Studio project is also listed as the Active Project in the HDR Light Studio Connection panel.
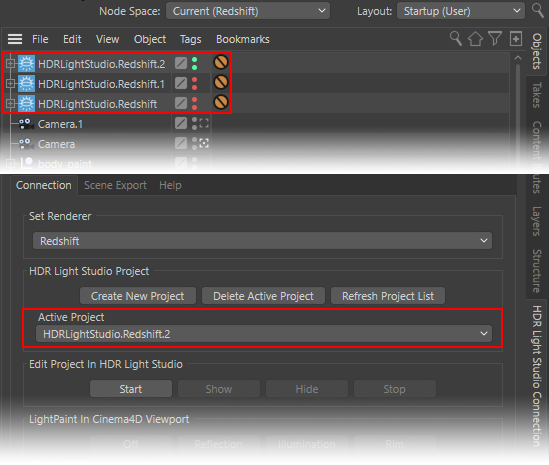
 Tip: Working with Multiple HDR light Studio Projects
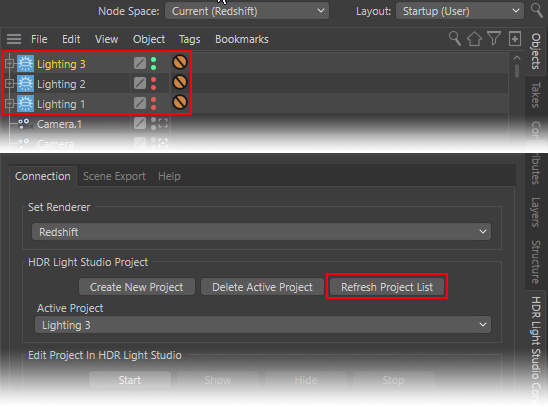
Tip: Renaming HDR Light Studio Projects
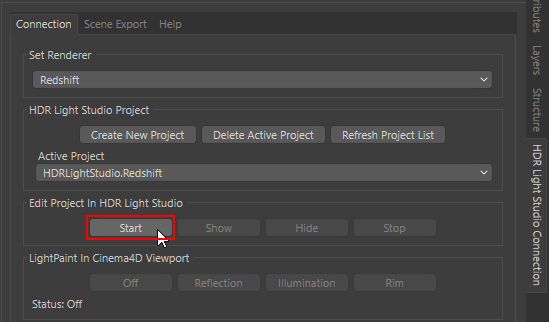
Start HDR Light Studio
Press 'Start' to start HDR Light Studio in a connection with Cinema 4D.
 Please Note: If HDR Light Studio is already open standalone, connected with another 3D app, or connected to another session of Cinema 4D - the connection will not function correctly. So please ensure HDR Light Studio is not already open before starting it from Cinema 4D.
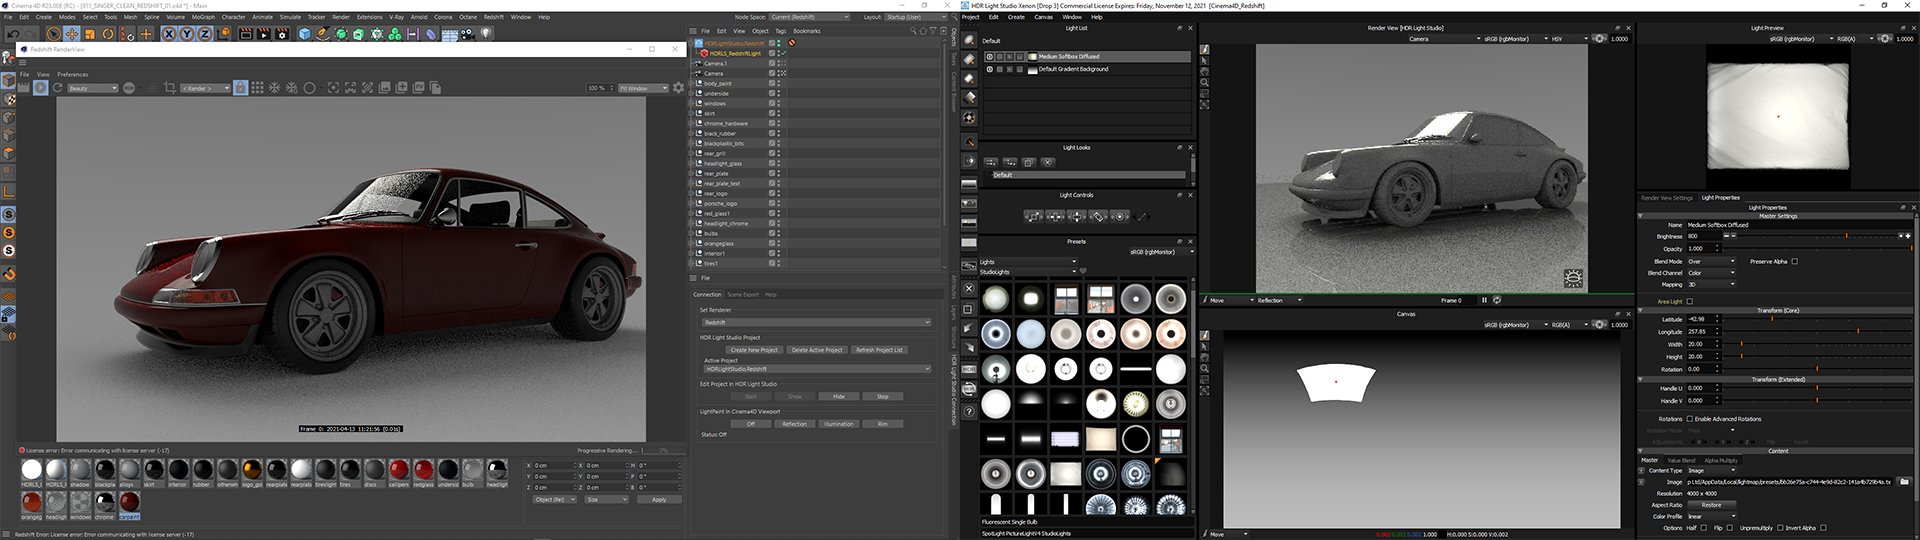
The HDR Light Studio application now opens connected with Cinema 4D. Behind the scenes, the HDR Light Studio connection has taken control of the environment image in the active HDR Light Studio lighting project.
The HDRI map from HDR Light Studio is now shared with Cinema 4D as a temporary low-res image (a proxy). This image is fast to calculate and fast for Cinema 4D to load and use during the interactive lighting design process.
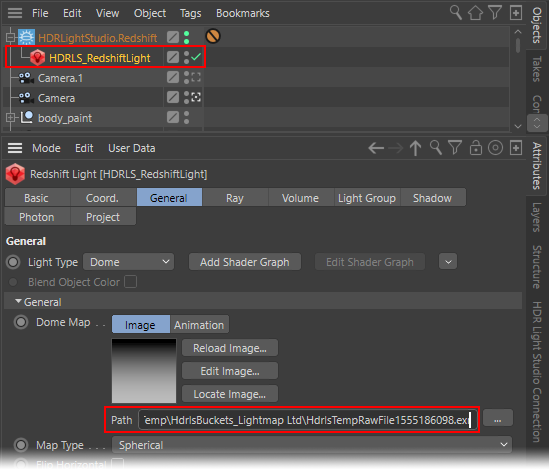
When the lighting design changes in HDR Light Studio, the environment in Cinema 4D is updated to use a new temp file with a new file name with a random number on the end (see image above). This ensures the renderer uses the new image and not a cached old image.
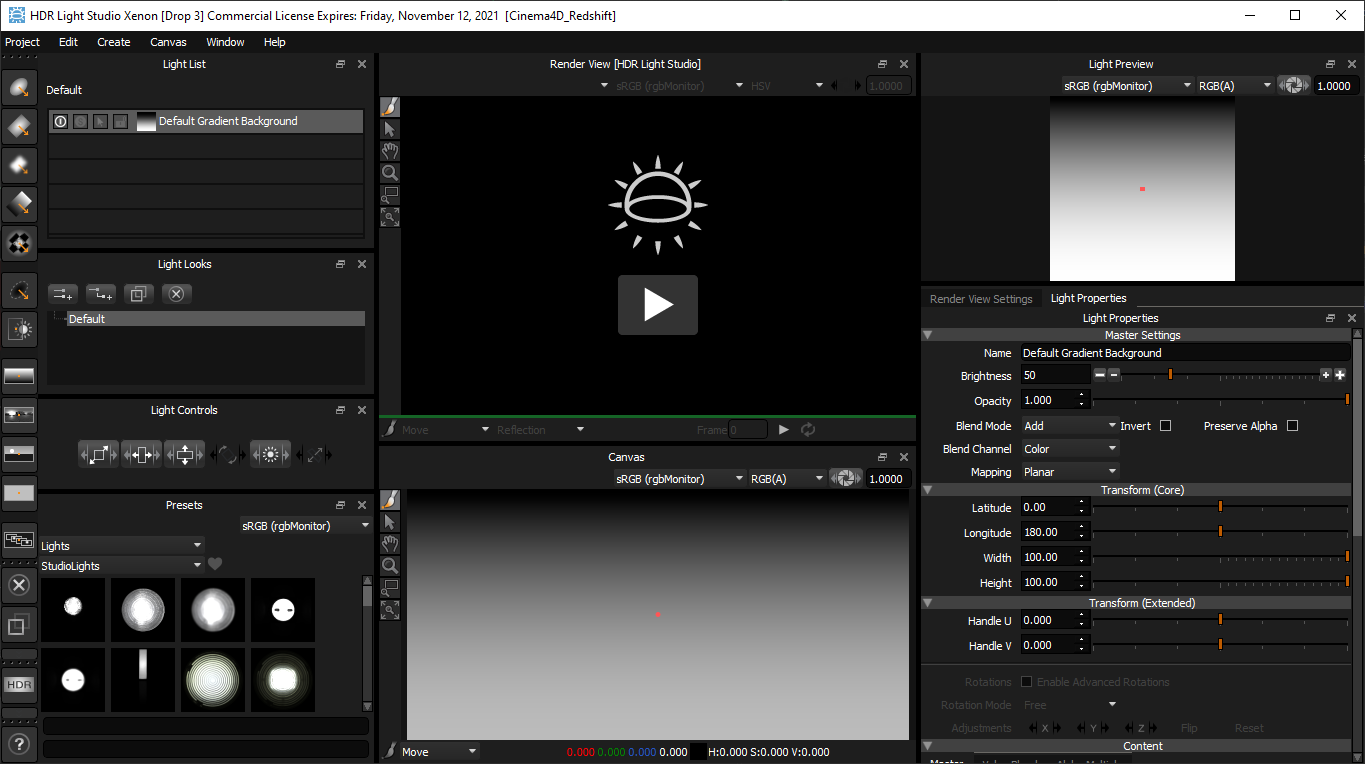
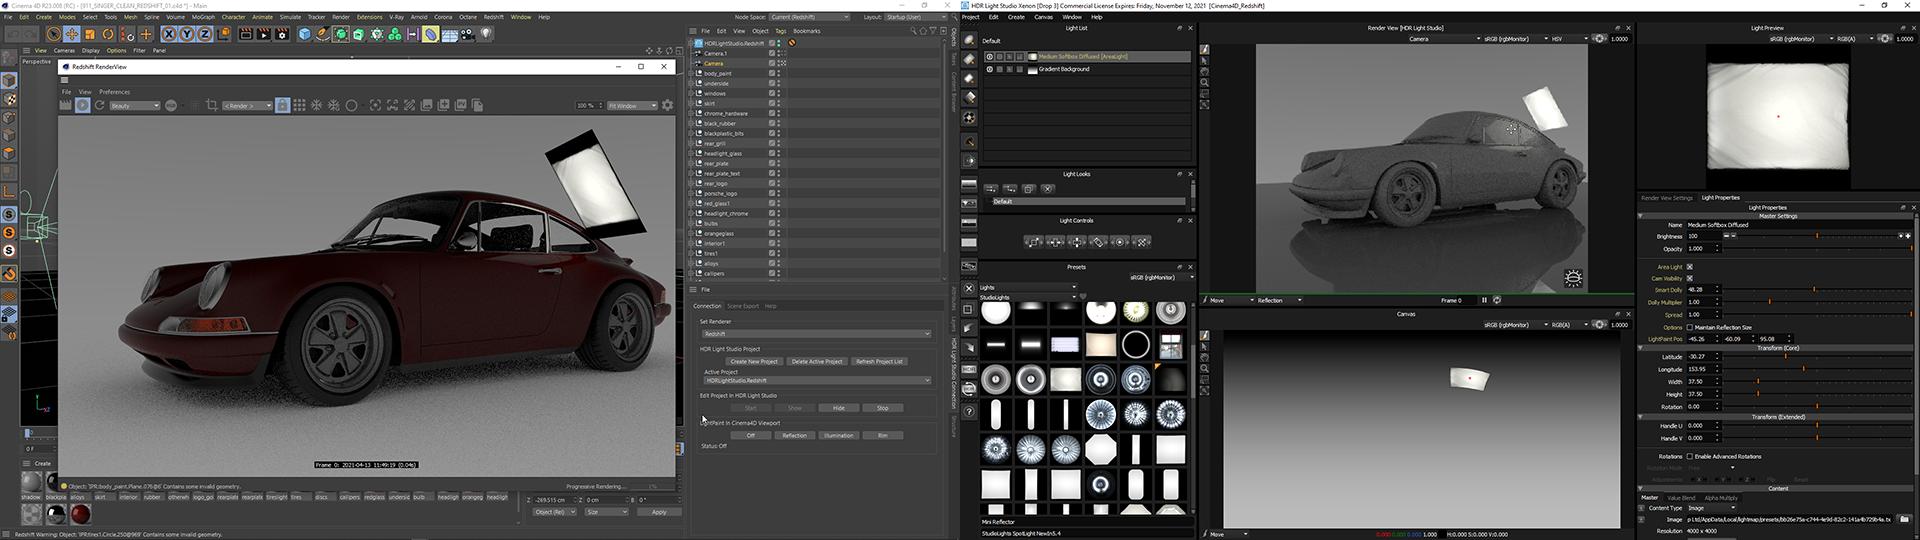
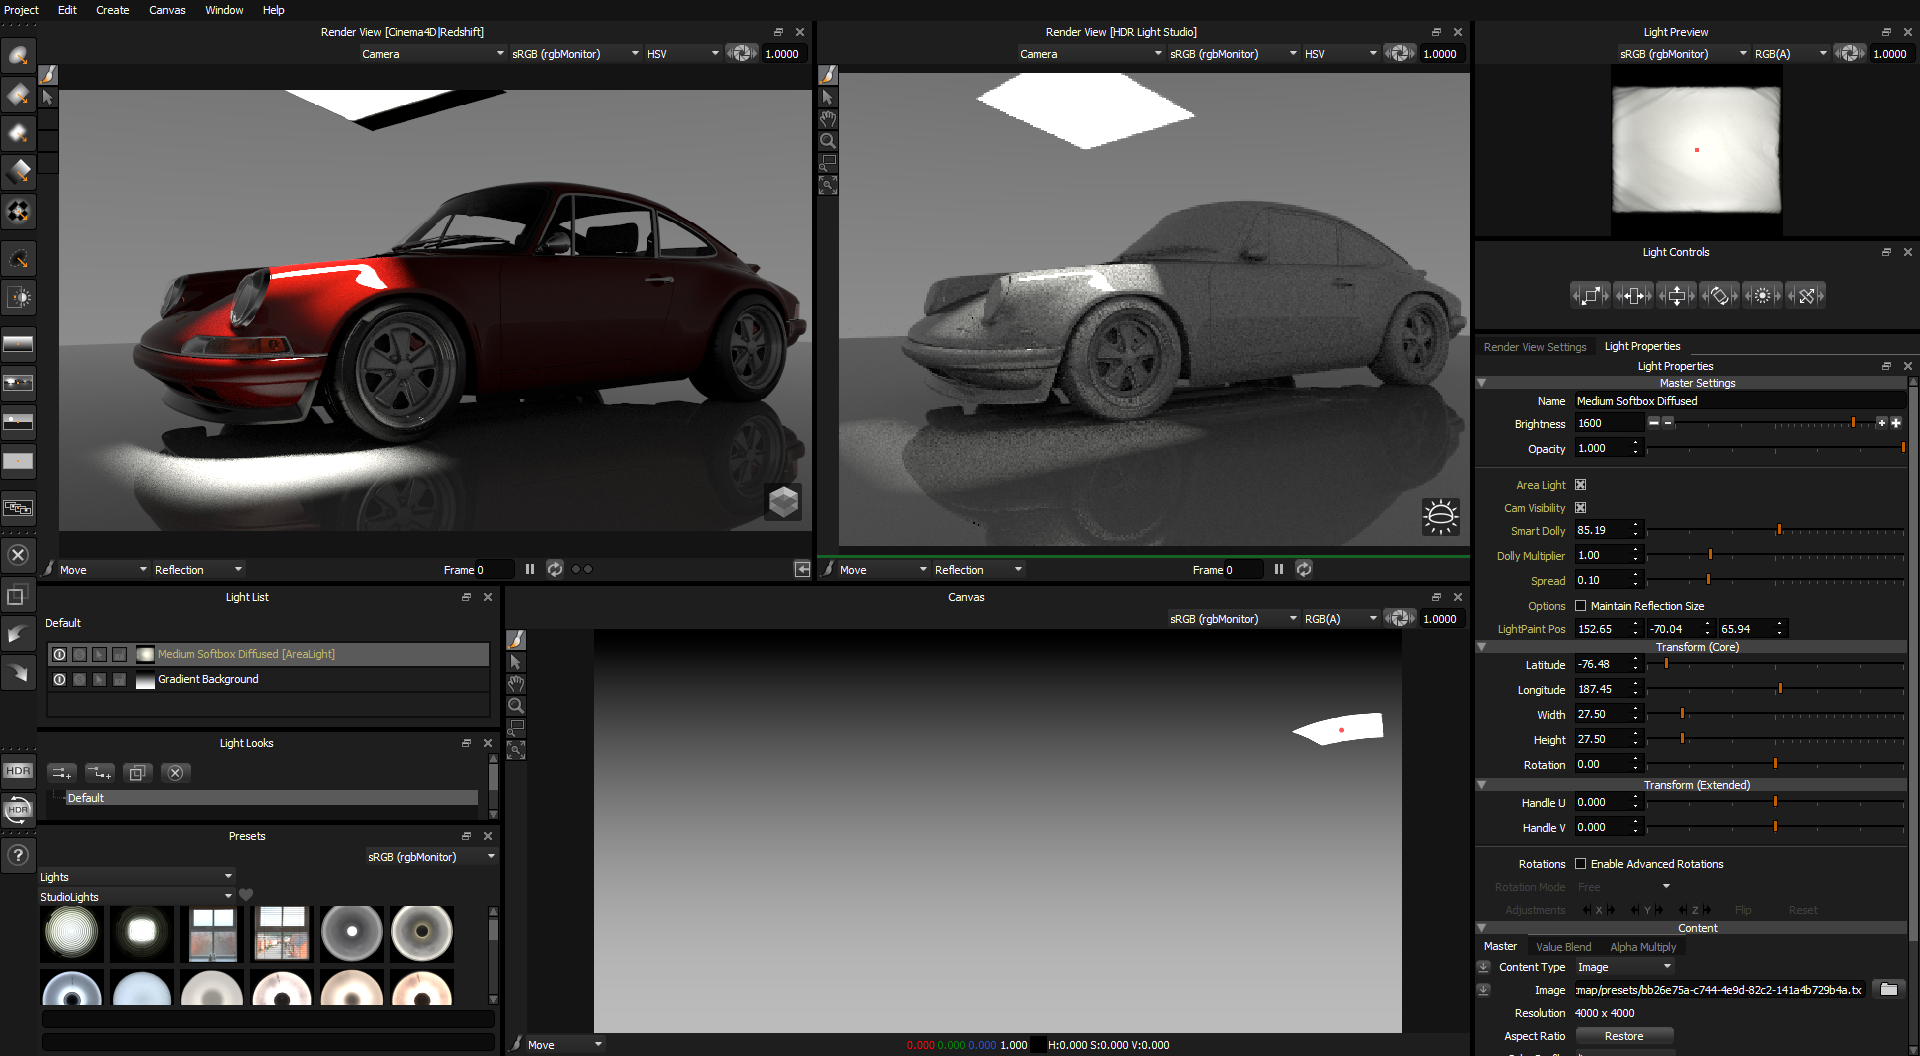
Default HDR Light Studio Interface Layout with Cinema 4D
By default, the HDR Light Studio interface should look something like this. (below)
If not, you can reset the HDR Light Studio interface layout by going to the menu: Window > Layout > Load > Default > Cinema 4D
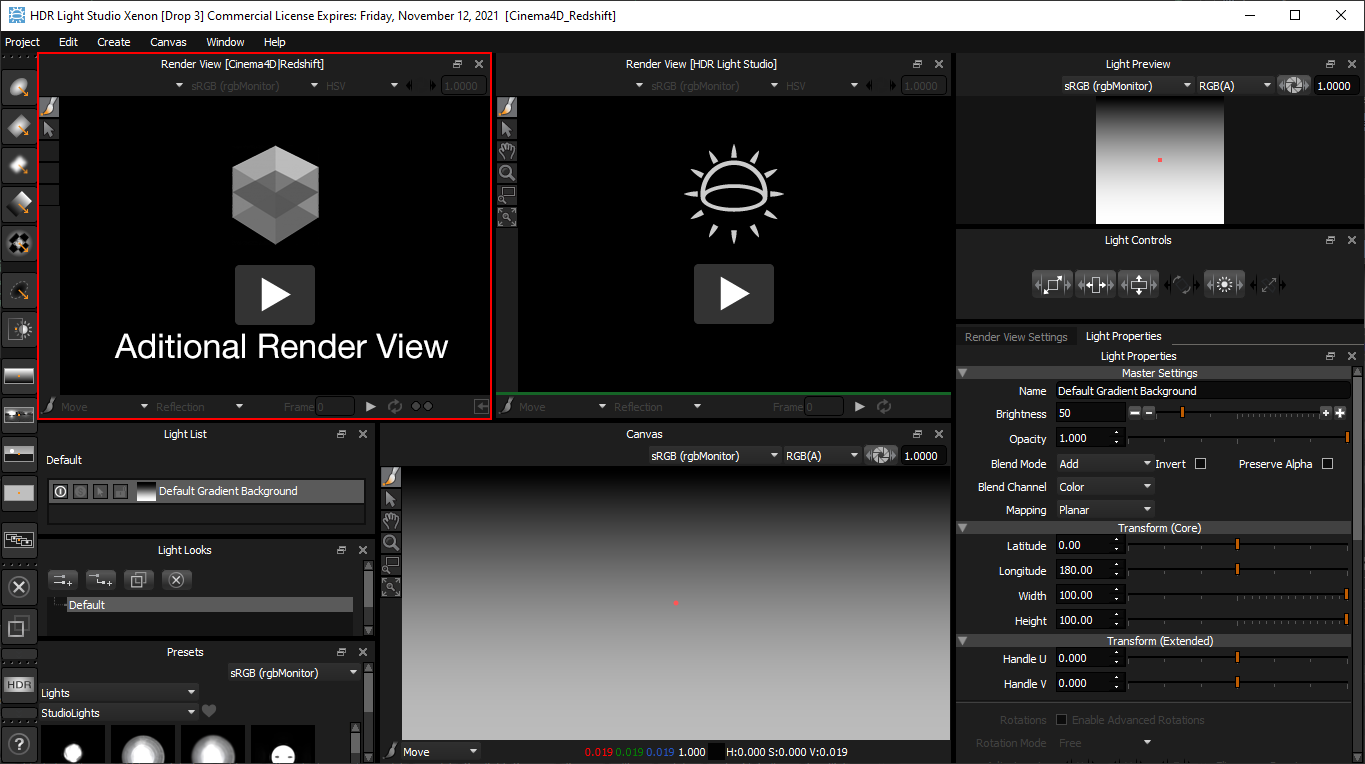
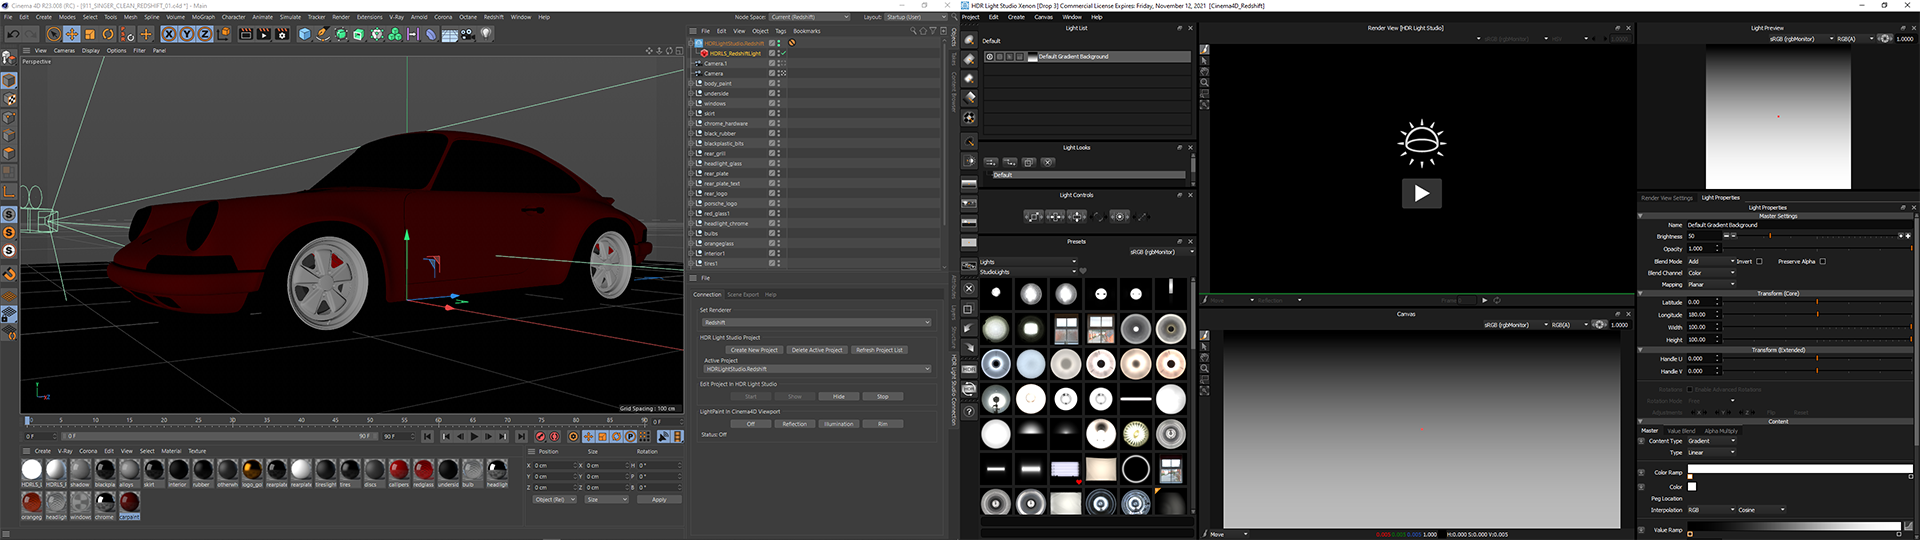
Additional Render View
This default interface layout is different to using HDR Light Studio standalone. An additional Render View has been added on the left. In this example, the panel is called Render View [Cinema4D|Redshift]. This view allows the interactive render from Redshift in this case (supports Arnold and Octane too) to be displayed inside the HDR Light Studio interface. You can then drag and drop lights onto this view and use LightPaint to position lights here too.
When would you use this additional Render View?
Using this additional Render View is ideal when using a computer with one display - as everything you need to light the shot can be viewed inside HDR Light Studio. However, there is an overhead to using this view and it's very much optional. For simple scenes that render fast and don't bog down your computer too much, this view works really well.
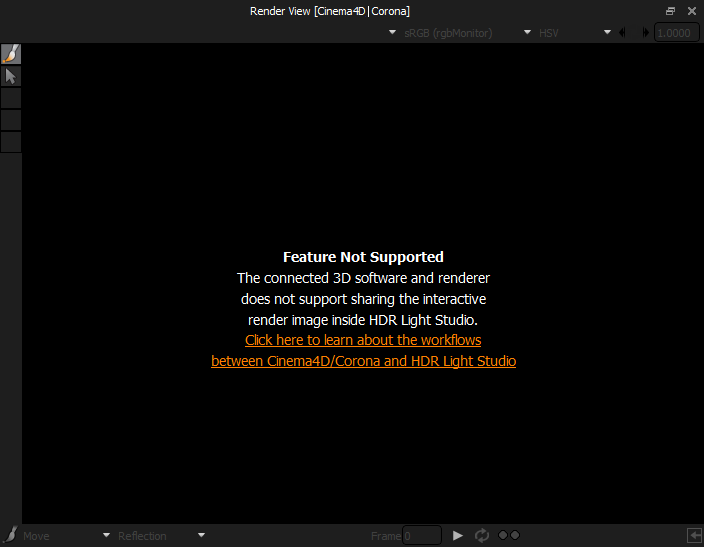
Feature Not Supported Message
If you are using V-Ray, Corona or native Cinema 4D renderers, then this additional Render View will contain a message telling you the feature is not supported. This is expected, as those renderers are unable to stream their render image with HDR Light Studio at the moment.
Considering this additional Render View is very much optional and not compatible with all renderers in Cinema 4D, for now in this tutorial we will remove this Render View by changing the interface layout. Towards the end of this tutorial, Octane, Arnold and Redshift users can learn how to use this additional Render View.
Changing the Interface Layout
Using the menu go to: Window > Layout > Load > Default > Standalone
The HDR Light Studio interface will update to the standalone layout you are familiar with from our Getting Started training.
Most professional 3D artists have at least 2 displays. Using 2 displays provides the best workflow because you can place Cinema 4D on one display and HDR Light Studio on the other. If you have one display, there are alternative interface layouts you can configure, we show a range of interface layouts here.
Exporting your scene into HDR Light Studio's Internal Renderer
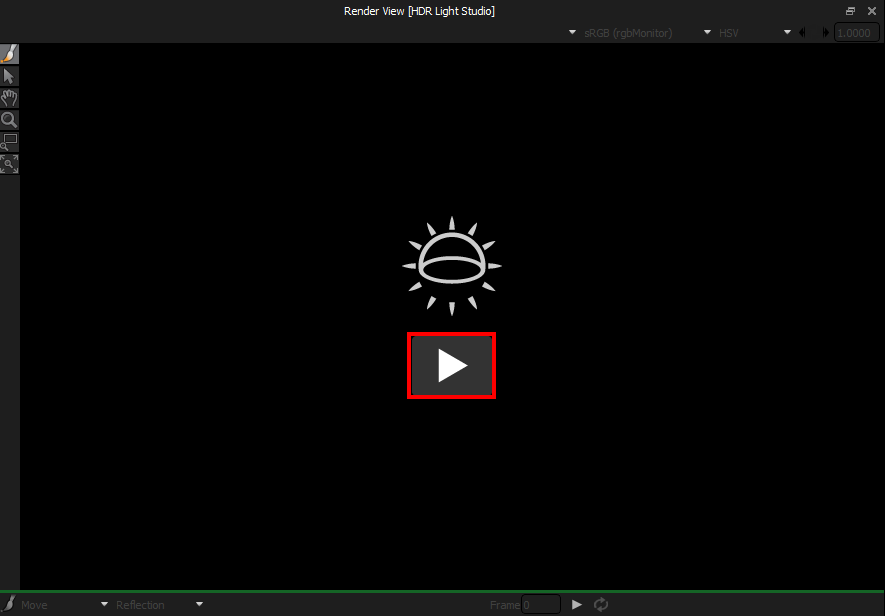
When we used HDR Light Studio standalone, we used the Render View [HDR Light Studio] to position the lights on an interactive render of the scene. Let's get the Cinema 4D scene into HDR Light Studio's Render View so we can paint it with light.
The easiest way to do this is by pressing the Play button on Render View [HDR Light Studio]
Because HDR Light Studio is connected with Cinema 4D, the Import Scene Geometry panel pops up.
Leave the settings at their default and press the Import button
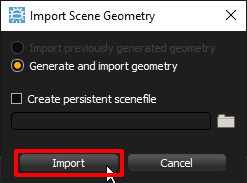
By default, the whole Cinema 4D scene is exported as an Alembic file (that's automatically deleted after your lighting session) and loaded into the Render View [HDR Light Studio].
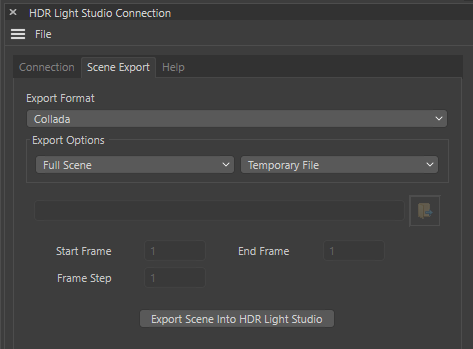
However, selected scene geometry can be exported using the 'Scene Export' tab in the HDR Light Studio Connection panel in Cinema 4D if required.
Using the Scene Export Panel in the Connection
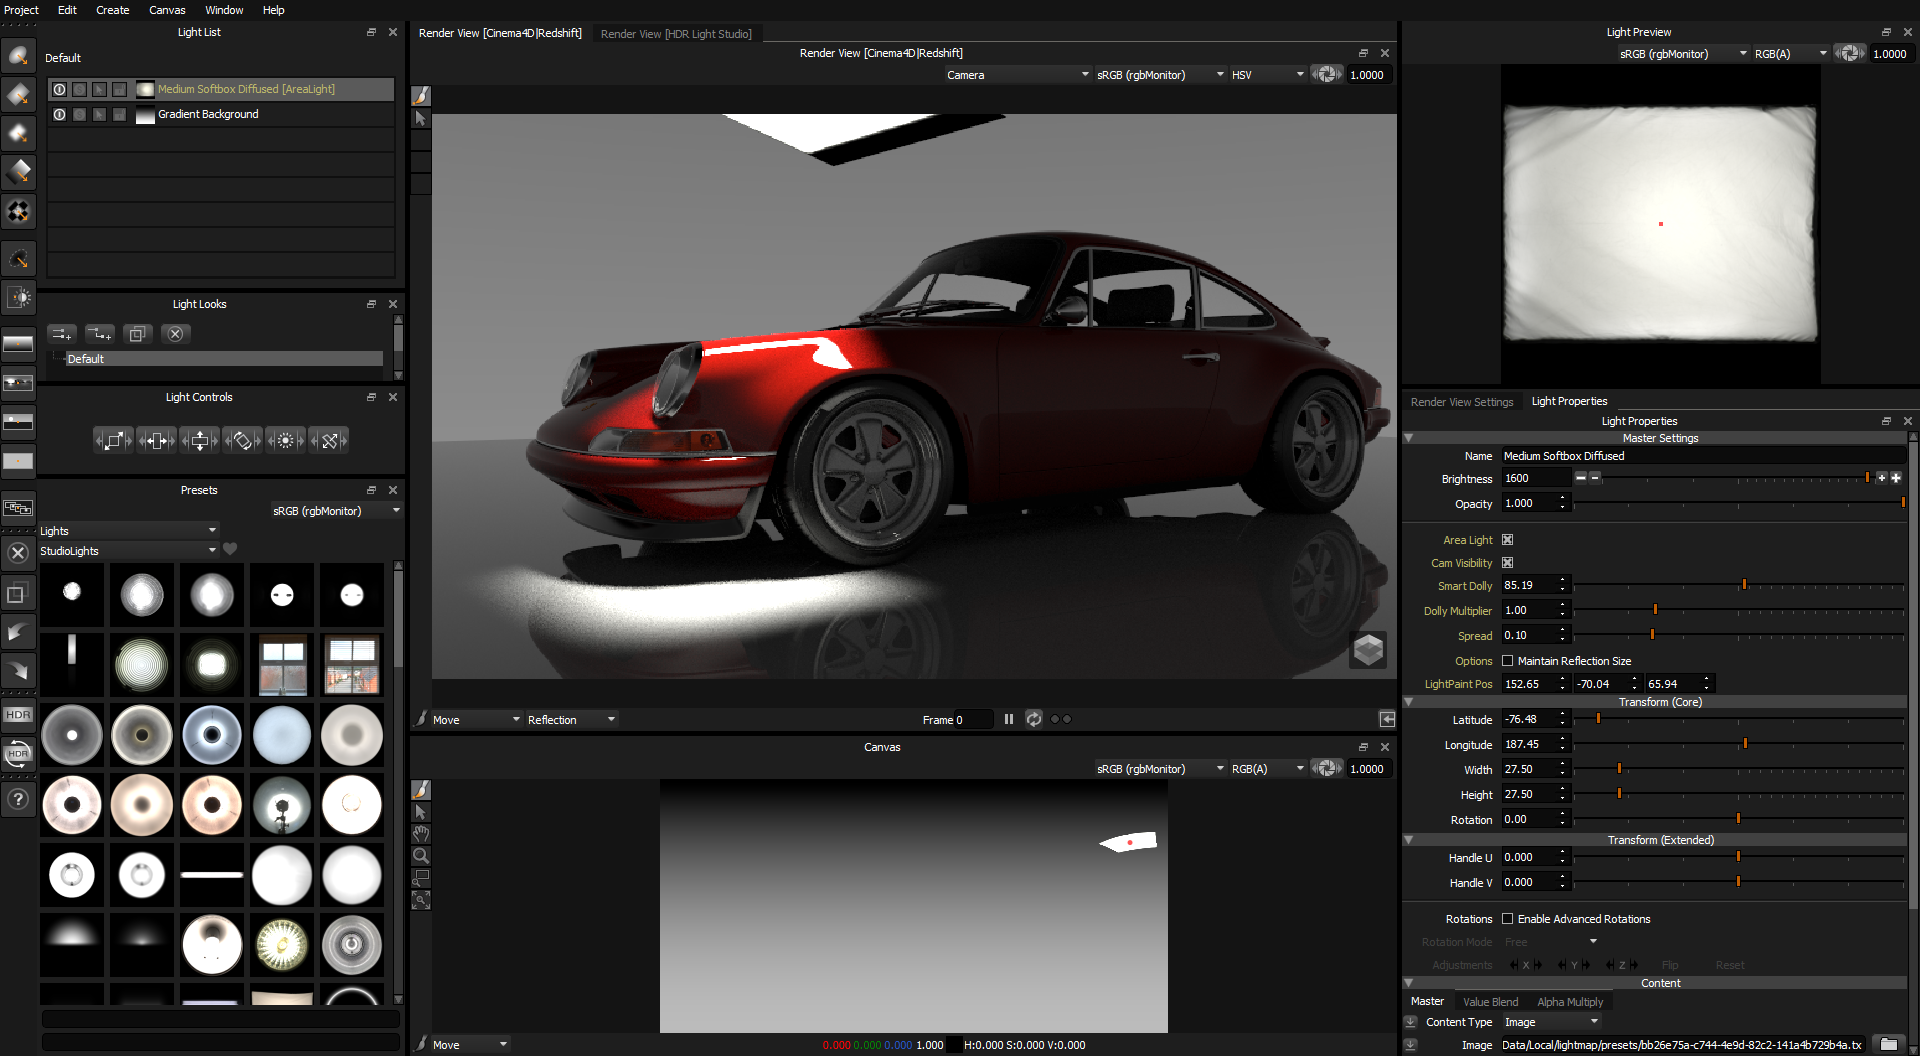
We will now use this Render View in HDR Light Studio as the interface for positioning lights on the model, with real-time rendered feedback.

Let's make our first Light
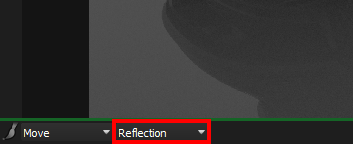
By default, LightPaint is set to Reflection in this view. So lights are moved to reflect in the clicked or dragged location on the 3D model.
Learn about LightPaint here.
Drag and drop a Preset Light onto the 3D model in the Render View.
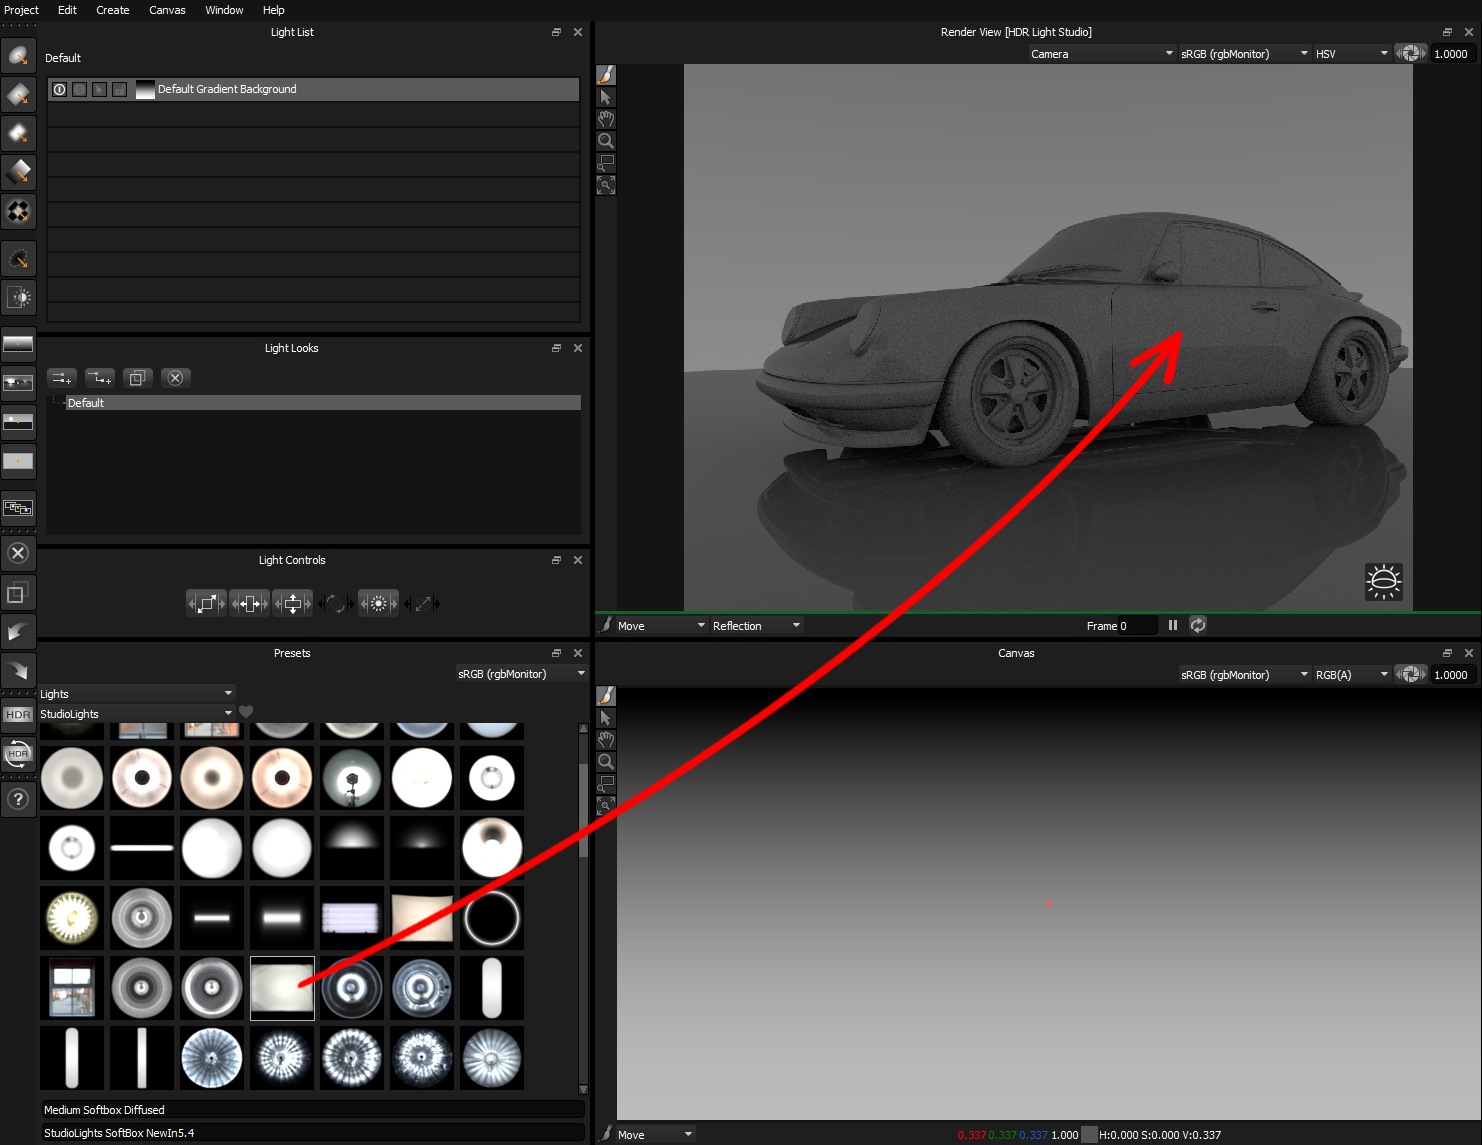
A new light is added to the lighting design - it's reflecting where the light was dropped on the 3D model.
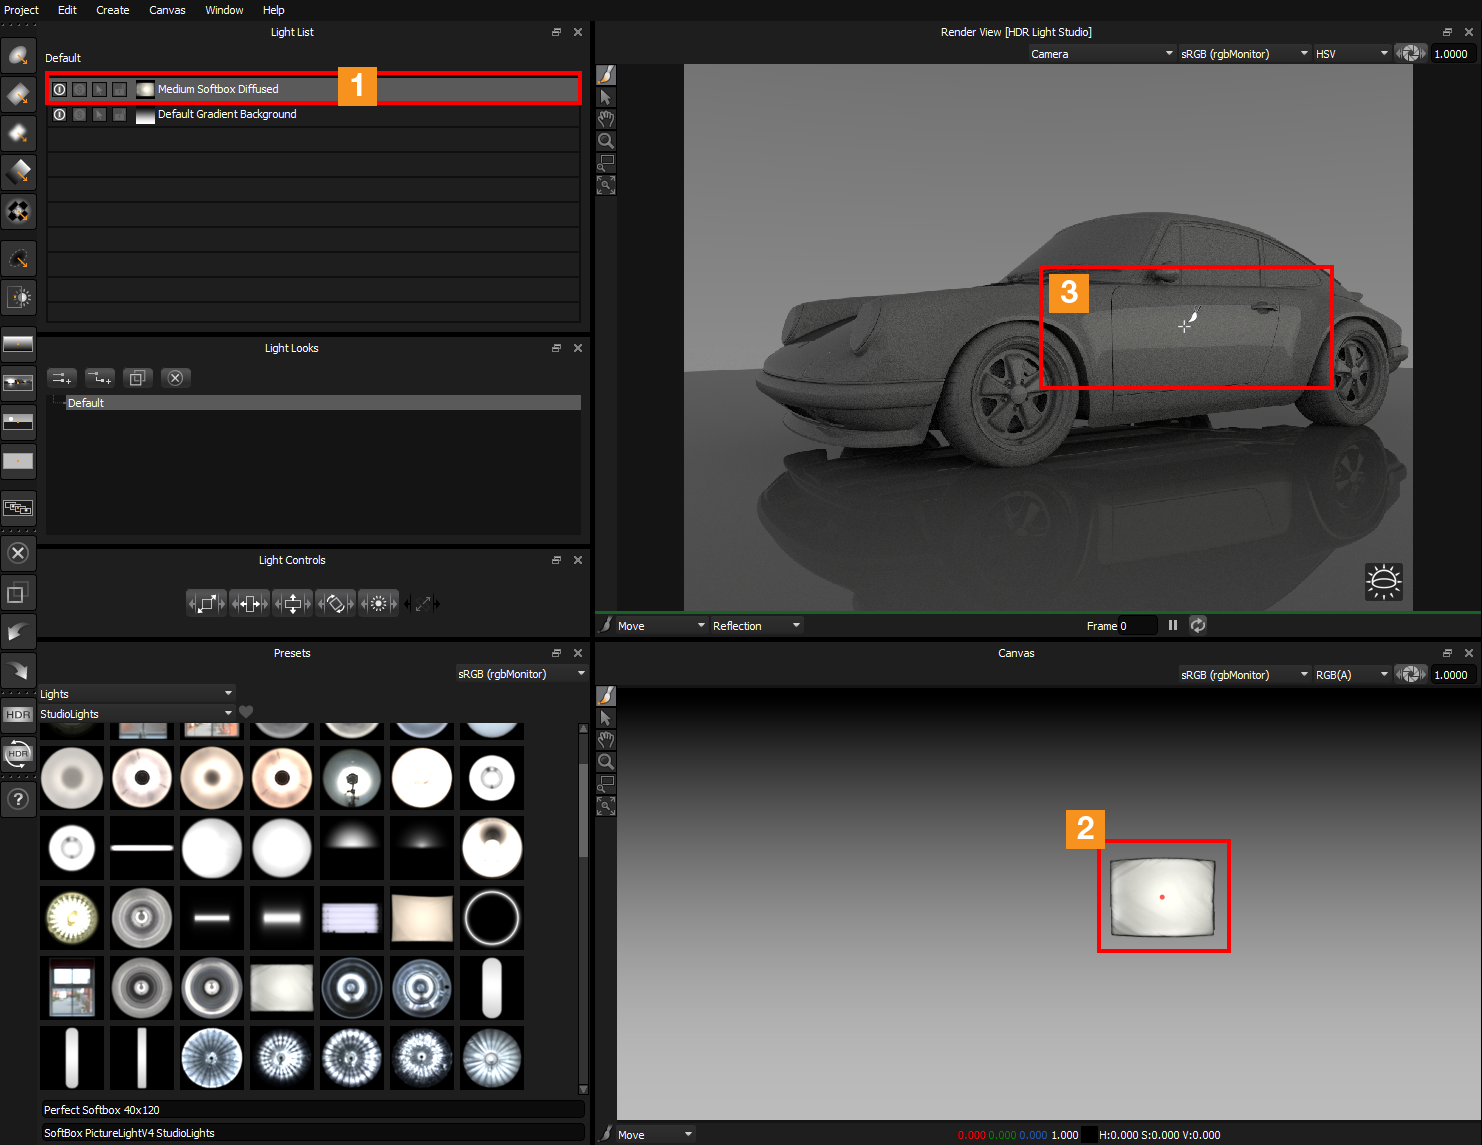
As a result, you can now see in HDR Light Studio:
•1. New light added in the Light List
•2. New light can be seen on the Canvas
•3. Render View has updated to show the new light on the model
Just the same as when we used HDR Light Studio standalone, but we have the Cinema 4D scene in our Render View.
Move the Light
You can see that the LightPaint tool is active in the toolbar in the Render View [HDR Light Studio].
Click on the 3D model to reposition the selected light, (highlighted on the Light List)
Interactive Rendering in Cinema 4D
Whilst we have been working in HDR Light Studio, Cinema 4D has been updated with every lighting change, via the Connection. Let's start interactive rendering in Cinema 4D so we can see the lighting.
Start Redshift interactive rendering in Cinema 4D.
Redshift starts interactive rendering using the current lighting from HDR Light Studio.
You can see the lighting in HDR Light Studio's Render View and in the interactive render in Cinema 4D are matching.
We can leave Redshift interactive rendering in Cinema 4D as we work on the lighting in HDR Light Studio.
Tip: If the scene is large/complex and interactive rendering in your renderer is too slow, then produce test renders from time to time.
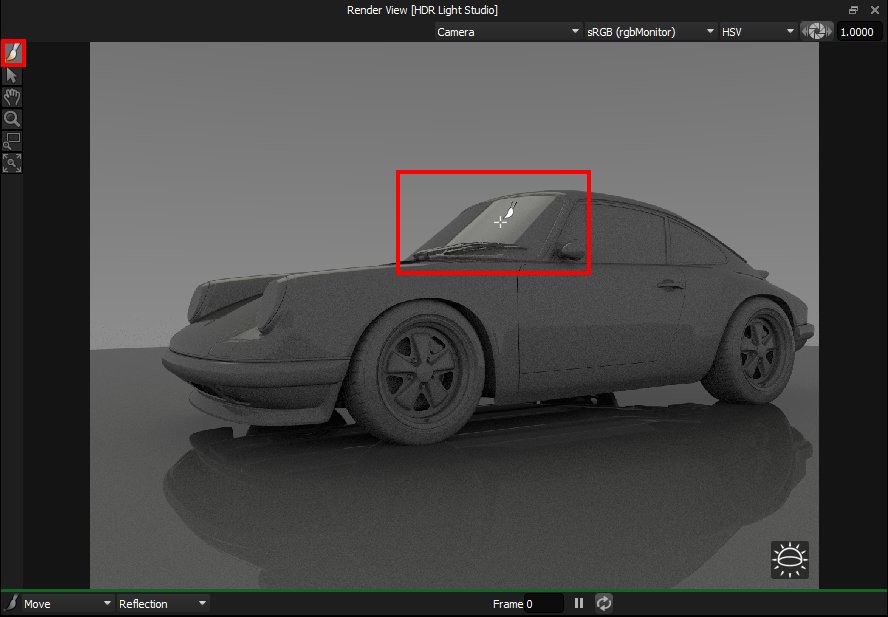
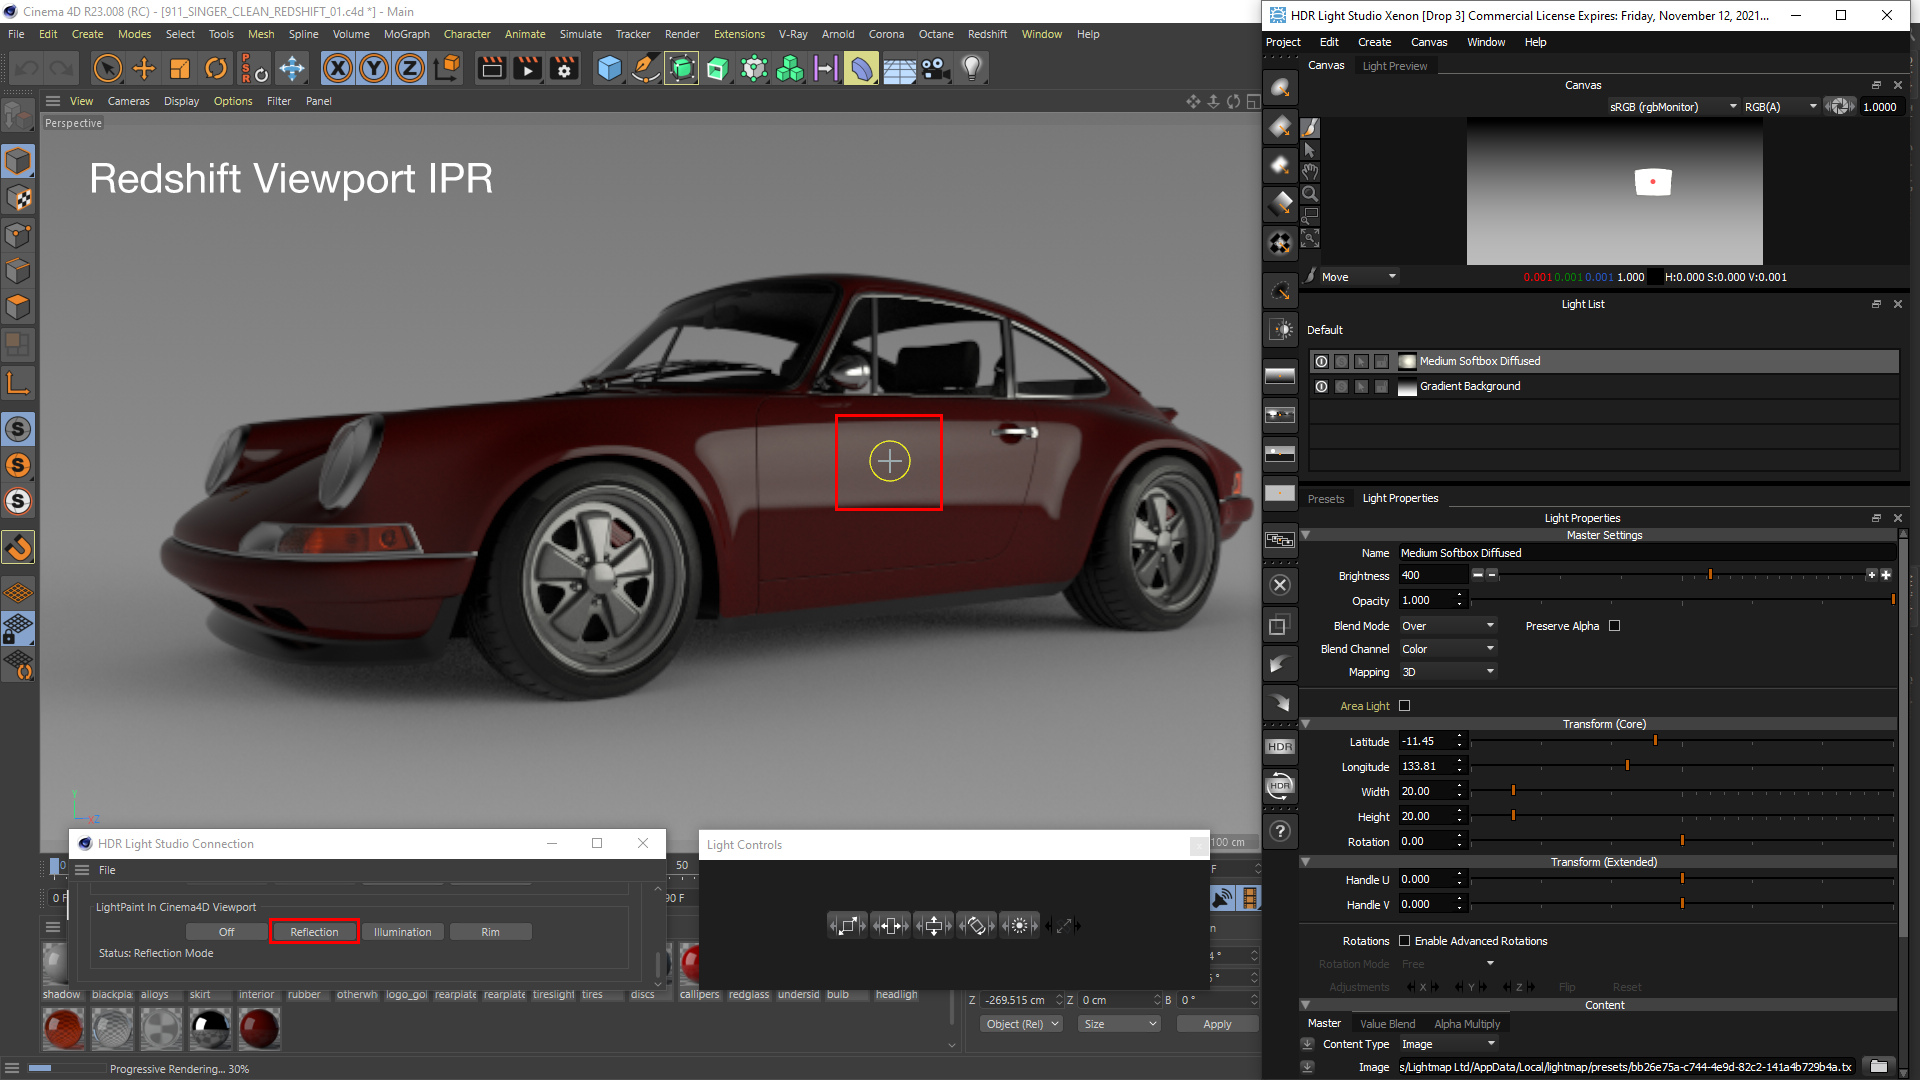
LightPaint in the Cinema 4D Viewport
An alternative to using the Render View [HDR Light Studio] to position your lights is to LightPaint directly in the Cinema 4D viewport.
This is enabled with the LightPaint tool buttons on the HDR Light Studio Connection panel in Cinema 4D.
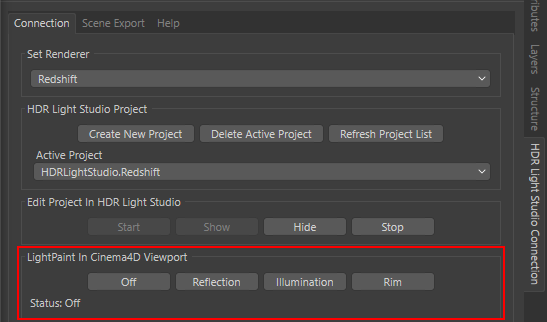
Choose a LightPaint mode, for example, click on the Reflection button.
Now click on the model in the Cinema 4D viewport and the selected light in HDR Light Studio is moved to reflect in that location.
Some renderers, Redshift, for example, allow viewport rendering in Cinema 4D. This provides a nice lightweight workflow, without the need to load the model into HDR Light Studio and have 2 renderers running at the same time. In the example screengrab below, we are using HDR Light Studio on a single display with Cinema 4D. We have rearranged the interface to show Cinema 4D on the left and have HDR Light Studio on the right. LightPaint Reflection mode has been chosen and Redshift is rendering in the viewport. We have clicked on the side of the car to position the selected light in HDR Light Studio.
To learn about rearranging the HDR Light Studio interface, see Customizing the Interface
Tip: When using HDR Light Studio on the same display as Cinema 4D, go to Window and activate the Always On Top Setting. This allows you to click on the Cinema 4D interface to position lights, without the Cinema 4D interface covering the HDR Light Studio interface.
Tip: The advantage of LightPaint in Render View [HDR Light Studio] is that it is fast and responsive - allowing you to drag lights in real-time and discover the light position 'sweet spots'. Using LightPaint in the Cinema 4D viewport, you can only click to position lights. When large models are loaded the LightPaint calculation in Cinema 4D can be slow also - so there will be a time delay between clicking and the light moving in HDR Light Studio.
Making Area Lights - A 3D light mapped with an HDR texture
So far the lighting we created is on the HDRI map shared with Cinema 4D. This is about to change!
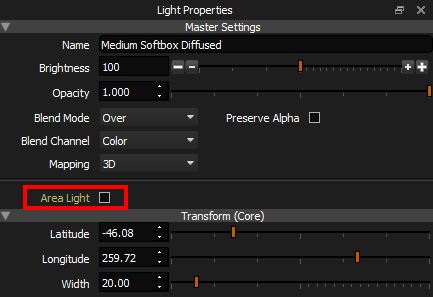
Please Note: Only Lights with 3D mapping show the option to be converted into area lights, as these are the only lights that make sense to become area lights.
Enable the Area Light check box in the Light Properties panel for the selected light.
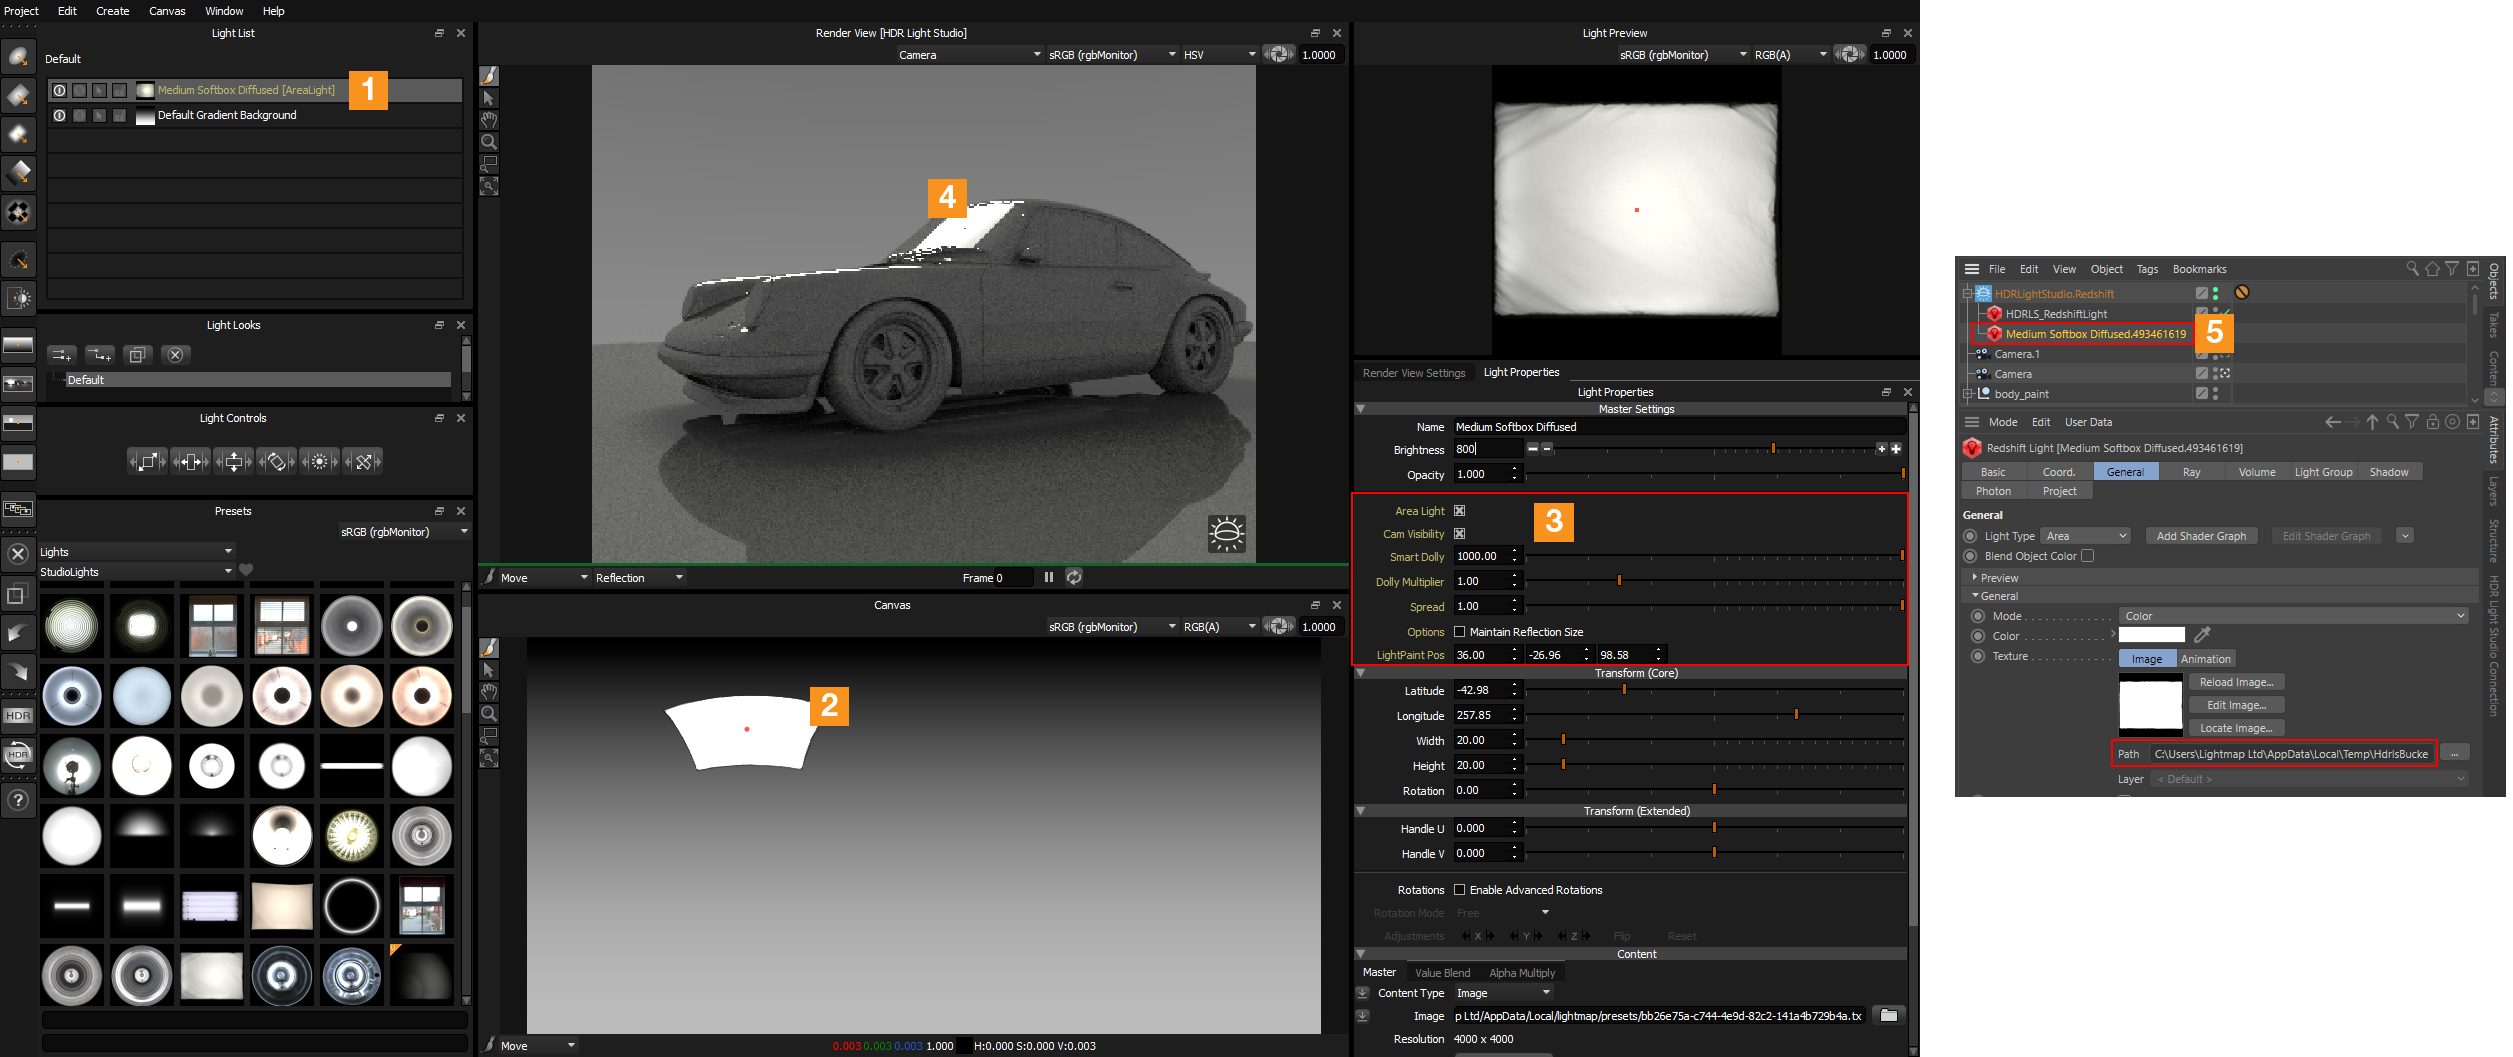
As a result of enabling this Area Light setting, the lighting looks very similar to before, but lots of things just happened with that single setting:
•1. The Light in the Light List gets the suffix [AreaLight] and its text is now yellow.
•2. The light has been removed from the HDRI map but is still represented on the Canvas as a view of the light as seen from the center of the world. Don't be confused, it's really no longer on the HDRI map lighting the shot!
•3. Additional Area Light properties have been added to the Light Properties for this light, with a default Smart Dolly distance of 1,000 units.
•4. An Area light has been created in the Render View [HDR Light Studio], mapped with the HDR texture to control its appearance.
•5. An Area Light has been created in Cinema 4D for the selected renderer - mapped with the HDR texture from HDR Light Studio, and matching the size and position of the area light in HDR Light Studio.
Change the Area Light Distance
Initially, the Area Light will be far away from your model providing a similar lighting effect to when it was on the HDRI environment. We need to move it closer to the model so you can see it in the Render View and in the Viewport in Cinema 4D.
Reduce the Smart Dolly slider value to move the light closer to the 3D model.
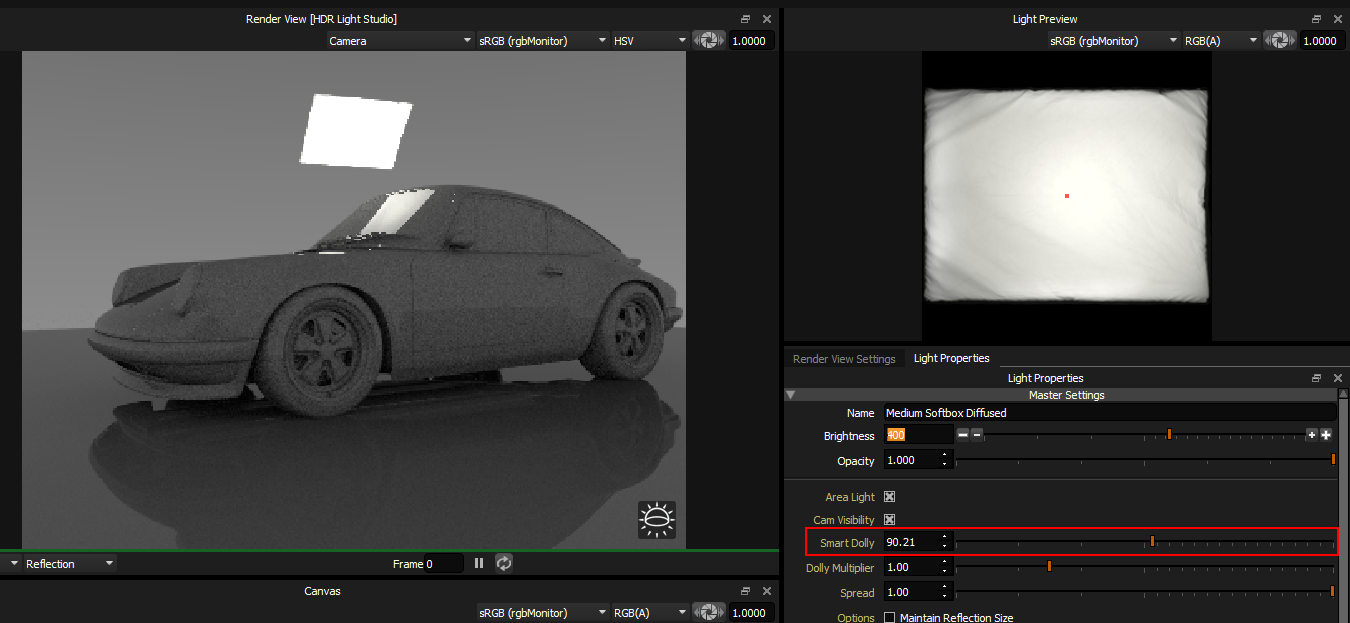
HDR Light Studio has a scene scale setting that is useful when working with Area Lights in Cinema 4D. If the area lights are too close or too far away by default, adjust the Smart Dolly Scalar value in Preferences. This value scales all area light distances in HDR Light Studio.
Let's take a look at the Cinema 4D interface now. You can see:
•1. The Area Light that HDR Light Studio created can be seen in the viewport.
•2. Area Lights made with HDR Light Studio are shown inside the active HDR Light Studio project. In this example inside the HDRLightStudio.Corona group.
•3. The Area Light has been set up for your renderer. You can see the texture from HDR Light Studio mapped to the light properties. This texture is updated when the light's appearance is changed in HDR Light Studio.
Please Note: Renaming/deleting/duplicating HDR Light Studio area lights in Cinema 4D (or any part of their associated shader network/file nodes) will cause problems!
Moving Area Lights
In HDR Light Studio, use LightPaint in the Render View [HDR Light Studio] to move the Area Light.
Area lights are controlled just like any other light in HDR Light Studio with the addition of the distance controls.
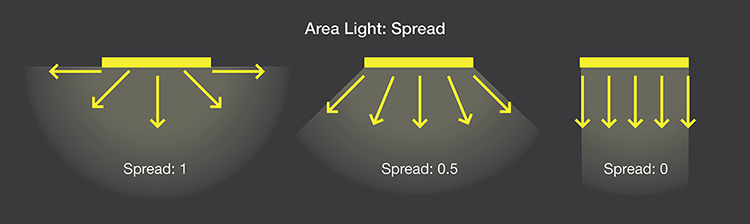
Area Light Spread - Arnold, Redshift V-Ray and Octane only


Using the Additional Render View - Arnold, Redshift and Octane only
Finalizing the Lighting Design
Rendering the Final HDRI Lighting Textures
So far we have been sharing lo-res temporary textures with Cinema 4D for your lighting - to keep things fast during the lighting design process.
Now let's complete the lighting process by producing higher resolution and higher quality sub-sampled HDR textures on disk.
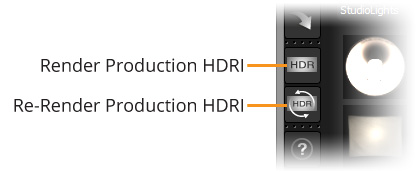
Press the 'Production Render' button in HDR Light Studio.
The top HDR button on the toolbar
Set your Production Render settings
Notice how the 'Orientation' is already set for Cinema 4D and your set renderer. This ensures that the rendered HDRI map is orientated correctly when rendered.
For more information on these settings see: Production Render Dialog
Press the Browse button to choose a file location and give the lighting file a name.
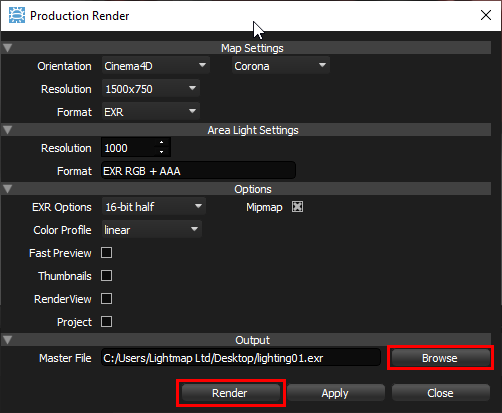
Press the Render button in this panel.
The production quality HDR textures will now be calculated and saved as permanent files on disk.
Once complete, the connection automatically updates Cinema 4D to use these new textures.
Stopping HDR Light Studio
If any further changes are now made to the lighting in HDR Light Studio, all lighting textures will be updated to use new proxy images, and the link to the rendered files is broken.
Please ensure you 'Stop' the HDR Light Studio connection after you have rendered your final lighting files.
Press the Stop button.
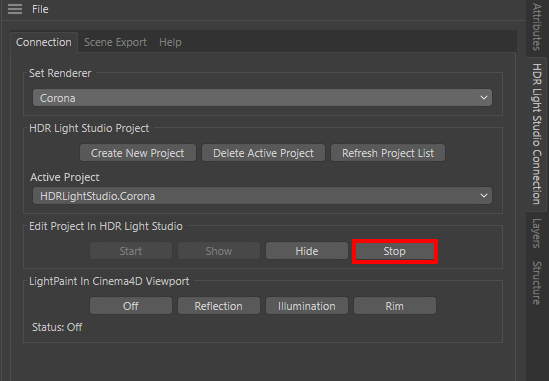
HDR Light Studio now closes and leaves your Cinema 4D scene with a complete lighting setup for your renderer. This scene uses standard lights and can be rendered anywhere, even on computers without HDR Light Studio licenses.
Please Note: If you want to edit the lighting design, press the Start button and HDR Light Studio will open and load the lighting design project data which is embedded in the Cinema 4D scene. You can now edit the lighting, but make sure to render the final HDR textures at the end of the process.
Save the Cinema 4D scene.
The current state of the HDR Light Studio project is embedded in the Cinema 4D project. You should save your Cinema 4D scene now.
Saving and loading HDR Light Studio projects
HDR Light Studio projects can be saved from the HDR Light Studio interface at any time during the lighting process as an HDi file (native HDR Light Studio project file), even when using HDR Light Studio via a connection. If you were to open HDR Light Studio in a connection with Cinema 4D, this project can be loaded into HDR Light Studio using Project > Open Project. The lighting design would load into HDR Light Studio replacing its current design, and would then be synced back into Cinema 4D. This is how you can move lighting between Cinema 4D projects or between other supported 3D software.
